So, I’m telling you how I personally shorten the sleeves of pullovers, cardigans and chunky knit sweaters, and use crochet to close the loose open loops. You can do this with knitting needles - whoever likes it more or who knows what better.
How to shorten the sleeves of a knitted sweater or chunky crochet sweater
This is not the ultimate truth, this is just my personal experience that I want to share.
If someone does something fundamentally different, please share - I will be very curious to learn something new. I think this will be interesting to many.
Shortening a long knitted sleeve
We will need:
- Candidate for rework
- Crochet hook
- Scissors
It happens that I have to roll up my sleeves as much as twice to achieve the desired sleeve length. But since this is a knitted knitted fabric, the hem does not hold up well.
I have already accumulated two sweaters that are candidates for alteration.
Shortening the trousers
How to properly shorten women's trousers
I think that not all women of short stature are immediately suitable for all purchased items. The main problem in this case is the length of the trouser legs and sleeves. Although there are other problems, I know from myself. It’s even worse for tall women - you have to look for fabric to put it on! If you are interested in how I shorten my pants, and I almost always have to do this, then this is the place for you. You will also need a sewing machine.
Sometimes I get lazy and wear it as is for a while (or don’t wear it straight at all because the sleeves are too long and get in the way), but if I suddenly decide to redo it, I try to do it well. So that nothing bothers me and I can wear the thing.
I haven’t picked up the hook for so long that I could barely find it. Naturally, I have more than one, but this one is my favorite, I would say universal. I got it from my grandmother, a small English hook, flattened in the middle. This is both a memory of her and an object that I use.
Determining the required length
Where to begin? First, you need to try on a jacket or sweater, determine the desired sleeve length on yourself, and mark it to be sure, for example with a pin. Depending on the knitting, pattern, and thickness of the yarn used, you need to decide how wide the crochet sleeve trim will be. Maybe just one or two rows, or maybe more, especially if it is a pattern or border along the edge of the cuff.
If it is a full long sleeve, and not three quarters, then it is better to let it be a little longer than to accidentally turn out to be a little shorter.
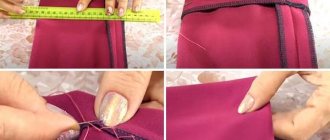
The photo below shows all the basic steps for shortening the sleeves of a sweater and reducing the neckline.
Shorten the sleeve and reduce the neckline of the knitted product
If, in order to shorten the fabric, you need to measure and cut, then with a knitted product it is better to do it differently. At the required length, pull out one loop and pull it, tightening the sleeve, until the knitting is gathered like an accordion. Cut or break the elongated thread on both sides. The sleeve splits into two parts.
We don’t throw away the lower part, but unravel it, wind the threads into balls, they will be very useful to us.
Regarding the side seam, I can say that you can open it at the very beginning, but you can also open it after, depending on your convenience. In the motley sweater I unraveled the seam later, and in the pink one at the very beginning.
Next, we gradually pick up all the open loops from machine knitting onto knitting needles or a hook. We put the first loop on the hook, knit using the second, and so on until all the loops are closed. To do this, balls of yarn obtained from leftovers are used. There is only one loop left on the hook, as it should be when crocheting.
The colorful pullover is very simple, it does not require additional decorations, so I decided to simply, without further ado, crochet a couple of rows and close them off. That's what I do. No crayfish steps, patterns, picots. That's it, one sleeve is shortened. We also shorten the second one in the same way.
We reanimate, we correct what was damaged
| anya Reg.13.10.2003Message.1 | I bought an amazing sweater at the store. It suits me very well, but it's too long. I don’t know how to shorten it. Help, please! If it is impossible to do this yourself, please tell me where knitwear is repaired and corrected. Thank you! |
| Fox Reg.08.24.2003Comm.89 | shorten the product Try contacting any knitting studio or clothing repair shop; in extreme cases, just call the directory in any studio. This can also be done manually if the knitting is of the “hand-made” type. At the height you need, select any piece of loop and cut it. Then you pull the thread and the lower part “falls off”. It turns out that you are disbanding the current row. Then you either close the edge, knit it with knitting needles in the opposite direction (down) - or make an edge or an elastic band (depending on what the bottom is). Good luck! to photo hosting → to photo hosting → to photo hosting → |
| Gelya Reg.10.03.2004Message.180 | Hi all! Dear needlewomen, tell me how to solve this problem: I knitted a blouse, but didn’t calculate it, and it turned out to be much wider than needed (about 5-6 cm), now I need to decrease it at the sides. You can’t touch the armhole, it fits like a glove. How to painlessly remove excess? Only the most radical option comes to mind: machine stitch along the new side line, cut off the rest. are there any other ways? well, except to unravel and tie again. |
| LT Reg.22.08.2003Message.700 | reduce in the sides. You can stitch it on a machine, but with the seams facing out. Place the allowances on both sides of the seam and carefully quilt (or sew on a machine). You will get a finishing strip. |
club.osinka.ru
We reduce the stretched collar (neck) by crocheting
Another thing I didn't like about this sweater was the collar. At first it seemed normal, but when worn (I wore it a couple of times at home), it stretched so that it could be worn on one shoulder.
Neck too big
But I want a normal neckline. Therefore, I simply crochet it, slightly tightening it in those places that I want to reduce. I use the same threads that were left after cutting the bottom of the sleeve.
Stretched neckline reduced by crochet binding
Another jumper's collar is fine, but the sleeves need reworking.
The neckline on the pink pullover suits me
We do exactly the same as with the previous one. Unravel the bottom of the seam.
We begin to unravel the seam
We take out the thread, cut it, separate the knitted fabric, unravel the lower part, winding the threads into balls. Crochet it.
Here I decided to knit several rows and finish with a scalloped edge, or picot. Simple and modest. The knitting itself is openwork. I want the bottom to be narrower at the wrist, so I knit it tightly.
Shortening the sleeves of a pink pullover
Initially, the cuffs were tied with an elastic band, but you can immediately see that it was of little use. Therefore, I simply made the bottom of the sleeves narrower; the arm will fit smoothly; you can also roll up the sleeves if you wish.
It seems like I always shorten my sleeves almost the same way, but it still turns out a little differently!
Sweater decor - alteration and decoration of knitted clothes with ribbons
If you are happy with everything about a sweater, but you want to modify the item, update it, decorate it, then this post talks about a simple but unusual original decoration of knitwear. Namely, ribbons. The color, thickness, and texture of the tapes can be different, and the final result depends on them.
How to properly cut a knitted item or convert a pullover into a cardigan
Share on Facebook
It happens that there are quite good things lying in the closet. There could be many reasons for this. In knitwear, for example, the neckline may be too small (in children's clothing this occurs at every step) or the size may simply become too small. There is a way to change the model without bandaging and use a simple trick to turn a pullover into a cardigan. To do this you need to cut it correctly.
How to cut a knitted item correctly
What is needed for this
Step 1. Find the center of the front and mark it by passing a thread of a contrasting color BETWEEN THE LOOPS (this is important!)
Step 2. Select threads that match the color (as you can see, contrasting ones look very interesting in this case) and a hook. We bend the product along the intended line and, grabbing the threads of the loop closest to the line, we knit a series of half-columns. How this is done can be clearly seen in the picture. We repeat the same on the other side.
This is what should happen. I think it's very cute.
Now take the scissors and cut the threads of the center line. As you can see, it’s very simple, you just need to do everything carefully.
I simply crocheted the neckline.
Now we just cast on the knitting loops for knitting the straps as we usually do. We knit a bar.
And here is the result. It looks just great!
This method does not require additional fastening of the cut edge; crocheting holds it perfectly.
Source
Click “Like” and receive only the best posts on Facebook ↓
fairy-hobby.ru
If the sleeves are long, what should I do?
Every person has knitted items. They are comfortable, practical, and keep you warm in cool weather. But the problem is that their sleeves often stretch or sag.
It's okay, they can be carefully hemmed. Knitted fabric differs from ordinary fabric in its structure, so you need to be patient in order to beautifully process the bottom of this part.
If a machine-knitted sweater has long sleeves, then we will do this work.
Operating procedure:
- On the product with cuffs, mark the new length. For example, you need to shorten it by 10 centimeters, measure 10 centimeters upward from the cuff with a ruler, draw a cutting line with chalk, leaving 1-15 cm for sewing on the cuff.
- Cut off the cuffs and sleeve along the marked line.
- We put a needle on the machine for sewing knitwear, selecting the “knitted stitch” function. If there is no such needle, then we leave the same needle, put a “zigzag”, the width of the step is 1-2, and the length is 2-3 to get an elastic seam.
- We remove the front part of the car and put the sleeve on the protruding part. We process the cut part.
- If the sleeve is too wide, step back 1 cm from the edge, sew a line in wide increments, and tighten it to the required size.
- Place the cuff face to face on the finished edge and sew with a zigzag stitch.
- We process the cuts using an overlocker or by hand.
Trimming the sleeves of a sweater
If the sweater is knitted with a large knit, then we will do the following manipulation:
- Measure the required length on the sleeve of the sweater.
- Clinging to one loop, we pull on it until the part in this place gathers “into an accordion”.
- We cut the drawn thread on both sides.
- The part splits into 2 parts.
- We wind the lower part into a ball.
- On the top part we put all the loops on a knitting needle or hook. Close as with normal knitting.
You can crochet new cuffs to finish off the sleeve beautifully.
Little tricks for repairing knitwear
Short women often face this problem: the long sleeves of their favorite dress make it difficult to wear this product. They need to be hemmed using different techniques.
Blind seam
The blind seam, made by hand, looks great.
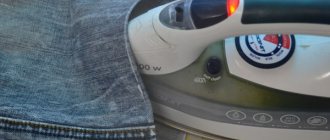
- First, bend the sleeve to the required length, iron it without smoothing the fabric, but applying the iron so as not to stretch the stitching.
- Then sew a basting stitch.
- Next, choosing one of the hidden seams, fold the sleeve of the dress.
Oblique seam
A running bias stitch is perfect for holding layers of fabric together. The needle goes from top to bottom or bottom to top.
The best choice is a seam where small spaces are left between short stitches.
Seam, needle forward
You can hem this part with a seam similar to machine stitching. This is the most reliable of the hand stitches:
- Insert the needle into the tissue, then after 5 mm bring it forward.
- Insert the needle again, stepping back from the needle exit point by 3 mm.
- Pull the needle out at a distance of 6 mm (= double stitch length).
- Then bring the needle to the point of the first needle withdrawal and bring it out again at a distance equal to twice the length of the stitch, continue in the same way from right to left, as in the figure.
Another type of stitch, which is performed from right to left, will help to hem unnoticeably.
Goat
The finishing seam “Kozlik” is also considered strong and reliable. Its disadvantage is the ability to catch on something sharp.
The stitch should be done from left to right.
Operating procedure:
- Finish the bottom of the sleeves with an overlocker.
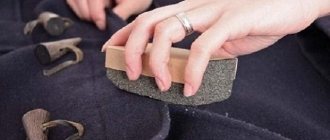
- Turn the hem allowance inside out and press.
- Hem with a goat stitch.
To do the job correctly and accurately, use a needle to grab one or two threads of the fabric above and below from the edge of the overlock stitch. The distance between the grips is approximately 1 cm, but no more. Before fastening the thread, stretch the fabric slightly.
How to make decorative stitching
To decorate a dull project, you can highlight the hem stitches with a different color thread using a double or triple decorative stitch. The optimal stitch width is 2.5 cm.
Finish the bottom of the sleeves with an overlocker. Turn the hem allowance inside out and press.
Use a blind stitch on your sewing machine. Adjust the stitch width so that the needle lightly catches the fabric at the fold. Try it on a separate piece of paper first.
Then sew a seam along the exposed edge of the hem allowance. The best stitch length is 1 mm.
Required Items
Before starting work, you should prepare all the necessary tools so as not to be distracted from the process.
You will need:
- needle;
- 15-20 pins;
- threads of a suitable color;
- sharp scissors;
- soap or colored chalk;
- sewing machine. It will greatly facilitate the process;
- measuring tape.
How to fix a stretched sleeve
When wearing knitwear, the sleeves often stretch unsightly.
Stretched sleeves can also be shortened. This work can easily be done on the sleeves of a jumper knitted in stockinette stitch.
If the elastic bands on your sleeves just stretch, you can easily use the method suggested in this video.
First, we will determine the length by which we will shorten this part and measure it on the product.
We begin to separate the cuff from the sleeve. We will do this along the 2nd row above the cuff, so that later the upper part of the sleeve can be easily attached to the 1st row of stocking stitch.
One part of the loop is cut near the seam, and the fabric is divided into 2 halves.
One row is unraveled in this place of the fabric, the threads are pulled out from each loop.
Loops open at the cuff, which need to be gathered with a needle onto a thick thread. This way the cuff remains separated.
After separating the cuff, the same procedure is done with that part of the part that needs to be shortened. You should try on a jumper or sweater to determine how long to shorten the sleeves.
When the loops of the main part and the cuff have opened, you should sew them “loop to loop”. Pull the thread from the excess part. You can straighten it over a boiling kettle, if the composition of the yarn allows.
If there are more loops on the main part of the sleeve than on the cuff, you should press it down slightly, catching 2 loops together on the main fabric. Next, decide on the center on the cuff and the main fabric, then start stitching, straightening the decreased loops. The seam of the cuff should match the seam of the main part.
How to reduce sleeve length without cutting?
Not all women want to cut off the material on their sleeves. Is it possible to reduce the length without cutting? Try this procedure:
- Measure the required sleeve length, fold, baste, and iron.
- Fold the bottom edge so that there is enough space to insert a wide elastic band.
- Insert a wide elastic band. You will get some really cute cuffs.
Dear women, now you know how to shorten the sleeves of a knitted sweater. There is nothing complicated here, you have already seen this. Good luck!
How to shorten the sleeves of a knitted sweater - methods
Over time, the sleeves of knitted sweaters often stretch out. We have to figure out how to shorten the sleeves of a knitted sweater without cutting them, tucking them to the desired length. But over time, the number of layers of sleeve folding increases, resulting in a rough, thick cuff. Cutting it is not at all easy, given that the loops of the knitwear can come down during work. The finished shortened sleeve should remain elastic along the lower edge, so hemming it with a traditional non-stretch stitch will not work.
Reduce the size of a wool sweater
First you need to determine the type of material from which the jacket is made. There are materials that shrink significantly when washed. So it’s enough to wash the item and not sew it up. These types of fabrics include wool, cashmere, fleece and some types of knitwear.
If the fabric is not of this type, you can still try using a special washing method.
- To do this, soak the item in hot water for one hour, the time is approximate, not exact. You don't have to add powder, although for wool you can use a wool product (preferably a liquid product).
- Then wash it in the machine on the delicate cycle or by hand in water at a temperature of at least 60 degrees. Attention! If you try to correct the size of a sweater in the washing machine, it may not shrink evenly, the wool may change its structure and the overall appearance may change.
- Automatic spinning also contributes to fabric shrinkage! Be careful with delicate fabrics. However, if the jacket is made of particularly delicate fabric, then this should not be done so as not to damage it. Delicate fabrics include cashmere and angora wool.
- Do not hang the item washed in this way on a dryer or line, but place the jacket on a fabric that perfectly absorbs moisture, straighten it and leave it to dry.
After such actions, the jacket should decrease in size. Materials that do not shrink when washed will need to be sutured. This can be done in several ways. To reduce the sleeve part, you need to unravel the seams in the place where you need to remove the excess, and then stitch again, but with a larger margin.
You can also change the size of the sweater by adding darts to it. This method is good if you also want to slightly change the style of the product. Usually darts are made in the waist area. On the wrong side of the sweater, outline the lines of future darts. A mark is made along these lines, after which the jacket needs to be tried on.
If the size is back to normal, then the dart lines can be machine stitched. In addition, you can narrow the waist area by reducing the size of the sweater at the side seams. To do this, simply make a running stitch parallel to the existing seam.
How to reduce sleeve length without cutting
Not all women want to cut off the material on their sleeves. Is it possible to reduce the length without cutting? Try this procedure:
- Measure the required sleeve length, fold, baste, and iron.
- Fold the bottom edge so that there is enough space to insert a wide elastic band.
- Insert a wide elastic band. You will get some really cute cuffs.
The stretched sleeve can be shortened through the top. To do this, the sleeve is evaporated and, raised by the required amount, sewn in again. Excess fabric along the edge can be left inside if it is not bulky. You can cut off the excess by processing the seam allowance with bias tape along with the armhole allowance of the front and back.
The first option is the easiest to implement: it is better to take a wide elastic band and apply it thickly to the sleeve. Get a stylish cuff.
This option can be implemented not at the very edge of the sleeve, but a little higher, at the 3/4 level. In this case, you will get an imitation of natural gathering, as if the sleeves were naturally rolled up. The elastic band in this version is fastened with hidden stitches, manually.
Stylish bolero
For this alteration, a woolen, fairly thin sweater is suitable.
- Trim the bottom of the piece so that it is a little longer at the back. The front can be cut all the way to the neckline and pinned with a beautiful pin or brooch. The result is a stylish bolero that can be worn with dresses, jeans, and skirts.
If the sleeves are long, what should I do?
Every person has knitted items. They are comfortable, practical, and keep you warm in cool weather. But the problem is that their sleeves often stretch or sag.
It's okay, they can be carefully hemmed. Knitted fabric differs from ordinary fabric in its structure, so you need to be patient in order to beautifully process the bottom of this part.
If a machine-knitted sweater has long sleeves, then we will do this work.
- On the product with cuffs, mark the new length. For example, you need to shorten it by 10 centimeters, measure 10 centimeters upward from the cuff with a ruler, draw a cutting line with chalk, leaving 1-15 cm for sewing on the cuff.
- Cut off the cuffs and sleeve along the marked line.
- We put a needle on the machine for sewing knitwear, selecting the “knitted stitch” function. If there is no such needle, then we leave the same needle, put a “zigzag”, the width of the step is 1-2, and the length is 2-3 to get an elastic seam.
- We remove the front part of the car and put the sleeve on the protruding part. We process the cut part.
- If the sleeve is too wide, step back 1 cm from the edge, sew a line in wide increments, and tighten it to the required size.
- Place the cuff face to face on the finished edge and sew with a zigzag stitch.
- We process the cuts using an overlocker or by hand.
Let's trust dry cleaning
Some dry cleaners provide services to reduce items by one or two sizes. Usually, a specialist first studies the composition of the fabrics and issues a summary: is it possible to correct the parameters of the product. If the conclusion is positive, the sweater will be treated with a chemical composition that compresses the fibers, and then dried with steam. Steam treatment will fix the result, and the sweater will not stretch for a long time.
Modern chemicals do not spoil the paint and are safe for human health, because they erode without residue. But the method also has disadvantages: after a “chemical attack,” things never look like new. They also fray noticeably near the seams, so you will have to hand comb the jumper with a fine comb.
How to shorten knitted sleeves with an elastic band
There is an option to shorten the sleeves of a knitted turtleneck or jumper without cutting the fabric. At the same time, you will not only give the stretched sleeve a neat appearance, but also slightly change its shape, creating a more interesting silhouette. Take an elastic band, cut two small pieces and stitch vertically at the bottom of the sleeve, gathering it slightly.
You can also attach the elastic not at the edge of the cuff, but at about 3/4 level, then you will get the effect of a stylish and relaxed rolled up sleeve. You can sew on the elastic tape either by machine or by hand using a hidden seam.
Nuances that can ruin a thing completely
The following can be detrimental to a knitted item:
- ironing,
- drying on a rope or radiator.
In these cases, the canvas may become deformed in such a way that it will be impossible to correct it.
Video: how to irrevocably ruin a wool item
I once bought a synthetic sweater. I was still quite an inexperienced housewife at that time. I washed it by hand and hung it on a line to dry. As a result, I ended up with something very long. I had to think about what to do with this. Fortunately, either short dresses or what they now call tunics (I didn’t know such words then) came into fashion. In general, I found a matching belt, and simply turned the sleeve cuffs inside out and inserted an elastic band into the lower part. I want to say that I wore this mini-dress for quite a long time and was glad that I had come up with a second life for my mistake.
How to shorten the sleeves of a jacket with cuffs
As with lining and buttons, cuffed sleeves are often found on denim jackets. To shorten such a sleeve, follow these steps.
The presence of a cuff makes shortening the sleeve somewhat more difficult, but even a beginner can cope with this procedure
- Measure the required length on the sleeves of the jacket using a chalk.
- Remove the cuffs from the sleeves using scissors.
- Pin the sleeves of the jacket along the shoulder and side seams.
- From the control mark at the bottom of the sleeves, subtract the width of the cuffs and add 1 cm to the seam: cut the sleeves at this mark.
- Pin the sleeves at the bottom just above the marked line.
- Trim the excess, straighten the cut line.
- Open the cuffs of the jacket, iron them and cut them along new contours.
- If the cuffs have elastic, leave a small hole for it.
- Fold each cuff in half lengthwise and machine stitch the layers of fabric together.
- Finished cuffs are attached to the new sleeve line using a sewing machine.
- Finally, insert the elastic into the cuffs, sew the ends together and straighten the cuffs.
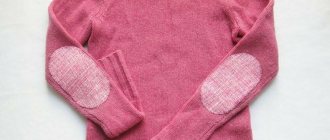
Spectacular embroidery
You can update a plain sweater with embroidery.
If you do not know how to embroider, give the product to specialists in a sewing workshop - they will do it professionally. Embroidery will depend only on your imagination. You can depict floral, animalistic motifs, geometric patterns.