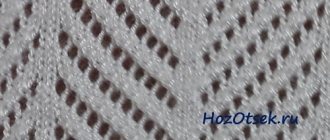
Crocheted napkins, tablecloths, curtains are a great addition to the interior. Such details add coziness to the home and add a special flavor. That is why many housewives decorate their apartments with knitted items, making them with their own hands or purchasing them in stores.
Using starch, you can not only smooth napkins and tablecloths, but also give them various shapes, turning them, for example, into openwork plates
Those who know how to work with crochet know that during the knitting process, the fabric of the napkin is stretched and wrinkled. To make the finished product even, it can be washed and ironed. And to achieve an ideal result, it is better to additionally treat the fabric with starch.
Crocheting is the process of creating patterns from threads using a crochet hook
Why starch knitted napkins?
Napkins are knitted using “Iris” and “Snowflake” yarns. These threads make beautiful products that are good for starching. While the product is being knitted, due to the weaving, the napkin becomes wrinkled and does not hold the desired shape. To make it less dirty and tougher, it is recommended to starch it. Thanks to this procedure, the threads are covered with a protective film.
They look thicker, protected from dust and any contamination, while the product:
- becomes dense and elastic;
- slightly bleaches and acquires gloss;
- loses susceptibility to dirt: threads covered with film are not saturated with dust and moisture.
Napkins most often serve as decoration for a coffee table, bedside table, or chest of drawers. Thanks to them, it becomes possible to cover up defects on furniture. After starching, the napkin can be easily turned into three-dimensional objects - a vase or a candy mold. Products made from white threads - cotton or linen, which are easily amenable to this procedure, are most often starched.
Aerosol
The most modern and fastest method is an aerosol. You can simply and effectively starch a small item in a short time; just spray the contents of the can evenly onto a crocheted napkin. Rules for spraying the aerosol: shake the can well and tilt it slightly, apply evenly to the product at a distance of 25-30 cm.
Unlike other methods, aerosol can be used on many types of fabric.
The product is simply sprayed onto a damp knitted item and ironed.
Basic rules and what to prepare for starching
Before you start starching a napkin, you need to:
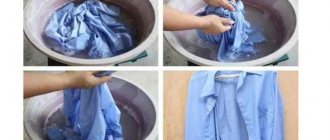
- Wash. To do this, it is better to first soak knitted items in warm water with the addition of washing powder for hand washing.
- Rub a little with gentle movements.
- Rinse well. If the napkins are knitted from natural fibers, you need to remember: they can shrink, so it is better to use warm water. You should be especially careful with woolen products.
If there are several napkins, they can be washed in the washing machine. After rinsing, it is recommended to start starching. The duration of the procedure largely depends on the thickness of the yarn. If it is thin, then the napkin is placed in the prepared paste, this procedure lasts about 5 minutes, when thick yarn is used, the time is 10 minutes.
Before you starch a crocheted napkin, you need to wash it
Then the product is lightly squeezed and laid out on a flat surface to dry. It is necessary to remember: only when the product is not completely dry, and a slight dampness is felt in it, can the napkin be given the required shape.
You can starch a crocheted napkin using starch or other household ingredients, but before the procedure itself you need to prepare:
- head pins: that is, with beads at the end;
- wire for aligning edges;
- ruler;
- a bowl for the solution;
- spray;
- white paper;
- a towel or white sheet;
- wide brush;
- drying surface;
- mold for bulk products.
Other ways: creating a matte effect
To create a matte effect, the solution must be prepared in milk, as a result the item acquires volume and a special pleasant shade.
The recipe for making such a paste is no more complicated than the classic one.
- Before preparing the solution and starting to starch, thoroughly clean the crocheted napkin or tablecloth with soap and water and dry it.
- Pour 1 tablespoon of rice starch (or 2 tablespoons of corn starch) into a glass of cold milk and mix.
- We eliminate all the formed lumps. For an ideal result, the mixture can be passed through cheesecloth or a sieve.
- Take 1 liter of milk with 1.5% fat content, bring it to a boil and pour the starch mixture into it.
- Cool the finished paste to room temperature.
White products look especially impressive after starching, acquiring a pure snow-white hue.
Traditional recipe with starch
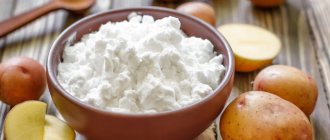
A frequently used method is starching using potato starch. It is easy to prepare by mixing starch and water. Due to this, the consistency becomes thick, resembling a paste, which will make the product harder and whiten.
How to starch a crocheted napkin - the easiest and most popular way - using potato starch
Some housewives like to use starch obtained from corn or rice. However, to give the greatest thickness, you will have to add much more of this starch than potato starch.
Solution concentration
The hardness of products after starching largely depends on the concentration of the prepared pastes:
| Solution concentration | Preparation |
| Weak | To obtain it, add 0.5 tsp to 500 mg of water. starch. This is applicable so that the napkin becomes too stiff and its edges sag slightly |
| Medium hardness | The solution is obtained by adding 0.5 tsp to 500 ml of water. The napkins come out firm and they hold any shape well. |
| Hard | In this case, add 1 tbsp to 500 ml of water. l. starch. This napkin is easy to make voluminous. It can become a vase for artificial flowers or an openwork bowl |
Starching algorithm
Not everyone knows how to starch a crocheted napkin correctly.
Much depends on the cooking of the paste, the preparation procedure of which consists of the following steps:
- Pour starch into cold water and mix thoroughly so that there are no lumps. If they form, it is recommended to pass it through a sieve.
- Bring the other part of the water to a boil.
- Pour in the starch solution in a small stream, stirring constantly with a spoon.
- Continuing to stir, wait until the liquid boils again.
- Turn off the heat and wait until the paste cools to a temperature of 35° C.
There are cases when starch has impurities, and then when mixed with water, dust particles are formed. To remove impurities, you need to add starch to cold water, wait a little and drain it, then pour it in again, mixing everything, and so on until the water becomes clear.
When starching a napkin, you must follow the following algorithm:
- Pour the cooled paste into a plastic bowl.
- Place a pre-washed napkin in it, making sure that it is completely immersed. If the threads are thin, then the immersion time takes 5 minutes; with an average thickness, 10 minutes is enough. Products knitted from thick threads must be kept in the paste for 15 minutes.
- Remove the product, squeeze it lightly and lay it out to dry on a horizontal surface. You can cover the bottom with a white towel or cotton cloth.
To make the starch more hard, you can add salt, sugar, milk, and talc.
How to starch a crocheted napkin using potato starch
How to starch a crocheted napkin using starch in another simple way:
- Prepare the microwave oven for use.
- Prepare a solution based on 500 ml of water, 1 tbsp. l. starch.
- Place the solution in the oven and heat.
- Remove and mix thoroughly.
- Load the product.
- Place the solution and napkin back in the microwave for 5 minutes.
- Remove and cool to 35°C.
- Wring out the product and lay it out to dry.
If this method is followed, the napkins retain their shape well.
How to starch a napkin crocheted with gelatin: recipe
a beautiful napkin lies on the table after starching with gelatin
. You need:
- glass of water
- 1 tablespoon gelatin
Prepare the solution:
- mix gelatin in a small amount of cold water
- stir and leave it to swell
- then add the rest of the water and place the solution on the stove
- When the gelatin is completely dissolved, turn off the heat underneath it.
- repeat the steps with the napkin according to the same scenario as in the section on potato starch
Drying, ironing and storage
It is important not only to properly starch the product, but also to dry it properly. To do this, you need to follow a number of rules.
Getting into the correct position
After the napkin is saturated with the paste, it must be laid out horizontally. For these purposes, use the surface of a table, ironing board, polystyrene foam or the smooth side of a ceiling tile made of foam material.
It is recommended to first lay a white sheet in several layers or a terry towel. The surface must be flat, otherwise the product will take on an irregular shape and will be wavy. It is not for nothing that the fabric is spread so that the napkin can be fixed with pins, about 1 cm thick. It should not get wet, otherwise the product will take a long time to dry.
Giving stillness
The napkin is first soaked in the paste, then laid out, straightened and secured with safety pins, pinning them to the ends of the product. This is necessary so that it does not deform, but has the correct shape.
You can secure the starched napkin using pins
To fix, you need to perform a number of sequential actions:
- Start giving the correct shape from the middle, securing 4 pins to avoid distortions.
- Stretch one tip, measuring the distance with a ruler from the center to the tip, securing with a pin.
- Carry out the same steps with all ends of the napkin. For evenness, it is advisable to take the ends of the napkin located diagonally, constantly measuring the same distances with a ruler. Then the intermediate segments are attached.
Drying
The most optimal condition is when the napkin is exposed to sunlight and the room is well ventilated. In some cases, you have to use an iron, covering the product with gauze or white paper.
If the napkin should be voluminous in the form of a vase or plate, then it is recommended to dry it by placing it on the form, after covering it with film. They can be a glass, bottle or bowl.
It is convenient to use a balloon as a form. It can be inflated in different sizes, but it is also recommended to cover it with cling film before placing a napkin on it. It is necessary to dry until completely dry, sometimes it takes about 2 days.
Ironing
Individual napkins will look aesthetically pleasing after steaming and ironing, for this:
- the iron should not be heated too much;
- iron quickly, being careful;
- To prevent the napkin from turning yellow, cover the product with several layers of gauze.
Storage
It is important not only to dry and iron the napkins, but also to store them correctly. The room must be dry: with high humidity, the products can become moldy, lose their shape , and fungi can grow on them. If sugar was used, insects (ants) may come running.
Dry method
You can starch a tablecloth and napkin without preparing the mixture.
This method is simpler, but after dry processing the product quickly loses its rigidity and wrinkles.
- Place the item on a cloth or sheet of paper and straighten it thoroughly.
- Apply starch powder on top in a thin “powdery” layer.
- Spray the product with water, it is convenient to use a spray bottle, leave to dry, covered with a cloth or paper.
The product must be covered with starch as evenly as possible so that all its areas subsequently acquire the same elasticity.
This processing method is not long-term; after a short time, the procedure will have to be repeated.
Advice. If the hardness of the product after drying is insufficient, the procedure can be carried out until the desired result is achieved.
What threads of napkins cannot be starched?
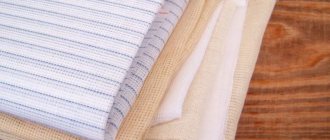
Napkins are knitted from various threads. But only products made from cotton and linen starch well and keep their shape.
Napkins made of woolen threads and floss cannot be starched.
It is not recommended to subject products made from the following fibers to this procedure:
- wool;
- floss;
- silks;
- synthetics.
They will not become rigid; starch does not penetrate well between the fibers of these materials. Silk threads may lose their structure. When starching colored and dark napkins, the natural color will be lost and white spots may appear.
Materials used
Any type of fabric and yarn is suitable for starching. You can starch cotton, wool, silk, and velvet. At the same time, it is important to choose the right amount of starch so as not to end up with an unbending napkin or, conversely, falling lace. Suitable types of starch for different materials are presented in the table.
Table - Concentration and type of starch depending on the material
| Material | View | Proportions per liter of water |
| Floss | Soft | One teaspoon |
| Wool (yarn) | Average | One tablespoon |
| Cotton fabric | Hard | Two tablespoons |
You can heavily starch a cotton or linen napkin. Chintz and silk should be handled delicately if you want to maintain the elasticity of the product. To starch light fabrics to medium hardness, one teaspoon of starch is enough. Flowing fabrics are starched with half a teaspoon of powder.
Mistakes and recommendations when starching knitted items
Many housewives make mistakes when starching products. Napkins lose their appearance, become covered with yellowness, dark items become covered with white spots.
Colored napkins should not be starched - they will become stained
It is advisable to adhere to the following recommendations to avoid mistakes:
- When it becomes necessary to starch snow-white napkins, it is better not to use starch and gelatin, because over time they turn yellow. It is better to use skim milk with rice starch.
- If the napkin is knitted from colored or dark threads, it is better not to starch it so that it does not become covered with whitish spots and stains.
- Products knitted from synthetics should not be starched. They can stretch and lose their correct shape.
- It is best to purchase a ready-made starch product in the form of an Aerosol.
- It is not recommended to store a starched napkin in a closet for a long time; it may turn yellow.
- It is necessary to remember: after treatment with starch, the item cannot be moistened, it will lose its shape, and everything will have to be done again.
- If the edges of the napkin are decorated with fringe so that it does not stick together, then it should be held over steam, then combed with a comb.
- To give the napkin a wave shape, you need to wrap it around a bottle or thick curlers.
- When using a hot solution, the product turns out to be solid.
- To iron a napkin without it sticking to the iron, you need to add skim milk instead of water.
- To make the item soak in the paste faster, it is recommended to put the bowl with the item in the microwave for 5 minutes.
You can give a starched napkin the desired shape using curlers and other improvised means.
If you like to add coziness to your rooms using crocheted knitted accessories, then you must know the technique of starching products. To starch a napkin, you need to choose the appropriate method.
When giving the product a three-dimensional shape, it is advisable to use starch with the addition of sugar, salt, gelatin, and PVA glue. It is important to maintain its whiteness, shape, fix it and dry it well. Only if you follow an algorithm of thoughtful actions will the product please you with its appearance.
Article design: Natalie Podolskaya
How to starch a napkin crocheted with PVA glue: recipe
a snow-white openwork napkin, crocheted, laid out on the table after starching with PVA glue
. You need:
- PVA glue
- water
We act:
- combine glue with water in a ratio of 1:2,
- stir the solution
- place the napkin in a container with adhesive solution,
- After the threads are completely soaked, remove them and place them on the surface that matches your wishes for the future shape of the napkin.