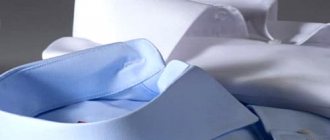
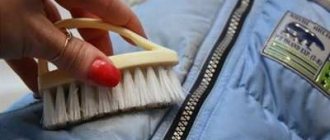
Starched linen, tablecloths and napkins mark a woman as an excellent housewife. But today starching is no longer in fashion, so girls do not try to master this knowledge, and when they are faced with such a need, they simply do not know how to do it.
How to starch a dress for a child in kindergarten or for a holiday? How to bring a medical gown into proper shape or shape a summer hat? We reveal important secrets of home economics.
After impregnating the fabric with paste, it becomes dense, but does not allow air to pass through, so the clothes are not completely starched. Collars, cuffs, medical or chef's caps, robe, etc. are starched.
How to properly dilute the solution
Choose potato starch as the main ingredient; it has a rich white color (sometimes with a bluish tint) and hardens as quickly as required.
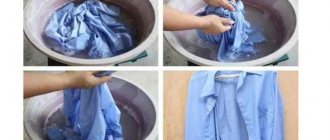
Before starching things, they must be rinsed in advance. The procedure can be performed on both wet and dry tissues. There are soft, medium and hard starching, depending on the concentration of the solution and the purpose of the product.
- Soft processing – used for processing bed linen, blouses, dresses. Add 0.5–1 teaspoon of starch per liter of water.
- Medium starching – intended for processing shirts, napkins and tablecloths. Per liter of water requires 1 tbsp. spoon of starch.
- The hard method is for caps, collars and cuffs. For 1 liter of solution you will need 2 tbsp. spoons of starch.
Subtleties of starching bows and satin fabric
- When choosing between potato starch and corn starch, you need to consider the color of the tape. For light-colored products, potato is preferable - its bluish tint will not give a yellowish effect .
- Corn starch hardens and dries a little longer than its potato counterpart.
- High-quality starch is possible only if there are no lumps in the prepared paste. You can ensure their absence, even if the solution is not perfectly homogeneous - straining with a strainer or several layers of gauze will correct the situation.
- A solution that is too thick can be easily diluted with water at room temperature and mixed thoroughly.
How to become elegant and what does it mean?
How to make a pompom from threads?
How to starch a tulle bow or petticoat
The soft method is suitable for all types of light fabrics, including tulle, chiffon, guipure, etc. Place a piece of fabric or bow in the solution for 15 minutes. Rinse the bow several times so that the paste is evenly distributed in the layers of fabric. Shake, dry a little. Before ironing the bow, lightly spray it with water.
If the model involves a multi-layered skirt, the bottom layer of tulle should be starched in a hard way.
How to store a gymnastics hoop
Polyethylene hoops are distinguished by their plasticity, so they do not break. But they have their own disadvantage: possible loss of shape (to an oval or “figure eight”) if handled incorrectly. To prevent this, immediately after purchase, you need to wrap the hoop with decorative tape and secure the design by wrapping it with one layer of transparent tape. This will add the required grams to the hoop according to FIG rules (the hoop must weigh at least 300 g) and make it stronger.
Store the hoop in a horizontal position (in a vertical position, the hoop imperceptibly “flattens”).
In hot weather, try to monitor the shape of the hoop, because it is more susceptible to changing shape and when the temperature drops (for example, at night) it can “freeze” in its previous shape.
Proper care and respect for your gymnastics equipment will significantly extend their service life.
Starch gauze and bandages
This will require a medium or hard method.
- Dilute the required amount of starch, immerse gauze or a product made from it into the resulting solution (it should be warm). After a few minutes, remove the gauze and carefully straighten it so that there are no creases. Dry slightly, then you can iron.
- To starch a bandage or gauze for medical purposes, select the medium type of starch, unwrap the bandage or gauze, and immerse it in the solution for 20-25 minutes. There is no longer any need to wash and rinse; all that remains is to dry the product slightly, after which you can iron it and carefully roll it up.
If a harsher starch is required, double the starch dosage.
Other methods of starching
When buying starch, you can opt for an already diluted product or in the form of an aerosol. But the method using starch powder is more reliable and cheaper.
Starch the tape using a spray with a similar effect. It should be sprayed from a distance of 20-25 cm, having first studied the attached instructions. After drying, iron. The tape will acquire shine, smoothness and strength.
Liquid starch sold in retail chains cannot be boiled. Just pour it into a container and dip the tape into it. After 5-10 minutes, remove the tape, dry it, and then iron it.
How to starch embroidery?
Most often, the base for cross stitch is already starched, but some manufacturers skip this manufacturing stage, which causes some problems.
To starch cross stitch in the finished product, use a special “starch spray” product, which is sold in household chemical stores specifically for starching.
Rinse the napkin and then iron it. Next, spray the back of the fabric with the spray and immediately place the hot iron on it. So process the entire napkin step by step.
Do not hold the iron on the fabric for a long time and do not rub it on the surface. A few seconds of drying is enough.
Professional starching products
For those who don’t really want to bother with starch and brew it, there is a lightweight version of the process. To do this, purchase a special starch product in the household chemicals department of a hardware store.
Advantages of special starch products:
- Such products are available in the form of a spray, liquid or powder. This way, you can choose the product form that is easiest for you to work with.
- The products are convenient and easy to use.
- Sprays can be applied to individual parts of clothing (cuffs or collars), which greatly simplifies the process. It is enough to spray some clothes while ironing.
- To process large items, special powders with starch are used. In this case, add the powder to the washing machine during the washing process.
Important! Before using any industrial product for this purpose, follow the instructions for use.
Starching a crocheted napkin
Crocheted napkins are incredibly beautiful and look perfect in any interior. But sometimes they need to be starched.
Prepare a solution for hard starch. Remember that it is correct to stir the starch in cold water and only then heat it, otherwise lumps will appear in the solution. Immerse a crocheted napkin in the resulting solution and leave for 5 minutes. Then take it out, wring it out and straighten it on the ironing board. After this you can iron it with an iron.
Instead of starch, you can use 100 ml PVA glue diluted in 200 ml of water. A crocheted napkin is also soaked and dried with an iron.
Features of this tape
Buying a ribbon for gymnastic exercises will not be a problem. Having ordered a product online, all you have to do is wait for the package to be delivered to your home. Firms specializing in the manufacture and sale of sports goods will ensure the purchase of tape made from high-quality fabric from both domestic and foreign manufacturers.
To make ribbons used in rhythmic gymnastics, satin is usually used. This is a rather soft fabric that cannot hold the required shape on its own. Starched tape does not wrinkle as intensively and is less susceptible to contamination.
Rhythmic gymnastics tape can only be washed in cold water without aggressive detergents.
In order for the ribbon to retain its properties and look beautiful at the most crucial moments of the competition, it must be properly cared for. The satin can be washed in 30-degree water using a washing machine in the “delicate” or “hand wash” mode. But even in this case, after 2-3 washes the tape loses some properties.
First of all, the tissue will lose strength, which will prevent the athlete from performing the exercises as required by the program. To prevent this from happening, the rhythmic gymnastics tape must be starched after each wash. In addition, it should be sprayed with an antistatic agent so that during movement it does not produce a static effect and does not stick to the carpet of the hall or to the athlete’s costume.
If there is a need to color the tape or apply a design, you can use acrylic paints or special markers for drawing on fabric. The dried tape is ironed through thin cotton fabric. Ironing is carried out at maximum temperature with steaming.
How to starch things in an automatic washing machine
You can also starch fabric and clothes in a washing machine; the method is especially suitable for processing bed linen; it is large items that are most difficult to starch by hand. Prepare a solution from the following ingredients:
- Potato starch 1 teaspoon.
- Water 500 ml.
Dissolve starch in cool water, then heat it. You will get a paste that should be without lumps. Cool the resulting product and add it to the conditioner compartment when washing in the washing machine (about 100 ml no more). Wash your laundry as usual, and when finished, wipe the machine drum with a soft cloth to remove any residue.
Description and importance of the procedure
The starching process is the creation of a protective film on the surface of the fabric. Depending on the thickness of the film, the item becomes more elastic or takes on a strictly defined shape, becoming like a sheet of paper.
The prepared clothes are rinsed for several minutes (or even seconds) in the paste solution, and then left to dry in a horizontal or hanging position. You can give it an unusual shape using improvised means - pencils, curlers, cardboard.
Why give shape
It would seem, why resort to this method of processing fabric when starched collars and dresses have long been out of fashion? Shaping and fixing the fabric is necessary in various circumstances: “putting on” a chef’s or medical cap, adding fullness to a skirt for a children’s party, securing crocheted cotton items. In addition, the starching method is useful for creative people to create fabric crafts - flowers, vases, lampshades. Starching, in addition to the aesthetic side, also has practical significance:
- natural barrier - the film formed on the surface protects against contamination, preventing stains from penetrating deep into the fabric;
- bleaching - after starching, light-colored items lighten and become cleaner;
- prevention of ironing - starched clothes are less susceptible to wrinkles.
The reasons for starching are different for each housewife. The main thing is to know that the process is carried out using substances of natural origin, without artificial impurities, which means that starchy items are safe for adults and children. The only drawback is the density. Starched fabric traps air, causing discomfort on a hot summer day. Also, due to its rigidity, the fabric can rub the skin (for example, a collar).
Materials and tools
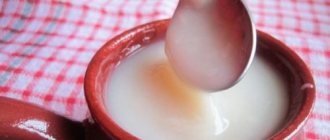
The main substance from which the process gets its name is dry starch. Absolutely anything is suitable for the procedure - potatoes, rice, wheat, corn. The natural paste holds its shape well and holds it for a long time. It is not difficult to dilute starch for starching. First, a certain dose is wetted and mixed, and filled with the required amount of water. Then the container is placed on the burner until it boils. It is also possible to starch fabric without starch. This can be done using three commonly available substances.
- Gelatin. Pour half a glass of water, add one tablespoon of gelatin powder. After swelling, add water to the edge of the glass, heat the mixture until dissolved. Remove from heat when the mixture begins to boil and cool. Ideal for knitted items and delicate silk.
- Sugar. Make a syrup by dissolving 200 g of granulated sugar in 100 g of water. Stir the solution over low heat until the grains dissolve. Remove as soon as the syrup begins to boil. If overcooked, the solution will turn yellow and share its color with the fabric. After washing, the sugar film is washed off, so the procedure must be repeated after each wash.
- PVA glue. Mix glue with water in a ratio of 1:2. It is more convenient to apply the resulting mixture to the product with a wide brush. This method is used for sewn or knitted crafts.
Any clothing made from different types of fabric is subject to starching. The exceptions are underwear (impractical and unhygienic), unyielding synthetics and dark fabric - whitish stains remain on it.
How to starch a hat
Use starch or gelatin. You will need a container suitable in size for the headdress. For example, a pan turned upside down.
- When choosing starch as the main ingredient, it is necessary to prepare a solution for the rigid method. It is important to achieve transparency of the solution, and then cool it slightly. Then the brim of the hat is immersed in the paste in stages on each side, and then it is put on the prepared form (pan) and straightened carefully to allow the solution to dry.
- 1 tbsp. A spoonful of the product is diluted in a glass of water, brought to a boil and stirred until the gelatin is completely dissolved. Then all that remains is to cool the solution and apply it to the brim of the hat using a silicone brush.
Why starch fabric?
The principle of starching is based on the fact that clean clothes are rinsed in water with the addition of starch. As a result of such actions, a protective film is formed on the surface of the shirt or blouse, which has a beneficial effect on the material:
- Makes the fabric denser.
- Keeps its shape well.
- Prevents material from creasing.
- Dirt during wear is not absorbed deeply into clothing.
- Yellowed clothes are bleached and take on a fresh look.
- Creates an environmentally friendly barrier.
Important! The only drawback is that when treated with starch, the fabric allows less air to pass through. Therefore, if you are processing summer items, starch only individual parts.
Workwear
It is customary to keep the clothing of doctors, food service workers, and laboratories in proper condition. A white robe and hats are typical for representatives of all of the above professions.
- A solution of medium intensity is optimal. After preparing it, immerse already clean clothes (robe, shirts) in the solution and soak them in it for about 15 minutes, stirring constantly.
- How to starch a chef's hat? You will need a hard solution in which to soak the product for 20 minutes. After processing the wet cap, you need to “put it on” an inverted three-liter jar and let it dry in this form. Adjust the cap if necessary.
There is no need to rinse the robe and cap after starching. All that remains is to iron the products with an iron; first, you can lightly sprinkle the fabric with water.
If you learn how to starch things correctly, you will later save yourself from a lot of problems and difficulties. The skill will be useful not only for preparing workwear, but also for children's suits, men's shirts and decorative items.
Features and nuances of processing
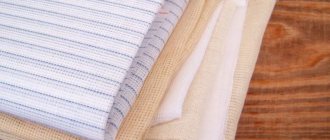
The easiest way to starch is flax or cotton. These are perhaps the most picky fabrics that can withstand any amount of starch and acquire the desired shape and structure. The most difficult thing is to deal with silk and do everything correctly so as not to damage the fabric.
In addition, some ladies do not understand how best to starch a hat to restore or shape it. Following the six rules of starching will help dispel all fears and doubts.
- Thin fabrics. Organza, natural silk, chiffon require a delicate approach. Starch light fabrics using a weak starch (literally half a teaspoon) or gelatin solution. Silicate glue is perfect (one small spoon for five liters of water).
- Wool products. Wool stretches under the influence of hot water, so it is better to starch woolen items in cold water. Pour a tablespoon of the substance into a liter of water and mix. Soak the wool fabric for half an hour, then gently wring it out to remove moisture. Dry horizontally.
- Hats. Unlike hat brims and “tablets” with fascinators, it is correct to starch hats with a soft or medium solution. Hardly starched hats and caps will not fit well on the head and cause discomfort. In this case, the lace hat or knitted panama hat must be shaped into a lampshade until the headdress is dry. This can be done on a special layout or frame. A jar, pan, or vase turned upside down is also suitable.
- Fringe. It is very easy to restore the previous appearance of glued fringe. It is enough to hold the molded threads over steam and then comb them with a wide-toothed comb.
- Embroidery. Embroidery is usually not treated with paste. If you still want to starch the embroidered design, then you should use a medium solution. The embroidery is soaked, wrung out and ironed on the reverse side.
- Gate. Sometimes you only need to starch the collar of a shirt. To do this, use a concentrated solution. First, wipe the inside with hydrogen peroxide to remove light stains. Then dip only the collar into the paste. It is convenient to distribute the product with a wide soft brush. When the collar dries a little, iron it through a thin fabric.
Starched linen and clothes retain their neat appearance and shape longer. Knowing how to properly starch things, mothers and housewives can easily maintain their cleanliness and aesthetics. Using home remedies, following the recipe, you can starch any fabrics and products - from light silk bows to thick linen pillowcases.
Video on the topic
How to care for gymnastics clubs
Rubber clubs for rhythmic gymnastics.
Over time, the color coating on rubber clubs gradually wears off. This can be corrected to a certain extent, and we can try to give the clubs a more attractive appearance. You can paint the clubs again; for this you can use paint in spray cans. It is sold in any specialized store, and you can find just a huge amount of flowers. You can get creative and paint the clubs using a stencil, for example, thus giving them the colors, patterns and shades of your swimsuit. It turns out beautifully if you make the base a single color, and after drying, apply a design, you can even use a brush.
Plastic clubs for rhythmic gymnastics.
The main problem that arises periodically with this item is its fragility. This only applies to plastic clubs. In uncarpeted training rooms and in gyms with concrete floors, even if there is carpet, the clubs may break into pieces if dropped. If you train in such a gym, it is better to use rubber clubs.
