Thanks to household appliances, home owners gain complete comfort. Using the same vacuum cleaners significantly reduces the physical effort spent on cleaning. Meanwhile, even super-reliable equipment, for example from Samsung, does not last forever, which says one thing: someday the time comes for repair or replacement.
However, convenient and practical units quickly make users get used to working with them. Therefore, most of their owners prefer to restore their devices to their functionality rather than buy new ones. We will tell you what repairs of Samsung vacuum cleaners can be successfully carried out with your own hands.
Minor faults and their elimination
If the vacuum cleaner begins to act strangely - to perform its functions incorrectly, to make loud noise, to vibrate - it needs help.
Most often, the cause of the malfunction is the cleaning process itself: the dust bag is completely filled or one of the filters is clogged with debris.
Some vacuum cleaners are easy to disassemble, while others require certain knowledge. To avoid mistakes, we recommend that you often look at the instructions, which are equipped with diagrams and tips.
Usually you can solve the problem on your own. But if you are not good at repairing equipment, it is better to take the device to a service center, to specialists.
Problem #1 - suction power has dropped sharply
If you notice that dust is poorly absorbed, and small debris remains completely untouched on the floor, you will have to find out the reason through partial disassembly. First you need to make sure that everything is in order with the pipe, hose and brush.
Procedure:
- disconnect the hose from the vacuum cleaner;
- separate the pipe from the hose;
- remove the nozzle;
- carefully inspect each part;
- try to blow out the pipe and hose.
If a large object (a plastic bag, a sock, a sheet of paper) gets into one of the elements, you need to carefully remove it, then reassemble it in the reverse order and try to start the device.
Sometimes the traction weakens simply because you accidentally touched the power regulator and set it to minimum. Be sure to check it before any disassembly.
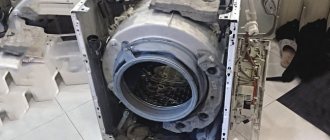
Problem #2 - the vacuum cleaner filters are clogged
Unusual sound, weak traction, stoppage of operation - the consequences of clogged filters. For devices with a fill indicator, this can also be determined by the red light coming on. Modern devices provide everything to ensure that filters can be accessed quickly and easily.
Usually there are two main elements that need to be cleaned - a plastic cyclone filter (a transparent reservoir with compartments) and a sponge enclosed in a plastic container. But sometimes it is necessary to replace the HEPA filter, and for washing units - additional engine protection.
Photo tips for disassembly, cleaning and replacement:
Image gallery Photos from
To get to the fine filter, you need to remove the cover located at the back of the device
If the filter is clean, then the reason is not in it - we install it in place. It is better to replace a dirty part with a new one, although some try to wash it
The finest dust remains in the sponge filter. It is usually inserted into the reservoir lid and enclosed in a small plastic container. The sponge washes well with soapy water
Container with cyclone filter
Plastic grille to protect the HEPA filter
New HEPA filter for Samsung
Sponge filter in container
As you can see, disassembling a Samsung vacuum cleaner to clean the filters is simple and quick. The elements are washed in warm water with a non-aggressive detergent. Then they need to be dried and reassembled.
Problem #3 - the device does not turn on
The standard test when the device is not working is to plug it into the network. Make sure the power cord is plugged into the outlet and the power control button is set to the correct setting.
If the indication does not work and the vacuum cleaner does not make noise, most likely the motor will have to be repaired or replaced. But problems with the board are also possible, so disassembling the case is necessary in any case.
Weak "pull"
As we have already found out, if the vacuum cleaner does not suck in dust well, then you will most likely have to repair the vacuum cleaner hose (you have a Samsung or a product of a different brand - it doesn’t matter). First of all, make sure that nothing is stuck in it - foreign objects caught in the hose greatly reduce traction. Simply put, look into the hose and remove the clog.
If you are sure that the hose is not clogged, carefully inspect it and check the integrity of the corrugation. Very often, housewives are too lazy to bend down to move the unit from place to place, and they simply drag it around the room “by the tail.” This causes gaps to appear between the turns of the corrugation, resulting in reduced traction. If you find a gap, take electrical tape and wrap the gap tightly in several layers. Such repairs, of course, will not be enough for a long time, and over time the hose will still have to be replaced, but it will still serve you for some time.
If everything is fine with the hose, check all the filters and the garbage bag - they may be very dirty. Clean the filters thoroughly and replace the bag with a new one. Also, do not forget to check the position of the power regulator - it may be out of order. Return it to the desired position.
Repairing the washing machine power supply
Geographically, the power supply of the washing machine is located on the electronic board of the device. You can determine it by the presence of one or two transformers. As shown above, the power switch is sometimes integrated with the pulse generator, and sometimes there is protection inside. Therefore, for the structural division of the board, it is useful to find descriptions for all relevant microcircuits.
At times, the power supply is represented by a separate miniature PCB plate, in the manner of an expansion card for the motherboard of a personal computer, inserted into a slot perpendicular to the electronic brain of the washing machine. But the main thing is that the power bus should go to this place. 230 volts can go to various relays (sometimes located nearby) that power the sump pump, intake valve. As needed, the programmer (on-board computer, electronics unit - call it what you want) gives a signal to use the selected equipment.
Reason #4: Software glitch
It's no secret that modern mobile phones are controlled by software specially created for them. The software of today's cellular device is as complex as Windows, Mac OS or Linux computer systems. Therefore, we can assume that the phone cannot be started due to some damage to the software part of the device. It is worth noting that the previously existing problem “Samsung phone does not turn on” was relatively easy to fix. With the help of a service cable and a program freely distributed on the Internet, everything was resolved within a few minutes. Now, reprogramming phone software is an incredibly difficult task. Since a generally accepted update is nothing compared to flashing the program code of a modern mobile communication device. By the way, not every cell phone repairman is a specialist who can restore the functionality of the phone’s software components.
Tip #4
Diagnosing the “collapse” of a mobile system is elementary. As a rule, a phone with damaged software will boot only until the company logo appears. Then the device may go into a “stupor” or “freeze”. Most often, an unsuccessful cyclic reboot occurs. Less often - absolute inaction. Paradoxical as it may seem (after all, we all know about the excellent Japanese quality), nevertheless, the situation “Sony phone does not turn on” is a fairly common occurrence in the world of “software failure”.
Software problem
When malicious applications are active, there is no anti-virus cleaning, no cleaning of software junk (cache), or installation of a large number of applications from little-known and unreliable manufacturers, the Android operating system often crashes.
There are several options to solve this problem:
- reset the system to factory settings;
- flashing.
Remove the SIM card and flash drive and get started. You must get to the Recovery menu for a hard reboot or factory reset. To do this, hold the volume control “up” and the power button for a long time.
If there is no reaction, then contact a specialist for flashing. You can change the firmware yourself, just use the software product from the official website of the manufacturer Samsung.
What to do
To understand the cause of the breakdown, it is necessary to analyze possible problems. This work is not difficult, it can be done at home yourself.
Clogged filters
There are several categories of filters, so each type has its own nuances. Cleaning filters:
- filter bag - emptied or changed as it fills;
- cyclone filters - washed with cold water after each cleaning;
- water - disassembled and washed under the tap;
- fine filters - disposable ones are blown with air, reusable ones are washed.
Hose clogged
If during operation the vacuum cleaner suddenly stops sucking in dust, you need to check the flexible hose for stuck objects.
You can get rid of them in several ways:
- The hose is disconnected from the device and accumulated dust and foreign objects are removed with long tongs.
- If an object is stuck in the middle of the hose, then you need to use a thin wire.
- You can also clean the hose under a strong stream of water.
Outlet fault
If the motor does not work when you turn on the equipment, the cause may be a faulty plug or lack of voltage in the sockets.
If the place where the cord attaches to the plug is broken, the entire power cable must be replaced. For this:
- You need to remove the back cover and unscrew the bolts holding the diaphragm.
- Carefully remove it and move it towards the pad with the gasket.
- Replace damaged elements and wiring.
The voltage in the outlet can be checked with a multimeter. A value of 198 B is considered to be within normal limits; if the numbers are lower, it means that the malfunction lies precisely in this reason.
You can replace a burnt wire yourself
Problems that only a specialist can handle:
- broken power buttons;
- burnt out engine;
- overheating of the control board.
To prolong the performance of the vacuum cleaner, it is important to follow simple rules:
- After each cleaning, clean the filters and change them as they wear out.
- Empty the bag from dust and dirt.
- Store the equipment in a dry place, as moisture getting on the motor can cause it to malfunction.
- To prevent the engine from overheating, the operating time should not exceed 60 seconds.
A vacuum cleaner is an indispensable equipment for cleaning an apartment. But it often happens that the vacuum cleaner does not turn on or suddenly stops working.
In order not to lose equipment and not be subject to unnecessary waste, it is important to follow the operating rules, as well as find problems in a timely manner and begin repairs.
There is a smell during operation
The cause of such a breakdown may be the hose (this is a common case for Samsung): dirt and debris often gets stuck between the turns of the corrugation, which over time begins to emit an unpleasant odor. Rinse the hose thoroughly with a stream of water, preferably under pressure and using detergent. After this, be sure to dry the corrugation thoroughly before using it again.
Another source of unpleasant odor can be the belt. Check its tension, tighten it if necessary or replace it with a new one. The smell of burnt rubber will disappear.
Disassembling the LG vacuum cleaner motor
The design of the electric motor of LG vacuum cleaners is practically no different from the motors of other household appliances. Only the dimensions and location of the mounting holes may vary.
- The disassembly process begins with removing the brushes from the brush holders. To do this, use a screwdriver to unscrew the screw terminals (or spring clamps).
- Next, using a screwdriver, pry up and remove the impeller casing (in some models, additional extension of the sides may be required).
- The impeller itself is fixed to the armature shaft using a nut with a reverse thread, which can most easily be unscrewed with a socket wrench (clockwise). After this, the impeller can be easily removed from the shaft by prying it off from opposite edges with a screwdriver.
- After the impeller, remove the air separator.
- Unscrew the coupling bolts on the housing and remove the armature with bearings and the top cover from the stator.
Engine repair
When starting to repair an electric motor, you need to pay attention to the following points:
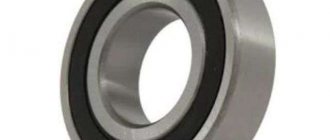
- A common cause of engine failure is bearing failure. To diagnose them, visual inspection or scrolling is used. If replacement is necessary, a puller should be used. The procedure itself is simple; problems can only arise if the bearing is completely destroyed and devoid of balls. Then the inner race may stick to the shaft and one side will need to be ground off to loosen it. It must be taken into account that the actions must be as careful as possible, since the sharpening stone can damage the rotor shaft. You can also try heating and knocking it out.
- Also, the cause of motor failure may be the armature commutator, which will require cleaning. To do this, place the anchor on an emery cloth (abrasive grit 1000) and turn it easily without pressing. Next, grinding is performed, using sandpaper with 2000 abrasive.
After this, the electric motor is reassembled according to the same scheme, but in reverse order.
Electric motor repair
If you decide to restore the old electric motor, lubricate or change the bearings, perform a complete disassembly.
First, unscrew the screws with a screwdriver and remove the impeller casing. Use a socket wrench to unscrew the nut. In most engines it has a left-hand thread. The impeller is pryed from opposite sides with two screwdrivers, trying to remove it from the anchor.
Unscrew the tightening screws on the body and remove the brushes. The motor will split into two parts: one will contain a stator with a copper winding, and the other half will come out with an armature and bearings.
All parts are carefully wiped off dust with a dry cloth or brush. Use a puller to remove the bearings and install new ones. If necessary, lubricants are pushed into the seat with the balls and separator. Assembly occurs in the reverse order of installing new brushes.
Why doesn't the robot vacuum cleaner's wheel spin?
With constant use, various breakdowns may occur. Often users are faced with the fact that the wheel of a robot vacuum cleaner has broken. Hair and pet fur can cause malfunction. During the harvesting process, they are gradually wound around the wheel. If you do not constantly clean the device, over time the wheel will stop rotating. You will need to carefully remove all hairs from the wheel.
Some owners note that the robot cannot move. But if you turn the wheel manually, it turns. The problem may also be small hairs. More serious problems include a malfunction of the motor that is responsible for rotating the wheels. Sometimes the control board or sensors fail. Only a technician at a service center can identify the exact error after a thorough diagnosis.
Dead batteries
Some vacuum cleaners can be turned on with a button on the handle to which the hose is attached. If you have such a vacuum cleaner, try turning it on with the button on the body.
If the vacuum cleaner starts from the button on the body, replace the batteries in the handle and continue using it. If the vacuum cleaner does not turn on from the button on the body, proceed to the next recommendation.
Why won't my Samsung vacuum cleaner turn on?
A vacuum cleaner is an indispensable assistant in the home, helping to keep your apartment clean every day. The device helps save time on cleaning carpets and floors, upholstery, etc. Sometimes we encounter problems such as the vacuum cleaner not turning on. What to do?
There are many reasons why a vacuum cleaner stops working. The reason may or may not be serious. To fix a serious breakdown, you will have to take the device to a service store or contact a specialist for subsequent repairs. Contacting a specialist will entail financial costs, so minor damage can be repaired yourself. But repair the device yourself if you are confident in your abilities. Otherwise, you will damage the equipment more, which will lead to severe damage.
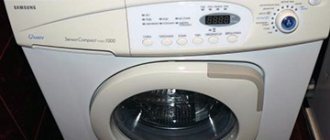
Let's look at the Samsung sc4740 model. Samsung sc4740 is a device with a dust collection container. The volume of the plastic bowl is 2 liters. The suction power is 360 W, with a consumption of 1800 W. There is no power adjustment. There is a fine air filter. Distinctive features include automatic winding of the network cable, the presence of a foot switch, and the ability to vertically park the telescopic suction tube. The noise level produced is 83 dB. Weight 4.6 kg.
To begin troubleshooting the device yourself, you should determine the cause of the breakdown. And before you start repairing a vacuum cleaner, you should understand its structure. For example, let’s look at the main features that prevent Samsung sc4740 from turning on:
- Engine failure
- Start button sticking
- Clogged filters
- Dust container clogged
Main reasons
There can be many reasons for equipment failure. Starting from the breakdown of the components of the vacuum cleaner, ending with more serious difficulties such as stopping the operation of the electric motor. The following are the reasons why home vacuum cleaners do not turn on:
Damage and breaks in the power cord of the vacuum cleaner. Sometimes the damage can be visible - cracks, kinks, breaks in the network cable. But sometimes the damage can be hidden - a tear in the conductor where the current flows
Be sure to check the network cable for integrity, and also pay attention to the connections. Damage to the plug. Often this damage is detected by the smell of burnt smoke and the color of the plug. Damage to the power button
The button may simply get stuck, fall out, be faulty, etc. To prevent this breakdown, you should completely disassemble the structure of the household unit, check the operation of the button, if possible, replace the board and put the structure back together. Damage to the electrothermal relay. An electrothermal relay is a thermal motor protection that is responsible for protecting the motor from power supply overloads. Modern models are designed so that the device does not turn on without turning on the thermal relay. Engine damage. Check the motor for debris, sand or dust. The motor may also stop working due to wear and tear caused by prolonged or active use. The engine may also deteriorate due to water ingress. You won't be able to disassemble the engine yourself, just inspect it. Damage to the triac. A triac is a semiconductor equipment responsible for regulating current parameters in the network. Reduced network voltage. Most modern models are equipped with a protective shutdown function during power surges. The device simply turns off automatically to avoid engine failure.
Why doesn't a working vacuum cleaner turn on? Sometimes the cover may be hidden in a faulty socket. The absence of a network power source can be determined using any other electrical equipment. To do this, turn on the device, and if there is no power, then the problem lies in the power supply. This is the most harmless breakdown and does not affect the operation of the device in any way.
Device of various models
The Korean corporation Samsung occupies one of the first places in the world in the production of all kinds of cleaning equipment. It produces all types of vacuum cleaners: industrial, construction, for cleaning companies, but the most popular are household devices for home use. These devices also have many varieties, for example, for dry or wet cleaning, washing vacuum cleaners, units with an aqua filter, and even robotic vacuum cleaners .
Each type of product has its own functionality and technological features, which may determine the type of breakdown and complexity of repair. Let's look at the most common models of Samsung household vacuum cleaners and their technical characteristics.
Samsung SC4520
A budget version of vacuum cleaners from the popular Air Track series (literal translation - “air path”), where a special plastic container is used instead of a garbage collection bag. For its price, it has a fairly good suction power of 350 W and a power consumption of 1600 W. There is no suction power adjustment. Performs dry cleaning only. Equipped with a cyclone filter and a double (two-chamber) container that separates large and small debris. The volume of the dust collector is 1.3 liters, the weight of the vacuum cleaner is 4.3 kg. The length of the power cord is 6 m, automatic rewinding.
Samsung Easy1500
The full model name is SC52-EO. A household vacuum cleaner with average suction power - up to 370 W, and power consumption of 1500 W. The device is equipped with a fabric bag for collecting debris and an additional filter installed in front of the engine impeller. The volume of the dust collector is 2.5 liters. The cord length is 6 meters, automatic rewinding system. The weight of the device is 3.7 kg. Provides only dry cleaning: if moisture gets in, the engine can quickly fail. Produces an average noise level of up to 85 decibels. Has a dust bin full indicator and a power regulator.
Samsung VC-5853
Inexpensive, medium-power option, great for cleaning small spaces. Equipped with a 2.4 liter waste collection bag, it allows for dry cleaning only. The power consumption of this Samsung vacuum cleaner is 1300W, suction power is 330W. Equipped with a built-in fill indicator. The length of the electric cable is 6 meters, the type of winding is automatic, the permissible range is 8.5 meters. The device weighs 3.6 kg. Has an additional fine filter. The noise level produced does not exceed 78 decibels. The suction tube is composite and can be disassembled into three parts.
Samsung SC6570
A modern, bagless household vacuum cleaner. In it, debris accumulates in a special plastic cyclone filter with a capacity of 1.4 liters. It has a dust bin full indicator and a convenient telescopic tube on which the power regulator is located. The weight of the device is 5.3 kg. The length of the electric cable is 6 meters, the range of the vacuum cleaner is up to 9 meters. Suction power – 380 W, power consumption – 1800 W. The noise level produced is no more than 78 dB. It is equipped with an additional turbo brush and a fine filter. It involves performing dry cleaning only; getting moisture into the dust collector is extremely undesirable.
Samsung SC6573
Compact and convenient household vacuum cleaner with a plastic dust collector (cyclone filter). Equipped with a telescopic sliding tube and container filling indicator. A power control mechanism is built into the handle of the tube. The device weighs 5.2 kg, the volume of the dust collector is 1.5 liters. Power consumption is 1800 Watts, and suction power is 380 Watts. The noise level produced during operation is 80 decibels. The cable rewind type is automatic, the cable length is 6.1 meters, and the operating range of the vacuum cleaner is 9.2 meters. The kit includes a turbo brush. The vacuum cleaner is designed for dry cleaning.
Samsung SW17H9090H
A universal vacuum cleaner with an unusual and stylish design that performs both dry and wet cleaning. Dust collector type – aquafilter with a capacity of 2 liters. The kit includes an additional HEPA filter and turbo brush. Sliding suction tube with built-in power regulator. The weight of the device is 8.9 kg. The length of the network cable is 7 meters, the rewind type is automatic. The operating range of the vacuum cleaner is 10 meters. Power consumption – 1700 W, suction power – 250 W.
When choosing a model and during operation of the device, be sure to take into account the manufacturer’s recommendations regarding the type of cleaning performed. Many owners believe that if a vacuum cleaner has a plastic dust container (container), then, regardless of the model, it can be used to remove spilled liquids or during wet cleaning of carpets.
This opinion is wrong. The plastic container itself is not exposed to moisture, and it can even be washed under the tap after removing it from the device . But if the vacuum cleaner is not intended for wet cleaning, then its filters do not retain moisture, and it, even in small quantities, certainly gets into the engine of the device. Subsequently, this can lead not only to failure of the unit itself, but also to a short circuit in the electrical wiring in the room.
What to check first
Some of the problems that caused the device to fail can be fixed by owners themselves, without the help of specialists.
Is the socket working?
First of all, check that the outlet is working properly:
- Plug in another household appliance and see if it works. It is best to turn on a small lamp or table lamp - if the socket is working, the lamp will immediately light up.
- Try plugging the vacuum cleaner into a different outlet and see if it works there.
Is the bag too full?
Quite often, the vacuum cleaner does not turn on because the garbage container is full. When the dust bin is completely clogged, air passes through it more heavily and the suction power decreases. The load on the electric motor increases, and eventually it will overheat, shut down, or fail.
Modern models are equipped with an indicator that signals when the bag is full. If there is no such “red light”, listen to the sound of the engine: when it is working for wear, you can hear an increasing hum. Often the unit starts to “stink”.
If the bag is not overfilled in time, the engine will overheat. Electronics or a thermal relay can track this moment and turn off the engine itself - then just empty the bag and let the car cool down. If there are no sensors, the motor will burn out and the equipment will have to be repaired.
Have large objects gotten into the hose?
Debris stuck in the hose will lead to a drop in suction power, and as a result, overheating and engine failure. Usually the culprit is large objects (rags, children's toys) that got inside the sleeve or telescopic tube and could not move into the dust collector. But sometimes small objects also get stuck - for example, a toothpick stands across the channel, catches other debris and forms a plug.
Is the engine protection filter dirty?
The motor protection filter, located immediately behind the garbage bag, is subject to regular contamination. Small dust particles seep through the dust collector and settle on the filter: as a result, the passage of air becomes difficult and the engine heats up again.
Is the cable or plug broken?
The cable of the vacuum cleaner is constantly in motion during cleaning - the cable clings to corners, gets under furniture, and the unit itself often runs over it. All this negatively affects the integrity of the cable.
- Check the cable. Sometimes the damage can be determined by torn insulation, but often the metal strands are damaged internally, and the insulation does not cause suspicion. Open the case and find the place where the cord connects to the electrical board. Plug the cable into the outlet, take a multimeter and measure the voltage at the connection point. If there is no current, the problem is either the cable or the plug.
- Replace the plug or its parts. If the plug is removable, open it and look for burnt contacts or other defects. Simply cut off the permanent plug from the wire and replace it with a new one.
If the other plug does not give a positive result, then the final cause is in the cord - replace the whole thing.
How long did the equipment work?
If the vacuum cleaner stalls, check how long the equipment was running before. It is possible that after a long cleaning it simply overheated, and the electronics turned off the motor to cool it down. Wait a while (at least 20-30 minutes) and your assistant will be ready to work again.
Is there a burning smell?
If during cleaning you smell a burning smell, then most likely the armature or stator winding has burned out. In this case, you cannot do without qualified repairs - you will have to replace the burnt part, and in some cases the entire engine.
Sometimes they suggest rewinding the armature and stator windings; we recommend looking at the economic feasibility. Most often, a new assembled module will be cheaper.
Lastly about electronics
It must be said that the electrical circuits of vacuum cleaners, except for the most expensive ones with microprocessors, are not particularly complex. The electrical circuit diagram of the vacuum cleaner, which can be considered close to typical, is shown in Fig. below. The network voltage in this case is 110 V. For a voltage of 220 V, the resistance of R1 is increased to 150 Ohms and its power to 2 W. R5 takes 330 kOhm, VR1 and VR2 each take 470-510 kOhm, R3 – 24 kOhm 2 W. The operating voltage of all capacitors is 630 V.
Electrical circuit diagram of a vacuum cleaner with power control
R3 sets the maximum power of the vacuum cleaner; it can be changed within 12-47 kOhm. VR1 is the operational power control, and VR2 is set to its minimum value, and here you need to be careful. The fact is that if the motor armature stops, every half-cycle of the mains voltage a starting current equal to 3-5 working currents will flow through it, and an expensive powerful triac (TRIAC according to the circuit) will burn out
Therefore, when setting up the circuit, the VR2 engine is first set to minimum resistance, then a voltage of 175 V is given from the LATR and VR2 very carefully, without overshoot, reduces the motor speed to 700-800 rpm
Thermal protection in such a circuit is also easy: a 1-1.5 MΩ thermistor (for a 220 V mains voltage) with an inverse logarithmic temperature characteristic is connected in parallel to C3. Physically, the thermistor must be in thermal contact with the motor housing, but be electrically isolated from it. A “cold” thermistor (at room temperature) does not affect the operation of the circuit, but when heated to 70-80 degrees, its resistance will drop to 1-0.5 R3, C3 will charge more slowly during the half-cycle, the low-power DIAC triac will open and open the TRIAC later , and the engine power will decrease by half or four. In approximately the same way, it is possible to modify most vacuum cleaners with power control, but without automatic protection.
***
2012-2020 Question-Remont.ru
cope itemtype=”https://schema.org/Article” data-nonce=”a60280afaf”>
cope itemtype=”https://schema.org/Organization”>
The brushes on the robot vacuum cleaner do not spin
Almost all models of robotic vacuum cleaners have two or one brush installed at the bottom. They help remove dust and debris from corners and other hard-to-reach places. Some devices are equipped with a turbo brush for more effective cleaning. Most often, the brushes on a robot vacuum cleaner do not spin because they are heavily clogged with dirt or pet hair.
This problem can be easily fixed by cleaning the parts. They must be cleaned periodically. While cleaning, hair and fur constantly wrap around the brushes. It is enough to carefully remove the brushes to remove dirt. After installation, noise may occur in the brushes. This indicates that they were not secured correctly. You will need to remove the brushes from the robot vacuum again and install them correctly.
But banal cleaning of hair and animal fur does not always help. If the part has been thoroughly cleaned and installed correctly, but still does not work after being turned on, the problem is more serious. In this case, the problem lies in the operation of the brush motor. It's hard to fix this on your own. If the robot vacuum cleaner breaks down, it is recommended to contact qualified specialists.
Filters
Before disassembling the housing, it is worth checking all the filters in the vacuum cleaner. It is their clogging that leads to a decrease in the power of the equipment, automatic shutdown or even burnout.
Cleaning foam filter pads is simple; just rinse them under running water and dry naturally. If a large amount of dust accumulates on the paper filter, it is recommended to replace it.
It is very difficult to purchase HEPA filters for some vacuum cleaners due to the updating of the range with new models. There is no need to despair; it is easy to make a cleaning device with your own hands. The basis is:
• old filter housing (in the form of a frame);
First you need to remove the paper accordion from the frame, which you need to thoroughly wash, dry and treat the surfaces with an alcohol-based solution (for the purpose of degreasing).
Next, the interior liner is cut out according to the parameters of the frame and fixed to it with glue, having previously applied it along the contour. The unused filter (from which it was trimmed) should be packed in a plastic bag so that it does not absorb dust during storage. Later you can replace the liner again.
Other causes of problems and solutions
- The device has entered sleep mode. To wake the TV from sleep mode, you need to press the on/off button on the remote control;
- The power indicator is not lit. When the indicator light is off and the TV stops turning on, you need to check whether there is voltage;
- The power indicator blinks and the TV does not turn on. The flickering indicator light means that the TV is independently searching for the type of fault. The amount of flickering determines the problem in the device.
To find out the cause of the breakdown, you need to read the instructions - to determine how many flickers are responsible for what.
If you are unable to identify the cause yourself, you should contact the service center.
Prevention of the problem
If the TV starts to turn on or off on its own and this is not caused by internal wear of parts or external problems, then such breakdowns can often be avoided.
For this:
- Connect the TV to a stabilizer to prevent power surges and, as a result, replacement of burnt TV parts;
- Unplug the TV from the socket when the device is not in use;
- Regularly clean dust and dirt from under the TV panel.
Expert advice
Many questions can often be answered on various websites and forums. Some TV breakdowns associated with problems turning the device on/off may be beyond the capabilities of the average user. And it is strictly prohibited to independently eliminate a problem that in one way or another can create a health hazard. Therefore, if in doubt, it is better to contact the service center.
Removing contaminants
The choice of method for removing contaminants depends on the specific part or element of the vacuum cleaner being cleaned. The body – both outside and inside – can be wiped with a damp cloth. It is convenient to clean its parts and all kinds of recesses with a soft brush or brush. The plastic container, hose, pipe is washed under running water using a soap solution. The waste collection bag can be washed by hand or in a washing machine, and the optional felt filters can also be washed.
As for special fine filters (HEPA filters), there are several types, each of which requires different cleaning methods. Only HEPA filters with the letter W in the product labeling can be washed under running water; this should also be mentioned in the instructions for the vacuum cleaner. Such filters are washed only under cold running water without using soap solutions, cleaning products, or household chemicals. Then let it dry at room temperature; under no circumstances should you dry the filter on a radiator, fireplace or near a gas stove.
Other types of HEPA filters cannot be washed - they are cleaned with a brush or blown with air, otherwise the product completely loses its capabilities and becomes deformed. The service life of HEPA filters is 1-2 years, depending on the frequency of use of the vacuum cleaner. Disposable filters are made from paper and fiberglass. They do not provide for any cleaning at all; even blowing with air will disrupt the structure of the product. Therefore, when a disposable filter becomes clogged, it is simply replaced with a new one.
Call the master
When attempts to independently solve the problem of a Samsung vacuum cleaner not turning on are unsuccessful (even if there is no visible damage, the household appliance still does not work), a professional technician will come to the rescue.
A faulty vacuum cleaner can be taken to the nearest service center, or you can call a specialist at home (contacts are not difficult to find on the Internet). When filling out an application, you must indicate the model of the Samsung vacuum cleaner (information can be found in the device’s passport or on a plate located on the case), and clearly describe the problem that has arisen.
Depending on what exactly caused the vacuum cleaner to not turn on (the exact reason is determined by the technician after diagnostics), repairs can cost from 400 rubles. up to 1500 rub. Additionally, the cost of replaced parts and assemblies will be charged.
Full payment is made only upon completion of repair work, followed by testing of the household appliance. Any demands for full prepayment for repairs that have not yet been completed is a reason to refuse the services of a master!
Required Tools
The set of tools needed will depend on the type and model of Samsung vacuum cleaner. When disassembling and repairing, preventing or cleaning the device, as well as its individual elements, you cannot do without the following devices:
- Phillips and slotted screwdrivers - their sizes are selected in accordance with the type and depth of the screws;
- pliers;
- a stationery knife, or better yet a professional construction knife;
- lubricant;
- electrical insulating tape;
- electrical tester.
The type of work performed will largely influence the choice of tools. For example, to clean the surface of a suction hose before gluing cracks, you will need sandpaper and a degreaser (acetone, solvent). It is convenient to remove dirt on the shaft of the vacuum cleaner brushes with scissors, but to remove blockages you will have to use a long, stiff wire. For gluing cracks or chips on the body, universal super glue is suitable, but for moving parts, such as a hose, a more elastic adhesive material is needed.
Reasons for software failure
Modern TVs have a very large number of settings, which are quite difficult to understand. Therefore, a problem often arises due to incorrect settings by the user, after which the device may begin to turn on and off spontaneously.
One of the popular problems can also be automatic software updates: the received Internet update can independently change the TV settings.
If such a failure does occur, it is quite easy to fix it. You need to go to the settings and uncheck the box next to the self-shutdown section.
Alternatively, you can turn off automatic software updates.
If all these methods do not help, you need to look for failures elsewhere.
Recommendations
- Connect equipment through a voltage stabilizer. The protective device will protect not only television equipment from power surges in the network, but also other household appliances.
- When the first malfunctions occur in the operation of the television panel, immediately disconnect the device from the network. “Bad” signs include regular clicking sounds and a burning stench.
- If the TV receiver is “flat”, do not place it close to the wall. Especially if the wall is covered with carpet. The equipment gets quite hot inside. Hot air needs to escape through vents at the back of the case.
- It is better to eliminate periodically occurring failures immediately. Over time, the problem may worsen, and the TV receiver will no longer turn on completely.
- Do not unplug the cord from the outlet while TV is on. First turn off the device using the remote control.
- Let's "rest" the TV set to cool down. If you go away for a long time and leave the panel on, in the settings, enable the function to automatically turn off after a certain period of inactivity. So, if no button is pressed, for example, for two hours, the TV will go into standby mode.
Further actions
After the nut is unscrewed, it will be easy to pull out the washer, as well as the impeller located under the washer. Next, the cyclone mechanism is removed and the anchor bearings are already visible. All that remains is to unscrew the four retaining plates and lightly tap the manifold on the reverse side to disconnect the rotating mechanism from it. Shock absorbed bearings can be identified by looking at them as well as by spinning them. In cyclone vacuum cleaners, often, during long-term operation, the balls inside the bearings are destroyed. In this case, the only way out is to purchase and install new options.
Engine
As can be understood from the above, failure of the electric motor of a vacuum cleaner is classified as a rather complex malfunction. Typically, modern models use axial-type motors that have a rotation speed of about 20,000 rpm. This part is a design that requires special attention if repairs are necessary. To carry it out you will need to have the following tools:
- a pair of screwdrivers for various sizes of Phillips screws and a pair of flat-head screwdrivers;
- tweezers;
- wire cutters or pliers;
- bench vice;
- motor lubricant.
It should be noted that you should follow safety rules and under no circumstances repair the electric motor of a vacuum cleaner connected to the electrical network. If we talk directly about repairing the device, then to carry it out you first need to disassemble the device. Moreover, this should be done in a clearly established order:
- the container for collecting dirt, rear and front filters is removed;
- Unscrew the screws located under the filters with a screwdriver;
- we dismantle the device body, lift the front part and only after that the rest, the body is usually removed very easily;
- Now we clean the body of the electric motor itself using a brush or rag.
Read more: Do-it-yourself tire cesspool The device should be inspected and further repaired, the last process will be carried out according to the following algorithm:
First, use a screwdriver to unscrew a pair of side bolts that are located in the upper part of the case; turn it a little and inspect the motor (it will not be possible to dismantle it now due to the fact that the coil will interfere with this); carefully free the motor from the wires, disconnect all the connectors and remove the coil wires so that the coil itself is still on the body; Now we remove the engine, after which we repeat cleaning it from dust; Next, we dismantle the rubber seal, for which we unscrew a couple of side bolts; using a screwdriver, separate the two halves of the motor housing; now you need to remove the motor itself from the plastic housing; when examining the upper part of the motor, you can see the so-called folding, they should be bent in the opposite direction, and a screwdriver should be inserted into any gap so that the halves are separated from each other (this will free the turbine from the housing); using a 12mm socket, you need to unscrew the bolt (the thread is left-handed, so when removing the screw you need to turn it clockwise); the motor stator must be wedged using small wooden blocks, and the entire structure must be supported during operation; we dismantle the turbine; take out the washer and unscrew a couple of bolts; at the bottom there are 4 more bolts that need to be unscrewed; Next, remove the brushes, first unscrewing all the bolts; now you need to knock out the anchor, then insert the key into the hole and knock on it with a hammer; after these manipulations, it should seem to jump out; Now you should pay close attention to the bearings: if they are in good condition, they can be lubricated with oil; use tweezers to pull out the boot; If the bearing rotates with a sound that resembles the rustling of leaves and at the same time remains dry, then it should be cleaned and well lubricated (you can use carburetor cleaner to clean this part).
You can learn how to disassemble the motor of a vacuum cleaner from the following video.
Engine repair can only be started if you have experience working with electrical equipment. In addition to knowledge, to perform the work efficiently, you must have special measuring instruments.
Case disassembly
The upper part of the body is secured with self-tapping screws. Unscrew them with a screwdriver and screwdriver to remove the cover. If you are removing the dust container, also unscrew the screws underneath it.
The main part of the case is held on by self-tapping screws or special latches. After removal, access to the motherboard opens. If you are sure that the board is operating normally, move it aside to avoid damage during diagnostics and repairs. To do this, disconnect its connectors and unscrew the screw in the central part.
Next to the engine there is a check valve - a small button that can be pulled out quite simply. The valve is needed to stop the engine if it becomes clogged due to strong suction force. Without a valve, the electric motor may burn out.
To access the engine itself, remove the bolted casing and rubber surrounds. There may also be protective pads made of foam rubber or felt next to the motor. They secure the position of the engine and do not allow it to touch the walls of the casing.
How is the problem solved, and is it possible to prevent it?
Why doesn't the vacuum cleaner work? Let's look at some trivial reasons that any user can deal with. Automation failure can occur for the following reasons:
- Filling the dust container. This will be indicated by the presence of a dusty smell.
- Ingress of large debris. Large sizes of dirt stuck in the air duct interfere with the flow of air sucked by the vacuum cleaner.
- Debris stuck in the hose. Evidence of this is a change in sound when the device is turned on.
- Pre-engine filter is dirty. During this process, an unpleasant burnt smell appears.
Let's consider the possibilities of repairing a faulty Samsung vacuum cleaner, and what to do when the vacuum cleaner does not turn on. You can fix the above problems yourself, but it’s still better to avoid them in the first place. To do this, you will need to disconnect the equipment from the power source, then disassemble the device and clean the debris accumulated inside.
To access the dust container, remove the top cover. Some dust containers can be cleaned, or you can replace them with new ones. It is also advisable to wash the dust collector and dry it. In order not to spill dirt and dust, you should close the existing valve for a tight seal. When installing the dust collector back into place, make sure that the neck fits snugly against the bag holder. If this does not happen, then dirt and dust will seep into the structure, which will lead to overheating of the motor and accumulation of dirt on the components.
Filters require additional care. Be sure to read the instructions and find out how many filters are installed in your particular vacuum cleaner model. All filters installed in the structure should be checked. Some types of filters can be washed with running water to clean them. But before installing it in the structure, you should definitely dry it. Starting a vacuum cleaner with a wet filter will cause damage. Periodic replacement is carried out according to the manufacturer's recommendation. When the filter has served its useful life, it is replaced with a new one. The filter life is indicated in the operating book.
All replacement consumables, filters, brushes and other accessories can be purchased at a specialized store.
To remove blockages in the nozzle, unscrew the corrugated accessory from the body, inspect its integrity, remove the accumulated dirt and screw it back. Dirt stuck in the bellows prevents air flow.
But still, if the vacuum cleaner does not turn on, what should you do? If the repair of the breakdown is serious, it is better to contact specialized technicians who can solve this problem.
But it is worth remembering that the main possible breakdowns occur due to engine overheating. You should adhere to the following rules:
- To prevent overheating, use the vacuum cleaner for no more than 30 minutes when cleaning. At maximum mode, use the device for no more than 10-15 minutes. Longer operation may lead to overheating; to do this, allow the device to rest and cool down.
- Make sure the dust bin is full to remove accumulated dirt and dust. An excess of dirt and dust will not allow air flow to pass through, which will lead to overheating of the electric motor. Also, an excess of dust in the dust collector will lead to clogging of the structure inside the device.
- Clean the pre-motor protection filter in a timely manner. Excessive contamination can lead to the formation of an unpleasant burnt odor.
- Avoid sucking large objects that may block the blower. Before using a vacuum cleaner to clean the floor covering, you should collect large debris and accidentally fallen items by hand.
- You need to monitor the level of noise produced. If the sound changes, this may indicate a clogged brush or bellows accessory.
Monitor the performance of your home assistant, and provide timely care for the vacuum cleaner and its replacement consumables. Then it will be easier to avoid breakdowns of equipment to maintain cleanliness in the house.
Diagnostics
Before you take on repairing a Samsung vacuum cleaner with your own hands, you need to try to determine what exactly is broken.
Correct diagnosis is very important, because the speed and cost of repairs directly depends on it. The design of the vacuum cleaner is quite simple, so before paying money to the technician, you can try to fix the problem yourself
It should be noted that breakdown is not always associated with engine malfunction. Such a malfunction can be determined by the sound of the operating unit. If the vacuum cleaner hums, whistles, makes intermittent sounds and throws out dust, you are most likely out of luck - the engine is “covered”. But it happens, for example, that the vacuum cleaner seems to be working, but the garbage is not pulled out well - then, most likely, the hose or filters are to blame. Let's take a closer look at some of the common problems with this very useful home assistant.
The main malfunctions of vacuum cleaners from different manufacturers
For each manufacturer, we can identify the most common problem encountered in manufactured models. The analysis below is based on online customer reviews.
Samsung
Samsung vacuum cleaners are quite reliable, but they also require careful treatment and timely maintenance. It is necessary to monitor the condition of the filters and dust collector and clean them regularly. There are also problems with the motor and the power button.
LG
Judging by user reviews, vacuum cleaners from this manufacturer quickly clog filters and lose suction power; fragile attachments break faster than wear out. There are cases of excessive heating and shutdown during operation.
Philips
Those who at one time preferred vacuum cleaners from this company say that over time the suction ability is lost and the noise during operation increases. There are complaints about an unpleasant odor during operation and a poorly winding cord.
The Philips vacuum cleaner caused the following reaction from our author: Philips FC 9184
Bosch
Over time, the rubber seals of these vacuum cleaners suffer, and the parts fit less well to each other. Bosh often releases cordless models, and the batteries also sometimes require replacement. Often the engine also fails.
Dyson
In reviews of Dyson vacuum cleaners, there are practically no complaints about their performance. The only thing is that with wireless models, the battery discharges faster and faster over time and it has to be replaced (which, in principle, is natural).
3 ways to unscrew the rotor mounting nut
Let's call them conditionally according to the technology of performing the work:
- cutting a slot;
- fixation with a noose loop;
- fastening in a vice through adapters.
Each of these methods has its own advantages and disadvantages and can be used depending on the availability of equipment and tools.
Slot on shaft
A little history
This rotor mounting technology was used on the collector motor of any vacuum cleaner produced during the Soviet era. For ease of manual assembly and subsequent repairs, a groove for the screwdriver blade was always created at the end of the shaft at the factory.
Its force fixed the position of the rotor shaft, and the torque from the wrench clamped or loosened the nut. I still have a similar engine that was used in the design of a homemade trimmer. This slot is clearly visible in the photo below.
Modern technologies
Nowadays production widely uses industrial robots and automation of all processes. In addition, the marketing policy of well-known manufacturers is designed to:
- long service life of manufactured equipment within the declared resource;
- performing repairs by block-by-block replacement of failed devices without disassembling them.
For these reasons, the manufacturer simply replaces the defective commutator motor with a new one without disassembling it: it’s faster, easier and more profitable. Well, our home handyman likes to fix everything with his own hands the old fashioned way.
How to make a slot
The vacuum cleaner motor mounting nut and rotor shaft are made of ordinary steel. You can make a cut in them. However, in our case, it is not possible to do it in the usual way due to the recess of the fan housing in which they are hidden. Therefore, you will have to use an ordinary homemade electric drill and a circular saw of the appropriate diameter at the end.
Then we place a wrench on the nut, and a screwdriver on the cut in the motor shaft. All that remains is to apply force to create the opposite torque and use it to disassemble the mount.
I did not use this technology: I did not have a small circular saw at hand for cutting metal. I tried two other methods.
And you can watch its implementation in the video by Alexander M “How to unscrew a nut.”
Loop
The method is based on holding the anchor by the collector plates using a noose assembly. I had to check two options for unscrewing the nut using:
- soft copper wire:
- plastic rope.
Wire fastening
In principle, the polyvinyl chloride insulation of the mounting wire squeezes the rotor shaft well onto the commutator plates, maintaining the integrity of their surface, and allows it to be held for unscrewing the nut.
I used copper wire with a diameter of 2.5 mm square. However, the design of the loop turned out to be loosely tightened and did not completely provide a noose. When working with the key, I felt that the shaft was turning and did not apply much force.
When I pulled my wire out of the engine, I saw frayed insulation on it. I didn't experiment with this method anymore. However, I suggest watching this technology in the HamRadio video “How to unscrew a nut on an engine.”
Fastening with cord
He took a piece of thin rope and folded it in half in length. In the middle I threaded a soft wire that acts as a needle.
With its help, it was possible to conveniently place the soft cord in a loop on the noose and pass it around the collector plates.
I tied a fastening knot around the housing window.
My attempt to unscrew the nut using this method did not work: the structure of the cord turned out to be weak - it simply broke due to the applied tension forces.
If you repeat this method, choose a stronger rope, cord or belt.
Clamp in a vice
To fix the anchor in this way, it was necessary to make two adapters in the form of rectangular blocks from wood.
Their cross-section should fit into the hole in the housing for attaching the brush, and their length should reach the collector plates and protrude slightly outward. It is better to first measure these distances using a caliper or ruler.
Moreover, the side adjacent to the rotor must be sharpened with a round file in the form of a segment for a tight fit to the motor shaft.
With the help of these adapters, it was possible to fix the engine rotor in a vice, pressing with medium force.
All that remains is to set the socket wrench to 12 mm and rotate it clockwise.
The nut is safely unscrewed. A machined factory cavity is noticeable on its inner surface.