LATEST NEWS
Onions and spicy garlic are classic aromatic vegetables that most Russian dishes cannot do without. Many gardeners successfully grow these crops in their summer cottages, receiving a rich harvest.
After collecting onions and garlic, the question arises - where and how to store vegetables until spring? A similar problem is also familiar to those people who buy vegetables in early spring at a reasonable price in large quantities for further storage in an apartment or basement. Since onions and garlic are plants from the same genus of bulbous plants, the rules for growing, harvesting and winter storage are the same for them.
The basic principles of successful storage of vegetables are based on the rules of harvesting, drying and preparing for winter storage. It is also important to observe the temperature regime and maintain the necessary humidity in the room where the crop is stored. If stored properly, vegetables will definitely not dry out, sprout, and resist rot and disease. In this article we will share with you the methods and secrets of successful and high-quality storage of garlic and onions in an apartment, private house, cellar and basement.
How to store onions?
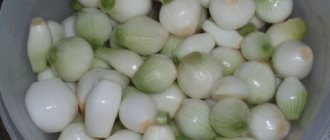
- First, the onions need to be selected and dried. At home, onions are stored in baskets, boxes, drawers, nets and even old nylon stockings. It is better to choose small boxes and crates (no more than 30 cm in height) and always have holes for ventilation. If you are going to put the onions in a bag or net, also add a layer of up to 30 cm.
- Do not store onions in plastic bags under any circumstances; they do not allow air and moisture to pass through, so the onions will quickly begin to rot.
- To preserve onions for as long as possible, you need to periodically inspect them and remove spoiled bulbs.
- If you find that the onion is damp, dry it again and put it in a new container.
Why do onions spoil?
Sometimes it is difficult to understand why onions rot during storage and what to do about it. Most likely the cause is excess humidity. For example, if you leave fruits in a plastic bag for a long time, condensation will begin to form on their surface. Sometimes you can detect rot and a whitish coating from fungus. These problems are also caused by excess moisture. In this case, it is necessary to quickly get rid of the damaged bulbs and reconsider the rest. If the room is humid, then you should find another place to place it. You can also sprinkle the heads with dried nettles, chalk, sawdust or husks - they will help absorb liquid and preserve food.
- Storage systems
Life hack: how to properly store food in a home refrigerator?
How to store garlic at home?
Garlic grown in our area is divided into two groups of varieties - spring and winter. The former are more difficult to grow, but they can be stored for up to 1–1.5 years. Spring garlic should be stored in the same way as onions. How to store winter garlic at home, since its shelf life is shorter than that of spring garlic? But even so, winter crops can be preserved until the New Year without any problems. However, there are ways to make the shelf life of garlic as long as possible. Whatever method you use, keep in mind that the garlic should be in a well-ventilated and dry place.
Basic ways to store garlic:
- For fresh garlic, you need to cut off the stems and roots, scorch the cut points a little over the fire and dry the heads. The roots and stems can be cut with a regular knife or scissors. The stems are not completely removed, but leaving 1.5–3 cm from the head. Garlic processed in this way can be stored well if you put it in a linen bag, sprinkle it with onion peels and hang it in a dry place. Another suitable way to store prepared garlic is spread out on newspaper.
- If you like garlic “braids”, which can make the kitchen interior more cozy and “rustic”, the stems can be braided and hung in the form of “garlands” instead of being cut off. By the way, you can also store onions in the same bundles. In addition to decorating the interior, garlic and onion garlands will be an excellent means of disinfecting the air in the apartment.
These storage methods are more complex, but will allow the garlic to last until spring.
- The garlic head must be divided into cloves and each peeled. Place the slices in jars with sunflower oil. The oil, by the way, does not spoil and can be used.
- Without cleaning, place the heads in glass jars, sprinkling with flour, and pour a 2 cm layer on top. Close the jars, but periodically open them during storage so that the flour does not become damp.
- Another option is to use table salt instead of flour. Then a layer of salt is poured onto the bottom of the jar, and then garlic. Each garlic layer is sprinkled with salt. In this case, the storage container does not need to be closed.
Now you know how to store onions and garlic at home. Using these recommendations, you will never find that such necessary and healthy products suddenly go bad, and you are left without an important ingredient of your favorite dish.
Published by: admin on November 03, 2022, section: Miscellaneous, views 17744
Many people grow healthy natural vegetables and plants on their plots, including onions and garlic. And what housewife doesn’t keep these products in her arsenal? But not everyone knows how to store them correctly and are very surprised when they discover that the onions have rotted and the garlic has dried out. At the same time, storing them is not so difficult.
You need a presentation - how to wash it properly
If a gardener definitely wants to wash the garlic crop, he needs to be guided by the following rules:
- No need to try hard. The less the bulbs are moistened, the better.
- Excess dirt should be removed mechanically (by hand, with a stiff brush, steel wool) - and only then washed. In this case, care must be taken to ensure that the heads are not damaged. Bulbs covered with scratches or missing scales will not be stored for long.
- After washing, the garlic should be dried. Since it is wet, it is best to dry it as long as possible. For winter crops, which are particularly germinating, it is better to organize drying in the shade, without exposure to solar ultraviolet radiation.
- Already dried crops should be stored for storage, sprinkled with absorbents that absorb excess moisture. You can use coarse salt, onion or garlic peels. Hay, straw or dry leaves are a little worse. Synthetic absorbents are very good - but they are usually expensive and are not used in gardening practice.
But it is better to use other cleaning methods:
- Wiping. Dirty heads are simply picked up and wiped off the adhering soil.
- Shaking. The dried harvest is placed on a large sieve and slightly shaken. The earth falls off the heads, but the husks and the lobules themselves remain untouched.
- Bulkhead. When peeling and discarding diseased and damaged lobules and heads, dirt inevitably falls off.
Garlic, like any other crop, requires special storage conditions. Excessive humidity during washing reduces its shelf life. Therefore, unless required, washing garlic is not recommended.
Read further:
Is it necessary and possible to wash garlic after harvesting from the beds?
Preparing the vegetable for storage: how to dry garlic after digging and how long to do it?
Storing and harvesting winter garlic from the beds. When and how to do it correctly?
Deciding on the time of digging or when to remove winter garlic in Siberia and spring garlic from the beds?
I took the deadlines into account and got a good harvest! When to remove garlic from garden beds for long-term storage?
Methods for storing onions and garlic
Typically, onions are stored at room temperature in a heated room. For example, in an apartment, on a balcony or storage room. There are several well-known storage methods:
- Use baskets to store onions
The best option for a basket for storing onions would be a knitted basket. Before placing your harvest (a batch of onions, whether your own or purchased), check the baskets for dryness. The baskets should not be wet.
If you notice a sign of moisture, dry them in sunlight for a day or two. Using a basket, you can lay large volumes of onions; thanks to the basket, they do not spoil under the weight of other onions.
- Use for storing boxes or crates
For storage in boxes (cardboard), boxes with holes will need to be used. Without them, when the humidity is high, the bulbs will begin to rot. It is advisable not to store more bulbs in such containers.
Recommended quantity: no more than a bucket per box. At the bottom of the box you need to place a piece of paper or newspaper. It will absorb moisture, preventing your bulbs from rotting. With this method, you need to sort through the bulbs and remove rotten ones if you notice them.
When using a wooden storage box, make sure it is dry. Place a piece of cardboard under the bottom of the box to soften the hard surface. Under the weight of the top bulbs, the lower ones will be damaged and begin to rot.
Cardboard will avoid this problem. It's good if the box has holes, but if your bulbs are so small that they will fall through it, you can put plastic mesh around the edges.
This will allow fresh air to flow in and prevent the bulbs from slipping through narrow openings.
- Use grids for storage
Place the bow in a nylon net or purse. This method is one of the best; its application does not require much effort. All you need to do is put the bulbs inside.
The pressure in the mesh is distributed evenly and does not damage the bulbs under its own weight. Also, under the influence of vaga, the bulbs will not rot, since they are well ventilated.
When storing onions in nets, it is very convenient to place them in any place convenient for you, simply by hanging them on a nail or hook.
- Braiding onions
This storage method involves weaving braids from onions. When harvesting onions, do not cut off the greens. Let the onion dry. And then braid the greenery into braids.
As with the previous method, you can place the bulbs in any place convenient for you. They will be well ventilated and stored longer.
Choosing a variety for the future harvest
Traditionally, people in Russia like to plant spicy onions.
It is well stored due to the content of glycosides in the pulp of essential oils. The share of sweet salad vegetables accounts for no more than 20% of planted areas. According to reviews from experienced gardeners from different parts of Russia, these varieties of spicy vegetables are recognized as the best. Bessonovsky.
Multi-germ (family) medium-sized vegetable. The variety is extremely unpretentious and easy to grow. Small (50-60 g) spherical heads are covered with yellow skin. Up to 5 of them are formed in a nest. The harvest ripens in 85 days. The taste is sharp, juicy, with a bright aroma.
Sets in storage
Productivity up to 2.5 kg per 1 sq. m.
Ermak.
The variety is intended for Siberian gardeners and is characterized by early ripening (up to 90 days) and keeping quality until May. Weight of yellow round heads is 150-190 g. The taste is semi-sharp.
Productivity 2.5-4 kg.
Stuttgarter Riesen.
An old German variety of yellow large onion. The weight of the flattened heads is 120-140 g. The taste is sharp and pungent. Turnips are great for storing in an apartment.
From 1 sq. m, 3-3.5 kg of food heads are collected.
Strigunovsky.
Unpretentious cold-resistant onions. The head grows small, weighing 80-110 g, flat-round in shape. The taste is spicy.
From 1 meter of beds they harvest up to 3 kg. Turnips keep well.
Rostovsky.
A multi-primordial, unpretentious vegetable that is ideal for growing in southern arid latitudes. Its bulbs are small, weighing 60 g, covered with light yellow husk. The taste is sharp, the storage is long. Suitable for feather forcing.
Hercules.
Early onion of Dutch selection, with a large onion (up to 200 g). The taste is sweet-spicy, the color of the husk is yellow.
The yield is 3-4 kg.
Karatalsky.
Forms a large head, elongated oval, weighing 200-230 g. Suitable for growing in dry areas with poor sandy soil. Stays great until spring.
Calibrated planting material
From 1 sq. m remove 2.5-2.8 kg.
Centurion.
A Dutch variety loved by farmers for its high yield, uniformity of heads in shape and size, and disease resistance. The turnip weight is 120-150 g, the peel is yellow. The taste is spicy.
With an industrial approach to cultivation, the yield reaches 600 kg per hundred square meters.
Chalcedony.
Recommended for the southern regions, where it shows the highest yield (5-7 kg per 1 sq. m). The heads are large, rounded and elongated. Due to its large supply of nutrients, Chalcedony is suitable for obtaining spring vitamin greens.
They produce a harvest no less than the spicy varieties. But the sweet vegetable has more stringent requirements for storage conditions. As a rule, red onions are pickled or used in preparing canned vegetables. In its natural form it stays well until the New Year.
A good onion set - what is it like?
The first selection of seedlings is carried out after harvesting, when the plants are laid out to dry. Sick and damaged bulbs are subject to destruction. After drying, the sets are trimmed and sorted by size and quality.
Good planting material meets the following requirements:
- set size is from 10 to 20 mm in diameter;
- the bulb is covered with completely dry, shiny and dense integuments, the color characteristic of the variety;
- the neck is dry and thin;
- the bottom is dry, without signs of rot;
- The set itself is solid and full-bodied.
Garlic
Storing garlic follows approximately the same principles as onions. The main factor in preserving the plant in winter remains a warm room and ventilation.
Before storing garlic, check it for rotting or damage. If the garlic looks healthy, it can be used for storage.
- In pigtails.
- In linen bags.
- In a hanging net.
Garlic in braids
Everything is simple here. This method, as with onions, involves braiding garlic on their stems. Then we hang the braid in any convenient place. There is no need to do anything else; in such conditions, the garlic will hang quietly until the next season.
Garlic in a bag
Store garlic in bags. This is a convenient storage method. The garlic is placed in a small bag. In it, the garlic does not press on each other with such force that it damages neighboring fruits, and the bag itself absorbs excess moisture and allows air to pass through.
Garlic in a net
Just like onions, garlic can be hung in any convenient heated room on a nail or string, where it will safely survive the entire winter.
As we can see, there are a lot of ways to store onions and garlic. Try each of the methods listed above and find a more convenient option for storing these plants.
For storage in boxes (cardboard), boxes with holes will need to be used. Without them, when the humidity is high, the bulbs will begin to rot. It is advisable not to store more bulbs in such containers.
At what temperature should seeds be stored?
The worst enemy of dormant seeds is warm, moist air. Where it is hot and humid, seeds can lose their viability in a matter of months, and in a few weeks if there is free access to air. Sudden changes in temperature are also unfavorable for them. The ideal conditions for storing most seeds are moderate temperature (12–15°) without significant changes and moderate relative humidity (not higher than 50%).
Seeds should not be left for the winter in unheated rooms in garden plots; it is better to transport them to the city without leaving them in damp and cold for a long time. For damp seeds, shallow freezing (from 0° to -10°) is often disastrous, especially when repeatedly passing through 0°.
When deep frozen (from -15° and below), dry vegetable seeds retain their viability well, but storing seeds at sub-zero temperatures is still undesirable. They fall into a state of deep dormancy and, under normal germination conditions, behave as non-germinating. To bring them into an active state, stimulating influences, such as heating, are required.
How to store onions in baskets
For this purpose, preference should be given to a real wicker basket, but if the harvest turns out to be too large, then you can use several similar specimens. It is necessary that the baskets are dry; to do this, you should expose them to the sun for a couple of days for proper drying. If the basket is used for the first time, you can be sure that the vegetables will be safe. When reusing, it is recommended to treat the container with 2% Bordeaux mixture, and each product will need to spend about half a liter.
Next, you need to dry the basket and only then put the onions into storage. The product can be filled to the top with onions, since the vegetable will not receive any damage due to its own gravity, therefore, no problems will arise. Why are these types of baskets a great option? You can periodically take out the product and inspect the condition of the bulbs through the cracks; if any vegetable begins to rot, it must be removed. In addition, you should also remove those bulbs that were located next to the spoiled vegetable.
Useful to know
Let's look at the most common problems when storing garlic and ways to solve them.
The garlic turned black and began to rot
The quality and keeping quality of garlic depend on the condition of the plant during the growing season. Most often it suffers from fungal and bacterial diseases. They do not appear immediately. If at least one head was infected at the time of harvest, the disease will soon spread to the entire crop. It is necessary to send undamaged heads for storage, otherwise pathogens get inside through cracks, as a result of which it most often turns black.
Storing onions and garlic together
Garlic and onion are close relatives; they belong to the onion genus. Therefore, they have similarities in both cultivation and harvesting and storage. However, despite similar storage conditions, it is advisable not to put them together in the same box. The most suitable option for the neighborhood is to hang them in nets or place braids of onions and garlic nearby.
What to do with sprouted teeth
Under no circumstances should you throw away sprouted garlic. It can be added to your favorite dishes in the same way as non-sprouted. It contains substances that are not even found in freshly harvested vegetables. During the germination process, new enzymes appear in it with a powerful effect against many diseases. It is useful to use for reduced immunity, viral and colds, for the prevention of stroke and blood clots. It helps with poisoning and stops diarrhea, prevents the development of malignant cells, and cleanses the body of carcinogens. The antioxidants formed in it stop premature aging of cells.
If the garlic starts to spoil
If, despite all efforts, the garlic still begins to deteriorate, immediate action must be taken. You can clean the good teeth from the bad ones, grind them in a meat grinder and add salt. Place this garlic mass in a jar and store in the refrigerator.
When to dig up garlic for storage
It is best to dig it up on a dry, sunny day. When garlic is suitable for harvesting, its stems begin to fall to the ground, the foliage withers, and the false stem softens. The heads, cleared of soil, together with the stems, are dried for about 5 days. After drying, cut off the roots and stem. Garlic planted before winter is harvested at the end of July, and in the spring - in the second half of August.
Storing garlic at home
In our conditions, garlic is grown, which is divided into two types: winter and spring. The second option is more difficult to grow, but can be stored for up to one and a half years. In this case, the storage method is no different from the option with onions. With winter garlic, everything is a little more complicated, however, even it can be saved until the beginning of the new year. There are methods to extend the shelf life of vegetables. Regardless of the method chosen, keep in mind that the garlic should be in a place that is well ventilated and dry.
Saving periods
Garlic can be stored in the cellar all winter if all recommendations for maintaining temperature and humidity are followed:
- in boxes, crates, the shelf life can easily reach 6 months;
- in stockings, braids, nets - about 5-6 months.
In some cases, garlic can last longer. It depends on its variety, proper harvesting, preparation and many other factors.
So, a basement (cellar) is an excellent place to store garlic.
If it maintains the desired temperature and humidity, and there are no bacteria or mold, the garlic will be on the table all year round.
Garlic is not the most fastidious plant to store. That is why there is every chance of keeping it in the basement all winter.
Basic storage options
Fresh garlic is freed from stems and roots, the cut area is lightly scorched over the fire, after which the heads must be dried. The roots and stems can be cut using a knife or scissors. In this case, the stems should not be completely removed; they are left at a distance of 3 cm from the head itself. After processing, the garlic should be placed in a bag, onion peels should be poured inside, and then the product should be hung in a place where moisture does not penetrate.
You can use another option, in which the vegetable is laid out on a newspaper. You can weave garlic stalks into braids and hang them in the kitchen area as garlands. This will make the room look more rustic. In addition to the aesthetic component, such braids will also play a disinfecting role. Consequently, the air will always be clean, without bacteria.
Fresh garlic is freed from stems and roots, the cut area is lightly scorched over the fire, after which the heads must be dried. The roots and stems can be cut using a knife or scissors. In this case, the stems should not be completely removed; they are left at a distance of 3 cm from the head itself. After processing, the garlic should be placed in a bag, onion peels should be poured inside, and then the product should be hung in a place where moisture does not penetrate.
Methods
In banks
One of the favorite ways of many housewives is storing garlic in glass jars.
Preparation for wintering garlic in jars takes place in several stages:
- Disassemble the heads into cloves.
- Dry them at room temperature for about 5 days.
- Place the garlic cloves in jars.
- Do not cover with a lid, place in a dry place.
In a refrigerator
Can garlic be stored in the refrigerator? The refrigerator is a salvation in matters of food safety. Traditionally, housewives store pumpkin, broccoli, peppers, cauliflower and other vegetables in the refrigerator.
To store garlic in the refrigerator you need:
- Dry the heads well.
- Place them in paper bags.
- If desired, sprinkle with salt or onion skins.
- Store in the refrigerator separately from other vegetables.
Carrots can also be perfectly preserved in onion skins.
How to store garlic in the refrigerator in this video:
In salt
A method loved by many housewives. To store garlic in salt you need:
- Prepare garlic for storage: sort and dry.
- Take boxes made of plywood.
- Pour salt into the bottom of the boxes.
- Lay out a row of garlic.
- Add salt.
- Place another row on top.
Such rows can be laid out up to 4-5 in one box. Garlic in salt also stores well in jars.
It is important to fill the spaces between the heads well and make sure that they do not touch each other
Twisted in a meat grinder
If the heads begin to deteriorate, this storage method is used to save the entire harvest. For this:
- They choose good cloves and throw away the spoiled cloves.
- Peel the garlic.
- Grind using a meat grinder.
- Salted.
- Placed in jars.
- Close the jars with plastic lids.
- Place in the refrigerator.
This option is suitable not only in case of crop damage, but as one of many storage methods. If the harvest is very rich, it is better to store some of the garlic. Also, this garlic mass can be used for emergency preservation of certain products from spoilage, for example, in the country.
The disadvantage of this method is the short shelf life, but the advantage is that you always have ready-made garlic mass on hand.
In purified form
Peeled garlic should only be stored in the refrigerator. It just won’t last long in its natural state. To increase the shelf life of such garlic, you can place it in a jar and fill it with oil.
An alternative is to store the peeled garlic in a sterilized jar. To do this, clean, dry garlic cloves are placed in a pre-sterilized jar, covered with a plastic lid and placed in the refrigerator.
In oil
The advantage of this method is that in addition to preserving the garlic, the output is oil with a wonderful aroma.
The method is simple:
- Peel the garlic cloves.
- Pour a little to taste into the jar: olive, sunflower, etc.
- Place the garlic tightly in a jar with oil.
- Close the lid and put it in the refrigerator.
This method can also be used to store green onions.
In fabric bags
Take rag bags that you can sew yourself from the remains of unnecessary fabric. Dip the bags into a strong saline solution. After that, dry it. Place the heads of garlic into “salted” bags. The salt has saturated the fabric, thereby creating an obstacle for pathogenic bacteria. Garlic will last a long time.
By the way, you can store dried vegetables in fabric bags, for example, broccoli or kale.
In paraffin
The method is unusual, but effective. Garlic heads are dipped in melted paraffin. It envelops them and freezes. Garlic in a paraffin coating can be stored for about six months. The same processing method is also used for storing gladioli bulbs.
In flour
Garlic is placed in three-liter jars with the heads in the position in which they grew in the garden. Sprinkle each row of garlic with flour. These jars are stored open in a cool place: the refrigerator or on the balcony.
In the sawdust
Instead of salt and flour, the garlic is sprinkled with fresh sawdust, preferably pine sawdust. The garlic is placed in plywood boxes or boxes and stored in a dry, cool place. By the way, many housewives successfully store carrots in sawdust.
How to preserve garlic at home until spring? 12 ways to store garlic in this video:
How to preserve onions and garlic at home until spring?
Onions and garlic are mysterious vegetables, after them the breath smells bad, it’s unlikely that anyone will be able to eat them just like that, taking an onion head and simply chewing it like an apple, as well as garlic - clove by clove, like seeds, yes and whether he wants to. But, nevertheless, these vegetables are present in every dish, every salad, and what would a kebab be without aromatic onion rings? And of course, we should not forget about the medicinal benefits of these vegetables: they are a phytoncidal sea that can drown any bacterial fire in our body.
Correct growing and harvesting conditions
- Choose varieties that have good shelf life. Onions with yellow scales tolerate storage better than red and white ones. Spring garlic stores much better than winter garlic.
- Do not overfeed onions and garlic in pursuit of large heads. Experts advise stopping fertilizing and even watering when a head about the size of a chicken egg forms.
- Follow cleaning deadlines. If you harvest early (before the head is fully ripened) or late (when the bulb, after a period of dormancy, begins to grow again), the harvest will not be stored well.
- Within the correct time frame, it is good to reschedule the cleaning time for dry (without rain) weather.
- After harvesting, the main task is to dry the onions and garlic well. If there is no rain, then they are left to dry right in the garden bed. If the weather is damp, place the crop under cover.
General recommendations
To begin with: both onions and garlic (whether purchased in a store, at the market, or dug up from a favorite plot) should be thoroughly inspected and cleaned from the ground, but not by scraping or removing the shells (with the exception of the rotten ones), but carefully, for example, with a soft brush or cloth.
Next, it needs to be dried for about a day, a lot depends on the state of the garlic at the moment: it may already be dry and its shells rustle when you run your hand over them and do not look or feel raw.
Check the ends and bottoms of the garlic and onions: they should also be dry. Finally, inspect the heads for rot: if there is none and the garlic and onion bulbs look healthy, then they can be used for storage. The storage place must be dry and ventilated.
The necessary conditions
The cellar can be warm, cold, stuffy, and so on, and different vegetables require different temperatures and humidity. Garlic and onions must be provided with a temperature of +5 degrees with an average air humidity of 60%. To do this, it is recommended to create different zones in the cellar for different vegetables. Some stocks have wetter or colder places, others warmer and drier. If there are a lot of different fresh vegetables and fruits, then perhaps you should think about heating individual areas of the cellar. But just don’t forget about ventilation and a constant flow of fresh air, otherwise the workpieces will “suffocate.”
Another important condition for the successful preservation of bulbous plants is the well-groomed nature of the cellar itself. It is necessary that its walls be smooth, solid, without cracks and holes, and not leak. There should be no dampness on the floor and no mold in the corners. It is also necessary to carefully inspect the premises for possible frogs, rodents, slugs and other pests. They may still be at a young age. The easiest way is to immediately set traps and watch whether someone appears in them or not.
Of course, you should not forget about the waterproofing of the cellar, general thermal insulation, otherwise the entire zoning will “collapse” and the cellar will freeze.
Goshiok and Elena say:
Onion storage
Storing onions in baskets
For these purposes, it is better to choose a real wicker basket or several of them if you plan or you have already collected an impressive harvest of onions. The baskets should not be wet, and if this is the case, then dry them in the sun for two days, a day on one side (outer) and a day on the other (inner).
If you are using the baskets for the first time, then be sure that the onions will last a long time, but if you repeat them or for the third or fourth time, then you can first treat them with 2% Bordeaux mixture, using half a liter of solution for each basket, then dry them as described above, and only after that put the onions into storage.
You can put a lot of onions, a full basket, they usually don’t get injured under their weight, so there shouldn’t be any problems with storage.
Why are wicker baskets a good option? Periodically, at least once a month, you simply take out the basket and examine the bulbs through the cracks; through them you can see when this or that bulb suddenly begins to rot. Then the onion will have to be sorted out, and all those in contact with the rotten onion and itself will have to be removed, and the rest will have to be put back into storage.
Often onions are stored at normal home, room temperature, under a table or in a pantry, or on a heated balcony or loggia, and they lie there almost until the new harvest, that is, for a very long time.
Storing onions in paper bags. © canida
Advice. To store onions, it is better to use natural baskets rather than plastic ones, they can be harmful and are often used only for short-term use. For their production, low-quality materials may be used that release harmful substances into the products.
Storing onions in boxes and crates
A good option is boxes that have drainage holes on the sides, for example, boxes for crackers and similar products, which are also made so that the products stored in them do not get wet, and air circulates. In cardboard boxes with drainage holes at home, it is advisable to store no more than a bucket of onions in one box.
You need to put dry newspaper at the bottom, it will absorb excess moisture if there is any, and replacing the newspaper with a new one is very simple if you suddenly notice that the lower bulb has begun to deteriorate.
By the way, in this option it is impossible to look through the onions, as if through the bars of a basket; once a month you will have to sort through the entire batch and reject those that are beginning to rot and all those bulbs that touched the rotting ones.
Wooden storage boxes are usually used to store apples and other products. It’s great if the box is new and well dried. Storage in boxes provides two options - if the bulbs are small and can slip through the gaps between the boards of the box, then you can line them with a plastic mesh to protect them from rodents, then you can control the condition of the bulbs and they will not spill out.
The second option is without a net, but you need to put a layer of cardboard on the bottom, otherwise the upper bulbs will damage the lower ones under their own weight, and they will quickly begin to rot, and you will have to sort through all the products (if something happens, replacing the cardboard with a new one is quite simple and quick).
Storing onions in a braid. © Heddi
Storing onions in nets
We see onions in nets in markets most often; usually the weight of such packaging is five or ten kilograms. Previously, when I was smaller, the nets consisted of nylon, and the onions were stored there longer, now they are plastic, often blue or orange, and the onions are stored worse in them.
The advantage of storing in nets is that you don’t need to think about where to look for an option for placing onions: such a net can be placed or hung in a pantry or on a balcony, but if it is not nylon, but plastic, then you will have to check your luggage every month. But this option is perhaps the simplest - I bought it at the market, brought it home, hung it on a hook - and that’s it.
Onions are and have been stored in nylon stockings, it is believed that this is almost the best way of storage, the air is ventilated, and you won’t be able to stuff too many heads into the stocking, therefore, they do not put too much pressure on each other, dents do not form and the onion does not begin to rot in the stocking, if it ever starts, it will be very long, and it can lie or hang like that almost until the new harvest. In addition, if the stockings are transparent, it is very easy to observe the condition of the bulbs (if they are rotten, then immediately remove the spoiled ones).
Storing onions in braids
Braids - probably few people know how to weave braids from onions, but before it was almost a decoration for the house: onions were dug up along with the green mass, dried and braided into braids, which were stored on an ordinary clove; such onions were also stored very a very long time.
What you cannot store onions in is plastic bags, especially if they are tightly tied, there is no air, moisture does not circulate and the onions deteriorate very quickly and rot.
How to dry garlic cloves for the winter
There are many ways to dry garlic for the winter. Some people prefer to do this without destroying the head; many people like to form the bulbs with dried tops into bundles resembling braids and hang them in the house. For many years, such garlic braids were considered to be a household amulet against evil spirits and evil spirits. But the most popular modern method is drying garlic cloves.
Naturally
Before starting the drying process, it is necessary to peel the garlic cloves.
To do this, you can use several culinary tips:
- press on the head of garlic with the flat side of the knife, which will cause the head to disintegrate and the scales will begin to come off easily;
- You can also place the garlic head in a metal bowl, having previously processed it with a knife in the manner described above, cover it with another bowl and shake vigorously. When you open the bowl, the husks will lie separate from the perfectly peeled cloves.
After the garlic has been peeled, it should be checked for any darkened spots or damage. Then each clove is cut in half and laid out on a flat surface with the cuts facing up. It should be dried in a dry room with good ventilation or in the fresh air in the shade, so as to avoid direct sunlight. The drying process must be controlled by turning the raw materials over every few days. The results of drying in this way can be expected in a week or two.
We recommend reading about drying and preparing herbs: parsley, dill, arugula, sorrel, cilantro, spinach, green onions, spring onions, thyme, mint, raspberry leaves, cherry leaves.
In the oven
Drying garlic in the oven is not much different from a similar natural process, but, of course, it will not last two weeks. In the oven this process will go much faster and will take from 3 to 6 hours. To prepare, it is better to cut it into thin slices or slices, which will significantly speed up the process of removing moisture from the product
It is important to know that a dried vegetable will retain all its beneficial substances and minerals even after changing its usual state. Next, you need to cover a baking sheet with parchment paper and place the garlic slices on it in one layer.
The temperature in the oven should be low, about +50 °C, which will gradually remove moisture while preserving all the richness of the product. After placing the baking sheet in the oven, you will need to time it and check the condition of the garlic after 3 hours.
The slices must be stirred periodically, allowed to cool slightly, and then put back into the oven, and ultimately tested for strength. If the garlic slice has become brittle and breaks, then the drying process is over; if it is flexible and soft, then drying should be continued. In order to create an influx of fresh air, the oven door can be opened slightly from time to time. If the oven has a convection mode, this will significantly improve the air exchange process.
Important! Garlic slices must be constantly monitored so that they do not burn or become too brown, otherwise the taste of the dried product will become bitter.
In an electric dryer
The variety of household appliances pleases modern housewives and makes household work easier and more enjoyable. One of the processes that has received recognition from many housewives is drying vegetables in an electric dryer. Let's look at drying garlic in this machine.
In order to dehydrate garlic, you need to rid it of scales and husks and place it in one tier on a drying rack. Having connected the electricity, you need to set the temperature to +50…+60 °C and start the process. It will also take from 3 to 6 hours, depending on the thickness of the slices and the power of the unit.
Learn how to dry thyme, mint, raspberry leaves, and cherry leaves for tea to preserve their healing properties.