A new phone or other gadget usually does not have charging problems. But over time, some owners begin to notice that the device’s charging socket has become loose. This is expressed in the fact that the charger connector moves away from the gadget terminal while replenishing the energy reserve, the process turns into torture. A radical way to fix the problem is to replace the charging connector, because once a problem has arisen, it will only develop. But you can try to slightly extend the life of the connector or even repair the mobile device yourself.
Signs of a faulty charging socket
The main sign of a malfunction in the charging socket of a smartphone or other mobile device is, naturally, the lack of charging. Moreover, at first the problem appears as a floating one - the charger randomly disconnects and connects again when the plug is wiggled in the socket compartment. Over time, the contact disappears completely - charging the gadget becomes impossible.
It's not worth bringing things to this point. You need to start sounding the alarm immediately when the first symptoms appear. After all, finding a replacement nest will take time, perhaps a lot (see the next section). And without charging, not only are we left without communication, but we can destroy the battery of a mobile device, since it cannot be stored in a discharged state.
Main reasons for failure
Replacing the charging connector of iPhone 5S, Nokia, Samsung and other types of phones may be required in several cases. The most common faults include:
Mechanical damage:
- The plug is inserted incorrectly and the contacts are damaged.
- The power cable is abruptly pulled out of the phone.
- A foreign object has been inserted.
- Falling or hitting a hard surface.
Pollution. Dust may get inside the devices. It could also be foreign parts that prevent the charger from working properly.
Moisture or liquid has entered. A flooded connector is often faulty. This causes the device to break the phone.
Defect in production. The connector paths were not soldered. After some time, a malfunction appears.
Often you have to deal with an already broken charging device. Using such a device or experimenting with it is incredibly dangerous - you can break the equipment. It is important to remember that replacing the power connector on a phone includes a specific list of steps, depending on the type of phone. For example, in devices manufactured today, everything is incredibly small. The arrangement of the parts is tight. This makes repairs somewhat difficult.
Types of connectors and their differences
Finding a new charging connector can take a lot of time, and the reason here is not only long delivery times, but also the fact that today there are already many types of connectors that one or another manufacturer uses in their devices.
It would seem, what is the problem? Nowadays, the most popular connectors for phones, smartphones, and tablets are microUSB and USB type-C (type-C). Let's talk about them. The socket broke, I looked to see which one was installed, typed it into a search engine, and ordered it. But the trouble is that there are many dozens of microUSBs alone, varying in design and type of fastening. The photo below shows 12 sockets, all of them microUSB.
These are all microUSB, although they differ significantly from each other in design and mounting
But if you go to the same Ali, you can see a completely bleak picture:
100 (one hundred!) most popular microUSB connectors
Of course, each of them has its own marking, but the problem is that this marking is not indicated on the body of the device, which means that you will have to look for it visually - God grant us a keen eye. The situation is not much better with type-C. There may not be a hundred of them (although you never know), but there are also quite a few.
These are all type-C sockets
Therefore, before you sit down at the computer or go to the nearest store, you will have to disassemble the gadget and find out exactly what is installed in it. For a more accurate result, it may even make sense to desolder the connector, since it is often impossible to determine the type and shape of the fastening “legs” under the solder layer. Especially if it has already changed.
Disassembling a tablet computer
Remove the back cover, take out the battery, SIM card, flash drive and unscrew the fastening screws. There were 11 screws in my ZTE tablet model.
Read also: A conspiracy to get rid of moths!
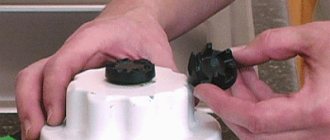
Now carefully remove the general housing cover covering the board with radio components. Here, as in the remote control, the main thing is to find and unlatch the first latch. But unlike the remote control, the plastic from which the case is made is soft, and the touch panel is easy to separate. As a rule, the touch panel goes into the general housing cover, and therefore you need to open the tablet from the touch panel side.
What tools are needed
To replace the connector yourself, we will need the following tools:
- thin tweezers;
- tools for disassembling a mobile device (depending on the type and model of the gadget);
- soldering hair dryer (if the connectors will be replaced with its help);
- holder for boards of one design or another (preferably);
- head lens or tripod lens;
- soldering iron with a power of 25 W with flat thin (diameter 0.8 mm) tips.
Healthy. It is better to buy a set of tips of different shapes for a soldering iron for such work. They are inexpensive, but allow you to perform a variety of operations.
Do-it-yourself repairs
You need to act very carefully if you decide to fix the phone charging socket with your own hands.
To disassemble the case and remove the socket we will need:
- A small set of screwdrivers.
- Technical tweezers (ordinary tweezers will do).
- A stationery knife or a regular sharp one.
- Soldering Station.
Now you need to do the following:
- Unscrew all the screws that secure the housing.
- Carefully remove the cover by prying it off with a utility knife.
- We ground the soldering iron, solder the wire to the negative (device body). The second end of this wire must be connected to the body of the soldering iron itself.
Important! These measures are necessary to ensure that the mobile phone does not suffer from the accumulation of static electricity, which can damage parts. It would also be a good idea to make an antistatic wrist strap and ground it.
- Now we unsolder all the wires from the socket. This is necessary to prevent short circuits.
- Next, you need to remove the screws from the board that hold it in place. Now we have access to the microUSB connector.
- We take out the old socket, solder a new one in its place, assemble the device in reverse order and check its functionality.
You might also find our instructions on how to clean your phone's headphone jack useful.
Share on social media networks:
It's hard to believe now that mobile devices were the easiest way to connect with other people. Now an ordinary mobile phone has turned into a high-speed smartphone with enormous multimedia functionality, and the case has begun to store the power of a good computer inside it. Using devices is very addictive and some people don’t even take a break for at least a short time. This kind of use takes a toll on charging, and constant recharging can damage one of the phone's most important connectors. You will learn how to fix the phone charging socket if it is broken in today's article.
Consumables
In addition to tools, you will need consumables. For soldering we will use acid-free (neutral) flux and solder paste. They are easy to buy in the appropriate store or order online on Ali.
Neutral flux (left) and solder paste
To dismantle the socket part using a soldering iron, you will need thin lead-tin solder with a lower melting point. To remove solder residue from the tracks, copper braided shielding is useful. If we work with a hair dryer, we will have to additionally buy thermal insulating (Kapton or foil) tape to protect nearby parts from overheating and spontaneous desoldering.
Important! Very often, instead of conventional solder, many people use low-melting alloys Rose or Wood. I would really not recommend doing this even when dismantling the socket, since these alloys are too fragile, and it will not be possible to completely clean them from the tracks after removal. Soldering, even with a minimal admixture of these alloys, will crack within the first week of operation of the gadget.
We will do the washing with Galosh gasoline, isopropyl or ethyl alcohol, having previously sealed the critical components that are afraid of liquids (microphone, camera, etc.) with ordinary tape. Just in case, we’ll stock up on single-core copper wire with a diameter of 0.2–0.3 mm. He will help us if the fault lies in broken tracks. You can get such a wire from a regular stranded wire by simply removing the insulation from it. Of course, in this case you will also need a scalpel or a sharp knife.
A core of such wire will be useful for solving the problem of torn tracks and contact pads
Healthy! Enameled winding wire should not be used, since in order to tin it, you must first mechanically clean off the enamel. But doing this more or less efficiently is very difficult, especially if you are not a specialist.
Replacement with a hair dryer
Now let's move on to the question of how to fix the charging connector. First, let's try to make a replacement using a soldering gun. We disassemble the smartphone and inspect the components located next to it. In our example, there is a camera made of ordinary plastic located very close by. When you remove the socket with a hairdryer, it will simply melt.
If the camera is removable, then remove it by disconnecting the cable. If it is soldered or other non-removable components are located nearby, seal them with thermal tape.
We apply soldering flux to the mounting and interface contacts and heat it with a hair dryer set at 360 degrees Celsius. We will warm it up in a circular motion.
Periodically check with tweezers to see if the solder has melted. As soon as it melts, the connector can be removed from the board.
Important! If there are other elements located near the socket, we try not to overheat them so as not to desolder. If you are not sure, seal them with thermal tape.
Now, using a soldering iron, we apply a small amount of lead-tin solder to the mounting and interface pads. This will lower the melting point of the standard lead-free material, allowing you to solder the socket at a lower temperature. Otherwise it may melt.
Expert opinion
Alexey Bartosh
Specialist in repair and maintenance of electrical equipment and industrial electronics.
Ask a Question
Healthy! If you irradiate the mounting pins and interface contacts with tin-lead solder before dismantling, the temperature of the hair dryer can be reduced to 300–320 degrees. This temperature is enough to dismantle the tinned connector, but not enough to melt the factory solder with which the remaining components of the circuit are soldered.
We set the hair dryer thermostat to 300 degrees and heat the seat. As soon as the solder melts, we install the connector in place, warm it up slightly, press it with tweezers, making sure that the contacts in the socket recess coincide with the interface pads on the board.
The mounting contacts are soldered, all that remains is to solder the interface ones. To do this, apply just a little solder paste to them and heat them with a hairdryer. The temperature is the same - 360 degrees.
If we apply too much solder paste, adjacent contacts may become soldered. We immediately pass between them with tweezers, or even better, with a soldering iron with a thin tip.
Since the soldering flux is acid-free, it does not need to be washed off. We connect the device to the charger, then to the PC to determine the operation of the interface contacts. If everything is in order, then the work can be considered completed.
Healthy. Replacing a Type-C connector is no different from replacing a microUSB. We do everything exactly the same, there are just a lot more interface contacts - you have to use a good magnifying glass and tinker.
Conclusion
The article describes in detail how to fix a wobbly USB port so that your phone can charge. Performance can be restored at home if you have the appropriate equipment and skills. Otherwise, it is better to entrust repairs to employees of a service center or repair shop. Since inept intervention often leads to irreversible consequences, when even an experienced specialist is not able to fix the breakdown.
What questions do you have? Leave messages in the comments section.
Is it possible to unsolder the socket with a soldering iron and how to do it
We found out how to replace the connector using a hair dryer. With some practice and care this will not be difficult to do. But how to replace the connector if you don’t have a soldering gun? After all, not every one of us does soldering, and buying a hair dryer for one time is somehow stupid. Well, if you don’t have a hair dryer, you can repair your smartphone using a regular soldering iron.
We place a flat tip on the soldering iron, and while it is warming up (the tip, of course, is already tinned - ready for work), we apply soldering flux to the fixing legs, the connector itself and its contacts.
Our task is to increase the heat capacity of the socket body, to dilute the refractory lead-free solder, which manufacturers use for soldering, with less refractory tin-lead solder. Take a soldering iron and apply solder.
Now we begin to warm the body while shaking it with tweezers. In just 5–10 seconds the solder will melt and the connector can be removed.
We remove excess solder from the mounting holes and contact pads. Apply soldering flux again.
We take the braid and quickly solder the contact and mounting pads through it. The solder was successfully absorbed into the braid, not only ours, but also the refractory solder that the socket was soldered with at the factory.
Using Galosh gasoline or alcohol, we clean the contacts from used flux. It is convenient to use a cotton swab for this.
Important! If there is a camera, microphone or similar components near the place where we will wash, be sure to seal them with regular tape so that solder does not get into the devices, which will damage them.
We inspect the contacts for breaks or short circuits. Installing a new connector. Using a magnifying glass, we make sure that all the pins are on their contact pads on the board.
All that remains is to solder the mounting and interface contacts. Let's start with the editing rooms. We apply flux and solder each of them using lead-tin solder.
Now interface. We apply soldering flux to them and solder each of them with a thin tip. Those with good eyesight can even do it without a magnifying glass.
We take the “Galosh” again and wash off the remaining flux with a cotton swab. Using a magnifying glass, carefully inspect the contacts for missing connections or soldering of adjacent contacts. If necessary, apply flux again and repeat the operation. Soldered contacts can be easily separated by passing a tip between them. We assemble the gadget, connect the charger, and make sure that everything works fine. At this point the replacement process can be considered complete.
Important! After replacing the connector, be sure to connect the smartphone to the PC and make sure that the gadget is recognized by the computer as an external drive.
Cleaning after soldering
After any soldering, it is advisable to clean the soldering area. This is necessary to 100% eliminate corrosion from flux (if you were using inexpensive flux). And also for beauty, so that the soldering area is clean.
Tools used
Galosh gasoline is excellent for cleaning soldering areas. You can clean it with a regular brush, cotton swabs or disks, as well as regular cotton wool.
Nuances when cleaning
There are often microphones near micro USB connectors. When cleaning, do not forget about this, because if flux or a cleaning agent with flux residues gets on the microphone membrane, it will no longer work at all and the microphone will have to be replaced.
If the tracks are broken
Often the conductive paths or contact pads under the connector are broken. This can happen both during operation of the part and during dismantling. In the first case, the tracks come off in attempts to “find contact” by pulling the plug in the socket. In the second - in case of underheating (the pads break off along with the connector) or overheating (the foil simply flies off the textolite substrate).
How to be in this case? Most often, the problem can be solved using a soldering iron with a thin tip and a single-core wire with a diameter of 0.2 mm (see the “Consumables” section). We strip the installation wire and extract one core from it. We service it carefully. We install the new connector with a hairdryer or soldering iron. Then solder one end of the wire to the socket contact, and the other to the place closest to the break. Here we are lucky - there are spots nearby that are easy to solder to. If they are not there, then you will have to clean the torn tracks from the varnish, tin them and solder to them. A little more complicated, but also possible.
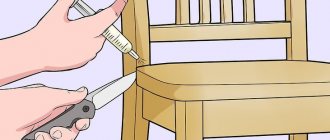
We wash the “Galoshes” and study our work. If everything is visually beautiful, then we strengthen the nest with compound. Apply it from a syringe and heat it with a hairdryer for a minute at 180 degrees. The compound will strengthen the entire structure, since several contacts practically do not hold onto anything, which means the connector will have play.
Expert opinion
Alexey Bartosh
Specialist in repair and maintenance of electrical equipment and industrial electronics.
Ask a Question
Healthy! If you need to dismantle the connector, the compound can be easily removed by heating it with the same hairdryer at a temperature of 300 degrees Celsius.
Wireless way
If you have a relatively new gadget, you can charge it using Qi wireless charging. You just have to purchase a special device with an induction plate. Just place your phone or tablet on the device connected to the network and wait for a notification to appear when the battery begins to fill with energy.
The method is only suitable for devices that support wireless charging.