In our country, washing machines from the South Korean company Samsung are very popular.
Accordingly, many users are interested in how to restore the functionality of such a device in the event of a simple breakdown.
Indeed, the owner will be able to fix some problems himself, without resorting to the help of a paid service.
Next, we will look at how to repair a Samsung washing machine with your own hands, what malfunctions occur most often and what needs to be done to ensure that the device works without such measures for as long as possible.
List of required tools
You can’t take a “Korean” with your bare hands - you need to prepare something:
- a set of screwdrivers or a screwdriver with a replaceable tip;
- a set of socket and open-end wrenches;
- adjustable pliers (the grip width can be adjusted);
- pliers;
- side cutters;
- two tweezers: one with increased length, the second with curved tips;
- soldering iron with a power of 30 - 40 W;
- knife;
- mirror with long handle;
- flashlight or small electric lamp;
- low power gas burner;
- crimping pliers for fixing wires in lugs and contact connectors;
- a flexible metal ruler with a length of 70 cm or more (using this tool, it is possible to rotate the drum into its normal position, the flaps of which were left open by mistake by the user when starting the machine);
- a magnet on a nylon thread or nylon cord (helps to remove small metal objects that have gotten inside the unit);
- hammer weighing from 300 to 400 g;
- pliers for dismantling spring clamps that secure flexible hoses to fittings.
You will also need the following measuring instruments:
- multimeter;
- voltage indicator in the form of a screwdriver;
- current clamps or ammeter for alternating current at 20 A (used to estimate the power consumed by the heating element during heating).
In addition to the indicated devices and tools, you may also need some materials:
- Super glue;
- silicone sealant;
- sealing/insulating compound;
- wire lugs;
- rosin for soldering or flux LTI-120;
- heat-shrinkable tubes of different diameters;
- stranded wire;
- metal and plastic clamps;
- fuses for current 4 - 5 A;
- insulating tape.
Prepare a liquid for treating rusted connections, for example, “Liquid Key”.
Often during repairs it is necessary to understand whether power is supplied to the heating element. To do this, just turn on the machine to warm up and look at the electric meter: the rotation speed of the disk or the blinking frequency of the LEDs (for electronic meters) should increase.
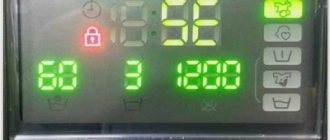
Communication between control modules (AC6, AC or AE) is broken
Lack of communication between control boards can cause error codes AC6, AC or AE to appear on the display panel.
A malfunction of the control module can be caused by various reasons, including a failure in the firmware, failure of triacs, tracks (microcracks) or relays
It can be assumed that the following errors were the cause of such signals:
- the modules were connected incorrectly;
- There are defects in the solder connections of the communication connections.
There may be a temporary network outage. Then it is enough to turn off the device, and after 15-20 seconds turn it on again. If the fault does not resolve itself within this time, you must contact the service center to replace the control module.
The process of disassembling the washing machine
It is not always necessary to completely disassemble the car, but when repairing some components, this cannot be avoided. “Arrange a showdown” should be in this order:
- The top cover is removed: this element is held in place by two screws on the back side of the unit. After unscrewing them, the lid must be moved back 1.5 cm, after which it can be removed. At this stage, the network (anti-interference) filter, level relay and transformer will become available.
- Next, you need to remove the distribution hopper for washing powder and disconnect the three hoses held by metal clamps from it. The clamps should be loosened using special pliers or pliers.
- The massive counterweight found under the top cover is removed from the bottom up after unscrewing two long bolts.
- We remove the front panel: to do this, you need to unscrew the screws that secure the control panel (two in front and one on the right). The left side of the front panel can then be detached using a screwdriver. Next, pull out the lever and disconnect the base panel (this item does not apply to the R 6091 model). Now you need to remove the hatch seal by releasing the clamp holding it.
After this, the front panel can be removed by first unscrewing the 8 screws that secure it.
At this stage, the heating element, hatch lock, shock absorbers and drain pump become available.
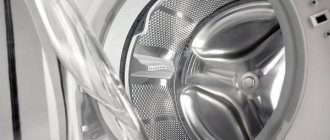
Disassembling the washing machine
Your next steps:
- On the wire clamp that presses the rubber casing to the drum (through this part the drum is connected to the body), you need to unscrew the bolt.
- With the car on its side, you need to unscrew the 4 screws on the bottom cover, after which it can be removed. This will give you access to the electric motor and another, smaller counterweight. These elements, together with the pump, are fixed on shock absorbers, which, in turn, are attached to the body of the machine.
- We disconnect the wires connected to them from the contact connectors of the engine and pump. In order not to forget the connection order, the wires must be photographed or marked in some way before disconnecting.
- We unscrew the two bolts that secure the shock absorbers to the body.
- Unscrew the water inlet located under the top cover. There is no need to disconnect the wires from it, since they do not interfere with the disassembly process.
- To dismantle the elastic suspensions with which the drum is connected from above to the body, the hooks at their ends must be straightened with pliers - first from the drum side, then from the body side. Be prepared for the fact that they do not give in very willingly.
- All that remains is to unscrew the smaller counterweight and remove the drive belt, after which the drum can be removed.
When assembling, the belt should be placed first on the engine pulley and only then on the drum pulley.
How to fix it yourself?
Since an error on the display can indicate a variety of operational problems, all options should be considered. Sometimes the issue can be resolved without the arrival of a specialist.
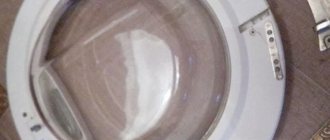
First you need to inspect the door itself
At the same time, attention should also be paid to the sealing rubber. The cuff itself cannot be a hindrance, but if the rubber is torn, separated and bent, the part will require replacement
There may also be a problem with the cuff preventing the door from closing if, after repair work on the door carried out earlier:
- it is installed incorrectly;
- A non-original part was installed.
After re-repairing and properly installing the original cuff, the problem should go away. In cases where the interference is a foreign object, it simply needs to be removed.
Another option is to try restarting the device. For this:
- Turn off the washing machine.
- Open and close the door again.
- After 10-15 minutes, turn on the washing machine. A characteristic click should sound.
- Restart. If the failure was software, then restarting will be successful.
Overloading the machine can lead to an error when there are a lot of things and they are tightly compacted. It would be better to put some things aside and start again.
DIY washing machine repair
Let's look at typical situations that owners of Samsung washing machines have to face:
Washing machine won't turn on
If the unit does not respond when you press the power button, remove the plug from the outlet and reinsert it.
If this does not help, try plugging into this outlet some device that you are absolutely sure is working - this will help check the presence of voltage in it. If the check shows that everything is in order with the power supply, you need to call a specialist.
Water flows slowly into the machine
If water is slowly filling into the machine, you must first open the cold water tap on any of the mixers and make sure that there is sufficient pressure in the water supply. If the pressure is normal, you need to see if the water supply valve to the machine is fully open.
Next, the valve, filling hose and mechanical cleaning filter at the entrance to the machine are checked for the presence of debris and small objects.
Sometimes the reason for the slow filling of the washing machine lies in the low location of the drain hose - in this case, water will immediately pour out of it.
If your machine has a drain hose connected from below, its free end should be raised 2/3 of the height of the machine. With a lower position, the water will drain simultaneously with filling.
Stopping the washing machine during a cycle
The most common reason is that the machine is overloaded with laundry. After removing some of the things, the unit will return to normal operation.
Also, unplanned stops can occur due to poor contact in the power button, which results in periodic loss of power to the machine.
If the drum stops with a knock during the spin cycle, it means the machine was installed skewed (checked with a building level) or laundry got tangled in it.
The drum does not rotate
Most often, the reason is that the door is not closed tightly or the water supply to the machine has been stopped. If everything is in order with this, then the problem is in the electronic “brains” of the device and you cannot do without a specialist.
Water doesn't heat up
Typically, this phenomenon indicates failure of the heating element due to natural wear or due to the formation of a large amount of scale. In Samsung machines, the heater is located under the tank on the front panel side (it will need to be removed).
Before you start replacing the heating element, you need to check with a tester the presence of voltage at its contacts.
It happens that there is no heating due to a broken contact somewhere. Then you have to “ring” the entire electrical circuit. But more often the tester shows the presence of voltage, which indicates a malfunction of the heating element itself.
Having disconnected the wires and temperature sensor from the heater, you need to unscrew the nut holding it, after which the heating element can be removed.
If necessary, the seat needs to be cleaned, then a new heating element is installed. By connecting a temperature sensor and wires to it, you can assemble the unit.
Water does not drain/leaks/flows
If water begins to seep out through the powder container, it means that it is either full or the detergent has been left in it for too long, which has led to a blockage. The container must be removed, rinsed thoroughly and reloaded with the amount of powder specified in the instructions.
The reason for the appearance of a puddle of water on the floor is most often a disconnection or damage to one of the hoses - the fill or drain.
Drain hose
If their condition is satisfactory, you need to take a closer look at the door - perhaps water is leaking out due to a worn seal. There are also seals at the connection point of the filling hose. If there is a high degree of wear, they need to be replaced.
The machine's inability to discharge waste water is most often caused by foreign objects or debris getting into the drain pump, its filter, or the drain hose.
Repairing washing machines is expensive. Even for basic filter cleaning you will have to pay 600 rubles. Doing your own repairs can save you a lot of money. Ardo washing machine: do-it-yourself repair according to the master’s guide.
An overview of the main breakdowns of Bosch washing machines and methods for eliminating them are presented here.
Zanussi washing machines, despite their reliability, have weaknesses - a poor door lock design and a relatively weak drive belt. In this topic https://aquacomm.ru/cancliz/mnogokvartirnyie-doma/santehnika/zanussi-stiralnaya-mashina-remont-svoimi-rukami.html we will learn how to troubleshoot some problems ourselves.
Excessive noise in the washing machine/vibration
The unit may be too noisy if installed incorrectly or if the transport bolts behind the drum have not been removed. Another reason is that a foreign object, such as a button or coin, has gotten inside.
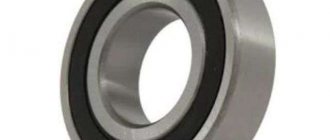
Also, strong noise may be a sign of destruction of one of the bearings. Replacing bearings is a rather complicated operation, since they are installed on the axle shafts and in mounting holes with interference; removal requires a special puller.
If unusual noise is heard while draining water, you need to check that the machine is installed correctly (level) and inspect the drain pump filter for the presence of foreign objects.
Bearing replacement
If a strange noise in the form of a roar, knocking or squeaking clearly comes from the electric motor, you need to contact a service center.
If the machine fills with water making a loud noise, it may be due to excessively high/low pressure or a foreign object getting into the fill hose. First of all, you need to try to normalize the pressure by turning the valve handwheel back and forth on the outlet for supplying water to the machine. If this does not affect the noise, you need to disconnect the hose and check it for debris or small objects inside. You also need to check the coarse (mechanical) filter at the entrance to the unit and clean it if necessary.
The door does not open
In Samsung machines, the door is locked until the wash is completed. Also, the hatch lock is blocked if there is a high temperature inside the unit (drying or heating mode).
In this case, you just need to wait a while until the inside of the car cools down somewhat.
If after this the door remains locked, find the small cover on the bottom right of the front panel and remove it. Underneath you will find a cable that must be pulled to open the door in an emergency. After this you will have to contact customer service.
heating element
Hard water causes the heater to break down, resulting in scale formation. On the heating element, due to constant heating, it turns into stone and damages the surface. Note that in regions where there is soft water, for example, in St. Petersburg and the surrounding area, heaters practically do not fail. Moscow has hard water, and such damage is a pressing issue.
Removing the heating element
In order to extend the service life, use anti-scale products: Calgon, professional converters, or folk ones in the form of citric acid.
The malfunction manifests itself in two ways:
The heating element burns out;
leakage occurs on the housing.
In both cases, diagnosis is carried out with a multimeter. In order to gain access to the contacts, you must remove the front panel. See the disassembly sequence here. Unhook the wires. We put the tester to check the resistance.
First, we examine the contacts that receive voltage. If there is infinity between them, then replacement is necessary. Then we set the maximum limit.
Expert opinion
I work in the household appliance repair industry. Extensive experience in restoring washing machines and dishwashers.
Ask a Question
Important! Reliable results can be obtained if the multimeter measures up to 40 MΩ. We look at the resistance between ground and each contact
If the value is different from zero, then the heater must be replaced. Operation with current leakage will lead to incorrect operation and damage to the control module.
We look at the resistance between ground and each contact. If the value is different from zero, then the heater must be replaced. Operation with current leakage will lead to incorrect operation and damage to the control module.
Other problems and their solutions
The following troubles also happen:
- The paint on the body has become stained, changed color, or started to peel. Rust has appeared on metal parts: similar phenomena occur if the machine is installed in a room with high humidity. It is necessary to either move it to another location or install a dehumidifier in the room.
- The display does not light up or does not work at all, or the image on it has stopped changing.
The cause of the latter phenomenon may be increased humidity or water getting inside. The front panel should be dried and the car should be left overnight in a dry place. If drying does not help, you will have to call a professional.
The types of breakdowns of all washing machines are similar. In the next article we will talk about Kandy brand devices. Kandy washing machine - do-it-yourself repair of basic faults.
See this link for common breakdowns of Indesit washing machines and how to fix them.
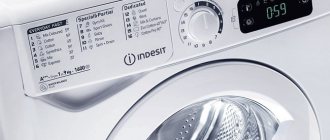
Let's check the equipment
It doesn’t matter whether you purchase a unit at a hardware store or order an SMA to your home, be sure to check the machine before paying for the purchase or signing the receipt documents handed over by the courier. In the presence of a delivery employee or sales manager, open the original packaging, inspect the case very carefully, make sure that there are no scratches, chips, dents or other defects.
Often, equipment is damaged during delivery, when unscrupulous employees hit it while transporting or lifting it into the apartment. If you find a mark from an impact, peeling paint or something else on the machine, under no circumstances sign up for the unit, but ask for a replacement. If the SMA is safe and sound, you can calmly sign the goods acceptance certificate and release the courier. But remember that you must have the phone number of the store where you purchased the equipment, so that if a breakdown is detected, you can contact an employee and resolve any issues that may arise.
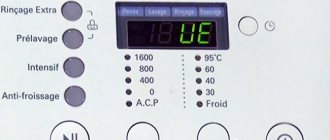
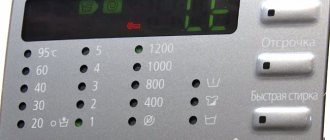
Before connecting the washing machine, plug in the power cord and see if the lights on the digital display and control panel come on, and if the program selector responds to your actions.
No signal from the vibration sensor (8C1, 8C, 8E or 8E1)
The fact that the signals from the VRT+ device have stopped coming will definitely be displayed on the Samsung machine on its display with codes 8C1, 8C, 8E or 8E1. All of them indicate that there are problems with the correct operation of the sensor.
This sensor error is caused by the following reasons:
- the vibration sensor of the washing unit has failed;
- there were problems with the internal electrical wiring;
- The unit was assembled in violation of technical standards.
Check the sensor connection contacts and electrical wiring. Then assemble the unit and test it in operation. If the problem persists, then the sensor itself is faulty. It should be changed.
Replacing elements on the control board
We will show you how you can replace some elements. To do this you will need a soldering iron and a new part.
Capacitor. On the control board it serves as a kind of stabilizer. To replace it, you need to solder the new part to the positive electrode. To find out where which electrode is located, use a tester.
- Resistor. To check the operation of the resistor, a tester is used. 1st order resistors should show a result of 8 Ohms and an overload of 2A. Second-order resistors show 3-5A, while the resistance values depend on the frequency of the module. If the indicators do not meet the standard, the elements are replaced using the soldering method.
- Thyristor block. You can check the thyristor unit by measuring the negative resistance. Indicators should be no higher than 20V. The unit filter could also have burned out. You can repair it by cleaning the cathode.
- Trigger. Testing a trigger involves measuring the voltage of the input contacts. Their performance should not exceed 12 V. The trigger filter resistance should be 20 Ohms. The element is also replaced by soldering.
Soldering of board components may be disrupted due to strong machine vibrations. Therefore, you need to ensure the correct and stable installation of the washing machine.
The master knows how to properly repair the control board. Think twice before you start repairing it yourself, because the electronic unit is quite expensive. If you do not have the skills to work with a soldering iron, and the test indicators do not give specific results, contact the service center.
For those who have decided to do their own repairs, a video on the topic:
Source