A washing machine is an integral attribute of the home, which simplifies life and helps maintain cleanliness. Sometimes cases arise that indicate the device is not working properly or the possibility of an imminent accident. A cause for concern may be a situation when the drum in the washing machine dangles during washing, making loud noises. You can deal with this problem yourself by inspecting and fixing the problem.
Additional signs of concern
A breakdown should be suspected if the drum play during spinning begins to be accompanied by certain symptoms:
- the unit rattles, and most of all - when spinning clothes,
- during the spin process, the drum begins to knock on the body part or on the glass loading hatch,
- the washing machine starts jumping or vibrating,
- The drive belt keeps falling off,
- the drum begins to rub against the cuff of the loading door,
- At first glance, the machine works fine, but the rotating drum makes squeaks and other noises,
- oily traces are visible under the unit,
- the machine begins to leak, there are traces of rust on the tank behind the rear panel,
- laundry is stained with oil or rust,
- the drum dangles a lot, then flies off and falls to the bottom,
- the washing machine chews the laundry,
- the drum jams and turns with difficulty, producing a metallic grinding sound,
- During operation, plugs are knocked out, smoke appears from the machine,
- The drum of the device is skewed.
Such a loose element, along with any symptoms, begins to signal a significant breakdown. And even in the case when the machine executes all programs, its operation is not recommended. When the drum of a washing machine dangles, more serious problems can be expected in the near future, including complete disposal of the device.
Bearing wear
The drum is attached to the body using a pulley on which a bearing is mounted. When rotating, the drum rests on a bearing. And if during operation it wears out more than it should, or becomes bent, noise, grinding, and difficulty rotating the drum will appear in the operation of the machine. As a result, the vibration will increase, and the drum may jam, or vice versa, it will become very loose on the axis.
If wear occurs on the crosspiece on which the bearing is mounted, the lateral mobility of the drum will increase. During the spin cycle, the machine parts will rub strongly against each other and against the walls of the housing. This will cause additional deformation of the drum itself, up to the appearance of cracks on it. And cracks will cause water leakage. The operation of the machine will be accompanied by strong vibration, even moving it around the room.
Causes of breakdowns and the procedure for determining them
A certain percentage of play is built into the washing machine by the manufacturer; this is considered normal. And there is no extraneous noise. But when the conversation turns to a breakdown, you need to act as follows:
- The loading hatch of the washing machine opens, then you should grab the drum with your hands, moving it to the sides without much effort. After this, it must be twisted clockwise and in the opposite direction. If you notice a grinding sound, these are the initial signs of a problem.
- Turn on the washing machine and set the “spin” program to the highest limits. When chatter occurs during rapid rotation, it feels as if the drum has been thrown off its own axis, and loud noises are heard again. Why does this happen? Look for a problem in the bearing or shock absorbers.
- To reliably clarify the failure, it is necessary to inspect the bottom of the machine. In most cases, failure of bearing devices is accompanied by water leakage through moving parts located on an invisible part of the tank. There is a high probability that at the end of the wash a large puddle will appear under the machine. This means that it is high time to replace the seals and bearings.
- When significant knocking noises are heard, but there is no water leakage, the bearings should not be changed - check the shock-absorbing devices. And getting to them is much easier.
The initial stage, which does not involve disassembling the unit, will not help determine anything else. It is possible to finally understand where the problem lies only after penetrating under the body part.
Failure of springs and shock absorbers is usually recognized quickly. They are simply examined thoroughly, shaking them a little. If at least one failed spring is detected, or a broken shock absorber is found, we can assume that the breakdown has been identified and disassembling the tank itself will not be required. And if everything is in order with such elements, then you will have to disassemble the machine further to remove the tank.
Washing machines with collapsible tank
50% of SMAs are collapsible. It is this solution that allows craftsmen to change bearings without problems. In the collapsible version, the halves are connected by bolts. The joint of the parts is lubricated with sealant or sealed with rubber - all this is done to prevent leaks. Disassembling a glued drum:
- A wooden beam is placed in the drum pulley and jammed. In this case, the tank is located with a hatch in the floor.
- Take a socket of the required size with a ratchet to unscrew the bolt securing the pulley to the shaft.
- Remove the pulley. Next, unscrew the bolts connecting the halves of the tank.
- Having unscrewed the bolts, they hit the shaft lightly. Remove the rear part of the element being dismantled.
- Use a blowtorch to heat the bearings and then pull them off with a puller.
Damage to shock absorbers
Shock absorbers fix the tank in the washing machine from below, dampening vibrations during washing and spinning. The more often you use the equipment, the more you overload it, the faster the shock absorbers will fail. Even under ideal operating conditions, shock absorbers wear out: the lubricant dries out, the piston becomes loose and moves freely. Therefore, during the spin cycle, the tank will begin to dangle, the machine will jump around the bathtub, the intensity of vibrations will increase, and the drum will begin to knock.
It is necessary to change both shock absorbers, then the load will be distributed evenly. If you change only one, the new spare part will quickly break and the problem will recur.
In some washing machines, dampers (shock absorbers) are accessible from below, and in others from above. The specialist unscrews the bolts securing the shock absorbers to the body, disconnects them and replaces them with new ones.
On some machines, dampers are accessible by removing the front panel. The specialist will perform the following actions:
- Remove the top cover of the machine by unscrewing the fixing fasteners on the back of the case and sliding the top panel.
- Remove the powder container and the lower plastic panel that covers the drain filter.
- Dismantles the control panel by unscrewing the fixing fasteners and disconnecting the cables.
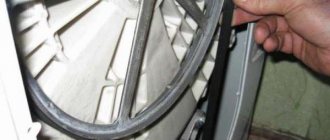
- Remove the rubber cuff.
- Unscrew the bolts securing the front wall and remove it.
Once access to the shock absorbers is opened, the old spare parts are dismantled, new ones are installed, and the unit is assembled in the reverse order.
If you are not afraid to disassemble and repair equipment yourself, you can do it all yourself.
The tank is attached to the machine body on an axle. It is suspended from above by springs that compensate for its swinging. From below, its vibrations are compensated by shock absorbers and dampers. The following malfunctions can lead to increased drum play:
- Stretching, tearing or deformation of the upper springs.
- Deformation or rupture of shock absorbers.
- Wear of shock absorbers.
As a result of such phenomena, the backlash of the washing machine drum will increase. The tank will swing violently and rub against the body. Increased mobility can lead to loosening of the bearing, deformation of the tank itself and increased wear of all parts.
Preventative cleaning measures
Due to frequent use of equipment, malfunctions occur. Therefore, it is necessary to carry out regular prevention:
- Before washing complex laundry, you must make sure that all items are removed from your pockets and that there are no sharp buttons or protruding decorative elements on the surface.
- Check the condition of the rubber seals regularly. If they are not tensioned tightly, then water seeps through them and the drum begins to rust. Signs of damage can be seen in these same elastic bands: as soon as they darken, they need to be pulled closer to the body.
- Check the condition of the water that is pumped into the tank. If there is excessive salt content in it, the tank becomes coated. Regular cleansing is the ideal solution to the problem.
- You should not load the tank with a large number of things, so as not to wear out the fasteners and other parts.
Advice
Before each load of laundry, it is necessary to check that the drum is securely fastened and that there are no visible changes in its appearance, first pour water into the tank and run it idle to make sure that the engine is working properly.
How to replace a shock absorber
To carry out such repair work, it is necessary to remove the rear housing cover, disconnect the drum from the motor shaft, and sometimes remove the electric motor. Due to the fact that during assembly the bearing is firmly pressed into the mount, it must be knocked out. In a number of models, it is possible to dismantle the crosspiece, and sometimes you have to remove the tank itself.
Particularly difficult are cases where the washing machine has a solid tank made of plastic or composite material. To access the drum, you have to cut it. Instead of the dismantled broken bearing, a new analogue is installed, then the machine is checked for rotation and the rigidity of the drum fastening, and assembly is performed in the reverse order. You can organize a trial run to test the device.
This element, like spring hangers, cannot be restored. A specialist will install new ones for you. Temporary measures will not help in such situations. You will have to remove the housing cover, loosen and remove the springs one by one to inspect the fastening points for integrity.
When the tank is freed, you can remove and change the shock absorbers, and hang the tank in its original place. If the old springs have lost their elasticity, they are replaced with new analogues. By the way, when performing work, the master must check the condition of the tank and the supporting bearing cross.
The repair is completed with assembly and testing.
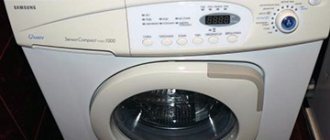
Minor drum chatter in Ariston, Kandy, Bosch, LG or Samsung washing machines is provided for by the manufacturer from the very beginning. Backlash is necessary for the normal functioning of the device. But such rocking of the drum does not cause the formation of extraneous knocks during the washing process. But when they are heard during the spin cycle, it is recommended to take a number of actions:
- open the loading door, grab the drum with your hands, and twist it. If you hear a grinding noise, look for the problem.
- Indesit starts with an empty drum at maximum. If during rotation there is a feeling of large vibrations accompanied by noise, then it is necessary to inspect the bearings or shock-absorbing devices,
- pay attention to water that may leak from the machine,
- If you hear a grinding noise but cannot find a leak, replace the shock absorbers.
READ MORE: Modern bathroom design ideas 168 photos beautiful fashionable interiors for renovation in an apartment and a private house 2020 design options
Let's look at cases when it may be necessary to replace or replace the washing machine drum drive belt yourself.
But a loose or torn belt indicates certain signs of trouble that need to be identified and eliminated.
After all, if it breaks, the belt can damage many electrical wires, sensors and other elements that are located in the back of the washing machine tank. We will also dwell on why the drum drive belt flies off or breaks.
V-belts. Installed on washing machines with asynchronous motors. In cross-section, such belts have the shape of a truncated triangle. The length of the belt is always indicated on the outside, according to which you can choose a new one if necessary. Made from tougher material. As a rule, they rarely tear.
The V-belt should be taut “like a string” and bend quite a bit in the middle. Otherwise, spinning problems and washing program failures may occur.
Installation of the fallen V-belt drive begins with the engine pulley, the remaining part is put on the drum pulley, after which carefully, forcefully rotating the drum pulley, we install the entire belt.
note
If the belt is stretched, you need to tighten it with the engine. To do this, you need to remove the belt, loosen the engine mounts, move it towards increasing the length of the belt, tighten the mount and install the belt. If the tension of the drive belt is not provided for by the design of the washing machine, then it must be replaced with a new one.
Poly V-belts. Installed on cars with commutator motors. In cross-section they have a jagged shape of several small wedges.
They differ in length, which is indicated in millimeters, as well as in shape (“H” or “J”) and the number of wedges, the shape of which depends on the teeth on the engine pulley.
For example, the designation on a poly V-belt “1287 H8” means that its length is 1287 mm, its wedges are shaped like “H” and their number is 8 pieces. The rest of the markings on the belt are not particularly important.
The tension of the poly V-belt must be such that the middle part can be wrapped around its axis 360 degrees, and further rotation must be very tight.
Separately, let’s say that on some models of washing machines (for example, narrow Siltal machines), poly V-belts are installed very tightly.
Important
This means that when putting the belt on the drum pulley, the belt may not appear to be the correct length.
But this is not true, you just need to use more force than usual when putting on the belt and rotating the pulley, being careful not to injure your hands.
Accelerated belt wear is a “disease” of narrow washing machines. All components and elements of such models are located close to the body, and the belt is no exception. When a narrow car is still new, the springs and shock absorbers work properly. But subsequently they wear out a little, the amplitude of the tank during spin increases and as a result the belt begins to touch the back wall of the case.
This ultimately leads to damage and stretching of the belt. Then it needs to be replaced, since the stretched belt subsequently flies off and can damage wires and other elements.
A broken belt can also be caused by a cracked or broken drum pulley. The fact is that it is made of an inflexible but fragile alloy, which, if the laundry is overloaded, imbalanced or the belt is incorrectly tensioned, may not withstand and burst.
When the bearings of a washing machine are worn out, this, in addition to extraneous noise, also causes vibration of the drum pulley, which increases with each wash. If you use a washing machine for a long time with worn bearings, the vibration of the pulley becomes so strong that the belt can stretch and fly off during spinning, and in some cases break.
Often, the reason why the washing machine belt comes off is a temporary imbalance of the laundry during the spin cycle. If the washing machine fails to evenly spread out the laundry before spinning, then during the spin cycle a sharp impact of the tank against the walls of the housing may occur. Strong shaking may cause the drive belt to fly off.
Therefore, it is recommended not to overload the washing machine and to properly place the laundry in the washing drum. Lay out each piece of laundry to avoid curling during washing.
Such a malfunction often occurs on vertical models of Brand brand washing machines with the end of ECO (economy option) after approximately 8-10 years of operation. The fact is that over a long period of operation of the washing machine, its plastic tank is deformed, as a result of which the drum pulley and the electric motor pulley gradually shift relative to each other.
This causes the belt on the drum pulley to move towards the washing machine tub. Subsequently, the belt shifts so much that part of its plane begins to hang over the plane of the drum pulley, and it flies off during the spin cycle.
The problem can be temporarily solved by moving the engine towards the housing wall. This can extend the life of your washing machine by six months or a year.
To eliminate the malfunction, it is necessary to replace the tank and possibly the drum, which is not economically profitable. Therefore, in the end, such a machine has to be replaced.
Often the cause of belt breakage is its drying out at the point of greatest bend, where the belt goes around the electric motor pulley. For some reason, this happens mainly on vertical models and after they decide to use the machine after a long break in work.
That is, the bent section of the belt, when left in this state for a long time, dries out and takes on a certain rigid shape. After the rotation begins, this section, which has lost elasticity, begins to stretch and breaks off.
At first, a quiet extraneous sound will appear during washing, spinning, even when manually turning the drum. Over time, the sound will intensify, and a strong buzzing sound can be heard during the spin cycle. Rust streaks are visible under the CM on the tank. The laundry does not wring well, it is covered in stains from oil and rust.
Ignoring the problem will cause the drum to wobble severely if you press lightly on it. Also, the belt will often fall off due to pulley play, and the drum will rub the hatch cuff. In extreme cases, the drum will jam, sometimes it falls down, so it is impossible to operate the machine.
Why is this happening? Over time, the seal becomes less airtight, water appears in the bearings, the lubricant is washed off and the balls in the bearings become rusty and destroyed. As the deformation progresses, the grinding noise of the rotating drum will intensify. Water will also start to drip through the bearings at the back of the drum. If water gets on a running motor, it will cause a short circuit and knock out the machine, causing the motor to smoke.
If you do not change the bearing and oil seal when these symptoms occur, the crosspiece, caliper and tank will become damaged over time and it will be much more expensive to repair the washing machine. In LG models with direct drive, drum play will damage the Hall sensor, so you need to urgently call a specialist.
READ MORE: Ideas for a dacha 89 photos interesting dacha solutions on how to decorate the yard and garden with your own hands home and garden decor
Stages of the technician’s work when replacing a bearing:
- Unscrew and remove all bolts on the rear panel.
- Removing the dispenser.
- Removing the control unit.
- Removing blocking.
- Removing the remaining fixing parts, removing the front panel.
- Loosening the clamp.
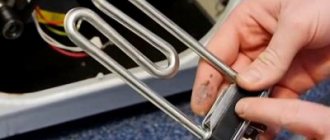
- Dismantling the counterweight and tubular electric heater.
- Disconnecting all cables, pipes, and belts from the tank.
- Dismantling the motor, after which the tank and drum are removed.
Stages of disassembling a tank by a master with changing bearings:
- The cuff (rubber seal) is removed.
- The tank is installed so that the pulley is accessible, the bolts securing the pulley are unscrewed, which is also dismantled.
- The shaft is knocked out, after which the bolts connecting the two parts of the tank are unscrewed, which are also separated.
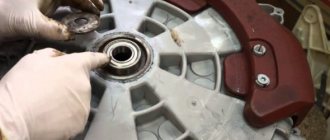
- Old grease and dirt adhering to the bearing are removed.
- The bearing is knocked out, the seals are removed.
- The space is wiped and lubricated with lubricant.
- New seals with bearings are installed.
Foreign object stuck
During washing, a knocking sound is sometimes heard due to the presence of some foreign object in the tank. These could be keys, coins, buttons, rhinestones, or a bra wire. They can even pierce the tank at high speeds, so the device will jam and water will leak onto the floor. After removing foreign objects, it is necessary to check the parts for integrity and serviceability.
Other causes of breakdowns are a malfunction of the belt (stretched, frayed or torn), breakdown of the electronic control unit, or electric motor.
If you act incorrectly and connect the device to the system incorrectly, important parts of the washing machine will fail. Therefore, it is better not to carry out independent repairs, but to entrust the matter to a specialist.
If you hear a loud knocking and grinding noise while the washing machine is operating, the machine begins to turn the drum with difficulty, there is a possibility that a coin, a nut or a sock has fallen into the body, in a word, any small thing that can leak behind the drum. In addition, parts of a scattered bearing or shock absorbers may be in the tank. And then the car will make a loud grinding noise.
If foreign objects that get into the tank are small, they can pass through the drain pipe and get into the filter. It will be quite easy to get them from there. You will only need to unscrew the filter from the housing and clean it of foreign objects. Just first you need to put rags on the floor to remove the water that has spilled through the filter hole.
If foreign objects are located at the bottom of the tank, then they can be removed through the heating element hole. For some models, the heating element is located at the back, and then you just need to unscrew the back cover, unscrew the heating element and remove foreign objects. In some models, the heating element is located in the front. Then getting it out will be more problematic. A professional technician will help you deal with this case.
Let's halve the glued tank
Disassembling a glued tank will be different from working on a “new” tank. First of all, this will affect fixation, since after repair it will be attached not only with self-tapping screws, but also with sealant. The first ones are easy to unscrew, but the second one will have to be tinkered with - the dried glue holds well and is not removed quickly.
Some “craftsmen” suggest removing the sealant with a sharp knife, picking and cutting. However, experienced craftsmen do not recommend doing this for two reasons. Firstly, it is too long and ineffective. Secondly, the blade can jump off its intended path and puncture the tank, creating a new problem. It is much safer and more effective to go the other way: cut the tank with a hacksaw with small scars, going in a circle along the seam. Repeated cutting will be easier, since only the layer of dried glue will provide resistance.
The main thing is to act extremely carefully, focusing on the old “path”. Even the slightest bevel will ruin the tank - gluing it will be extremely difficult
It is not enough to simply halve the tank - it is important to remove any remaining sealant. A layer of dried glue will prevent the tank from sticking together, so you need to clean it off the seam
We proceed like this: take fine-grained sandpaper and sand the cut without going into the plastic. Then we shake off the crumbs with a rag and proceed to repair the bearing assembly.
Why does the drum in the washing machine dangle and rattle ?
Washing machine breakdowns are always an inconvenience for users. Especially if the drum dangles in the washing machine, making unpleasant, rumbling sounds. It is highly undesirable to continue using such a household appliance. There is a risk of damage to other critical components of the machine.
will carry out urgent diagnostics and repair of the device.
Just call us at the number, arrange a time for a service technician to visit, leave information about the symptoms of the malfunction, the brand and model of the washing machine, and the time of use.
You can call a specialist not only on weekdays, but also on weekends and holidays. We will arrive in any district of Moscow and St. Petersburg in the morning from 7:00, lunchtime and even late in the evening, as we work until 23:00.
If your washing machine is knocking, there may be several reasons for this knocking: improper installation of the machine itself, problems with one of the counterweights, a loose power filter, a slipped shock absorber or a broken spring, foreign objects between the drum and the tub, as well as problems with bearings.
First of all, before you panic, take a close look at the laundry in the washing machine. It happens that during the washing process, laundry rolls up into one laundry ball.
This happens especially often when you wash a set of bed linen, and the duvet cover serves as an excellent environment for the formation of this lump.
Advice
In this case, during the spin cycle, the washing machine jumps, jumping and moving all the built-in equipment in the neighborhood.
If there are no problems with the laundry, but there is still a knocking noise, then to figure out exactly why the washing machine is knocking and what to do about it, read below.
An unevenly installed washing machine can be a common cause of knocking.
Look carefully at your car to see if it is skewed in any direction; you can also use a special level and check for sure.
If the washing machine is standing with a clear distortion, then try to tighten the legs so that the washing machine stands level and stable. Special silicone supports can also help.
A very common breakdown when the washing machine knocks during the spin cycle is a loose weight or balancing stone. This thing looks different, but it has the same meaning.
The main task of this stone is to weigh down the tank and balance it. If the fastenings of the stone are weakened, then the load will perform the opposite function, further weakening the washing machine tank.
It is for this reason that the washing machine knocks during the spin cycle - the stone is no longer tightly pressed to the tank and begins to knock against it. At the same time, the stone weighs quite a lot, and if its mass hits the tank, over time the tank will be damaged.
There is no need to explain that in this case you will have to change the washing machine.
A loose balancing stone is one of the reasons why a car may jump
Where can you find this notorious stone? Typically there are two loads in a washing machine. One is mounted at the top, the second at the bottom on the front of the tank or at the bottom. There are exceptions, but they are rare. The material of the cargo varies.
Starting from ordinary cast iron blanks, ending with concrete blocks. The loads are secured with screws and nuts. Despite various tricks, in the form of nuts with rubber stoppers and various groovers, the weights still unscrew and begin to knock like steam hammers. To minimize damage, you just need to tighten loose connections.
note
In theory, after these manipulations, the knocking sound during the spin cycle of the washing machine should stop.
If the stone breaks, then only replacing it with a new one will help.
An equally popular misfortune is a broken or unscrewed surge protector. Its function is to extinguish electrical impulses from the washing machine and prevent them from entering the network of the apartment or house.
When the filter flies from its place, it begins to bounce around on the wires, like on a swing between the body of the washing machine and the tank, and knock vigorously against them. The sound is not very pleasant and, moreover, such movements can cause a short circuit.
To prevent this from happening, you need to securely secure the torn part in place.
Check how tightly the surge protector is attached
Also, the washing machine drum may knock if you have problems with the spring or shock absorber. What does it mean? The tank is suspended from the body of the washing machine using springs, and from below it rests on shock absorbers.
All this is needed in order to dampen the vibrations that occur during spinning at high speeds. Over time, the spring may burst and the shock absorbers may break, which will immediately lead to the characteristic knocking sound of the washing machine during the spin cycle.
Operating the machine is highly undesirable if the problem is a faulty shock absorber
If you are not in the habit of checking your pockets before washing and washing your underwear in special bags, then there is a high probability that a foreign object may be causing the knocking noise.
READ MORE: Layout of a one-story house 10 by 10 51 photo room designs with a diagram for a 1-story building with an area of 10x10 sq m
A very common case is a bra underwire. At best, it will get stuck in one of the holes in the drum and will knock on the tank with each new revolution. Getting it will not be a problem. At worst, it will fall into the tank.
In this case, only disassembling the washing machine will help and it is advisable to seek help from specialists.
Video instruction: how to remove a foreign object from the washing machine tank
If the bearings “fly”, then knocking is less typical for this malfunction, but is possible.
As a rule, the washing machine rattles during the spin cycle, and over time this noise will only increase.
Important
In this case, we advise you not to delay for a long time, but to immediately contact specialists, otherwise repairs can take a toll on the family budget.
You can ask them in the “Questions and Answers” section in the topic
Sometimes a situation arises when during a spin cycle the sound intensifies, a grinding sound appears and the machine begins to vibrate strongly. The reason for such manifestations is a malfunction of the counterweight.
A balancing block is attached to the drum, which dampens vibration during spinning at high speeds. When using the machine for a long time, the fasteners that secure the counterweight wear out. Instead, the counterweight begins to sway with the machine, increasing its vibration. And loud knocks appear when parts of the counterweight hit the tank body.
Such malfunctions are quite rare. But it’s better not to try to fix them yourself; in repairs, the technician uses special equipment, without which you will likely damage more parts than repair them.
Main rules of disassembly
Before removing the drum from the washing machine, users watch an instructional video that gives them confidence. After watching, you get the impression that disassembling a washing machine is a simple task that can be completed in a couple of hours. But this is a misconception. In fact, this is a delicate process that conceals a lot of nuances unknown to home craftsmen. Without knowing about many little things, you can completely break the device - so much so that it cannot be restored.
Before disassembling the drum on an automatic machine, you need to gain access to it. You have to almost completely empty the body of all parts - they are removed so that nothing interferes with the removal of the elements of the washer. When disassembling the machine, you need to follow the rules that apply to all SMAs:
- The knot must be removed with extreme caution. 90% of washing machines have tanks made of plastic, which is not able to withstand serious mechanical stress.
- Take an assistant - it will be difficult to disassemble the device alone.
- If you have to saw the element to be removed, drill holes along the seam for future fastening. This will avoid displacement. A large number of bolted connections will allow the sawn halves to be tightly connected. Use waterproof sealant generously.
- When you unscrew the screw connection that holds the pulley, act extremely carefully. You need to apply force, but in such a way as not to damage the faceted surface of the screw head - otherwise there will be more problems.
- To remove the rear part of the SMA, you have to knock on the shaft - but you should not hit it hard.
Tools needed for repair work
It all depends on the type of damage. If you need to change shock-absorbing elements or springs, then all you need are flat-head and Phillips screwdrivers, an awl, some keys and a repair kit suitable for this model. And if bearings need to be changed, then a wider range of items will be needed:
- hammer with striker made of copper,
- rod or pin made of steel material,
- sealant (cold welding),
- set of screwdrivers and awl,
- open-end wrenches and a set of sockets,
- pliers,
- special lubricant for washing machine parts,
- bearings and seals included.
The shaft is removed from the drum pin with a copper hammer, because this type of striker will not damage the part. A steel rod or other suitable device is needed to knock the bearings out of their seats. The main thing is that such a device must be long and suitable in thickness.
Welding or sealant will be needed when in some model of washing machine the tank turns out to be one-piece. It will have to be sawed along the seam, then the connection will be made. Using an awl, the stuffing box elements are pryed up, pulled out, all fasteners are unscrewed with screwdrivers; keys are needed for the same purpose. Lubricant is applied to shock-absorbing elements and seals.
Other drum faults
Your washing machine may make a variety of loud noises during all phases of the wash cycle: washing, rinsing, and spinning. This always indicates some kind of malfunction or the presence of foreign objects in the tank body. In addition to the breakdowns described above, this may be a malfunction of the surge protector fastening.
Our company’s specialists will quickly and efficiently repair your equipment. Before repairing, the technician will perform a complete diagnostic of the machine. The price for repairs depends on the faults identified and the complexity of the repair. We repair washing machines of such brands as LG, Indesit, Candy, Ardo, Zanussi, Electrolux, Bosch, Beko, Samsung and others.
The FixWasher workshop accepts applications for repairs of washing machine drums every day from 7:00 to 23:00 by calling 8(495)228-42-92.
Calibration
The Samsung washing machine independently determines the weight of the items loaded into it. To make this value more accurate, you need to run the calibration mode.
This is done in several steps:
- Switch off the device and empty it.
- Press the “Temperature” and “Delay End” buttons simultaneously, and then “Power”. The device should turn on.
- Click on the “Start” button, this will activate the calibration mode.
- The drum will begin to rotate clockwise and counterclockwise. The whole process takes about 3 minutes.
- When it stops, “End” will appear and the device will turn off.
After calibration, the equipment is completely ready for washing.
Depending on the model, the process may differ slightly, so before starting the machine you need to study the instructions.
Advice from the experts
If the drum of your washing machine dangles during the spin cycle or wobbles when you swing your hand while the machine is turned off, do not rush to worry.
The washing machine tank with the drum is suspended from above on springs and rests on shock absorbers from below, so the entire structure can easily move in three possible directions - up and down, right and left, and back and forth.
Even if the drum wobbles a lot during the spin cycle, this is not a disaster. Perhaps you simply overloaded the SMA, which is why it reacted with turbulence.
A malfunction should be suspected only when play in the washing machine drum is accompanied by the following additional symptoms, one or more:
- The washing machine makes a lot of noise, especially during the spin cycle.
- During the spin cycle, the drum knocks on the SMA body or on the glass of the hatch
- The machine jumps or vibrates strongly during the spin cycle
- The belt regularly falls off the pulley
- The drum rubs against the hatch cuff
- The machine seems to wash and spin normally, but it makes noise or creaks when the drum rotates
- Traces of an oily dark liquid are visible under the washing machine
- SM leaks from below, if you remove the back wall, rusty traces of leaks are visible on the tank
- The washing machine stains the laundry with black oil or rust stains
- The washing machine drum flew off and fell to the bottom of the tank
- The drum is jammed and rotates heavily with a metallic grinding noise.
- SMA chews on things
- The washing machine breaks plugs or smokes
- SM drum warped
Possible breakdowns
Dispatchers of the “Community of Masters” always record the malfunction described by the client and transmit the description to the master. Here are the main breakdowns in which our customers complained that the washing machine drum was loose.
* Spare parts necessary for repairs are not included in the price and are paid additionally. The exact price depends on the brand and model of the washing machine and is determined after the technician diagnoses the problem.
7
Within 24 hours after your call, the technician will come to your home at any time convenient for you, diagnose the unit and, if necessary, repair it, returning the machine to its previous performance. All work and spare parts are guaranteed for up to 2 years!
If there is a problem with a bearing or shock-absorbing device, then all elements should be replaced, because a failed part will soon lead to a chain of problems from its analogues. And when you have disassembled the washing device, immediately change the seals, which also have operating limitations and wear out quite quickly.
Remember that machines from different manufacturers differ in their design and are disassembled in different ways. This feature should also be taken into account when undertaking repair work on your own.
Disassembling the unit tank and removing the bearings must be done correctly. There are washing machines in which it is possible to get to the shock absorber through the top of the machine or through its bottom. This convenient feature helps save time during repairs - you don’t have to remove the panels.