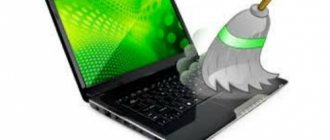
Hello! We are all familiar with the annoying noise that constantly emanates from our favorite computer and does not stop for a second. You can get rid of it if you clean the laptop or PC fan from dust, but such cleaning is not an easy task; only a knowledgeable person should clean the PC. Otherwise, you can easily break something, causing the device to stop working altogether.
Do I need to clean fans and coolers in laptops and computers?
The component, called Cooler in the English-speaking part of the Internet, is an extremely important part of the entire system. It performs one of the main roles in the system unit: it constantly cools the processor and video card, saving them from overheating. Therefore, when the fan itself becomes dirty, starts to spin slowly or stops completely, the other components begin to get very hot.
Therefore, we recommend a thorough cleaning every few months. Otherwise, get ready to buy new parts and change the “stuffing” of your PC every couple of years.
What can happen if dust accumulates on the computer?
- Dust clogged into the heatsink of a processor, video card, or chipset reduces its thermal conductivity. In this case, the sensors receive a signal that the temperature has increased, the fans begin to rotate faster, as a result of which the noise increases greatly. If the air pumped by the fans can no longer effectively cool the radiator clogged with dirt, then the processor begins to overheat, as a result of which the user may notice how the computer “slows down” and begins to process each action for a long time. When a certain temperature threshold is reached, the computer will automatically turn off, but on some models there is no automatic shutdown when a certain heating threshold is reached, and in this case the device may simply fail and you will need to repair the computer. It is worth noting that different models of central and graphic processors have very different operating temperatures - for one device a temperature of 80°C may be quite normal, while for another 60°C is clearly too much, so don’t be scared in advance by simply installing special software and looking at the temperature
- As is known from physics, hot air can contain more moisture than cold air. Therefore, when the air is cooled, the vapor contained in it condenses and settles. For example, we can observe this process in winter, when warm air in a room, car or bus comes into contact with the cold surface of the glass and water condensation settles on it. The same thing happens in your desktop computer or laptop - hot air heated by microchips meets cold air pumped by fans from the outside environment. As a result, water condensation may form in the system unit. If the computer is very dusty, then the likelihood of a short circuit increases greatly since wet dust is an excellent conductor of electricity.
How to determine when it’s time to clean your computer from dust?
It’s very simple - dust settles everywhere, of course, but this is most noticeable if you look at the uneven surfaces of the radiators that are located above the central processor, on the video card, and possibly above other elements that get very hot. Also, dust often accumulates heavily in the power supply and on the fan blades. It is worth noting that due to static electricity, your computer is a magnet for dust and is often much more dirty than other devices and surfaces in the room.
How often should you clean your computer or laptop?
We recommend carrying out this procedure at least once a year - this will avoid many problems with replacing iron, increase its performance and service life
If you want to clean the computer yourself, but do not know all the intricacies of installing components, carry out this procedure extremely carefully and carefully, having read the corresponding article on our website. Or you can always contact computer help service
If you found this article helpful, please vote for it. This will help others find this article more quickly from many others that are less useful.
How to clean your laptop fan from dust yourself
If you decide to clean the fan blades, disassemble your device. Be careful, try not to bend anything. Small copper tubes are very fragile, so be careful not to touch them.
- A can of compressed air.
- Cotton buds.
Without disassembling the cooling system itself, carefully go over it with cotton swabs, trying not to miss a centimeter. The blades themselves can be wiped with cotton pads, but very carefully. Remove any remaining dirt using a spray can.
Disassembling the case
The most effective option to clean the system unit yourself at home is to disassemble the unit. It's not difficult, just unscrew a few bolts holding the cover in place. Typically, both side panels are held in place by 2-3 bolts. Having unscrewed them, the walls move towards the rear side of the system unit and are then easily removed. They rest on special grooves. Those who regularly carry out cleaning may not tighten the bolts. Do not forget that before carrying out the procedures, the system unit should be turned off and completely disconnected from the network.
The user's next action is to remove all dust. You can use a vacuum cleaner, but you should choose a low suction power and carefully clean the internal surfaces. You should act carefully so as not to accidentally pull in the wires (if the vacuum cleaner does not have power adjustment). If there is a large amount of dust and it has covered small parts, then it should first be blown off using a can of compressed air, and if there is none, then a simple enema will do. You can remove dust with a brush, and after it rises, use a vacuum cleaner again. If the user decides to clean the system unit without a vacuum cleaner, then a can of compressed air is the best choice. It will allow you to thoroughly blow through all hard-to-reach places.
Users often ask whether it is possible to wipe the inside of a PC with a damp cloth. You can wipe, but only those surfaces that are not system components - you do not need to wipe the motherboard, RAM, or chipset.
Ideally, when cleaning, you should remove removable components from the system unit - memory, disk drive. This is done so that they do not interfere with proper cleaning. The second reason to do this is to check the reliability of the connections. Sometimes the system unit is placed under the table, and the user accidentally touches it. This may cause the cable to jump out of the connector and cause problems in the future. When cleaning, it would be a good idea to check all these places.
Particular attention should be paid to the fan. It was mentioned above that it suffers more than others and if there is no cleaning for a long time, it becomes clogged. If possible, the fan should be removed and blown out. If there is a lot of dust, you will need to disassemble it too. In this case, it is worth lubricating it. To do this, drop a little machine oil onto the axle.
Proper cleaning involves replacing thermal paste (Moscow). It should not be changed every time you clean it. It all depends on what kind of paste was initially applied. If the system unit is new, then it is best to change it after a year. This is then done according to the recommendations on the packaging (there are pastes designed for 10 years of service), and also as needed
How to clean a computer fan from dust
Various manufacturers, including the increasingly popular Samsung, build similar “fans” into their video cards. Since the component responsible for video heats up quite quickly, it needs to build in its own cooling system.
Carefully disconnect the video card from the computer. Soak a small cotton pad in chlorhexidine or any similar substance. Wipe the blades of the device. Clean the most difficult to reach places with a cotton swab.
To get to the cooling system of the computer power supply (not the processor - namely the power supply), it must be carefully and carefully dismantled, then disassembled. Clean the cooler, if necessary, lubricate it with oil, then reassemble it in the reverse order. A full overview of cleaning is described in the article - “how to clean the computer power supply from dust.”
Cleaning the PC CPU cooling system
Before servicing your PC, turn off the computer, unplug it from the power source, and open the side cover. Heavy surface contamination can be carefully removed with a vacuum cleaner at low power and a soft brush.
1. Disconnect the processor fan cable from the motherboard.
Disconnect the fan power cable from the board
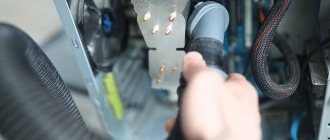
2. For an Intel processor, use a screwdriver to turn each of the four mounting screws 90 degrees in the direction of the arrow on the clip. Pull up to remove the cooler.
Turn the intel screws 90 degrees to e.g. arrows
3. For AMD, turn the plastic lever on the heatsink side to the left. Remove the metal spring from the plastic frame on either side of it and disconnect the radiator.
On AMD, turn the lever to the left
AMD remove metal plate spring
4. Clean the bottom of the heatsink and the surface of the CPU from old thermal paste. This is best done with a damp cloth soaked in WD40 or a clean cloth.
Unhook the fan from the radiator by unfastening the latches
6. Using a brush, clean the radiator fins. A can of compressed air will also help in removing dust.
Clean the radiator fins with a brush
7. Use a brush or compressed air to clean the fan blades. If the dust is sticky and difficult to remove, use wet wipes for office equipment.
Remove any remaining dust on the blades with a damp cloth
Once cleaning of the mechanical components is completed, all steps should be performed in reverse order.
1. Install the fan on the radiator so that all latches are secure.
2. For the Intel kit, rotate the plastic ends of the mounting clip to their original position (90 degrees in the opposite direction of the arrow).
3. Apply some fresh thermal paste to the surface of the processor, spread it evenly with a plastic card. Install the cooling kit on the processor, screws (Intel) into the corresponding holes, and the spring-plate (AMD) hooked onto the plastic frame on both sides in series.
We suggest you read How to reduce font size on your computer
4. For Intel, press the two opposite screws until you hear a clicking sound and the pins are locked. Now do the same with the other two.
5. For AMD, hook the metal spring onto the plastic CPU frame. Then turn the lever clockwise to firmly connect the processor to the heatsink.
Secure the cooler lever
6. Connect the fan power to the appropriate connectors on the system board.
How to clean a computer cooler
In the same way, you can wash the main fan of the system unit.
It’s the easiest to work with, so if you see how much regular cleaning costs and don’t agree with this amount, go for it. Try it yourself. The advantage of a regular cooler is that it can be completely removed and cleaned on all sides with the same cotton pad and swabs.
To disassemble the mechanism, carefully remove it from the motherboard. After the cleaning process itself, you can peel off the protective adhesive tape and drop a little oil to make the device work more quietly. For all PC coolers, this algorithm remains unchanged.
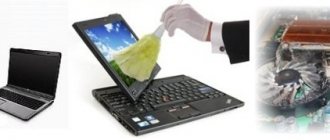
Cleaning your PC monitor screen
1. If possible, use products that have antistatic properties.
Cleaning agent with antistatic properties
2. Put a little foam on the cloth and wipe the entire computer monitor cover (except the screen), printers, etc.
3. To clean LCD screens, use another product designed specifically for this purpose.
Cleaning agent for cleaning LCD screens
4. Apply a small amount of LCD screen cleaner to a soft cloth. Wipe starting from the center, thoroughly cleaning along the edges. Once the screen is dry, you can turn on the computer.
Cleaning your PC monitor screen
What is a program for cleaning a fan on a laptop and is it effective?
The same cleaning process can be implemented using the program. In fact, such software does not do anything supernatural. It simply accelerates the cooler to maximum speed, causing the dirt to fly off on its own. However, this method rarely helps to cope with all problems and will not remove a huge hardened layer of dust from the cooler.
Is there a fan cleaning function in windows 10
If you don’t like third-party programs, you can use the built-in ones. For all modern laptops that come with an operating system, a special driver is preinstalled for it.
Finishing touches
Sometimes it happens that after such manipulations the computer refuses to work. This may be caused by the fact that when manipulating the power supply, the contact in one of its connectors may have loosened.
Therefore, the first thing to do if problems arise after “general cleaning” is to remove and reinsert all the connectors of the power supply into their places.
The main connector (20 or 24 pins) has a lock that you must press to release it.
The connector must be pushed in tightly until the lock clicks into place. A similar lock also has a 4-pin connector with a voltage of 12 V, which also connects to the motherboard.
It also happens that even after reconnecting the power connectors, the computer still “hits the wall” and refuses to work normally. In this case, you need to reconnect the memory modules, video card and other expansion cards.
The memory module has protrusions on its sides (short sides), and the connector on the motherboard has latches. To remove a memory module, you need to open the latches on both sides.
Sometimes, after several years of operation, contacts on not very high-quality modules or boards darken. Unfortunately, they have not been covered with gold (as before) for a long time...
Darkened contacts can be cleaned with a regular eraser.
But this must be done carefully so as not to tear off the conductive tracks from the base. After cleaning, you must carefully remove the “pellets” of worn-out gum from the contacts (with the same brush)
When installing memory or cards, grasp them by the edges and avoid touching the contacts with your fingers.
We remind you that manipulations with modules and boards should be performed with the power turned off. The power cable plug must be unplugged.
If you are afraid to look into your computer because you don’t know how it works, read the article. And again, and with the ending. And you will succeed!
If, after cleaning the dust, any overtones appear or the noise increases, then most likely there are some problems with the fan. If we already looked into the computer, then it would be nice to lubricate the fans!
We will tell you how the fan works and how to lubricate it in the following articles. Subscribe to blog updates so you don't miss out. Do you want to know how to perform keyboard maintenance?
Victor Geronda was with you.
See you again!
Why doesn't my computer or laptop turn on after cleaning the fan?
Sometimes after you have cleaned the cooling device yourself, the device itself refuses to start.
This happens for two reasons:
- Incorrect assembly.
- Damage to contactors and wires.
Try to disassemble it again for initial diagnostics. Check if everything was assembled correctly.
Why did the fan start to chirp after cleaning?
It's worse when all the components are working, but the annoying noise has not disappeared. On the contrary, it is intensifying. This also means that you made a few mistakes during assembly. Most likely, the blades of the mechanism affect the housing or radiator. Often they touch the power wires in some way.
Try to hang it evenly.
Timely and proper cleaning can save your computer from contamination. But don't take it on if you're not confident in your abilities. In this case, it is better to take the component to the so-called “dry cleaning” of a full-fledged service center.
Pros of timely cleaning:
- Overheating of components can be avoided.
- Dust will not accumulate in the computer.
- Spare parts will last longer.
Disadvantages of timely cleaning:
- To do this you will have to disassemble the PC.
- Its blades are quite fragile.
- The device can be broken.
It happens that the usual sound of your computer turns into a slight hum, which grows over time. In most cases, this same hum is produced by a dusty cooling fan. Because over time, the layer of dust that sticks to the cooler blades adds a lot of load when it unwinds.
p, blockquote 1,0,0,0,0 –>
As you understand, in this article we’ll talk about how to clean the cooler yourself at home.
p, blockquote 2,0,0,0,0 –>
Making your own graphite lubricant for the cooler
To prepare graphite lubricant, you need to take a few drops of synthetic machine oil and add graphite powder to it. Mix thoroughly until smooth. The result should be a graphite lubricant with a thick consistency.
Graphite for preparing cooler lubricant can be obtained by grinding off the lead of a simple pencil or brushes from a commutator motor on fine sandpaper. Some brushes are made from a mixture of graphite and carbon. Therefore, if you are not sure that the brush is graphite, then it is better not to use such a brush. Of course, it is best to use industrial-made graphite for lubricant.
How to clean the cooler in a computer. Step-by-step instruction
Disassembling the system unit
So let's get down to business.
p, blockquote 3,0,1,0,0 –>
- First, we need to disassemble the system unit; more precisely, we need to remove its side cover.
- To do this, turn the block towards you with its back side and use a “+” screwdriver to unscrew the 2 screws. Then press the lid and slide it forward.
- Next, we need to find out which of the coolers makes the biggest hum (noise), the one that is noisy and will be the most clogged. In order to find out which of them makes the most noise, turn on the computer and with the system unit lid open, listen to the hum of all the fans.
- After identifying the faulty cooler, so to speak, turn off the computer and disconnect the power cord from it.
As practice has proven, fan blades are most often susceptible to rapid clogging:
p, blockquote 4,0,0,0,0 –>
- video cards;
- power supply;
- processor.
Since we are not looking for easy ways, I will describe to you how to clean the power supply from dust and dirt.
How to clean the system unit - an enhanced and effective method
It is clear that you will need equipment to perform this operation. Here's what you should prepare in advance:
- Phillips and flat screwdrivers;
- napkins or dry cloth;
- brush or small brush;
- ethanol;
- compressed air cylinder – recommended;
- vacuum cleaner;
- thermal paste.
The next step will be to disassemble the system unit and each component. The process can take more than an hour if everything is done carefully, so be prepared.
Disassembling the system unit
At the first stage of disassembly, nothing difficult will arise for you. Usually one or two covers on the sides are removed. On some models they need to be pushed to the side with force. Before this, of course, on the back of the system unit you need to disconnect 4 latches or unscrew 4 screws.
From now on you need to be careful. In order not to forget where to connect what, take a photo of the contents of the system unit. This is especially true for beginners.
Next, turn the system unit over and place it on its side. And we begin the next stage of disassembly.
First of all, assess the condition inside the case - how dusty is it? The further goal is to disconnect the cables from their connectors and ports and unscrew the bolts securing the PC components: video card, sound card, RAM, and so on.
Removing the cooler and processor radiator
The cooler and radiator are one of the main problem areas for dust accumulation. Dust particles settle on fans very well, making their operation difficult.
In order to remove the fan, you usually need to unscrew the bolts on it from 4 sides, or bend the latches and remove the cooler. Also, do not forget to disconnect the cooler cable attached to the motherboard.
If possible, unscrew the bolts, disconnect the latches, or lift the radiator mounting bracket clamp and remove it, but very carefully. If it feels like it won't budge, it's possible that old thermal paste has caused the heatsink to stick to the processor.
If the radiator was removed along with the processor, then pry it off with some plastic card or a flat wooden spatula. And don't push too hard.
This is interesting: 7 effective methods to reduce computer overheating
Removing the processor
Removing the processor, as well as installing it, is very simple. There is a latch next to the socket that usually needs to be lifted up. Next, carefully remove the processor. Keep in mind that the legs on the processor can be bent and then not only will you not be able to insert it, but you will not be able to insert it at all. Although there are methods that can be used to straighten the legs.
How to remove a video card
First, disconnect all cables connected to the graphics adapter. Next you need to unscrew one or two screws that secure it to the system unit.
On some motherboards, you can simply remove the video card or other components, while on other models you need to bend the clip on the slot and then pull the element up.
Disconnecting RAM modules
So that nothing interferes with us during the cleaning process, we need to unscrew and remove almost everything. So, RAM modules are long strips that are secured on the sides with latches.
To remove the modules, you need to pull these latches to the sides on the sides. The strips should then be easy to remove.
We store all bolts and small elements in a visible place where they will not roll away.
What is a cooler?
In English, the word “cooler” is literally translated as “cooler”. In fact, this is a regular fan that circulates air inside the system unit or laptop. Thanks to this component, heat is effectively removed from heated surfaces.
I later found out that there is such a useful function that protects the hardware from overheating. By the way, not all models are equipped with such capabilities. And if the fan fails (or you forget to connect it), the consequences can be disastrous.
Why clean your PC?
Some people believe that cleaning a personal computer (PC) is not necessary, but this is not true. If you do not clean the system unit, dust will begin to accumulate in the heatsink of the central processor, motherboard chipset and video card. Dust coating on the surface of heat sinks reduces its ability to conduct heat, which leads to increased temperatures of PC components.
If there is a large amount of dust, even an installed fan will not be able to normalize the temperature, and the computer will begin to overheat. Therefore, to avoid overheating, they periodically clean the components of the system unit.
https://youtube.com/watch?v=qsqgkXYt9E8
https://youtube.com/watch?v=qsqgkXYt9E8
Why do you need to clean?
Over time, a lot of dust accumulates inside the PC, which reduces cooling efficiency and increases static charge. The temperature of vital elements rises, a slight burning smell appears, performance drops, and the cooler begins to operate louder. As you yourself understand, this is not good.
I strongly recommend checking the cooler regularly (at least once every three months, or if strange sounds appear inside the case) and cleaning it of dust.
How to clean your computer
To conveniently and quickly clean the system, you will need the following tools:
- dry flannel cloth;
- large brush or brush with a long handle. A narrow paint brush is best suited for these purposes. You shouldn’t take an artistic one - it’s too soft and small, it will be of little use;
- long tweezers (5–8 cm is enough). If you later plan to use it for cosmetic purposes, be sure to thoroughly disinfect it after cleaning your computer;
- vacuum cleaner with a narrow nozzle.
The monitor should be cleaned with special commercial wipes, sprays or foams. Be sure to choose a product that suits your display type.
Professional dust removal products
To clean the insides of the system unit, there is only one professional means - a compressed air cylinder (also called a pneumatic cleaner). You can buy it at any hardware store for about 300–500 rubles. The principle of operation is simple - a high-pressure air stream escapes from the cylinder nozzle and effectively blows out dust. The product is a great addition to your arsenal of computer cleaning tools - it allows you to quickly blow dust out of hard-to-reach places.
One cylinder lasts for several years of use, so the price is more than affordable
Video: how to use a pneumatic cleaner
What not to use
When cleaning your PC, eliminate wet rags and sponges from your arsenal. They are suitable for wiping the case from the outside, but not from the inside - this way you risk damaging the boards.
If you do not have a vacuum cleaner, then it is better to patiently collect the dust using a brush, cloth and tweezers, but do not resort to using a household hair dryer. Firstly, it will spread all the collected dust so that even a person without allergies will sneeze for about half an hour. Secondly, it will nullify all your efforts, because all this dust will again settle on the boards and processor in a short time.
When cleaning your computer, do not use cotton swabs. They easily split into small fibers upon contact with sharp parts. For the same reason, you should not use regular paper napkins. If you need to get to a hard-to-reach corner, it is better to wrap the screwdriver in a flannel rag.
When cleaning any part of the computer (be it the system unit, monitor or keyboard), do not use ethyl alcohol. It promotes oxidation of contacts, and can easily corrode the anti-reflective coating on the monitor. The result is a rainbow-colored, but not at all cheerful image.
Prohibited products also include washing powder, glass cleaners and other detergents, as well as products containing ammonia, acetone, and toluene.
Disassembly and general cleaning
- Turn off your PC and unplug the power cable, which is usually connected to the back.
- Using a screwdriver, remove the retaining bolts that hold the side cover in place.
- Place the system unit on its side so that the ASUS motherboard is at the bottom. Do you see how much dust has accumulated?
- First, we clean with a vacuum cleaner (only the power should be set to medium level).
- We remove hard-to-reach places using a brush. Be sure to wipe the surfaces of the board and radiators with a cloth, which we first dip in alcohol.
- How to clean the computer power supply from dust? We use the vacuum cleaner in suction mode, bringing the tube to all accessible holes in the power supply unit (especially on the fan side).
Using a brush and vacuum cleaner
Ideally, of course, it wouldn’t hurt to remove all the components, that is, disconnect them from the motherboard and clean each of them separately. But this will require a lot of your time, although in most cases it is enough to simply put the system unit on its side and clean it without removing or disconnecting anything.
It is best to use a brush with synthetic bristles for this procedure; static electricity will not accumulate on it, unlike a brush with natural bristles. I also recommend insulating the metal part of the brush, this one at the base, in order to avoid... well, I think you guessed what. The fact is that even after de-energizing the computer, residual voltage sometimes remains on its elements, and this must be taken into account, there are no trifles here.
Usually most of the dust accumulates at the very bottom, where it is not difficult to reach. Using gentle movements, we sweep away all the dust from hard-to-reach places in the system unit, mainly these are places for attaching cages with hard drives, the motherboard tray, and in general places near all coolers, and at the same time you need to keep a vacuum cleaner hose nearby so that the “disturbed” dust is immediately went into the vacuum cleaner, and did not scatter around the room and so that you did not breathe it.
Pay special attention to all kinds of coolers and radiators installed on components (video card, motherboard, processor). If you can’t sweep it out with a brush, try taking a thin screwdriver and use it to scrape off the pressed dust from the radiator elements and cooler blades, just be careful not to accidentally bend anything there. I suggest watching a video that talks about this in more detail:
In general, if there is a little less dust in your system unit than in the video, then you don’t have to waste time removing components. I don’t see the point in polishing the insides of the computer, because in a month or two all your efforts will “come to naught.” Well, okay, now I propose to move on to considering the second method of cleaning your computer from dust.
Cleaning the video card
After this, you can turn on the PC to listen to each of the fans. This will allow you to find out which of them is the noisiest (that is, problematic). Often, the cooler of the discrete graphics adapter is the most clogged.
- To clean it, you should disconnect the board from the chipset, after first disconnecting the VGA / DVI / HDMI cable that connects the card to the monitor.
- Now you can remove the cooler by unscrewing several fixing bolts. Don't forget to unplug the cable from the power connector:
- Carefully go over the blades with a brush and remove dust from the radiator grille. It can look quite scary:
- Try to leave as few fingerprints on contacts and tracks as possible. It is better to wipe the surfaces with a cloth and alcohol before installation.
Cleaning peripherals
The keyboard and mouse are the devices that the user touches most of the time, and the degree of contamination depends on their performance. These devices are real breeding grounds for bacteria without proper care.
Keyboard and Mouse
Before using cleaning products for your computer or keyboard, remove any stuck particles under the buttons, turn it over and gently tap the back of the keyboard with your palm, after laying it on an old newspaper. Use a brush if necessary.
We suggest you familiarize yourself with Cleaning fur at home: restoring the purity and shine of a product made from natural fur
1. Using a cloth with a small amount of plastic cleaner or a damp wipe, clean all flat surfaces of the keyboard.
2. The buttons on the sides may still be dirty. There are several ways to clean them, one of them is special keyboard cleaning sticks.
Special keyboard cleaning sticks
Cleaning keyboard buttons with special sticks
4. Mice have mostly dirty sliders (especially when you work without a mouse pad), so for your own comfort, remove these deposits regularly. It's easy to do even with your fingernail.
Cleaning a computer mouse
5. Using a damp cloth, wipe the handle top and bottom. It's best not to use foam on plastics because it gets into crevices where it's difficult to remove.
How to disassemble the cooler?
Having completed these simple steps, proceed directly to disassembling the fan itself:
- Peel off the label on the side where the wires are located.
- Using a sharp object, pry up the rubber plug and remove it.
- Remove the retaining ring with a slot on one side. To do this, insert the tip of a knife or thin screwdriver into the slot and turn it 90° so that it moves apart and lift the ring.
- Remove the rubber sealing ring framing the rod.
- Disconnect the impeller from the fan frame.
- Then you can clean and lubricate.
Remove the sticker and pull out the retaining ring
Following the retaining ring, pull out the rubber seal and separate the parts of the cooler
The procedure for cleaning the system unit of a desktop computer
The process of cleaning a desktop PC from dust consists of several stages, which will be discussed in this section. In general, this method is not too complicated, but it cannot be called simple either. If you follow the instructions completely, there should be no difficulties. The first step is to prepare all the tools that can be used when performing the procedure, namely:
- A set of screwdrivers suitable for your system unit for disassembling the device;
- Small and soft brushes for hard-to-reach places;
- Rubber eraser;
- Rubber gloves (if desired);
- Vacuum cleaner.
Once all the tools are ready, you can begin.
Be careful if you do not have experience in disassembling and assembling a personal computer, because any mistake can be fatal for your device. If you are unsure of your abilities, it is better to contact a service center, where they will do everything for you for a small fee.
Computer disassembly and basic cleaning
First you need to remove the side cover of the system unit. This is done using special screws located on the back of the device. Naturally, before starting work, you need to completely disconnect the computer from electricity.
If the last time you cleaned your computer was a long time ago, at this moment huge layers of dust will open up in front of you. The first thing you need to do is get rid of them. A regular vacuum cleaner, which can suck up most of the dust, is best for this task. Carefully walk it over the entire surface of the components. Be careful not to touch the motherboard or other parts of the system unit with hard objects, as this may damage the hardware components.
Once this is completed, you can move on to the next steps. For proper and high-quality cleaning, it is necessary to disconnect all components from each other, and then work with each of them separately. Again, be extremely careful. If you are unsure that you can put everything back together, it is better to contact a service center.
Disassembly occurs by unscrewing all the screws holding the components. Also, as a rule, there are special latches with which RAM or a processor cooler are installed. Everything depends solely on the individual configuration of the device.
Coolers and processor
As a rule, the largest amount of dust accumulates in the fan and radiator that are part of the processor cooling system. Therefore, cleaning this computer component is the most important. You will need a brush prepared earlier, as well as a vacuum cleaner. In order to remove the cooler, you need to loosen the latches that hold it in place.
Blow the radiator thoroughly from all sides to remove any loose dust. Next, a brush comes into play, with which you can get into each element of the grill and clean it perfectly. By the way, in addition to a vacuum cleaner, you can use a rubber bulb or a can of compressed air.
There is no need to remove the processor itself from the motherboard. It is enough just to wipe its surface, as well as the area around it. By the way, in addition to cleaning your computer from dust, this process is best combined with replacing thermal paste. We talked about how to do this in a separate article.
Read more: Learning to apply thermal paste to the processor
It is also worth paying attention to the need to lubricate all fans. If you have previously noticed extra noise when your computer is running, it is quite possible that it is time for lubrication.
Lesson: Lubricate the cooler on the processor
power unit
To remove the power supply from the computer system unit, you need to unscrew the screws located on its back. At this point, all cables coming from the power supply should be disconnected from the motherboard. Then it is simply taken out.
With the power supply it's not so simple. This is due to the fact that it not only needs to be disconnected from the motherboard and removed from the system unit, but also disassembled. This can be done using special screws placed on its surface. If there are none, try tearing off all the stickers and looking underneath them. Often the screws are placed there.
So, the block is disassembled. In general, then everything happens by analogy with the radiator. First, you blow everything with a vacuum cleaner or blower to get rid of unstable dust that appeared not so long ago, after which you work with a brush, getting into hard-to-reach places of the device. Plus, you can use a can of compressed air, which also does the job perfectly.
RAM
The process for clearing RAM is slightly different from that for other components. This is due to the fact that it consists of small slats on which not much dust accumulates. However, cleaning must be done.
Just for the RAM, it was necessary to prepare a rubber eraser or a regular pencil with an “eraser” on the back end. So, it is necessary to remove the strips from the slots in which they are located. To do this, you need to loosen special latches.
When the strips are removed, you should carefully, but not overdo it, rub the eraser over the yellow contacts. This way you will get rid of any contaminants that interfere with the operation of the RAM.
Video card
Unfortunately, not every craftsman can disassemble a video card at home. Therefore, in almost 100 percent of cases with this component, it is better to contact a service center. However, you can also carry out minimal cleaning using improvised means, which can also help.
All that can be done in our case is to carefully blow the graphics adapter into all the holes, and also try to get a brush to where it will go. It all depends on the model, for example, old cards do not need to be disassembled, since they do not have a case.
If, of course, you are confident in your abilities, you can try to remove the case from the graphics adapter and clean it, as well as replace the thermal paste. But be careful as this device is very fragile.
How to remove a video card
Many users do not understand how to clean their video card from dust. If you have an external video card with active cooling, that is, with a fan, then it also needs to be cleaned. We remove the video card. To do this, you need to unscrew the screws on the case that secure the board.
Afterwards, depending on the configuration of the slot, you should release or move the clamp to the side and carefully pull the board up. You can make sure that there is also a lot of dust in this place
That is why, using a vacuum cleaner and a brush, we carry out a thorough cleaning. Everything goes according to the principle of cleaning the cooler and processor: with a special brush we remove all the dust from the cracks and lift it into the air, vacuum it
We clean carefully so as not to deform the blades. Particularly contaminated areas are cleaned with alcohol.
Features of replacing thermal paste
Once all parts are completely cleaned, you can begin reassembly. Once again coat the processor with thermal paste. Thermal paste should be changed once every six months, but if you clean your computer more often, change it every time you clean it.
Apply the thermoplastic very carefully using the tip of your nail. It’s not a matter of saving, this manipulation ensures good thermal conductivity - the thermoplastic layer should be thin, so there’s no need to overdo it
Spread the paste with a clean finger or plastic card. You should cover the entire surface of the processor, while distributing the paste as evenly as possible, without gaps, and without crawling over the edges. We collect excess paste from the edges with cotton wool or a paper napkin.
We install the processor in its original place so that the corner marked with a golden triangle on it coincides with a similar corner in the socket. This is the only position in which the processor is positioned correctly. It fits into the slot on its own; you don’t need to press it. Then we strengthen it with a clamp.
We fix the radiator in place. To do this, you need to place the grooves of the bracket under the hooks, hooking them, and pressing the radiator with your free hand. It should be tightly attached and not loosen on the sides.
If your radiator is pressed to the motherboard with special screws, tighten them crosswise with uniform force. Afterwards, all that remains is to secure the fan and connect it to the device.
After finishing cleaning, you need to make sure that the cables that you disconnected inside are returned to their proper places and are firmly seated in their sockets. You can test turn on your PC without installing the cover. After making sure that everything works well, rotates and does not make any extraneous noise, close the system unit and begin comfortable and proper work with a clean computer.