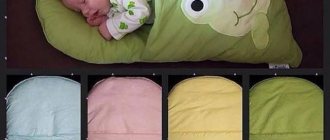
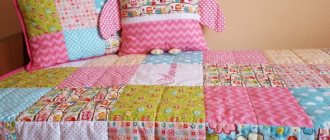
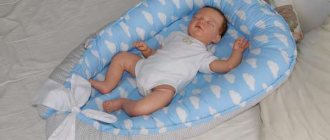
Do you want to sew a beautiful and comfortable envelope for a newborn? You can use the ideas from the article.
The envelope is essentially the first clothing of a newborn baby. In it, the baby is taken from the maternity hospital and taken for its first walks. By wrapping the body like a cocoon, the envelope creates coziness similar to that of the baby when he was still in his mother’s tummy.
Despite the fact that there are ready-made envelopes for newborns on sale, more and more mothers are deciding to sew this product with their own hands, and they have reasons for this. Thanks to patterns and step-by-step master classes, even a woman who has never sewed before will be able to create a discharge, summer and winter envelope.
Summer version of the envelope for discharge with your own hands, diagram
It is necessary to start with the fact that for a baby born in late spring or summer, an envelope is not always a necessary thing. After all, during a walk he will be covered with a maximum of a thin calico or cotton diaper.
But! And in the summer there may be a few bad weather days. During these times, the baby will feel more comfortable if he is wrapped in a cozy envelope.
IMPORTANT: Parents do not always buy summer envelopes to save money. But you don’t need a lot of money to sew a product with your own hands. Therefore, the expectant mother can have no doubt and get to work
To sew a summer children's envelope you will need:
- pattern
- graph paper
- scissors
- fabric and lace
- ribbons
- needles
- threads to match
- sewing machine
- tailor's pins
The envelope can be sewn according to the pattern, as in the picture.
Pattern for a summer discharge envelope.
- It is transferred in real size to graph paper
- All parts of the envelope will be double-layered. The outer layer is jacquard or satin, the inner layer is cotton fabric. For both materials take 135 cm by 80 cm
- The paper pattern is pinned to the fabric, outlined, and seam allowances are made.
- Cut out the envelope blank
- The inner and outer layers of the envelope are sewn together using a sewing machine.
- The lace is hand gathered into frills and attached to the top of the envelope.
- The remaining edges of the product are processed with an overlocker. They can also be trimmed with ribbon or lace.
- Ribbons are sewn to the envelope
Summer discharge kits.
IMPORTANT: Mom can do more - sew the baby not only an envelope, but also a whole set for discharge in the summer - a delicate suit - a bodysuit, a thin hat. If she knows how, she can crochet them
Materials and quantities for sewing
Sewing envelopes for newborns is a simple task that takes very little time. The main thing is to correctly calculate how much fabric, thread, etc. is needed. As a rule, beginning craftswomen use templates that can be found on the Internet or in a store.
Textile
The fabric should be exclusively natural, as it does not float, but warms the child. It is not necessary to completely wrap him up, since his heart beats much faster than that of an adult. This causes blood to circulate faster and body temperature to be significantly higher. Cotton is suitable for summer. Size – meter by meter, no more.
How to do it yourself
Threads
The threads must be strong and unbreakable. Preferably in the color of the fabric so that it does not stand out against the general background. It will be aesthetically pleasing and beautiful. One skein of thread is enough to secure everything well.
Decorations
If you decide to decorate an envelope for a baby with lace or ribbons, you don’t need more than a meter. Too much, it’s no longer fashionable, but tasteless. The same thing with stickers, stickers, bows, rhinestones. Everything should be in moderation. It is necessary to maintain a certain style.
How not to overdo it with decor
If we talk about a clear quantity: no more than five stickers, no more than three bows, no more than four stickers.
How to sew a winter envelope for discharge with your own hands?
For the winter, parents usually choose not just an envelope for their baby, but a bag - overalls with a hood and sleeves. In this, even in cold weather, your baby will be able to comfortably and warmly sleep in a cradle or ride in a stroller.
Pattern of a winter envelope - bag.
Sewing items for winter is more labor-intensive. The envelope for a newborn is usually three-layered. Fabrics are chosen more carefully. So:
- The top layer should be warm, preferably waterproof and windproof. Usually this is raincoat fabric. But sometimes fur, tweed, denim, hemlock, etc. are chosen
- The middle layer is insulation. Sheepskin envelopes are prized. But some children may be allergic to this material. Modern mothers prefer padding polyester, holofiber and other synthetic fillers
- The bottom layer is breathable, hygroscopic, non-electrostatic, always natural. Usually it is fleece, cotton or jersey
In addition to sewing supplies, to sew a winter envelope like the pattern below you need:
- materials for the outer and inner layers, insulation - 120 cm by 150 cm
- zipper fastener
- elastic bands for sleeves
- drawstring for hood
- appliques, other decor as desired
- The pattern is transferred to paper
- The details of the envelope - overalls are cut out (with seam allowances)
- The layers of the product are ground off
- Sleeves are sewn down and sewn into products
- Sleeves are complemented by elastic
- The side seams of the envelope are sewn down
- The hood is gathered and attached to the overalls
- A cord with a drawstring is inserted into the completed facing in the hood
- A zipper is attached to the envelope shelf
- The finished product is decorated
Ready-made winter envelope - bag.
Fabric selection
An envelope for discharge from maternity hospital is a product designed to protect the baby from wind and cold. A few decades ago, a regular baby blanket was used instead, which was rolled up and tied with a satin ribbon. When making an envelope for a child, you need to take into account the following points:
- at what time of year the discharge will take place;
- gender of the baby.
The main criterion that must be taken into account when choosing a material is that it must be hypoallergenic and safe. It is best to give preference to natural fabrics. It is especially important to adhere to this rule when choosing material for lining the product. A light summer envelope for a baby can be single-layer or with a lining.
Most often the following materials are used for manufacturing:
- cotton fabric – does not cause allergies and does not interfere with air circulation;
- satin - a smooth fabric woven from 3 threads, has increased strength;
- calico is a strong material that allows air to pass through;
- poplin is a natural fabric that is hard to the touch.
If desired, each of these materials can be used to sew an envelope, since they are safe for newborns and are guaranteed not to cause an allergic reaction upon contact with delicate baby skin.
Since summer is not always hot, it is recommended to make a lining in advance in case of cool weather. It is best to use holophane, which is an analogue of isosoft, as insulation. If desired, you can add a second layer of calico, which will prevent blowing.
Winter envelopes consist of two parts - an outer part and an inner part with a lining. The top layer of the product is sewn from warm, dense material. The following fabrics are most suitable:
- plush;
- fleece;
- grass;
- artificial fur.
Also, some mothers use satin to sew the outer part. For the inner layer, it is best to choose flannel - a safe hypoallergenic fabric. It is recommended to take as insulation:
- padding polyester;
- fluff;
- holofiber;
- sheepskin;
- bamboo fiber.
Each material has its own advantages and disadvantages. You need to choose fabric according to individual preferences and financial capabilities. To give the envelope a festive look, use ruffles, frills, and ribbons. Also, such a product must be equipped with special fittings: zippers, rivets, Velcro. If desired, you can tie the envelope with a regular satin ribbon.
As for color design, the most common shades for children's envelopes are pink, blue, white, lilac, and gold. The last three options are universal. They are suitable for both boys and girls. The only thing that is not recommended for sewing a discharge envelope for a newborn is fabrics with complex patterns and colorful prints.
Calico Plush
Poplin
Satin Fleece
Cotton
How to make a transforming envelope for discharge with your own hands? Patterns and sizes
The envelope, which folds out into a blanket, is very convenient and practical. With its help, you can organize a sleeping place for your baby anywhere.
It is simply sewn. You need to prepare:
- Fabric – 2 or 3 layers depending on the season. You will need squares of 1.1 m by 1.1 m for the main product and 50 cm by 30 cm for the pocket
- Fasteners - zippers. You need two of them. The first, measuring 50 cm, will connect the front of the envelope. The second, 30 cm, will be sewn on top. When buttoned, it will form a hood.
- Elastic band – 50 cm, drawstring
- Decor – ribbons, lace, organza, appliques, etc.
Pattern of an envelope - a blanket.
- The pattern is transferred to paper and cut out
- The details of the envelope are cut out - blankets from all layers of fabric
- The pocket is stitched down. You can decorate it as you wish. A 2 cm seam is prepared under the elastic band. An elastic band with a drawstring is inserted
- The layers of the blanket are connected so that they do not crumple
- A pocket is attached to the blanket
- A 50 cm zipper is sewn to the sides of the blanket, which will form the envelope shelf.
- A 30 cm zipper is sewn with the edge from the middle of the top of the blanket
- The decor of the transformable envelope is being produced
The finished envelope is a blanket.
Step-by-step instruction
It's no secret that the success of sewing a particular product largely depends on quality tools. By making sure that the scissors are sharp, the needles are comfortable, and the chalk or pencil is visible enough, you will ensure that your work is pleasant and fruitful.
Cutting the pattern and sewing does not take much time. The main thing is to have good tools and prepare materials in advance so as not to waste time searching for missing parts.
So let's get started.
- Let's make a pattern.
- From the fabric for the outer and inner sides of the blanket, as well as from padding polyester, we cut out identical squares according to the pattern. They should be 1 cm larger than the planned size of the blanket.
- On the cut-out square of padding polyester we place two fabric squares, folded with their front sides facing each other.
Sew, leaving a small section free from stitching. Important: before you start stitching, baste or pin the fabric and padding polyester with pins. In this case, you will get the most even stitch possible. - Turn the blanket inside out and sew the free section.
- To ensure that the product does not lose its shape and lasts as long as possible, stitch the blanket so that it looks like a quilt. It is better to lay diagonal stitches so that diamonds remain on the canvas. The line should be small.
To preserve the product in its original form, extend its service life and give additional strength, it is necessary to stitch the blanket diagonally with a fine seam, creating the contours of diamonds.
DIY envelope for a girl
Envelopes for newborn princesses are delicate and elegant. According to tradition, they can be pink. But you can choose any other color. Here are some ideas for inspiration.
Pink envelope for a girl with lace. Delicate envelope for discharge. Envelope for a girl with original decor.
Envelope for a newborn princess.
Envelope for a girl with Mini Mouse. Mint envelope for a girl. Patchwork discharge envelope.
Elegant decor
When choosing decor, you need to be guided not only by your preferences, but also take into account the gender of the child. It is better to decorate an envelope for a girl with flowers or animal figures. For a boy, it is recommended to choose cars or geometric patterns. The most common options are:
- laying out figures from multi-layered lace;
- creating flowers and bows from satin ribbons;
- decoration with glass or plastic beads;
- fixing decorative fur pompoms;
- beadwork.
If desired, you can simply sew a colored 3D applique onto the top layer. When attaching decorations, it is important to place them in a place that the child will not come into contact with. It is also advisable that the decor is not too voluminous, as this may make the envelope inconvenient to use.
DIY envelope for a boy
Here are examples of cute envelopes for newborn boys. By the way, not all of them are blue.
Classic blue envelope for a boy. A hand-sewn warm blanket envelope for a boy. Envelope for the little gentleman. A funny envelope with cars. Envelope with stars. Winter envelope for a newborn boy.
Locks
Sew the side front pieces to the middle front piece from the neckline to the bottom. We pin the facings face to face and sew the frame from the wrong side.
Next, we rip the seam, not reaching about 2 cm from the bottom edge of the frame, and cut it to the corners. We cut off the insulation close to the stitching, turn the facing inside out and lay a stitch, removing 1 mm from the edge.
We pin the lock to the wrong side of the frame, having previously made fabric stops at the bottom.
We sew down the windproof strips, cut off the seam allowances close to the stitching, turn them inside out and stitch along the edges.
We pin the bar under the lock. For reliability, we baste the lock and the bar and only then sew along the line of the frame.
We do the same with the second lock.
We connect the parts of the back and the shelves of the upper part of the bag, placing them right sides together, and cut off the insulation close to the stitching.
Original and beautiful do-it-yourself envelopes for discharge, photo
The set includes an envelope and an original hat for a newborn. Summer discharge envelope. Envelope - a blanket with a drawstring for a girl. Winter discharge envelope. Summer envelope for newborn discharge. Envelope with ruffles. Fur envelope. Envelope with a cap.
Required Tools
To make the work of sewing an envelope for discharge with your own hands as easy as possible, you need to stock up in advance with all the equipment that you will need during the work. To make summer and winter versions, you need the same tools:
- graph paper;
- sharp scissors;
- several needles;
- pins with colored heads;
- chalk for outlining;
- threads matching the tone of the material;
- sewing machine.
The expectant mother is recommended to print out the patterns in advance, which will be used to sew the product. Working with them is much more convenient than with electronic layouts. In addition to tools, for sewing you will need the material itself, accessories (zippers, buttons, Velcro or ribbons), as well as decor. With minimal experience, you can sew a blanket for discharge in a day. If the simplest option is chosen, the work will only take a few hours.
Fastening methods
You can fasten an envelope in different ways. For fastening, you can use ordinary Velcro, which are sewn to the finished product. To determine where to place the tape pieces, fold the blanket and place marks in the desired location.
You can also secure the folded blanket with tape. This ribbon is decorated with bows and brooches. You can also make bows yourself from leftover fabric. You can get decorating ideas from the photos of blankets for discharge.
If this product is intended for a boy, it is better not to use lace decoration. It would be more appropriate to make a strict style bow in the form of a tie.
The advantage of such an envelope is that in the future it can be used for a long time as a regular blanket, and can also be wrapped around a child in a stroller.
Incorrectly calculated blanket
If you end up with a large blanket, it will be inconvenient to use with a small child. It will not fit in a crib or stroller.
But a small cloth will not be able to completely wrap the child.
If you want to place a blanket in a duvet cover, you need to remember that in stores there is mostly a standard size.
A blanket for a newborn should be knitted close to standard sizes and all the features of its use should be taken into account.
Example:
For a standard baby cradle, the length of the product can vary from 1-1.2 m and a width of 70-80 cm.
In order for the child to sleep comfortably and the blanket not to slide off during sleep, the sheet can be made a little larger: 100*130 and the excess can be removed under the mattress.
The product size 90*130 cm is perfect for walking.
For summer walks you can use openwork knitting size 100*100cm.
Of course, each mother chooses the size of the blanket, based on her own wishes and capabilities.
Photos of blankets for a newborn
Sources- https://o-krohe.ru/pledy-i-pokryvala/dlya-novorozhdennyh/
- https://weqew.ru/postelnye-prinadlezhnosti/pled/dlya-novorozhdennogo-2
- https://podelki.expert/pled-dlya-novorozhdennogo-foto/
- https://kpoxa.info/raznoe/vyazanyj-pled-novorozhdennogo-vypisku.html
- https://berkem.ru/tekstil/vyazhem-detskij-pled-spicami/
- https://natrukodel.ru/vyazanie/pled
- https://vivatvyazanie.ru/idei-dlya-detskih-pledov-spitsami/
- https://hendmeid.guru/vyazanie/detskiy-pled
- https://larecmasterici.ru/vyazanie/pled-dlya-novorozhdennogo-vyazhem-spicami-dlya-malchika-i-devochki.html
- https://osp-sakhalin.ru/bolezni/razmer-pleda-dlya-novorozhdennogo-spicami.html
- https://kidbooms.ru/opisanie-pleda-dla-novorozdennogo-spicami-podrobnaa-shema-vazania-dla-nacinausih-s-posagovymi-foto/
[collapse]
Preparing for knitting
Before starting work, you need to choose a knitting method (knitting or crocheting), suitable threads and decide on the dimensions of the product.
How to choose knitting needles?
Long knitting needles of different thicknesses are suitable for different yarns and different patterns
Relatively long knitting needles - more than 80 cm - are best suited for a blanket for a newborn; the thickness should be chosen according to the yarn used - from No. 3 to No. 6.
There are a huge variety of techniques for knitting children's blankets, so the choice depends only on your taste and visual preferences.
Calculation of the amount of yarn
To find out how many threads you will need to knit a blanket, you need to first knit a square with a side of 10 cm and then wash it.
Important! Pre-washing a sample product is necessary to assess how the size of the blanket will change after it.
Next you need to do:
- Measure the side of the knitted square after washing and drying. Calculate how many such pieces will be in the finished blanket;
- Calculate the number of loops in order to know how many of them will need to be cast on for knitting;
- Unravel the square, after measuring the length of the threads that were used;
- Multiply the resulting figure by the estimated number of squares.
Important! If the package of yarn contains information only about weight and not about length, then the pre-knitted and washed square does not need to be unraveled, just weigh it.
Additional factors that can affect yarn consumption:
- thin threads are consumed more;
- knitting dense patterns requires an increase in the amount of yarn, openwork - vice versa.
