How to tell if your laptop needs cleaning
You can understand the fact that it’s time to clean your laptop from dirt by the following signs:
- the device gets very hot;
- when turned on, a strange growing noise is heard;
- the fan works, but does not cope with its task;
- programs freeze when running;
- there is sticking of buttons;
- The device takes a long time to turn on;
- In some cases, when the laptop overheats, it turns off on its own.
All these signs indicate that the hour has come, and the laptop requires cleaning.
Soft cleaner to help
Don't be surprised by what I just said. You can eliminate clutter inside the case without disassembling the laptop. The essence of the method is that a specially downloaded utility accelerates the cooler to incredible speeds and knocks dust off the blades in this way. This method is suitable for new, not too dirty laptops. The program will not be able to remove the layer of dust that has hardened over time. Be careful and do not download unknown programs from the World Wide Web. I recommend using SpeedFan.
Existing types of laptop cleaning
Ways to clean your laptop from dust:
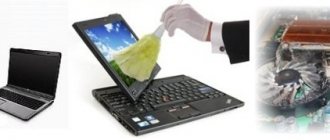
- Superficial - external cleaning of the laptop: case, screen, blowing dust from the outside through the fan holes. All this is a preventive measure not only for the device, but also for the health of the owner, since dust is extremely dangerous to health.
- Deep - complete disassembly of the device, cleaning every part from dirt.
Read more about ways to clean your laptop screen here.
Tools required for cleaning
- Vacuum cleaner/hair dryer for sucking up dust.
- Compressed air cylinder. It is similar in type to a hair dryer.
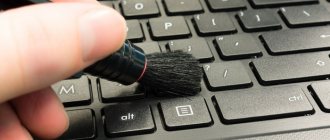
- Soft brushes and thin brushes for cleaning the keyboard and other small crevices.
- Cotton swabs and disks.
- Microfiber cloth for cleaning.
- A set of Phillips screwdrivers of various diameters for disassembly.
But for the “general wash”, you need to prepare:
- Machine oil to lubricate the cooler.
- For wiping microcircuits, use isopropyl alcohol.
- Thermal paste for cooling the device.
Liquid cooling systems
Liquid systems marked with their appearance a new stage in the development of PC cooling systems. The liquid began to be used to “extinguish” the hottest spots in the system unit. The liquid in such systems is either ordinary distilled water with the addition of alcohol, or antifreeze. Some extreme cooling systems are filled with liquid nitrogen.
cooling systems are filled with liquid nitrogen
The liquid cooling system can be divided into three technical units: heat exchanger, radiator and pump. All nodes are connected to each other using tubes into one closed circuit. The water block (heat exchanger) is responsible for transferring heat from the heated element to the fluid flow. The pump ensures the circulation of this liquid. The radiator is used to cool the liquid. The process is then repeated in a circle. In addition, liquid cooling systems based on the principles of evaporation are produced. Any fluid system is characterized by two key factors: the speed of fluid circulation and the efficiency of the cooling radiator (depending mainly on the size and material of manufacture). Liquid cooling systems today are sold either already integrated into the system unit, or as separate components intended for self-installation.
How to clean your laptop from dust without disassembling it
Superficially cleaning a laptop from dust at home is a fairly simple procedure. At the bottom there is a ventilation inlet grille - an opening for air to enter the cooling system. From the fan blades, the cooled air passes further to the video card and processor, lowering their temperature. At the end there is a fan grille through which heated air is blown out of the equipment. If you do the cleaning yourself, it is better to do it with an emphasis on the fan grilles, since a lot of household debris gets in there. Using a vacuum cleaner, you can remove small particles of dirt from the depths of the grate. How to do this as efficiently as possible?
- Disconnect the device from the network.
- Place it edge-on, like an open book.
- Remove the attachment from your household vacuum cleaner.
- Bring the tube of the switched on dust fighter to the grille and hold it there for 2-3 minutes.
- It is more convenient to clean the entrance to the ventilation with a can of compressed air. It is sold freely in any construction and technical market. The elongated aerosol nozzle is easily inserted into the ventilation compartments. When pressed, air comes out of the spout, which rotates the fan blades and removes dust from it. This is done like this:
- Turn the equipment over and blow out all the crumbs between the keyboard buttons with a balloon.
- Place the laptop on its edge and clean the ventilation outlet.
- Return to normal position and blow through the entrance.
This is a method for non-professionals, and experts recommend carrying out such preventive cleaning quite often - once every 2-3 months. This will improve the performance of the laptop and extend its service life.
Why and who needs this?
The fan in a laptop is designed to cool all the main systems of the device during operation. The principle of its operation is quite simple. It draws in cold air from the surrounding area, thereby reducing the temperature of the operating components of the laptop computer.
If this process is blocked for some reason, then the lack of direct air flow can cause:
- Melting and failure of the video card
- Device processor overheating
- Solder parts to each other
- Spontaneous shutdown of the laptop.
Remember! Replacing a microcircuit or any other part will ALWAYS be much more expensive and more troublesome than cleaning the device fan.
The laptops that are most susceptible to contamination are those that are frequently transported or placed on a carpet while working. Laptops of cat lovers and long-haired dogs are especially at risk. Yes Yes! Do not be surprised! It is this category of owners that needs to clean the fans every 3-4 months. More than one Samsung “flew” from fine animal hair. For everyone else, an audit every 6-12 months will be enough.
If there is increased noise generation in the cooler, excessive heating of the device during operation and constant shutdowns, clean it immediately.
Do-it-yourself comprehensive laptop cleaning
If simple methods do not help or the equipment has not been cleaned for several years, a comprehensive cleaning will be required with disassembly of the entire case.
Removing the back cover
The first step is to open the laptop to get to the contaminated parts. To do this, unscrew the bolts holding the panel at the back using a Phillips screwdriver of the required diameter. Twist them counterclockwise. On some models, only the portion of the panel above the vent is removed, rather than the entire cover. Collect the unscrewed bolts in a container so as not to lose them. If the cover does not budge, do not force it, but double-check that all the bolts have been removed. After removing the cover, wipe it outside and inside.
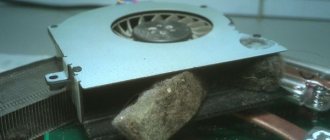
Radiator and cooler
- First of all, find the cooler and radiator. The cooler looks like a fan in a square or round frame, and the radiator is a box with a grille. They can be blown out with a vacuum cleaner or a spray can, and dust from the microcircuits should also be blown out. But you need to use the vacuum cleaner very carefully so as not to damage fragile parts. The handset must not be brought close to or touch the circuits.
- Unscrew the screws that hold the fan in place and put it somewhere else. Remove the fan, disconnect the cable leading to the microcircuit. Wipe the blades with a brush and blow air through the area where the cooler was located.
- For prevention, lubricate the engine with machine oil by dropping a drop inside. Return the device to its place, attach the cable and tighten the bolts.
- Thoroughly clean the radiator with a thin brush to remove old thermal paste and dust accumulations.
Video card and motherboard
- The motherboard is the most fragile part of a laptop, so you need to remove it very carefully. Walk over the surface with a soft brush slightly moistened with alcohol and blow off the microcircuits and contacts.
- Remove the processor from the slot as carefully as possible. Pull the socket pedal (the connector where the processor is inserted) slightly to the side and lift it up. The pedal should be vertical, then grab the processor by the sides and remove it from the connector. Go over the contacts with a cotton swab dipped in alcohol.
Replacing thermal paste
Cleaning the ventilation system involves changing the thermal paste. Remove any leftovers. If it's dry, rub it with an alcohol wipe. Be careful, there should be no scratches. Apply the paste a little at a time, spreading it with your finger or spatula (included) over the radiator plate.
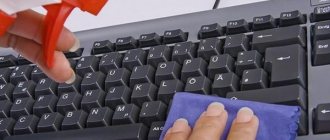
Cleaning the keyboard
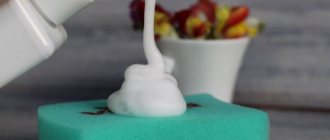
The keyboard is perhaps the dirtiest place on the computer. If it is not very dirty, wipe it from the outside with special napkins for equipment or a cloth soaked in a soapy solution. Wring out the cloth, soap the buttons, rub to remove dirt and soap, and wipe dry. It is important not to damage the markings or flood the keys.
Cleaning the connectors
Internet or USB ports can also become dirty. This periodically causes problems with connecting flash drives, phones and mice. Take a brush with long bristles. If the hole is narrow, then simply cut a strip of plastic along the width of the slot and cover it with double-sided tape. Dip the Velcro in alcohol and let it dry thoroughly. Lightly wipe the ports and blow them with compressed air.
Screen care
The monitor should not be rubbed with compounds that contain alcohol, as moisture may damage the screen. Buy alcohol-free wipes for LCD screens or a spray solution. Rub so that there are no streaks left. It is better to do a complete cleaning once a year.
Passive cooling systems
Radiator
Passive cooling systems have taken the lead in the evolution of cooling equipment for computer equipment. They owe their name to the absence of moving mechanisms, and they also do not have any power sources. A conventional radiator is the most common representative of a passive cooling system. The principle of its operation is based on the principles of heat exchange with the environment due to natural convection of air flows. The main factors in the efficiency of any radiator are its surface area and material of manufacture. The larger the surface area of the radiator, the more heat it can dissipate. With the further increase in the operating temperature of computer components, the area of the radiators had to be increased, which in turn led to the appearance of wave-like shapes of the radiator fins; they began to acquire a large number of tiers, etc. The first radiators were made from a fairly cheap and easy-to-process material - aluminum. But later, with an increase in PC operating temperatures, the dissipating power of aluminum became insufficient. Therefore, it was replaced by a more expensive, but at the same time having better characteristics, material - copper. At first, only cores in radiators were made from copper, later they began to make radiators entirely from it. There are, of course, materials with greater thermal conductivity than copper, but such “refrigerators” are no longer intended for the average computer user. Later, heat sink pipes began to be used in PCs. The heat sink is a closed metal tube (usually made of the same copper) from which air has been evacuated. Inside such a tube contains a certain amount of liquid, and it also contains a special capillary system. The liquid, starting to evaporate on the hot section of the tube, instantly transfers heat, distributing it evenly over the entire length of the tube. This liquid then collects into condensate in the cold area and returns to its original liquid state.
Radiator cleaning
Such heat pipes are many times more efficient than metal rods of the same diameter. But such tubes are not used for direct cooling. They are used exclusively when removing heat from a heated component to a cooler part of the computer, where it is possible to install a massive radiator that will dissipate the heat brought by the tube. But modern computers cannot be cooled exclusively using passive systems. Therefore, they are used alone only in the least hot spots of the PC. In other cases, an active cooling system is used.
How to prevent your laptop from getting dirty again
In order not to constantly clean the inside of the laptop, and to prevent dust from accumulating in the laptop for as long as possible, use these tips:
- use equipment on a hard surface - dust from the carpet or bed clogs the grille;
- do not eat while sitting at the computer - crumbs may get inside;
- spilled tea or coffee can completely kill the device;
- turn off the laptop when the work is finished;
- Clean your device regularly.
A laptop is a convenient portable device, and proper care is the key to its reliability and safety. Was the information useful to you? Write about your impressions in the comments below.
Problems after assembly
In some cases, due to inexperience or in a hurry, you can put the device back together incorrectly. The laptop may not turn on or may crackle when starting up. Do not panic! Most likely, you moved some parts out of place while cleaning and the fan blades touched the wires. A few millimeters can be critical and affect the operation of the laptop. Disassemble the laptop again and carefully reassemble it.
The most important sign that you did everything right is that the laptop is quiet and more responsive to all user commands.