Leather furniture wears out over time and loses its respectable appearance. If you don’t want to part with your favorite chair or sofa forever, you can update it by painting it. Fortunately, paint for leather furniture is sold in a huge assortment today in many hardware and shoe stores. All that remains is to choose a composition that matches the color, find a convenient place for painting - and you can get to work.
Is it possible to paint furniture yourself?
Leather furniture is a high-quality, comfortable and stylish interior frame. But even the highest quality leather changes color and wears over time, various cracks and obvious abrasions appear. The best way to refresh old furniture is to paint it a new color. Therefore, you can paint leather furniture yourself.
Scuff marks on leather upholstery can be repaired by painting.
The main thing in the process is to follow the stages of work and basic safety rules. Painting furniture will give it a new life, so if you want to update the interior in this way, you can safely get down to business after familiarizing yourself with some of the nuances.
If you follow all the recommendations, you can return the product to its original appearance.
Paint a bag or suitcase
Have you been wanting to update your bag or suitcase?
Don't delay, but start making your desires come true! Prepare the necessary materials:
- Paint (we recommend using acrylic).
- Acetone for dilution.
- Items for applying dye (brush, sponge).
- Items for working with paint (palette).
- Gloves for work.
Advice! If you don't have a special palette (or a palette from a children's painting kit), you can replace it with regular aluminum baking foil.
Carefully read the instructions for painting leatherette items. Doing the job according to these tips will help you get a good result.
- Prepare the bag for painting by thoroughly cleaning and drying its surface.
- Prepare the paint. Apply some paint to the palette or foil. It shouldn't be thick. To dilute, use acetone.
Important! Please note that acrylic dries quickly. Do not squeeze a large amount of paint onto the palette at once; it is better to add it as needed.
- Mix the squeezed out paint with a brush or sponge.
- Start painting. Try to apply the dye evenly, in long strokes.
- Once completely dyed, leave the bag to dry. This will take 15 to 20 minutes.
- Apply 2nd coat. If you are not completely satisfied with the result, after the 2nd layer has dried, you can paint it again.
- Let the bag dry on its own; do not place it near heating appliances.
Which paint to choose
There are many options for how to paint a leather sofa at home. There are more than thousands of paints in stores, but not all of them are suitable for leather upholstery. One of the most important factors of choice is the minimum value of toxins in the composition and the speed of drying. There are two proven means for updating the design of a sofa or chair.
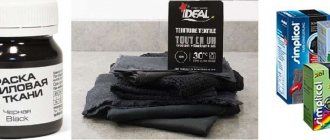
Special paint
Special paint is sold in leather or shoe stores. Impregnations or sprays can be passed off as paint, so you need to be careful. They will not be able to paint the skin well, as they are intended for care.
Special paint for leather can be bought in stores.
There are many forms of paint release. These can be: aerosols, balloons with a foam tip (any other soft and porous materials), jars with sealed lids.
A specialist and someone who has ever done painting says that options with sprayers are much more convenient. Sprays and aerosols are distributed more evenly without drips. If desired, you can easily apply a second and even a third layer. This way, problem areas are painted over more thoroughly.
Aerosol is the most convenient form of paint release,
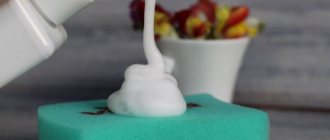
The spray can with a foam nozzle is easy to use. But it is more suitable for finishing small areas. It will be difficult for them to paint the entire product. The cost of this option is less than that of aerosol ones. But operation is much more difficult and longer.
A spray bottle with a tip is suitable for painting small areas.
Paint in a jar with an airtight lid is the most affordable option. But in the process of work it will cause many problems. You will have to paint with a brush. It will leave traces and stains. Therefore, this option is suitable only for those who are absolutely sure that they can handle it. It’s easy to ruin the upholstery of a sofa, but it’s difficult to return it to its original state.
Paint in a can is the most budget-friendly option, but it will be more difficult to work with.
Folk dyes
Folk dyes are also sometimes used, but this is the most unreliable method. They take a long time to dry and can quickly wear off during use of the sofa. If you want to paint leather furniture with high quality, then it is better to give preference to ready-made special paints. This way the result will definitely not disappoint and you will be able to save the sofa or chair.
Experts recommend painting over even small cracks with specialized paint, and not with folk dyes. Leather upholstery is very fancy and requires proper care, and if you smear it with various decoctions, it will not last long.
Preparing for painting
When starting to paint a sofa or other leather furniture, you should prepare the following items and materials:
- leather paint;
- alcohol or acetone to remove stains;
- soap;
- rags;
- water sprinkler;
- finishing coating;
- respirator and rubber gloves.
When everything necessary is ready, you need to take care of the location of the work. It is best to take the object to be painted into fresh air: into the yard or onto the veranda. If this is not possible, then you need to move the furniture away from the walls and other interior items, cover the floor with plastic film or paper, open windows and doors for better ventilation.
When painting, tiny aerosol particles can get onto neighboring objects. This must be anticipated and nearby things must be protected by covering them with film or cloth.
Now you can experiment with color. Light leather upholstery is easier to dye than dark leather. If the paint color does not match the intended one, you can mix the two compositions. True, this option is only possible if the paint is in a can.
Before starting work, it would be useful to check how the paint will lay down and what color you will get in the end. To do this, paint a small area of skin in an inconspicuous place and wait until it dries completely. Only after this will it be possible to draw the right conclusions.
The sofa or chair also needs to be prepared for painting:
- Using alcohol or acetone, remove various contaminants from the leather surface: felt-tip pen marks, grease and glue stains.
- Then the furniture is thoroughly vacuumed and wiped with a cloth soaked in soapy water.
- Use tape to protect those places and parts that need to be protected from paint.
- If the product has cuts or small tears, they are repaired with “liquid leather”.
- To complete the preparation of the sofa for painting, wipe the entire surface with a cloth lightly moistened with acetone.
Having equipped the place of work and prepared the object to be painted, it’s time to think about personal safety. The respiratory organs should be protected with a gauze bandage or a respirator. To prevent the aerosol from getting into your eyes, you need glasses. A work apron and gloves complete the outfit.
How to paint leather furniture yourself
Initially, you should set yourself up to paint the entire surface. You won't be able to match the color of the upholstery exactly. Therefore, partial painting of individual imperfections will stand out greatly. It will look as if the furniture was stained with paint during renovation and it was not possible to wipe it off. Before work, it is necessary to carry out the preparation stages. You can lay out for yourself in advance all the tools necessary for the painting process.
Preparing for painting
At the initial stage, it is checked whether the paint will adhere to the leather upholstery. This can be done by dropping a drop of water onto an inconspicuous area and rubbing in; if it is absorbed, you can safely prepare the sofa or chair for work.
- The surface of the leather product is thoroughly cleaned. There are two ways to organize this: take it to a professional dry cleaner or do it yourself. The second option will take longer. You should clean it yourself using steam, a vacuum cleaner, a brush or any other methods that will not harm the upholstery. Afterwards disinfection is carried out with acetone. All parts of the sofa, including armrests and legs, are brought into proper condition.
- After preparing the product, the workplace is put in order. Any type of paint can end up on floors and other surfaces. Therefore, it is advisable to cover them, and place the sofa itself on rags, paper or cellophane. The quality of ventilation in the room must be checked. The smell of paint is strong and can cause a headache or dizziness.
- Having prepared your workplace, it is important to take care of your safety. To prevent airborne poisoning, it is better to purchase a respirator.
Selection of tools and paint
Before painting, you should once again make sure that the chosen color matches the interior. It is necessary to take into account that it is much easier to repaint a light sofa into a dark one than a dark one into a light one. Painting with several types of paint will not work. It is important to decide which one to prefer: aerosol, regular in a jar or with a foam tip. The tools that will be useful depend on the paint.
Before starting work, you need to decide on the choice of paint.
List of required tools:
- Selected paint type.
- Disposable gloves made of thick rubber.
- Solvent, acetone is possible.
- Unnecessary rags or any other fabric products without lint.
- Brushes (only for paint in sealed cans).
- Sponges
- Brush
- Water container for spraying
- Cleanser (soap).
- Emulsion with a protective effect for leather upholstery.
Stock up on the necessary materials and tools.
Painting process
Before the main painting, it is important to do a test painting. It is more convenient and practical to do this in inconspicuous places: below, on the side or on the back. If the paint is absorbed evenly after rubbing and no peeling has formed, you can safely paint the entire surface.
Test staining is carried out on inconspicuous areas.
Important! When painting with several colors, it is better to cover individual areas with paper or film. This will help prevent colors from mixing and creating dirt.
Painting stages:
- The leather product is sprayed with water from a spray bottle to soften it. Visually divided into several zones. This way the work will be better organized and go faster. Processing occurs first in one zone, then in another, and painting is done in the same way. The first coat of paint may appear patchy. This is normal and nothing to worry about. With subsequent layers the color will even out.
- It is important to monitor for smudges; they should not appear. If the first applications were sloppy and it was not possible to avoid smudges and unevenness, you can blot the area with a sponge. To paint over folds, it is important to apply a little pressure to the surface to make them disappear. Do not allow dust or hairs to come into contact with painted leather upholstery. They should be removed immediately, since after drying this will not be possible.
- Don't get carried away with layering. Excessive use of dye may cause leather to become hard. The upholstery will dry out and subsequently crack even worse than it was before the restoration. Excess dye is removed with a damp, lint-free cloth.
Drying
It should be taken into account that subsequent layers are applied only after the previous ones have dried. After completing the last layer, the furniture must be left alone for 1 hour. Then gently dry it with a hairdryer at low temperature for 15-20 minutes, depending on the size and number of layers.
After painting is completed, the product must be dried with a hairdryer.
If cracks appear, too much paint has been applied. Nothing should appear on the furniture. With the correct technique, the surface after drying with a hairdryer remains smooth and evenly colored.
If too much paint has been applied, cracks may appear on the surface.
After the product has completely dried naturally, it must be wiped with a damp waffle towel. This will remove clumps and settled dust. The upholstery may stick together in some places. In this case, sandpaper will come to the rescue; the gluing areas are carefully processed with it.
It is important not to forget about the finishing touch – the sealing coating. It comes in two types: matte and glossy. The entire painted surface is treated with this emulsion with a protective effect. Afterwards it is wiped with a damp cloth.
After applying the finishing coat, wipe the surface with a damp cloth.
Step-by-step painting instructions:
Step 1: Prepare the room
- Place your leather sofa (or chair) in a well-ventilated work area.
- A garage or a lawn near the house is best, but if you live in an apartment and this is not possible, then open all the windows and cover the floor under and around the sofa with newspapers or oilcloth.
Step 2: Wipe the surface of leather furniture
Wipe down the sofa to remove any dust and/or dirt that has accumulated on the leather. To do this, use a rag with soap and water, wringing it well each time before washing the furniture. Water should not flow into the folds of the sofa, otherwise it will take a long time to dry; wipe with a slightly damp cloth.
Step 3: Clean the surface of leather furniture
Apply acetone to the leather to get a deeper clean and prepare the leather for painting. Pour some acetone onto a clean rag or washcloth and wipe the entire leather surface of the sofa.
Step 4: Lightly moisturize the skin
Spray some water on the surface of the leather sofa using a flower sprayer. Damp skin absorbs dye better.
Step 5: Apply paint
After spraying water, apply leather dye. Place some dye on a clean rag or washcloth and then rub it into the surface of the sofa. Be sure to wear gloves to protect your hands.
TIP: Work gradually on small areas of the surface. This will simplify the process and help achieve better coloring results.
- Spray one area with water, then apply dye.
- Then spray the next area and apply the dye. Continue until the entire sofa is painted.
Step 7: Wipe the surface
Use a dry rag to wipe off any excess dye after each area of the leather sofa has been treated.
Step 8: Leave to Dry
Let the leather sofa dry for about 1-2 hours and then apply another coat. You should continue to apply layers of paint until you get a color that suits you.
NOTE: Most leather sofas will require 3 to 6 layers.
Let the dye dry between each coat.
Step 9: Apply a protective layer of paint
Apply protective paint to your leather sofa after the last coat of paint has dried. It can be purchased wherever leather dyes are sold and is the final dye for leather products. Depending on which type you choose, you can create a glossy or matte surface of the skin.
Spray the protective paint onto the leather sofa and rub it in with a damp, clean rag. Leave to dry.
How to avoid mistakes
To prevent errors, you must strictly follow the instructions and observe all stages of work. Safety rules when painting must also be followed, otherwise furniture restoration may end badly. The most important aspects are briefly described to avoid mistakes:
- Do not apply paint to an untreated surface. It must be perfectly clean.
- Paint for coloring should not contain toxins, otherwise the product will be spoiled due to their excessive content and pose a health hazard.
- Before decorating each area, the skin must be moistened with water from a spray bottle.
- Do not start applying the first layer over the entire surface at once. It is more rational to do this in zones.
- Try to apply the paint evenly.
- Avoid entry of foreign particles. They can ruin the appearance, and it’s impossible to remove them without leaving traces.
It is possible and even necessary to breathe new life into old leather furniture. Leather products are strong and durable, so they can easily withstand more than one painting. The restoration process is a very painstaking work that requires attentiveness, perseverance and minimal skills in working with coloring agents.
By following the instructions for proper and high-quality painting, you can achieve an excellent result. The most important thing is to protect your respiratory and vision organs while working. You can paint only with thick gloves so that the paint does not get on your hands.
Tips and examples of painting
And now, for inspiration, we suggest looking at photographs of leather products before and after painting.
For example, you have a leather sofa like this, worn out from time to time:
And with the help of paint you can turn it into this:
- Moreover, if you choose a paint that is very different from the previous one, you will get a completely different sofa.
- You also need to pay attention to detail, also painting non-leather parts of furniture, such as handles.
Or this leather chair on which more than one book was read and dozens, or even hundreds of films were watched:
Such furniture is practically part of the family, and there is no question of throwing it away.
But in fact, this applies not only to furniture. In this way, you can revive any old leather items, such as bags or shoes.
So breathe new life into your favorite things and let them last for many more years!
Source


