In construction, polyethylene film is mostly used as a waterproofing agent or heat insulator when it comes to film greenhouses. Polyethylene has certain soundproofing properties, but not sufficient to use it as an independent sound insulator.
To glue polyethylene, you must first purchase the kind of glue that is used for gluing plastic.
Polyethylene and its properties
Polyethylene is a very common material with many excellent properties. It is used for insulation, for packaging, for protection from moisture, is an excellent electrical insulator, absorbs the most dangerous type of radiation - neutrons and is therefore used in protection against them, and is completely chemically resistant. This latter sometimes turns from an advantage into a disadvantage. How to glue polyethylene? Gluing is a chemical and a little electrical process, oddly enough. The molecules of the substances being glued are attracted to each other due to the difference in their electrical charges.
That is, there must be an adhesive in nature (and on the market) that adheres well to polyethylene, and when hardened, firmly holds the glued parts. So, the problem is that gluing polyethylene is very difficult. Its molecules are electrically very “balanced”, hence the extraordinary chemical resistance of the material. And a reluctance to stick to anything. However, the industry has found something to glue polyethylene with. True, not all of this is suitable for home, but some may come in handy. Here are the suitable methods, selected according to the resulting strength rating:
- Welding polyethylene
- Weicon Easy-Mix PE-PP Adhesive
- Epoxy glue plus oxidizing agent
We will consider these three methods further.
How to glue greenhouse film
To understand how to glue a film for a greenhouse, you need to distinguish what material is used for the structure and what properties it has. The choice of tool, the heating time of the edge and other nuances of soldering the artificial fabric depend on this, which should result in a uniform, even seam without holes or traces of thermal deformation.
Different types of film are used in the construction of the greenhouse:
- Polyethylene film is a non-flammable polymer that begins to melt at a temperature of +110...+130 degrees. Moreover, after cooling, it does not change its properties, remaining impenetrable to steam, gases, moisture and other substances.
- Reinforced polyethylene film - durable and resistant to any physical impact. The melting point is +120...+130 degrees Celsius. Structurally, it is a mesh frame with square cells (the thread material is fiberglass, lavsan, polypropylene, etc.), covered on both sides with polyethylene film. Unlike ordinary polyethylene, it has a rough surface.
How to combine plastic film for different types of greenhouses?
The main rule: you can only solder the same materials, for example polyethylene with polyethylene. Rough surfaces and edges made of different materials must be glued together using glue.
The technology for joining polyethylene is selected depending on the properties of the material. In the next subsection you will learn how to solder polyethylene film for a greenhouse at home.
Welding polyethylene
The strongest seam is obtained when welding polyethylene. If done correctly. The fact is that polyethylene is hot molded, usually under very high pressure, which reaches hundreds of kilograms per square centimeter. And when it is reheated at atmospheric pressure until it melts, it tends to shrink, a little, but this is enough to make welding difficult. Two types of welding can be distinguished: film welding and thick polyethylene welding (canisters, pipes, etc.)
To weld the film, heated objects or a special apparatus for gluing polyethylene, or more precisely, welding, are used. It works like this: both layers of film are pulled along a heated wedge, and then immediately welded with a pair of compressed rollers. With the correct selection of temperature and pressure of the rollers, an excellent result is obtained - complete sealing of the seam.
But with a little practice, you can learn how to glue polyethylene even with an electric soldering iron or iron through paper, so as not to spoil its sole. The clean edges of the film are placed on top of each other and driven through the paper with the edge of the sole of a heated iron.
A soldering iron with a clean tip, if turned on through the voltage regulator, welds the seam even better, and no paper is needed. You can also make a clamp on the tip with a small nozzle of a convenient shape made of metal. Then the tip can be used for its intended purpose, and the polyethylene will not be stained with solder or carbon deposits from flux.
Gluing thick polyethylene is more difficult and requires good skill. The best heating method: a portable gas burner (it’s convenient to use), or a hair dryer with a nozzle for a narrow jet of +250°C.
The procedure could be as follows:
- Thoroughly clean and dry surfaces before welding.
- Prepare polyethylene filler for the seam. It is best to take a narrow piece of the same material.
- Heat the edges of the seam until melting begins and let them “settle” a little. But don't get carried away with this process.
- Start introducing the additive (see point 2), fusing it evenly into both sides of the seam to a thickness equal to the material.
- Allow the seam to cool completely.
The same method is applicable when deciding what to use for gluing foamed polyethylene. The surface of foamed polyethylene is not very conducive to bonding, and it is better to weld it carefully.
For another method of welding thick polyethylene, see the video:
We glue the film at home
Avoiding calling specialists, some owners are wondering how to glue foamed polyethylene to metal, concrete or to each other. It is important to strictly follow the technological process, as well as consistently perform manipulations.
Often, repairing a roof, creating greenhouses or various canopies is not possible without connecting workpieces, so effective tips will definitely come in handy in everyday life.
Between themselves
Most often, BF-2 glue is used to implement an idea; this liquid dries out quite quickly, which speeds up the work of a team of builders or a person who has taken it upon himself to complete the job.
The edges need to be cleaned of dirt and degreased with acetone or technical alcohol, a thin layer of the product is applied to the surface of the material and the two workpieces are quickly combined with each other. For complete polymerization and hardening, it should be left for at least 24 hours, after which you can safely use the created canvas.
To metal
The metal base needs to be cleaned; special abrasive brushes are suitable for this; sandpaper will help to bring the surface to perfection, after which you will need to degrease the area.
The metal must be heated to a temperature of 110-150 degrees; for this it is better to take a filled blowtorch or a large gas cylinder. To bond, it is enough to press the film against the workpiece and smooth the surface with a roller, at which point the polymer will melt.
To concrete
After leveling the plane, it must be primed, for work, buy an adhesive base and apply the composition to the polypropylene from the side where there is no foil or other protective layer, if any.
It is worth reading the instructions in advance and following the manufacturer’s recommendations; often the brand advises to wait until the layer sets and is well absorbed into the material, only then begin to press the workpiece onto the concrete.
Other options
If the fixation needs to be done here and now, and the adhesive base is not available, you can use a household iron. Paper is placed on top of the two soldered edges to prevent the polymer from sticking to the heating surface of the device.
With the help of an open fire, you can also achieve good results by first connecting two pieces, just bring them to the flame, but the seam may not be as smooth as the owner of the building would like.
Gluing with acrylate glue with filler
The best glue is Weicon Easy-Mix PE-PP. It is specially designed for materials with weak adhesion. Most liquids “stick” to polyethylene very poorly and are simply squeezed out from the point of contact between the surfaces.
But this glue contains the addition of tiny glass beads, which prevents the glue from leaving the gluing area, forming a gap of the required thickness. Therefore, the gluing surface is sufficient and the glue, when hardened, holds the surfaces firmly together. It’s hard to find anything better than gluing polyethylene.
Surfaces must be thoroughly degreased and dried before gluing. Glue can only be supplied from a branded packaging mixer. The best temperature for performing work is +21…+23°С. Liquid glue is good for no more than 2-3 minutes. After applying the layer, you must immediately join the surfaces. Full readiness of the seam (maximum mechanical strength) for polyethylene will be achieved in a few hours (4-5 according to the experience of those who worked with glue). The adhesive joint is cured at a temperature from +15 to +70°C.
Specifications
Polyethylene is a chemically inert material, so regular glue will not work for it. At best, it will not be possible to achieve the necessary adhesion; at worst, the material will be damaged.
The connection of polyethylene parts occurs in two ways:
- welding;
- gluing.
If in the first case a heating element was needed, then in the second case a special adhesive composition was needed, which should be able to adhere to the smooth surface of the material. In addition, it should not contain solvents, otherwise the polyethylene will simply melt.
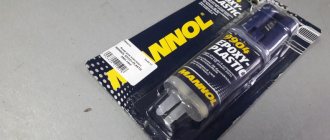
Bonding with epoxy glue
This is the most accessible method, if we talk specifically about gluing and not welding. Before gluing polyethylene, you need to prepare the surfaces.
Epoxy glue is not a glue for gluing polyethylene, but, nevertheless, phenol-formaldehyde resin has very decent adhesion to the surface of polyethylene. In this case, you need to act like this:
- Roughen the surfaces with emery cloth, then degrease and dry.
- Treat both surfaces with a 15-25% solution of chromic anhydride or 20-30% potassium dichromate. (Caution, caustic substances and dangerous carcinogens!) You can take another strong oxidizing agent: a strong solution of potassium permanganate. It is not much less effective, but is much safer. After treatment, dry the surfaces again.
- Prepare epoxy glue according to instructions.
- Apply a thin layer of glue to both surfaces and join.
- Maintain at a temperature of +30...+45°C for several hours, but it is better to keep for a day until ready.
In case of high strength requirements, welding should definitely be preferred. If welding is also accompanied by keeping the seam warm at about 70°C for several hours with slow cooling, then the seam will have a slight fragility. Rapid cooling of the seam makes it brittle, especially in cold conditions.
Acrylate adhesive with filler does not require mechanical preparation of the surface, except for unconditional cleaning and degreasing, which must always be done before gluing. You can even try to experiment with other acrylate adhesives by adding an additive in the form of crushed chalk or cement. It is possible that you will be able to get a high-quality and very inexpensive recipe.
Epoxy glue is the most difficult to use, and the strength here is not the highest. But in extreme cases, this may be a way out.
Instructions for use
Each adhesive comes with an instruction manual on the packaging. However, general rules for using such a composition can be identified.
- The surface on which the PVC product will be glued must be cleaned and degreased;
- Select a suitable adhesive composition. For plastic - glue based on vinyl chloride polymers, for rubber or fabric - thermoplastic types of glue;
- The composition is applied in an even layer;
- In order to increase the effectiveness of gluing, the seams must be exposed to high temperature;
- Allow to dry for 24 hours, without loading the glued surfaces during this period.
Preparation for gluing
This is how you can use self-adhesive to change an old refrigerator
The leveled surface is cleaned of dust and dirt (with water and dishwashing detergent) and dried. Everything must be removed carefully: even drops of fat, if we are talking about changing the “image” of the kitchen set. If you use abrasive or acid-containing products, everything will need to be thoroughly removed and washed several times with water and liquid dishwashing detergent.
If the original substrate is very loose, two coats of primer may be required. After drying, check for any smudges. If everything is smooth, you can begin finishing.
How to glue self-adhesive film on furniture, expert advice
Then, having peeled off one of the sides a little, glue one part, then the second on top. The seam at the corner is, of course, visible, but not so much that it is critical. To make everything “settle down” better, the pasted area can be warmed up.
Expert opinion
Strebizh Viktor Fedorovich, leading construction foreman
I removed the door and began to carefully examine it; it turned out that the film had peeled off not even from the very edge, but about 2-3 centimeters from the edge. If you want to clarify something, please contact me!
Lath (option for a wooden frame).
In this method, you can use wooden slats (glazing beads for windows are not recommended) with nails or self-tapping screws, or even better, packing tape secured with staples from a construction stapler.
As an option, cut a ribbon from old linoleum or any other strong material.
For many, this is the worst way to cover a greenhouse - because you have to damage the film. Such film does not last long, a couple of seasons at most. It’s fine if you nail down cheap film, but nailing down durable, expensive film for a couple of seasons is stupid, especially if there are safer ways.
Although reinforced greenhouse film is not afraid of breakouts from nails.

