Home / Care
Back
Published: 05/31/2021
Reading time: 2 min
0
13
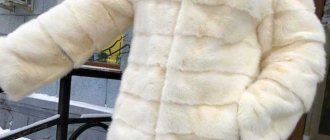
The Arctic fox collar is worn out. The coat itself is still strong, but something needs to be done with the “beast”. One option is to dye the fur. But so as not to paint it and throw it away, but to wear it for at least a couple more years. You can entrust the procedure to dry cleaning specialists, or you can do it yourself. Experts say that there is nothing complicated about it.
- 1 Useful information
- 2 Suitable products 2.1 Purchased
- 2.2 Folk
Helpful information
To understand what's ahead, you need to start with the rules. We invite you to familiarize yourself with the most basic ones:
- if the fur is light, it must be painted in a tone as close as possible to the existing one;
- paint a tone darker will return the product to its original color;
- It’s better not to experiment with new expensive options at home;
- but with the old ones you can, if you try and do everything correctly, the result will be satisfactory and expected.
The dye testing stage is mandatory. To minimize risks, choose inconspicuous places. If the pile remains intact and you like the new shade, you can dye the entire fur at home.
Painting rules
During the work process, it is very important to adhere to the basic principles of coloring, which will help you avoid common mistakes and not spoil your favorite thing. Before dyeing real fur at home, be sure to read the following tips:
- Before painting, you need to clean the product from all kinds of contaminants;
Before painting, you need to clean the product from all kinds of contaminants.
- You should not use the selected product on the entire surface of the fur at once, so as not to spoil it, you need to test the paint on a small area;
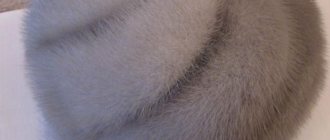
- choose the color carefully: gray and brown mink lends itself well to dyeing in more intense tones, and it is better to give pastel fur a rich brown tint;
- You shouldn’t skimp on paint, because the result directly depends on it;
- It is not recommended to use lighteners on dark fur, as the result can be unpredictable and the item can be hopelessly damaged.
Suitable means
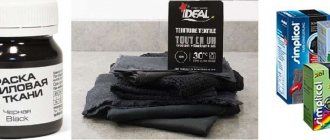
Important! Before you dye a fur product, you need to stock up on everything you need. You will need paint. You can’t do without a cleanser, a brush or brush, polyethylene, or a comb. Auxiliary ingredients you will need: vinegar, shampoo, glycerin.
Purchased
Fur can be dyed with a variety of means. The main methods are in the table below:
| Type of painting | Description |
| Deep | Hair dyes are suitable, since the lint has the same composition as hair. You need to choose a durable but gentle remedy, even if it is expensive. You need to buy 2-3 packages if you want to dye long, thick fur. |
| Superficial | To update the appearance. Sprays and aerosols are suitable. They quickly tint the product and cope with minor defects. |
With the surface method, the paint gets only onto the surface of the collar or fur coat. This may even be enough if the “beast” has a long pile. After all, only the tips of the villi are discolored, in particular, in the arctic fox and silver fox.
Folk
A solution of 1 part hydrogen peroxide and 3 parts water can deal with yellowed fur. Apply without touching the leather part. After 15 minutes, rinse off. If you leave it longer, the pile will become thin and brittle.
A solution of potassium permanganate can be used to dye a fur coat, for example, made from fox. Grains of dye are thrown into warm water. Their quantity is determined by the intensity of the pink hue. To process the product you will need a sponge. In the process, you should try not to get on the wrong side of the fur.
A small amount of blue diluted in warm water will cope with yellowness. With a sponge soaked in a blue solution, you just need to touch the surface of the product. But the very first wetness of the fur will again lead to the appearance of yellowness.
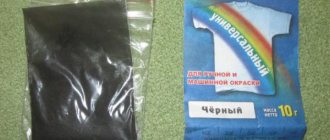
To obtain black color, take basma. After it, nutria and astrakhan fur acquire shine and a fresh look. The same dyes can be used to dye a mink fur coat.
Henna gives a reddish-golden hue, and a mixture of basma and henna is brown. The paint is diluted in warm water. The composition, thick as sour cream, is applied to the pile. After, for example, the collar is placed in a plastic bag and given the shape of a roll. After 1-3 hours, wash off and dry.
If you just need to maintain the color of a mouton or any other fur coat, you can use a tinted hair shampoo. You won’t get a permanent result, but the time for the main coloring will be slightly delayed.
Hair dye - a means to renew fur
You can begin the staining procedure. Hair is very similar in structure to fur, so you can use hair dye to give it the desired shade. Advantages of this method:
- availability (paint is sold in any supermarket);
- cost-effectiveness (you can choose a product that suits your price);
- wide range of colors (possibility of choosing any shade).
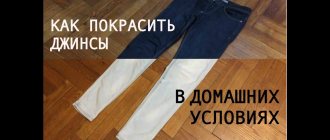
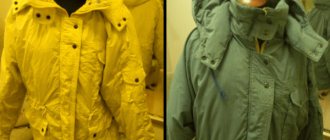
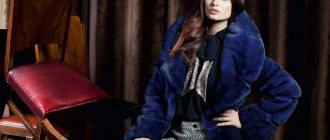
Natural fur before and after dyeing with hair dye.
The necessary dye can easily be found on supermarket shelves. This is an excellent example of how to dye natural fur at home quickly, efficiently and inexpensively. The chosen color will please you for 7-8 months, after which you can repeat the procedure again. Of course, the result largely depends on the chosen products, because they are durable. Some will delight you with long-term color retention, while others will begin to fade and change shade over time.
Hair dye is suitable for dyeing fur
Preparing items and work area
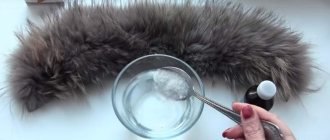
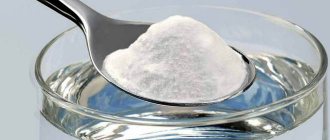
Only clean fur can be dyed with high quality. Therefore, the product must first be cleaned. You can use shampoo that is used to bathe pets. Although there are homemade cleaning options. For one of them you will need: salt, soda and liquid soap (2 tablespoons each) and a couple of drops of ammonia. All components are dissolved in water (2 l). To prevent the leather from cracking and retain its shape, glycerin is applied to the inside. The entire pile is covered with the cleaning agent. After a quarter of an hour, wash off and leave to dry.
Reasons for tinting at home
Fur by its nature can be artificial (synthetic) or natural. Sometimes it is quite difficult to distinguish them visually. But real fur will always cost more than faux fur. When buying various items of outerwear made of fur or leather, everyone hopes for their long service and perfect appearance. But time passes, and many people feel the need to paint part or all of the pile of the product. The reasons for this need may be the following factors.
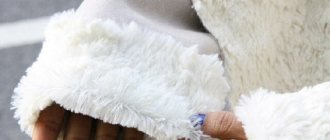
Faux fur dyeing process
- Yellowed spots are a natural change in the pigmentation of natural hair under the influence of time.
- Poor-quality painting – initially the product could have been painted without following special technology.
- They used poor quality paint - unscrupulous manufacturers could save money on the paint they used for fur, so the item quickly lost its proper appearance.
- Household damage to color and wool during wear. Regardless of whether the fur is real or artificial, it can be accidentally damaged by the person himself. There are many reasons for this: they were burned, stained with paint, something was spilled, etc.
- Color fading - under the influence of ultraviolet light, the original shade of the pile can fade and fade.
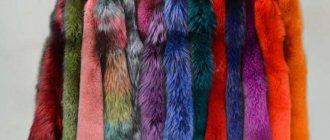
Fur dyeing
Note! In any of the above cases, it is necessary to restore the color, that is, you need to dye the hair of the product.
Coloring
Before using any paint, the first thing to do is read the instructions. Afterwards, protect your hands with gloves. To combine the dye with the oxidizing agent, take a plastic, porcelain or glass container. Apply the resulting homogeneous mass to the villi and distribute evenly along their length. For convenience, you can use a brush. If the product is small, a special brush for painting is suitable. When applying, help with a comb.
Author:
Zakharova Nina Afanasyevna
I hope you like my article! If you find any shortcomings, just write to me about it! I am always ready for a conversation and will answer any questions you have, ask them!