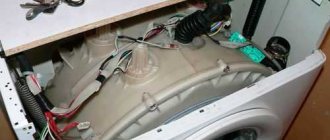
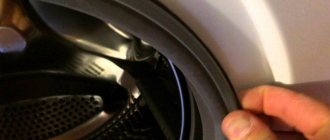
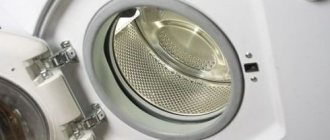
The loading hatch door is a CMA part through which the laundry intended for washing is placed into the drum. At first glance, it seems that its device does not cause any difficulties, and there should be no breakdowns. But frankly, technicians at washing machine service centers are faced with the problem of door failure quite often. Often the problem lies not in manufacturing defects, but in violation of the operating conditions of the machine. In this article you will learn how to repair a washing machine door yourself.
Preparing for work
To troubleshoot, you must:
- find out the characteristics of the SMA and, in particular, the door itself,
- clarify the basic requirements that will have to be observed during repairs,
- prepare tools,
- buy the necessary materials and spare parts (original versions),
- if the need arises, be prepared to manufacture the necessary elements yourself.
Having outlined an algorithm for your own actions, you need to think through every step so that the washing machine door becomes operational again.
Frequent causes of breakdown
Before you begin to directly repair the problem, you need to identify the source of the problem. Among the most common causes of washing machine malfunction are the following:
- the door support hinge has become loose;
- the sunroof glass was cracked;
- the latch on the door is loose or stuck;
- The hatch lock has stopped functioning normally.
Mechanical damage can be repaired at home without the services of a specialist, but if the control unit breaks down, difficulties may arise, so diagnostics are carried out using special devices. Here it is better to seek help from a specialized service.
Before starting repairs, you will need to stock up on the necessary elements. You need a screwdriver to disassemble the mechanism, as well as a spare part for replacement.
How to repair a washing machine door
Having prepared everything necessary, we begin the repair.
Door lock repair
Quite often, the lock latch stops working due to nicks appearing on it. Repairing the door lock of a washing machine is simple, for which there are two ways:
- if possible, the latch is dismantled,
- if this cannot be done, we work with the door.
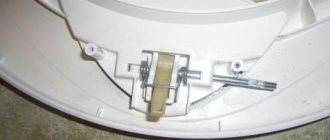
We unscrew the fastening screws of the door, remove it and place it on the table. Take a file and carefully grind off the notches. We lubricate the element with a graphite compound, removing its excess to prevent damage to things during washing. We hang the door in the place designated for it. The door lock works again.
Glass damaged
To fix this kind of problem you will need to buy epoxy resin.
The option of removable glass in washing machines is quite rare, and this complicates the repair process a little.
Polyethylene is taped to the outside so that there are no gaps. Damage that needs to be repaired is covered with reinforcement tape. Prepare the resin and pour it into the crack or hole. After a day, the polyethylene can be removed and the stains can be removed with sandpaper. As you can see, there is nothing complicated.
The support is broken
We remove the element and fix it. Take a nail 4 mm in diameter and cut it to the required length. Drill a through hole (3.8 mm) and heat the nail. When hot, insert it into the hole, and after a few minutes the door can be installed on the machine.
The door handle is broken - how to repair it
Nothing will help here - the element is replaced with a new analogue. It is necessary to unscrew the screws, remove the old handle, install a new one in its place and tighten the fasteners.
UBL repair
It happens that after finishing the wash the hatch cannot be opened. Most likely, the UBL lock, powered by electronics, failed. The first thing you should check is whether there is electricity in the house. If this is all right, then the device is most likely simply broken. Signs of his refusal to work are the following:
- the hatch does not open after washing,
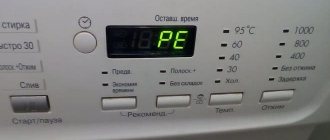
- after activating the machine, an error signal appears on the screen,
- The laundry is loaded, but you cannot latch the lock.
To make sure that the reason lies precisely in the device, and not in the management board, we diagnose it using a multimeter. If “0” or “1” appears on the device screen, it means that the UBL has really failed.
How to open the door in this case? We take a thin braid and thread it between the body of the machine and the loading hatch. We clamp both ends of the tape and pull it towards ourselves until the door opens.
Now let's figure out how to repair UBL with your own hands. We move the cuff and remove the fastening clamp with a screwdriver. If it is made of plastic, it will be enough to disconnect the latch. We unscrew the bolts holding the UBL, put the rubber inside, remove the lock, disconnecting the wires. A new analogue is installed in its place, and assembly is performed in the reverse order.
Removing the element from the body
Repairing a suspended door is a troublesome and extremely inconvenient task. It’s better not to complicate your task and remove the hatch from the body along with the hinges. This is done simply:
- remove the outer clamp on the hatch cuff;
- we fill the seal inside the drum (it is not recommended to completely remove the rubber band, since returning it to its place is difficult and time-consuming);
- We find one retaining bolt near each door hinge;
- take the key that fits head number 8.
- completely unscrew the bolts.
Be prepared for the door not to come off right away. In addition to the removed bolts, it is also secured with special hook holders. To free the hatch from them, you need to carefully lift the hinges 4-5 mm up, and then pull them towards you. If everything is done correctly, the door will easily leave the grooves.
When removing the door, be extremely careful: the locking hooks are made of plastic and can break off under strong pressure.
Pump disassembly
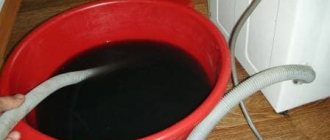
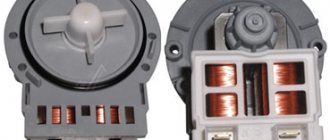
Often, owners of washing machines are faced with a problem such as stopping the water from draining. The reason for this is a malfunction of the pump. In this regard, the question often arises of how to disassemble the pump of a washing machine.
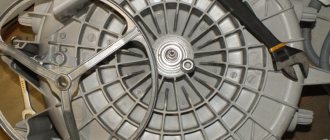
After the pump is removed, it must be disconnected from the cochlea. You need to unscrew the screws that connect it to the motor. At this stage, it is important to make marks that will allow you to install all the elements in their original position.
When the motor is removed, you need to inspect the impeller for wear. Under the influence of high temperatures, it undergoes deformation, which results in its friction against the body. In this case, you need to shorten the blades. Trimming must be done carefully, as significant shortening will reduce the productivity of the pump.
Looking at the locking device
You can guess that the UBL is malfunctioning by several telling “symptoms”. The most important thing is that the machine will display the corresponding error. A door that does not open at the end of the cycle or does not lock when closing also indicates problems with the electronic locking.
To remove and check the functionality of the UBL, you need to remove the device from the housing. But first, you should prepare some tools: a flathead and Phillips screwdriver, a multimeter and a double wire. The latter must have terminals on one side and a plug on the other for connecting to a 220-volt outlet.
Now we remove the UBL from its seat through the top cover of the washer. You can also get the device through the drum, but, we repeat: it is better not to touch the hatch cuff.
- Disconnect the washing machine from the power supply and water supply.
- We unhook the drain and inlet hoses from the machine.
- We provide free access to equipment by moving it away from the wall by 0.5-1 m.
- Loosen the bolts holding the housing cover and remove it.
- We find the fasteners that secure the UBL, which are located directly behind the door lock, and unscrew them.
- We put our hand through the top to the UBL and, holding it with the other hand, disconnect it from the supplied wiring.
- We take out the device.
Next, we begin to diagnose UBL. We take a multimeter, set it to measure resistance and apply the probes to “zero” and “phase”. Then we evaluate the result on the scoreboard: if a three-digit number is shown, then there are no problems with blocking.
Now, using a thin screwdriver, switch the UBL to the “Open” position and connect the device to the socket through the wire. If the mechanism works and a click is heard, then there are no complaints about the performance of the blocker. It doesn’t hurt to attach probes to the neutral and common contacts. The part is operational when “0” is displayed on the display.
What will you need?
When repairing a car hatch door, you will need a good screwdriver. With its help, you will be able to unfasten all the necessary components, as well as tighten the removed parts and fragments of the unit. Here it is worth clarifying the ideal type of bits used. In many cases, imported models of washing machines use, in addition to simple crosses, sprockets of various diameters, as well as shaped profiles. They should be kept on hand. You may need to stock up on special bit extensions.
Article on the topic: How to remove the motor from a washing machine
Repairing the locking mechanism
If the door does not close tightly, then there is suspicion of deformation of the latch lever. More precisely, irregularities appear on the part, which prevent the hatch from being fixed in the locking mechanism. It's easy to fix the situation:
- remove the door according to the algorithm described above;
- unfold the hatch with the latch towards you;
- take a file and grind off all the existing nicks and irregularities;
- lubricate the surfaces with graphite lubricant for prevention;
- we return the door to its place.
You must handle the hatch door with extreme care: do not hang wet things on it and do not allow children to “ride” on them.
When problems with closing the hatch are caused by sagging hinges or loose fasteners, you need to adjust the position of the door hinges. But here everything is determined by eye: we twist and tighten the fasteners until they fit completely into the grooves.
Fixing the glass problem
Broken, broken or cracked glass will prevent you from continuing to use the washing machine. To continue washing, you will have to either replace it or seal it securely. Unfortunately, the replacement option is not suitable for all machine models. More often, the user has to seal the cracks or go to the store for new equipment. Fortunately, it is not difficult to cover up cracks in glass if you follow the instructions.
- Tape the plastic film on the outside without any gaps or voids.
- Place reinforcing tape on the inside of the damage.
- Prepare an epoxy resin solution. Mix the resin and hardener until smooth in a ratio of 6 to 4 based on EDP glue. The consistency of the mixture should be like thin sour cream. If it turns out thicker, then heat it in a water bath, stirring occasionally.
It is better to seal cracks using an epoxy resin solution, since special sealants are washed out over time and leak.
- Fill all cracks and cracks with the resulting resin solution.
- Wait 24 hours.
- Remove the polyethylene and clean out any irregularities on the glass.
It is important to observe the timing and ratio of ingredients when using a resin and hardener solution. Otherwise, the protection will not last as long as desired.
