A little dark humor: putting together puzzles develops not only logic, imagination and fine motor skills, but also myopia and osteochondrosis. To justify such a hobby, we will decorate the interior with puzzles. How to make a picture from puzzles so that it looks beautiful and neat on the wall?
Let's learn some nuances so that the design of pictures from puzzles will be successful. Our tips will help you avoid annoying mistakes so that glued puzzles do not have to be thrown into the trash.
How to assemble puzzles
Those who are not in the know will think that this is just a toy for children, but in fact, adults are mainly interested in assembling puzzles. A great hobby to unwind after work. But a beginner, without understanding the nuances, can, on the contrary, undermine the nervous system.
The picture from the puzzles will not come out soon, but a fragment is already emerging clearly
To enjoy the process of assembling puzzles into a mosaic, you should prepare a little:
- find a place to assemble and store the puzzle;
- learn selection methods;
- sort the parts;
- figure out what to do with the finished puzzle.
It's fun to put together large puzzles, but you'll need a lot of space to lay out and fold the pieces like this. Leaving it on the floor or on the table is not an option, since this is not an activity for one day. The solution is to purchase a special mat for putting together puzzles. See how it looks in the video:
You can make a mat yourself from any thick, non-slip fabric. Replace the inflatable roller with foam rubber, and use elastic instead of belts. It is comfortable to work on even on a soft sofa. After the “meditation” session, the mat with the assembled fragment is wound onto a roller, secured with straps and placed in a corner until the next day or transported, for example, to the country house.
The work begins with sorting the parts by color and individual objects and patterns. As always, there will be a lot of blue details from the sky, sea, and ocean. It is convenient to store individual piles or collected small fragments in organizers or in candy boxes.
There are a lot of techniques on how to assemble them correctly; there is even a forum online for those who like to assemble puzzles. You can search for a part by sample, by puzzle, or by brute force. Everyone chooses their own option, but you need to start with the simplest section. If you want to become a cool puzzle collector, don't think about techniques, try experimenting instead.
Either way, you'll have a good time. It’s natural that one would want to be proud of such titanic work. For example, hang a puzzle on the wall, and how to glue it and arrange it into a picture, read below.
Methods for gluing a puzzle
How to secure puzzles into a picture so that they do not fall apart? At home, you can only glue the parts together from the front side or the back, and then glue the finished canvas to the base. It can be cardboard, plywood or canvas - with or without a frame. Alternatively, you can take the completed puzzle to a framing workshop, where it will be beautifully decorated and laminated.
Large puzzles on the entire wall
What glue is suitable
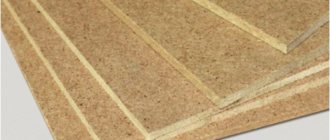
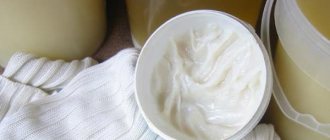
The most inexpensive and popular glue for puzzles is PVA; it is perfect for a base made of wood, fiberboard or thick cardboard.
Advantages of PVA:
- does not leave greasy marks or yellow streaks on the drawing;
- after drying it becomes transparent.
Among the disadvantages, it is worth noting that PVA is not moisture resistant. Therefore, it is recommended to varnish the front side of the panel several times, for example, for decoupage.
Advice! Apply each subsequent layer of varnish after the previous one has completely dried.
Products specifically designed for gluing:
- "Step Puzzle";
- Fix Puzzle Conserver Permanent;
- "Ginger cat".
The “Dragon” or construction “KS” composition is suitable for the same purposes.
Important! The selected composition should have a thick consistency and not spread. Otherwise, the wrong side of the parts will be deformed.
Sometimes a set of puzzles comes with a product specially designed for gluing them together.
One of the least labor-intensive methods is to use double-sided tape, similar to children's appliqué with rhinestones. Glue it to the base and assemble the puzzle, while the image details are immediately glued. The main drawback is that the fastening is not the most reliable. However, if you plan to place the picture under glass, this is not of fundamental importance.
Gluing the puzzle from the front side
Fixation occurs using glue or using a special film for fastening puzzles. Glue is poured between the parts, holding everything together tightly. The disadvantage of the option with glue is that you can’t take anything apart later.
The self-adhesive film for the puzzle is glued to the front side and holds the pieces together well. To make the design clearly visible, choose a glossy film. A good sample does not stretch or bubble. If it sticks unevenly, you can peel it off and try again.
Tips from the pros:
- Choose transparent glue that does not become cloudy or dry out over time.
- PVA glue is fine, but make sure it's a quality product.
- There is no need to skimp on film.
- Don't even think about roll tape unless you have someone nearby.
Before starting the gluing process, it is necessary to clean the painting from dust, lint and other contaminants. To avoid staining the table with glue, place tracing paper, parchment or a piece of wallpaper underneath.
Rating of the best
You can buy the following types of special adhesive compositions on the Internet or in craft stores: Step puzzle, Ravensburger Puzzle Conserve, KSK-M, Educa.
- First in the Step puzzle . It has high adhesion, is easy to apply, and dries quickly (within 1.5–2 hours). Packages 80 ml. enough to treat a surface of 0.4 square meters. meters. Does not deform the cardboard surface. Cost from 30 rub.
- Ravensburger Puzzle Conserve. It comes in a can with a foam nozzle. Forms a transparent, elastic coating, drying time 1 hour. Bottle 200 ml. enough for a canvas of 4 thousand segments. Cost from 580 rub. Not always available.
- KSK-M. A cardboard spatula is included with the adhesive material. Volume 80 ml. enough to treat a surface of 0.4 square meters. m. Has no color, forms a glossy film. Coupling time 2 hours. Price from 35 rub.
- Educa packaging of polymer solution 250 ml. enough to glue puzzles of up to 6000 pieces. Unlike other formulations, you can work with children from 3 years old. Also applied to the front side, it forms a transparent coating. Dries in 2.5 hours. Cost from 600 rub.
All adhesive mixtures, except Educa, can be used by children from 6 years of age.
Gluing the puzzle from the wrong side
The main question is how to turn the puzzle face down. You will initially need to assemble on an easily movable surface if you plan to attach the finished painting from the wrong side. This can be a sheet of fiberboard, plexiglass or a special mat. In this case, simply cover the top with a durable material, for example, another sheet of fiberboard, and quickly turn the entire structure over to the other side.
Another option is to use cling film:
- In this case, the canvas needs to be assembled on a substrate, which is slightly larger in size than the assembled puzzle itself.
- Wrap the finished puzzle together with the backing with cling film. You can make several layers of cling film.
- Then the entire structure needs to be carefully turned over, placed face down, and the cling film cut along the backing.
- Turn the edges of the film to the side and carefully remove the backing. Now you can glue the puzzles, and the cling film will protect the table from glue.
It is better to glue large paintings first from the front side and then from the back side. First, coat the front side with glue and wait until it dries completely. Now turning the mosaic over will not be difficult. Turn over carefully and coat the wrong side with glue.
What glue is suitable
To perpetuate your work in assembling the mosaic, the elements can be combined into a complete picture. To connect the puzzle pieces together and secure them to the base, you can use several types of adhesives:
- Specialized glue for puzzles. Some manufacturers add a special adhesive component to the mosaic kit already in production. Typically these solutions are very liquid, which allows the glue to penetrate between the segments and bond them together. Puzzle glue is colorless and odorless. After drying, it forms a transparent, glossy layer on the front side of the image. In this case, the image does not need to be varnished.
How to make a picture from puzzles into a frame
There are many ways to make a picture frame from puzzles:
- The most obvious is to purchase a ready-made frame that fits the size of your mosaic and follow the instructions. Frames for large-sized puzzles can be made to order.
- A beautiful frame emerges from the ceiling plinth. You just need to cut it and glue it to the base around the perimeter of the picture using liquid nails or instant glue. Ideal, because such a frame can be painted in a variety of colors.
- An interesting idea is to make a frame from unsharpened colored pencils, colored slats, pebbles, shells, and buttons. The base in this case should be larger than the drawing itself. The selected material of the required size is glued along the edges and the picture is ready.
What do you glue puzzles onto to make a picture? As a basis you can use:
- fiberboard sheet;
- ceiling tiles;
- Styrofoam;
- cardboard, canvas;
- fabric, gauze, tulle.
You know how to make a picture from puzzles. All that remains is to find out how to insert the glued picture into the frame:
Decoration options
What else can be made from puzzles:
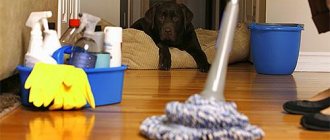
- An old coffee table will last for several more years if it is covered with puzzles. To do this, it is enough to glue puzzles of approximately the same tone around the perimeter, and puzzles of other shades to the main part.
- Old wardrobes and closets can also be decorated with puzzles of different shades. You can choose different tones and do everything in an orderly manner, or glue it in no matter what sequence.
- Decorating a vase with puzzles will add a modern effect to the design.
It is worth noting. If you cover furniture with puzzles, there should be a large number of elements.
Decoration of residential premises should be done thoughtfully so that there is no oversaturation of tones and colors and you can relax in the room.
CRAFTS FROM PUZZLES (1 video)
Related article: Options for using false walls in a room
How to hang a puzzle without a frame
The puzzle picture will look good on the wall even without a frame. In some room decor styles, a frame will even be out of place. How to carefully hang a pre-glued and well-dried puzzle on the wall:
- Using double-sided tape. If the canvas is small, it is enough to cut out a few squares of about two by two centimeters. Glue one in the corners and one in the center. Peel off the paper on the other side and apply it to the wall. If the puzzle is large, then glue it with tape around the entire perimeter and one strip in the center.
- Using sewing pins, but this option is suitable for small paintings.
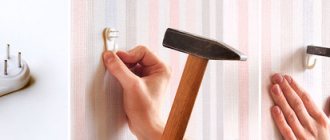
If you are absolutely sure that a puzzle on the wall will be appropriate, you can firmly glue it to the wall. The glue moment in this case is the most suitable. But if anything happens, you definitely won’t be able to restore the wallpaper and will have to repair it.
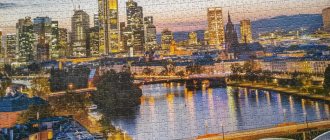
Pictures from puzzles in the interior
Puzzle mosaics will perfectly decorate the walls of any room. Of decisive importance will be the fact that the picture also depicts the framing option itself:
- For a living room or hallway in a classic style, a baguette would be a good solution.
- For a children's room, you can make a frame from scrap material. Laces, ribbons, colored slats, and pebbles are perfect.
- In the bathroom, you can hang a sea-themed painting framed with shells, pieces of sea salt and corals.
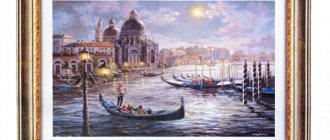
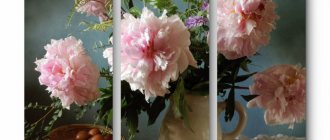
- For the kitchen, a puzzle depicting a fruit still life would be a good option. The frame in this case can be either classic wooden or decorated with twigs, dried leaves or artificial fruits.
Picture puzzle in the living room interior
The amazing is nearby. It used to be just a children's puzzle, but suddenly for many adults, the puzzle became a hobby for many years. Moreover: it has become interior decor. It's all about the image itself and your perseverance. Go for it and you will definitely be able to collect not only 200 parts, but also 2000!