Despite the huge variety of electric lighting devices, high efficiency and the longest service life allow LEDs to significantly outperform their competitors.
These are the types of light sources that people in many countries around the world prefer today, but mass production also generates great demand. Not all manufacturers are conscientious about technologies and recommendations, which leads to rapid burnout of products. Constantly buying new devices is “more expensive for yourself.” In such situations, DIY LED lamp repair is required.
Don’t be scared and immediately close the article - after reading the information below, you will understand that even an unqualified person with no work experience can handle such work. An assembled LED lamp or lamp is an expensive product, but buying a burnt-out part separately is not difficult.
LED lamp device
When starting to repair something, you should first carefully study the design and operating principle of the equipment. Regardless of the appearance and LEDs used, each lamp, including filament lamps, is designed according to the same electrical circuit. Remove the product case and inside you will see the driver - an electronic board to which various radio components are attached.
Any LED lamp operates on the same principle. The supply voltage is supplied to the contacts of the electric socket and transmitted to the output of a conventional light bulb base (E27 or other format). There may be several such conclusions. Two wires are soldered to them, through which the voltage passes to the input of the electronic board. The driver converts AC voltage to DC, usually by lowering it, and then transmits it to another electronic board with LEDs.
Driver is an electronic unit that generates and converts current and voltage into values that are sufficient for LED operation. In more expensive products, the board is hidden under diffusing glass for protection.
Repair instructions for LED light bulbs
First, the fault must be localized: at a minimum, determine what to repair - the driver or the light-emitting elements. If it was not possible to logically calculate the problem based on external signs, you can check each LED - there are only a few of them in such a lamp, the test will not take much time. Most likely, the LEDs in this lamp are connected in one series chain. You can try to clarify - to do this you need to scrape the paint off the board, but in this case everything is clear. Five LEDs cannot be connected in two or three identical parallel chains.
Replacing smd leds
Checking and searching for a faulty LED is performed using a multimeter in diode testing mode. Like a conventional semiconductor valve, the LED should open when a test voltage of forward polarity is applied, and the multimeter will show some resistance, and when a reverse voltage is applied, the LED will be locked and the resistance will be infinitely large.
Conventional multimeters are designed to test silicon diodes, and LEDs are made in most cases based on gallium arsenide crystals. The test voltage of the tester may not be enough to open the LED, so the ohmmeter may show high resistance in both directions. This is not a sign of a faulty LED. In this case, you can check the element by applying a rated voltage to it in the forward direction and determine its functionality by lighting the LED.
White LEDs open at a voltage of approximately 3.5 volts.
Unsuccessful attempt to test the COB LED with a multimeter.
You should also understand that many light-emitting elements are made using COB technology. It consists of placing several crystals on one substrate, connecting them, filling them with a compound and covering them with a phosphor. In this case, no multimeter will have enough voltage to open the entire chain of crystals. The only way to check is using a laboratory power supply. It is necessary to connect the clamps or probes of the source and smoothly raise the voltage from zero. If the correct polarity is applied, the LED will light up.
The LED lights up at 12 volts.
The faulty LED must be unsoldered. This is best done using a soldering station with a hair dryer. If it is not there, you can try with a soldering iron, but it must be of sufficient power. The LEDs are mounted on a heat sink, which will absorb a lot of heat. To warm it up enough, the soldering iron must be at least 40 watts (or better, more). It is necessary to cover both terminals with a layer of flux to retain heat, and alternately heat one side or the other. As a result, the LED will become unsoldered.
Soldering an LED with a 65 watt soldering iron.
After desoldering, the contact pads must be washed with alcohol and, if necessary, tinned. You can also solder the new LED with a hair dryer or a powerful soldering iron.
Driver circuit and recovery
Each manufacturer makes drivers of their own choice - this applies to both the general circuit and the element base. For evidence, you can look on the Internet - upon the corresponding request, the search engine will post a lot of pictures, and it is not a fact that it will coincide with the desired scheme. Therefore, it is often easier to copy the connections from the board, fortunately there are few elements on it. For this lamp, the following diagram was obtained.
Driver circuit copied from the board tracks.
Analysis of such circuits suggests that DB1 is a bridge rectifier, as evidenced by the markings on its case, and module U1 is a PWM generator.
You can check the operation of the rectifier by measuring the voltage at the indicated points. It should be around 300 VDC. If it is significantly less, it means that either the diode bridge or the oxide capacitor at its output is faulty. If everything is in order, you need to load the output with a resistor of several hundred ohms and use an oscilloscope to check for the presence of pulses at the driver output. The problem may be either in the U1 chip or in its wiring.
Driver verification scheme.
The current stabilizer uses quite specific components, and besides, their type cannot always be determined (lack of published diagrams from the manufacturer, lack of clear markings on the case), so it is not always possible to purchase elements to replace burnt ones, even via the Internet. The only available repair method in this case is to use a donor lamp.
The simplest diagram of a 220 V LED lamp
The simplest possible circuit for an LED lamp connected to a 220 V network includes a driver consisting of two quenching resistors that stabilize the voltage. The LED diodes are connected in different directions, which guarantees perfect protection against reverse voltage. In this case, the flicker frequency increases from 50 to 100 Hz.
For example, to connect an LED strip, two wires are soldered to the base. The ends of these wires are subsequently connected to the ends of the LED strip. The electrical circuit of the positive wire includes a capacitor with a parallel connected resistor and passes through the positive part of the diode bridge, and the circuit of the negative wire includes a resistor and is connected to the negative part of the diode bridge. Between the diode bridge and the LED strip, a second capacitor-resistor unit is installed, connected to both wires.
Simply put, the supply voltage passes through the limiting capacitor and goes to the diode bridge, and from there to the LED elements. By replacing the LED with a rectifier diode, you will not double, but lower the voltage - from 50 to 25 Hz. In this situation, the flicker of the product will become sensitive, harmful to the visual organs, leading to rapid fatigue and migraines.
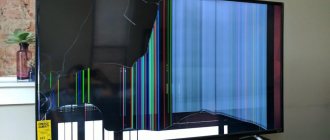
Why LED lamps break
Before you start repairing a light bulb, it is worth understanding why LED lamps burn out. First of all, a malfunction in the operation of any lighting device should be looked for in voltage drops. If there is such a problem in your home, then you do not need to repair the light bulb, but install a stabilizer.
Unpleasant consequences of voltage surges Source electrik-domoy.ru
Important! If the voltage “jumps” very much, it can break through the diode bridge and damage the lamp.
When installing new LED bulbs, you need to remember to have good ventilation. If it is insufficient and the heat generated during operation of the device is not regularly removed, overheating may occur. In this case, you need to take a closer look at the lamp: if the design is too closed, ventilation will not be provided, then you will have to buy another lighting device.
Another common mistake when arranging electrical wiring in a room is incorrect placement of wires or incorrect calculation of their cross-section. If it is not possible to change the wiring, the right solution in this case would be to unload the lighting line by choosing another, less powerful light bulb.
Also, the failure of an LED light bulb is caused by the incorrect choice of IP degree, that is, protection from external influences. If the lamp is exposed to high humidity, dust, or its body experiences impacts, you need to think about choosing lighting fixtures that are appropriate to the environment. Now that you know why LED lamps burn out, you can start repairing them.
An LED lamp will work well if you choose it correctly Source multiwood.ru
In addition to the above options for incorrect operation, LED light bulbs may fail due to manufacturing defects. Another implicit reason for the combustion of an LED lamp is its connection to a backlit switch. There are two ways out of this situation: if the design of the lamp (for example, a chandelier) has more light bulbs, you need to change at least one of them to a regular one. The second solution to this problem is to replace the switch.
When a lamp breaks down, the capacitor located in the power supply along with resistors and a diode bridge, or one of the LEDs, is most often damaged. If cheap elements that do not correspond to the rated voltage are used in the production of the lamp, as well as with poor-quality solder connections, the entire structure may break after just a few on/off cycles.
Disassembling an LED light bulb with sealant
Not all products are easy and simple to disassemble without damaging the components. Try turning the top of the body. If all else fails, you will have to use a solvent. Draw a certain amount of solvent into the syringe and squeeze it through the needle along the seam. Wait about 5 - 10 minutes, then repeat the operation.
Do this at least three times, then begin to rotate your upper body in different directions to swing it. Once the flask is removed, clean the interior walls by removing sealant and degreasing surfaces. If the device will be used in a room with a low level of humidity, no sealant is applied.
Driver repair
LED driver
If the converter is broken, it must first be removed from the housing and secured in the holder. The wires are disconnected with a soldering iron; they must first be marked or photographed so as not to be confused during assembly. After this, the functionality of all parts located on the board is checked.
If the microcircuit burns out, it is completely separated. The product is grabbed with tweezers, and the soldering area on the back side of the board is heated. When the tin melts, the chip terminals easily come out of the holes. Replacement is carried out in reverse order. If there is not enough solder, it is added with a soldering iron. This must be done carefully so as not to catch adjacent jumpers. To prevent this, the surface of the board near the solder joint is coated with heat-resistant varnish.
When the driver consists of a chain of resistors, capacitors and rectifiers, you first need to conduct an external inspection of the board. A malfunction is indicated by blackening or swelling of the parts. If there are no such signs, you will have to unsolder and check each element. This must be done one at a time so as not to break the chain by mistake. It is better to immediately after diagnostics insert the working element back and solder it.
The faulty part is replaced with an analogue. You can save time and money if you use a working resistor or capacitor from the donor lamp in which the crystal flew.
Another solution to the problem is to purchase several drivers whose characteristics correspond to the diode bridge. To replace them, you need to resolder 4 connecting wires, and then put the cap in place.
Determining the cause of failure of an LED light bulb
The service life of any product, including LED lamps, depends on the conditions of use, compliance with the rules and recommendations prescribed by the manufacturers.
There are many reasons why the service life indicated by the manufacturer does not correspond to reality: the use of low-quality crystals and incorrect assessment of performance, since actual operating conditions almost always differ from potential ones.
We list the main reasons for the failure of LED products:
- Voltage surges. It sounds strange, since diode lamps of all lighting devices are less sensitive to fluctuations in electrical parameters. Any changes in voltage for the worse affect the functionality of the device. This is less noticeable compared to incandescent, halogen, housekeeper or CFL bulbs, but it does happen.
- Miscalculations when choosing a lamp - choosing the wrong lampshade. If the configuration is technically incorrect, the likelihood of overheating increases. Once again, we need to remember that compared to other light sources, LED lamps emit minimal heat. There will be no fire, but increasing the temperature by a few degrees will reduce the longevity of the device.
- Use of low-quality components (crystals). Few manufacturers use parts with good technical and operational characteristics, due to the desire to reduce costs. As a result, the lamps fail faster.
- Technical errors made when constructing the electrical circuit of the lighting system. For example, when connecting LED lamps, electrical wiring with an insufficient cable cross-section was used.
- Various external factors, despite the increased strength characteristics of devices hidden in a plastic flask. This includes vibrations and mechanical shocks.
To extend the life of LED lamps and improve the quality of the glow, try to eliminate or minimize the influence of the above factors. Entrust the installation of electrical wiring to specialists, create the most comfortable and acceptable conditions for using the products.
A good device will have smooth edges. It is not always possible to assess the quality of the crystals used, so try to buy lamps in trusted stores from branded manufacturers.
Another option for extending the life of an LED light bulb is to use a dimmer to regulate the light output. It is important to buy dimmable devices in advance or upgrade existing ones yourself. The dimmer will allow you to reduce the starting current: the lower the value, the better.
Typical breakdowns
Since you have decided to repair an LED light bulb with your own hands, it is assumed that you have a tester or multimeter and you know how to carry out basic measurements. You will also need a soldering iron, but with a thin tip and low power. You can do without it, but you will have to look for a replacement. You also need to know at least a little how to solder with a soldering iron. You should also have tweezers, wire cutters and utensils. Utiki or duckbills are hand tools that look like miniature pliers with long grips - they are convenient for holding small parts, but you can get by with tweezers. And also spare parts. They will have to be purchased as the malfunction is identified. It's good if there is a second non-working lamp. It can be used as a donor to take the necessary parts from there.
The declared service life of LED lamps is almost half a century, and after six months several non-working pieces accumulate
LED breakdown
As already mentioned, in an LED light bulb the crystals are connected in series. From the output of one, the wire goes to the input of the other and so runs around all the elements. The scheme is very simple. But if at least one crystal is not working, the light bulb will not light. And crystals often fail, so the first thing we do is check them. Moreover, they are easy to find in any model. A circuit diagram is not needed for verification.
First, carefully examine all the crystals. Those that “feel” normally have a light, even color. Dark spots should alert you. If there are dark, almost black dots on the crystals, these LEDs are most likely broken. We are definitely changing them. If the surface is a little darker, the crystals are still shining, but are on their last legs and will soon burn out, then it is also better to replace them now.
A burnt-out LED has a dark spot on the surface
To check whether the LEDs are working or not, you can use a multimeter. It is switched to the dialing mode, the probes are applied to the LED contacts. If a small current is needed to operate the LED, the working LEDs light up. The second test option is a 3-4 Volt battery, the contacts of which have wires soldered to them. We apply these wires (observing polarity) to the crystals. The working ones light up, but the faulty ones remain dark.
How to desolder damaged LEDs
Up to this point, everything is simple and clear; repairing an LED light bulb does not present any difficulties yet. Now we need to decide how to solder small LEDs. The whole point is that they are soldered onto a substrate that conducts heat well. That is, by heating the contact of one LED, you simultaneously heat the entire board. If you use a low-power soldering iron, it will take too much time. Powerful is also not an option, since it is very easy to overheat. The maximum temperature that crystals can withstand without consequences is 80°C. With further heating, destruction quickly occurs, so when repairing an LED light bulb, the main task is to cause as little damage as possible to the remaining elements.
Spot heating still won't work, but you can try to cause minimal damage to neighboring crystals. To do this, we first bite out/break out the crystal plate, and heat the remaining metal legs with a low-power (20 W) soldering iron and remove it.
Soldering damaged LEDs
If you don't have a low-power soldering iron, you can use an iron. It must be firmly secured (for example, using a clamp) and set to medium mode. To minimize the “heating field” it is better to use the tip of the iron. In this case, we will heat the entire board. More precisely, we will heat the edge on which the damaged LED is located, but the entire board will warm up. And this is the disadvantage of this method - from overheating, the crystals become cloudy and quickly fail. Therefore, the trick is to quickly remove the damaged crystal as soon as possible.
Before starting work, we color all faulty crystals with a marker. We turn the board so that the place with the burnt elements is on the iron platform. We constantly pull the damaged element up, holding it with tongs. As soon as it comes off, we try the damaged ones located nearby. If they come off, great. No - we rotate the board so that the damaged element heats up more. Then we immediately remove the board and leave it to cool. No special means for quick cooling! Just put it down and let it cool on its own.
How to solder new LEDs
Contact pads remain in place of the soldered LEDs. We apply a drop of soldering flux to them, put the good ones on top (observing the polarity) and heat them up again, but this time we press on the crystal. When its legs “enter” the solder, remove the board or turn it over. If there is no LED, you can solder a piece of wire instead. The lamp will shine a little dimmer, but it will work. Yes! This trick only works if there are ten or more crystals on the board.
In some cases, jumper wires can be used instead of burnt-out LEDs
The video shows another replacement method. You need to find a similar LED on the strip, cut it out and solder it together with the substrate in place of the removed one.
Another way to solder small LEDs. It seems to be the most realistic without the use of special equipment. You can remove the diodes using a small gas torch.
Damage to the driver
If all the LEDs are visually normal or have already been replaced, we continue repairing the LED light bulb by looking at the driver. Some damage is easy to identify visually. Blackened or cracked resistors, swollen capacitors. If you look closely, this is all noticeable. If nothing is visually determined, we take a tester and check the integrity of the components.
There may be burnt resistances and leaking/swollen capacitors
It also happens that all the elements are absolutely normal, but the LED light still does not light up. Most likely this is a bad build. You need to check all solder joints. If you do not warm up the soldering area enough, over time the contact will deteriorate or disappear completely due to constant temperature changes. In the first case, the light is either on or off. In the second, it simply stops working. We hold all solder joints up to the light and look carefully. If we find a crack in the solder joint, that’s it. Cold soldering. Next, we simply warm up this place well with a soldering iron.
Cold soldering is one of the reasons why LED lamps fail
Diode bridges very rarely fail, so we check them last. If the diode is broken, we unsolder it, check it again (in theory, they should only be checked by unsoldering it), if the damage is confirmed, we install a similar one. Don't mix up the connection, otherwise nothing will work. In general, repairing an LED light bulb is not too difficult a task. It will cost significantly less than a new light bulb. And you, along the way, can improve the design. As a result, LED light bulbs will burn out less often. Either way, you have (almost) nothing to lose.
Repair
An LED lamp can be repaired regardless of the reasons for its failure. To do this, you need to disassemble the product into parts and get to the filling. First, the diffuser, which performs several functions, is removed. The component is either secured to the base piece via sealant or held in place with a latch. If the element rotates separately from the body, to remove it, just press in the right place.
It was described above what needs to be done if the diffuser is securely glued to the body. Let's add to the use of solvent the ability to remove the housing using a thin screwdriver: carefully pry it off without applying much force.
LED lamps with glass bulbs cannot be repaired, since it is almost impossible to remove such a diffuser without damage.
Replacing the power supply
In rooms with high levels of humidity, low voltage lighting devices are used - 12 or 24 V, which are connected to a common electrical network of 220 V. To reduce the high AC voltage to the required DC values, stabilizing power supplies are used, which can fail.
The cause of a breakdown of the power supply may be an increased load (if the total power of the luminaires used exceeds that allowed for the stabilizer) or an incorrectly selected degree of protection against dust and moisture (IP). To repair these products, you should contact specialized service centers, since it is impossible to restore them under domestic conditions (certain equipment and knowledge of radio electronics are required). The only option is to change the power supply.
When replacing the stabilizer, the LED lamp must be completely disconnected from the power supply - the wires are cut or the terminals are disconnected. Don't rely solely on the switch. Be sure to turn off the voltage through the apartment's distribution panel.
The power for the stabilizing power supply must be higher than the total value of the connected lamps. After disconnecting the failed element, connect a new one in accordance with the switching diagram. You can find it in the technical documentation for the equipment. The process is as simple as possible, since the wires are color coded and the contacts are marked with letters.
The degree of protection against dust and moisture for the bathroom must be at least IP45.
Replacing LEDs
To make the procedure as simple as possible, use a soldering station/hair dryer. It is more difficult to use a soldering iron, but it is possible.
Most devices consist of several LEDs connected in series. If at least one fails, the whole group or the entire light source stops working. In this case, if there is no suitable LED at hand, the burnt one can be replaced with a regular jumper. Remember that because of the jumper, the lamp will not work for long, but this way you can buy some time to buy the right element. The lower the total number of LEDs, the faster the jumper lamp will fail.
Modern lighting devices use SMD diodes, which can be soldered from the tape. When replacing, make sure to buy a part with identical technical parameters.
Driver repair
If the driver fails, study its design. An electronic board may consist of several SMD diodes, the size of which is much smaller than that of a soldering iron tip. In this case, you need to choose a soldering iron with copper wire on the tip. Solder the burnt element and select one that matches its characteristics or markings.
When no visible faults are found, the task becomes more difficult. You will have to solder each part separately and ring it. Once the burnt component is found, replace it with a new one and return all the elements to their places. To make the job easier, use tweezers.
Never remove all parts from the board at once. You may not remember their correct location and subsequently get confused. Proceed as follows: unsolder one diode, check its functionality, and then return it to its place. Repeat the same for the remaining elements.
Disassembling an LED lamp for repair
Before repairing an LED light bulb, study the instructions, as well as the design of the broken lamp. Due to the fact that there are no gases inside the LED lamp and the housing is not sealed, if it fails, you can try to repair the device yourself.
This is what a disassembled LED lamp looks like Source tauray.ru
See also: Catalog of companies that specialize in electrical work of any complexity
Step-by-step instructions on how to repair an LED lamp:
- Open the lamp to get to the internal structural elements.
To begin disassembling the light bulb, you must first open the clips holding the light-diffusing dome. If the matte top of the lamp is held in place by screws, you need to unscrew them; if the restraining factor is sealant, it needs to be carefully removed.
- Remove radiator.
After disconnecting the diffuser, take a screwdriver and carefully remove the heatsink (it will be located under the board with the LEDs).
- Separate matrix.
After removing the insides of the light bulb, the LED matrix must be separated from the entire structure. To do this, you need to unsolder it: warm up the contacts with a soldering iron, then carefully separate the part with tweezers. In this case, you need to start with the central board, which must be separated from the two contacts. You should also remove the sealant located around the perimeter of the lamp, or unscrew the retaining screws.
After nothing will interfere with the removal of the matrix with LEDs, you need to arm yourself with a thin metal tool like an awl or a needle. Carefully sliding it under the board, walk around in a circle so that you can pick it out.
Working with the LED lamp matrix Source masterpotoku.ru
By the way! Before you begin repairing a lamp, you should determine which LEDs are in the 220 bulb that needs to be repaired.
- Remove the matrix.
To remove the matrix with LEDs, which is no longer held in place, you will need to insert the central element into the slot. After this you can remove the matrix.
- Identify the broken link.
To identify a breakdown, in most cases you just need to look at each of the LEDs, which look like very small yellow squares. On one of them, upon closer inspection (you may need a magnifying glass), a small dark spot (black dot) will be noticeable.
- Remove the non-working element.
Now we’ll tell you how to repair an LED lamp after non-working diodes have already been detected. To remove all non-working LEDs from the matrix, you can heat it from below, then the process will be simplified (open flame cannot be used). Don’t forget to first fix the circle with diodes in the desired position above the work surface. After a good warm-up, the desired LED element can be simply removed with tweezers.
- Clean the contacts after removing the diode.
After cleaning the location of the burnt diode, you should also apply a special paste.
Another option for an LED lamp Source vodakanazer.ru
Remember! The ground corner of the diode indicates the location of the negative terminal.
- Change a non-working element.
In order for the lamp to work again, you need to replace the burnt out LED with a new one. As a last resort, you can install jumpers on the old one. To solder a working LED to the space vacated by the old element, you first need to look at what LEDs are used in 220 V lamps, and during operation, use a heating element.
- Allow the matrix to cool.
Important Notes
If the lamp is made using sealant, you will need an awl, a syringe and a solvent to remove the cap. It is necessary to run an awl along the edge (the connection between the cap and the lamp) so that a groove is formed. After this, you should fill the syringe with a needle with a solvent and inject it around the entire perimeter into the groove made. When half a minute has passed, you can unscrew the cap, because the sealant should have dissolved by this time.
At the fourth stage, when determining a non-working LED, in some cases you can use a multimeter.
A multimeter can be used to test some diodes Source mineavto.ru
Features of corn lamp repair
“Corn” is one of the varieties of LED lamps, named because of its shape and arrangement of semiconductors.
Servicing such products is as easy as shelling pears! The LEDs are located on top and are not protected by anything, so when replacing them it is not necessary to disassemble the device and get into its filling.
Ring each element separately and replace the faulty ones. The faulty component can be replaced with a regular jumper. The presence of such slightly reduces the service life of the “corn”, but does not in any way affect the stability and reliability of the device. This is only relevant for lamps of this type!
Is it possible to repair a printed circuit board?
If one or two tracks on the board are burned out, they can be duplicated with additional conductors.
A track duplicated by an external conductor.
If there are a lot of burnt tracks and the process of making a board using the LUT method is not scary, you can make a new board. The easiest way to do this is with the Spriny Layout program. It has a substrate loading function, which can be used as a photo of the faulty board.
Screenshot of the Sprint Layout program interface with a background image of the board.
Next, you need to adjust the drawing to the size, place the spots and areas for the elements on it and connect them with conductors (only the superimposed spots for drilling are shown in the picture) according to the template. Then the board is made in the usual way using laser-iron technology and the elements are soldered onto it.
Upgrading a lamp during repairs
While repairing lamps, you can experiment a little with LEDs. This is done due to the fact that identical LEDs (in type and brightness) with different color temperatures (warm yellow and cool white glow) differ in price by 3–4 times. Despite this, commercial LEDs with a warm glow, which are considered the most expensive compared to a conventional incandescent lamp, have a bluish tint.
Cheaper factory lamps are produced without a rectifier or smoothing capacitor. You can install it yourself at home using a regular soldering iron. Typically the elements are missing from Chinese products, whose manufacturers simply connect pairs of LEDs connected in different directions and add a ballast capacitor. The flickering of the lamp increases 2-3 times, which negatively affects human health.
Preparing for repairs and what is required for this
You need to prepare everything you need for work. Some items may be on hand, others will have to be purchased, but this will not cost much. List of tools and accessories:
- A small soldering iron with a small tip. The contacts in the lamps are small, so the standard option will not work. It is best to buy a special model with different types of tips (flat and point). We must not forget about the materials for soldering - solder, rosin, etc.
Soldering iron with a thin tip and USB charging - Set of tweezers. The tool store sells sets of tweezers for small jobs; they have devices of suitable shapes and sizes.
- Holder for a lamp or other unit (the so-called “third hand”). A good solution is a device with a magnifying glass to simplify the work. You can adapt available elements - cut off a plastic bottle or pick up something else.
- Small gas burner. Models from tobacco kiosks that are used to light cigars are suitable. If you can’t find such a device, buy a so-called “turbo lighter” that does not go out from the wind.
- A set of screwdrivers of different sizes to remove and disassemble the lamp. Most often, Phillips-head screws are used as fasteners.
Set of tools for repair.
Some fixtures use hex head screws, so you may also need a set of wrenches. Repairing LED lamps is a scrupulous job, since the products contain many small parts, and if handled carelessly, they can be damaged.
Blinking and eliminating their causes in an LED light bulb
The main reason why LED bulbs flicker is the use of a weak capacitor or lack of one. The problem can be solved quite simply - by installing a more powerful component. If the capacitor voltage is 102 V, and the LEDs are 180 V, the value of the first should be increased by 1.5 - 2 times.
Install a similar capacitor, but with a larger capacity. Simply resolder the old capacitor, replacing it with a new one. Another option is to connect a second capacitor in parallel to increase the total capacitance and power.
Types and main causes of breakdowns
If problems arise with an LED lamp or light bulb, it is impossible not to notice it. The types of faults may vary, but the most common are:
- The light disappears completely. This can happen either when turning it on or off, or during operation.
- Lighting can disappear at any time and resume after some time. Moreover, the time intervals can be anything.
- Flickering of a light bulb or lamp. The intensity may vary, but changing brightness creates visual discomfort.
- Flashing is when the light blinks every second.
- Damage to the structure due to impact or moisture entering the system (for example, due to condensation or if neighbors from above flooded the apartment).
When some of the light bulbs stop burning, you should not put off repairs.
If there are only a few types of faults, then there are many more reasons. The most common problems that arise are:
- Overheating of components and their deformation or contact failure. The diodes do not heat up much (up to about 30 degrees). But if the room is hot, then the temperature under the ceiling can rise to 50-60 degrees, and under such conditions contacts are broken, parts fail and individual elements on the board peel off. The problem also arises when the cooling radiator becomes covered with dust over time or the lamp is located in a place with poor ventilation.
- Violation of the recommended rules for using LED equipment. Along with the lamp and chandelier, there are always operating conditions under which the manufacturer guarantees long-term operation. Any deviations increase the risk of malfunctions significantly.
- Diode burnout caused by voltage surges or capacitor failure. This is typical for inexpensive models.
- Various violations when connecting and installing equipment. Short circuits and other network failures can cause breakdowns.
Important! The cheaper the product used, the higher the likelihood that even the slightest deviation from the norm will lead to malfunction.
When connecting, it is important not to confuse anything.
Don’t forget about manufacturing defects; they are much more common than in other types of lamps. Defects are especially common in lamps with a remote control, since the design is complex, and the technology is often not yet fully developed.
Tools and materials
Disassembling an LED lamp is not difficult - it is difficult to do this without damaging the housing and internal components. If you work carefully, you can get by with a minimum of tools, which are likely to be found in every home. You will need:
What kind of lighting do you prefer?
Built-in Chandelier
- a dull knife or thin metal plate;
- small Phillips screwdriver;
- scissors or side cutters;
- pencil or marker;
- soldering iron (optional).
If you plan to check the integrity and technical condition of electrical circuits and components, prepare a multimeter. It is better to work with thin gloves. Firstly, they will prevent the lamp from slipping in your hands, and secondly, they will protect you from cuts from shards of glass or plastic if the bulb breaks.