A frame for photo wallpaper is an original way of decorating surfaces, which has recently been gaining popularity. This solution allows you to create an interesting accent on the wall without spending a lot of effort. Moldings make it possible not only to decorate a room, but also to divide it into functional zones using various patterns and shades. Modern designers often use frames to give the space expressiveness and a certain structure. A new original decor option can be used in almost any room, both in an apartment and in a country house.
Frame with photo wallpaper Source obustroeno.com
Framing materials
It is quite possible to make a small picture in a frame from photo wallpaper yourself, using available materials. Of course, an easier way would be to buy a finished product, into which the image is simply inserted and secured from the inside. A baguette frame is suitable for this; such options are available for free sale. If you need a more accurate match between the size of the frame and the wallpaper, you will have to think about a hand-made product. It can be made from the following materials:
- Polyurethane plinth for ceilings;
- Wooden baguette;
- Wooden multi-colored slats;
- A strip of wallpaper that is already on the wall;
- Fake diamond;
- Parts of small twigs;
- Gypsum or decorative putty.
The selection of material is carried out depending on the overall style of the interior. Artificial stone is perfect for the country style, and the elegant wooden frame looks decent in the classic design of the room.
Natural materials require a corresponding picture plot. Products made from branches and wood will harmoniously combine with landscapes and rustic motifs.
Bed with photo wallpaper Source izhevsk.ru
If you plan to create a frame from plaster and putty, you should think in advance about the method of performing the work. Not everyone can make a neat outline and apply a drawing in the process, so you should calculate your capabilities and skills. If in doubt, it will be easier to take a plywood frame and distribute the material over it, and then fix the resulting picture on the surface.
Hallway with photo wallpaper Source otdelka-expert.ru
What replaces the usual pictures
Impressive wallpaper in a frame creates a stylish decor that replaces ordinary paintings. It is important to make a suitable choice of border and pattern, the structure of the internal filling.
For example, silk embossed wallpaper in a wooden frame with complex inlay will appear as a kind of art object in the room, pleasing the eyes of aesthetes. Flower trellises in a minimalist style border diversify the dullness of the covering of one tone.
Required Tools
Devices for work are selected based on the selected material. To make a neat cut on wood, a hacksaw for metal or wood is suitable. Such a tool must have small teeth for an ideal result. Polyurethane can be processed with a hacksaw or an ordinary construction knife. To accurately trim joints at corners, you will need to purchase a special tool called a miter box. It greatly simplifies the creative process and is sold in many construction stores.
Sofa with photo wallpaper Source grali.ru
Artificial stone does not require the use of special devices, but it is applied to an adhesive composition, which requires a mixture for dilution. Gypsum and other dissolving materials also require a container to hold the mixture.
At the final stage, you will need glue or other fasteners for the frame to fix it to the surface. You can use “liquid nails”, which reliably hold even relatively heavy elements. The ability to fix heavy objects is usually indicated in the instructions for the composition, so you must read it before starting work.
Screening.
My idea is to create slightly worn patterns with black paint showing through the wear and with delicate rose flowers in the corner. Let's see what happens, but for now we apply putty through a stencil. I use Parade acrylic finishing putty (it is very finely grained and sands well), and if you don’t have one, you can replace it with putty from any other company or use an artistic texture paste.
I apply putty to one side and let it dry slightly so as not to spoil it when I apply it to the other side of the frame.
My stencil has an adhesive backing and is very convenient to work with. If everything is ready, let the patterns dry well for an hour or more. After drying, lightly sandpaper to remove small particles that are not attached to the surface. Of course, they will all come off later anyway, but it is better to do this before painting with primer.
How to make a frame
When making a blank, it is important to monitor the dimensions of the frame so that it exactly matches the wallpaper contained inside. To do this, it is important to measure the size of the picture and cut the material according to the data obtained. Do not forget that the painting will be placed inside the product, so all parts must be measured from the inside. It is also important to make the corners correctly so that they are absolutely the same. To do this, use a miter box and set the tilt to 45 degrees.
Decorative frames Source serviceyard.net
The parts are sawed off and then the corners are checked for exact fit. After this, the product can be fixed on the surface. Any method will do - first stick a frame and then add a canvas, or first place a picture and then decorate it with a frame. Focus on your own habits and convenience.
Chalk paint.
Now we are working with chalk paint. But I want to note that to create delicate scuffs, it is not necessary to use chalk paint. This effect can be achieved with artistic paints. You can read how to do this at this link.
I have this decorative white aging paint Shabby Provence from Borma Wachs.
I tint it a little by adding a drop of vanilla art paint. The white color takes on a warmer, milky hue.
I apply it with a brush to the entire frame.
Let it dry and arm yourself with a damp cloth. We rub those areas where these very traces of time will be, i.e. abrasions.
I’m going through the ends, the stencil patterns, and I ended up with this, not yet completed, “shabi chic” frame, but I already like it.
When you can and cannot use moldings
In most cases, molding is perfect for wall or ceiling decoration. Its main functions:
- Hiding surface irregularities;
- Decoration of the junctions of walls and ceilings;
- Smoothing the surface;
- Room decoration;
- Identification of functional areas;
- Visual change in the size of the room.
Vertical molding makes ceilings appear higher, while horizontal stripes effectively expand the space. If the room is large enough, then you can use wide stripes with bright images. Such an interior will look very elegant and even aristocratic; creativity and art will be felt in it. But still, this option is not suitable in all cases - in small rooms the space will be overloaded.
Bedroom with photo wallpaper Source 100oboi.ru
It is not advisable to glue molding over wallpaper. In such a situation, it is difficult to predict its durability, and the risk of ruining the design with glue also increases. In addition, subsequent painting of the product may be necessary. If there is still such a need, then it is better to choose lightweight materials - for example, polystyrene foam or polystyrene.
Popular “complex” colors
Nowadays, “complex” colors with all sorts of tones and halftones are considered popular. You need to remember the rule of three: when decorating the interior, do not use more than three colors so that the interior does not look tasteless.
When experimenting with contrasts, you should not get too carried away, so as not to overdo it with colors. Nowadays, large color patterns with bright, highlighting shades are in fashion. This wallpaper is recommended as accents on one or two walls.
Decorating a room with molding
A frame for photo wallpaper on the wall is one of the most interesting design solutions for home decoration. A few years ago, only dull and inexpressive paintings could be found on sale, but nowadays the situation has changed dramatically. The construction market offers a large number of bright options for every taste, so each user can choose the most suitable product.
Photo wallpapers can become an expressive accent and add originality to your home. The modern manufacturing method assumes the wear resistance and durability of this material. For a painting to look beautiful on the wall and attract everyone’s attention, it is not enough just to stick it on. It is also necessary to take care of the appropriate decor for the image and frame it in a suitable frame.
Kitchen with photo wallpaper Source design-homes.ru
Selection of performance technique
Most often, designers design a picture in two main ways:
- The easiest way is to frame the entire image at once;
- A more interesting method involves creating a driptych or triptych - sticking several sections of a painting in a certain shape and sequence.
Each method has its own advantages and is suitable for decorating a specific type of interior.
White wall with photo wallpaper Source newwalls.as-creation.com
Selection of technology
When choosing a frame for photo wallpaper, you need to decide on the further use of the picture. You can order printing of image details that fit a specific frame or cut out elements from a large canvas. Next you need to do the following:
- The first stage of work consists of cutting and preparing the necessary parts from the whole canvas.
- Marking the location of the future placement of paintings and deciding on the method of their arrangement.
- Installation of frames on the prepared surface. This action depends on the purchased material - it can be gluing the frame, puttying and painting the stucco, or decorating any other suitable base.
- At the last stage, the details of the photo wallpaper are glued inside pre-fixed frames.
Expanding space with photo wallpaper Source design-homes.ru
Color selection
Interesting solutions for color design of frames:
- Contrasting combination of white planks and dark wall. For better effect, transitions to the ceiling, window and door openings, furniture contours and other noticeable interior details are finished in the same way. In this way you can visually expand the space and add light to it.
- White or light planks on pastel walls. This solution looks good in large rooms, such as a living room. The shade is suitable for decorating walls, paintings and mirrors, as a result the room looks more sophisticated and sophisticated.
- Multi-colored planks are often used for children's rooms and hallways; they can also be used to create a bright accent or highlight certain items. For the same purpose, choose contrasting strips or several shades darker than the main shade.
Living room with photo wallpaper Source krovli-zabori.ru
A specific color scheme is chosen based on the overall tone of the interior and the tasks facing the designer.
Coffee on photo wallpaper Source kit4en.ru
Examples of photo collage themes on the wall for different rooms
Photos can be placed in any room in a private house or apartment. The basic rule: the design style must correspond to the design of the room, harmonize in color and overall perception. You can go the simple route and buy identical frames for the entire panel, in which case they should be placed like tiles over the entire surface of the wall.
Photo collage – love story
How to choose family photos for photo frames on the living room wall
Photos in the living room can be placed on any surface, the main thing is not to overdo it with their number, but they will look most advantageous:
- Above the fireplace;
- above the sofa.
An excellent option for choosing a panel theme would be photos of all generations with the ability to add new photos. This can be done in the form of a family tree, at the base of which you can place a photo of the oldest family member or a group photo of all your loved ones. Place imitation branches with leaves between different-sized frames.
Family photo panel above the living room sofa
Family photo frames for the bedroom wall
The theme of the story of dating, love and wedding is suitable for the bedroom; it will charge you with a romantic mood on winter evenings and give a charge of positive energy in the morning. In order for their location to have an attractive appearance, you need to give the picture-collage of photographs a touch of intimacy and choose the right lighting.
All the best family moments on one panel
What will a child be pleased to look at in a children's room?
For children, the highlight of the design will be frames in the form of bright puzzles, fixed in a chaotic manner. An ideal example is a close-up photo of a baby with his first smile in the center, with memorable moments around him growing up. In one frame you can place casts of a hand and a footprint, the first curl of a child.
Great idea - photo next to the height meter
How to choose photo frames for the interior of the corridor
To place photos in the hallway, it is advisable to use a wall on which you can view the photographs both from a distance and by approaching them for a more detailed study.
Arbitrary placement allows you to complement the collection
Main types of frame materials
There is a huge variety of solutions, each of which has advantages and disadvantages. Let's look at the main varieties.
Flowers on photo wallpaper Source modernplace.ru
Wood
This is one of the oldest decorative options; it has been used to decorate the interior for many centuries. Traditional material is perfect for classic design trends; it can be decorated in various ways and painted. Before painting, the wood is treated with an antiseptic and varnished. The strips are fixed with self-tapping screws or an adhesive base.
Wooden frame Source pinterest.com
Advantages of the material:
- Easy processing;
- Durability and reliability;
- Possibility of painting and fixing with glue;
- Long service life if treated correctly;
- You can create openings for cables and other purposes.
Disadvantages of the product:
- Poor resistance to moisture;
- Expensive;
- Heavy weight of planks.
Gypsum
Gypsum stucco molding is also a popular solution for room decor. You can install it yourself using gypsum or alabaster mixture.
Plaster frames Source stroyfora.ru
Pros of gypsum:
- Large selection of shades, shapes and patterns;
- Durability.
Among the disadvantages:
- High price;
- Heavy weight;
- Fragility;
- Complexity and high cost of installation.
Polyurethane
The main advantage of polyurethane is its flexibility. For this reason, the material can be used to decorate surfaces of various shapes. Other advantages of this option include:
- Smoothness and lightness;
- Possibility of painting and varnishing;
- Easy to use, can be glued to wallpaper and various other materials;
- Durability, which allows the use of polyurethane frames for about 30 years;
- Affordable price;
- Similarity to plaster products;
- Easy to care for.
Polyurethane frames Source gazeta-pravo.ru
Polystyrene
Frames for photo wallpapers can also be made from another plastic material - polystyrene. It is generally similar to the previous one and has the following advantages:
- Easy to make cuts due to the smoothness and evenness of the material. This characteristic allows the product to be used for decorating complex shapes of surfaces and objects.
- Polystyrene is easy to paint in the desired shade.
- Simplicity and ease of care, moisture resistance and the ability to easily wash the material.
- Light weight and affordable price.
Frames made of polystyrene Source mr-build.ru
Despite all the advantages described, polystyrene also has a drawback - a grainy surface.
Styrofoam
Foam plastic decor attracts users with its cheapness and availability, but at the same time it cannot be called a quality product. Buyers choose it because of the following properties:
- A light weight;
- Easy installation;
- Flexibility;
- Affordable price.
Among the disadvantages are:
- Fragility and lack of strength;
- Insufficient clarity of the pattern and unexpressed surface relief;
- Unresistant to many paints and varnishes;
- Does not tolerate exposure to solvents and some types of cleaning products.
Foam frames Source postroika.biz
Metal
This material is not very often used for wall decoration; it is usually used for places where one finish transitions into another - on thresholds, steps, in corners and areas where elements join. At the same time, the metal performs not only a decorative function, but also protects surface joints from mechanical loads. You can fix the metal frames with glue or self-tapping screws. The trim should be placed over the outer edge of the material.
Metal frames Source baget-sharm.com.ua
Other materials
The traditional choice for many homes is still plaster, which is fixed with alabaster mortar. This technology came to us from the last century and is still successfully used by craftsmen in construction. It is quite difficult to fix stucco molding yourself, since it is very fragile and requires careful handling. Most often, such work is performed by trained professionals. Also, gypsum decor is difficult to repair - falling off material threatens rapid destruction of the created frame and requires the purchase of a new product.
Wooden moldings are very rigid and also require a professional approach during installation work. But they are quite versatile and can be used in almost any room. For fixation, thin nails and special wood glue are used to strengthen the fastening.
Polyurethane frames have become increasingly popular recently due to their light weight, easy mounting, environmental friendliness and safety in use. The products are fixed to the surface with acrylic glue. Using polyurethane is simple and convenient, since the material easily transfers coloring to any desired shade.
Profiles made of gypsum, plastic, polyurethane
Plaster moldings remain popular. They are spectacular in appearance, consistent with the design of ceiling cornices, and endow the room with artistic completeness of style. The advantage of gypsum products is the ability to acquire any round shape.
Note!
- Glass wallpaper - what is it? Pros and cons, types, features, characteristics, photos of design and combinations in the interior
- Plain wallpaper - 150 photos of modern design. Rules for choosing and combining wallpaper in the interior: kitchen, bedroom, living room, hallway
- Cork wallpaper for walls: design features, types, photos in the interior, combination options, new designs
Products made of polyurethane and plastic are often used to decorate rooms. They are easy to use, aesthetically pleasing, lightweight, and easy to install.
Polystyrene moldings vary in shape, patterns, and are resistant to humid environments. Easily painted in the desired shade. Plastic slats are perfect for the bathroom, because they are not afraid of moisture and are resistant to steam.
How to install molding
There are special construction rules for fixing baguettes and other home decoration elements. They should be followed so that the final result is a correct and beautiful decoration using a frame or molding. To glue structures, you need to use special compounds; you can also use liquid nails. Before installation, it is recommended to keep the planks for a day inside the room in which they will be installed. This is necessary to adapt the material to the existing microclimate of the room.
Hallway walls with photo wallpaper Source otdelka-expert.ru
Installation must be carried out in the following sequence of work:
- Thorough plastering and priming of the wall panel;
- Applying markings in areas of subsequent fixation of elements;
- Treatment of parts with mounting adhesive solution;
- The elements are secured starting from the corners;
- Checking the symmetry of the frames and the strength of fixation of the parts;
- You can then leave the surface for the glue to dry. This will take about 6 hours.
- Puttying cracks and cracks between the plank and the wall or ceiling;
- Clean off excess putty using sandpaper.
Useful tips
Helpful tips when creating a frame:
- Instead of paint, you can buy special powder and varnish from a hardware store so you can control the shade of the paint.
- There is one advantage of such a material as polystyrene foam; in case of any inaccuracy or unevenness, everything can be corrected with putty.
- For a long service life, the frame can be coated with white water-repellent paint before painting it in a certain color, so our frame will last longer.
Having completed this design, the mirror will not go unnoticed. It will perfectly decorate the interior and will be pleasing to the eye. And always, looking in the mirror, will warm your soul.
Frames for creating style
Molding in the interior is used for various tasks - creating a decorative surface, framing pictures, complementing an existing composition, dividing a room into functional zones or, on the contrary, combining the space into a single whole. Frames also effectively change the height of the ceiling, visually expanding or narrowing the room. It all depends on the purpose of their use and the choice of the appropriate type. Among the most important tasks of molding is the creation and addition of a certain style in the interior:
- Baroque. It is difficult to imagine this style of style without numerous skirting boards and baguettes, frames with rich stucco molding and gilded corners. Floral ornaments and relief carvings are harmoniously combined with panels of wallpaper and decorative plaster. All these elements are framed with light light strips.
Baroque direction Source stylingroom.ru
- Provence. This style is characterized by simple, straight lines, there are no elaborate shapes, you can see a relief molding at the junction with the ceiling and floor. There are no unnecessary elements here, the walls are free of stucco and other details. Light shades predominate as the general background; white, as well as pastel gray and cream tones are most suitable.
Direction Provence Source walldeco.ua
- Scandinavian style. In this direction, the walls are not decorated with moldings, only occasionally they use frames near window and door openings, and also mark the transition zone to the floor and ceiling. The shades are light, white and beige tones predominate, which do not stand out against the background of the general colors of the room.
Interior in Scandinavian style Source walldeco.ua
Mediterranean. In such interiors, you can use various design options using moldings - decorations for cornices, ceiling moldings, highlighting windows, doors and arches with decorative details with stucco. Curved shapes and lines predominate, and there are often many small carved elements. The brightest accent of the interior is usually a large painting depicting the seashore, a garden, or an exit to a balcony or porch. For such an element, photo wallpaper in a beautiful carved frame is used. Columns in antique style will complement the design of the room.
Interior in Mediterranean style Source decoretto.ru
- English. The most important thing here is to decorate the fireplace correctly; this can be done with the help of decorative decorations. Planks separate the joints of the wallpaper, and also place a cornice along the entire perimeter of the ceiling. The fireplace is decorated with the same elements. At the same time, the details should have a simple geometric relief and calm pastel shades.
- Classical. Some apartments in old buildings are designed in this style. They are distinguished by high semicircular window openings, arches, columns and various options for moldings. All interior elements are decorated, and the ceiling is also separated using baguettes. The classic allows for the decoration of walls with wooden panels, so here you can use various carved decorations in all sorts of variations.
Selection of various profiles
Correctly choosing wallpaper in profile finishing for a separate room is not an easy task. It is important to maintain the correct color scheme of the decor.
It is recommended to combine bright textured wallpapers using moldings of pastel colors, and products made in soothing shades should be combined with a baguette of bright colors.
Large planks create volume to the walls, giving the interior uniqueness. Moldings are made from gypsum and expanded polystyrene. Wooden planks will be a great idea for decorating walls in a room expressed in a classic or country style. They will make the room cozy and warm.
How to make a frame from wallpaper with your own hands
If there is any unused wallpaper left after the renovation, do not rush to throw it away. This detail can also be used if you include imagination and a little creativity.
Wallpaper history
In the first millennium BC, the first analogues of modern wallpaper appeared in the territory inhabited by the ancient Assyrians. For a long time, such products were black and white, and only in the 11th century AD technologies appeared that made it possible to make them color.
Paper wallpaper was first made by the ancient Chinese, who kept the method of its production a secret. It is only known that the material for them was rice paper. In the 6th century AD, Japan came up with its own technology for making wallpaper. It reached European states only in the 8th century.
Despite the novelty of the invention, the quality and durability of woven wallpaper was far superior to its paper counterpart. In addition, they had a high cost, as they were decorated manually. After some time, the Englishman Tsaner invented a method of making wallpaper using silk threads. Already in the 14th century, a wooden stamp appeared, which began to apply patterns to the surface of the product.
Additional options for using leftover wallpaper
Before considering the actual creation of frames, it is worth dwelling a little on alternatives to this use of material. For example, you can come up with various interior details or transform pieces of furniture. Some ideas for application:
- Pasting the back surfaces of shelving, hanging shelves or open cabinets. A solution with a pattern in the form of a decorative lattice looks great. This way it is easy to change the appearance of furniture with minimal effort, in addition, it is a very cheap and easy to implement option. If you want to add bright accents, you can use several different colors or types of paper, this design will be much more expressive.
- If desired, you can decorate the outer surfaces of furniture and interior items. In this case, all that remains is to ensure that the design is combined with the overall style of the room. To give an original look to a dressing table or coffee table, wallpaper is laid on the surface and covered with glass. This makes it easy to change the design of the furniture.
- Create interesting accents on your walls with framed wallpaper. Here there is room for imagination - to decorate the surface with frames of different sizes, but of the same tone, or to use different color compositions for maximum expressiveness of the decor. For those who love creativity, you can try to design the frame yourself. To do this, use a baguette, which can be purchased at any hardware store.
- If you cover cardboard or plywood with paper wallpaper, you will get an original handmade panel. There may be several of them from different types of paper, or products of the same color can be made. If one of the walls in the room is covered with wallpaper, an unusual accent made of the same coating will look beautiful on the opposite surface.
Interior in English style Source archidom.ru
Implementation of design ideas
Thoughtful wall design will add charm and personality to the interior. The wallpaper is decorated with moldings around the edges, bringing various design ideas to life:
- help divide the room into zones;
- improve the proportions of the room;
- act as accents of space;
- allow you to emphasize the texture of the wall covering.
Decorative strips can effectively differentiate between individual finishing textures - paint and wallpaper. At the same time, the popular combination of materials will organically fit into the design.
Making Photo Frames
There are a huge number of options for making frames, and you can even come up with your own, guided by your imagination. Let's look at a few original ideas for example.
Frame made of tubes
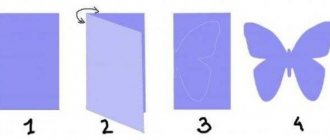
This is a very simple method, but the result is always stylish and interesting. Technique:
- Paper strips with a width of 2 cm are cut out, their size depends on the desired size of the future frame.
- Then tubes of equal thickness are made from the strips and glued together with office glue.
- After the glue has dried, the next stage of manufacturing begins. The tubes are placed side by side and cut on each side at an angle of 45 degrees. The edges must be made very carefully so as not to spoil the appearance of the workpiece.
- Then the entire structure is glued and reinforced with a piece of cardboard.
- The final stage may be decoration with sparkles and other decorative details.
To keep products in their original shape and prevent damage from moisture, cover them with paint and varnish. The paper must first be thoroughly primed with an acrylic-based solution.
Volumetric frame
Using this method, you can make an original frame using scissors and a small piece of paper. To do this, follow this procedure:
- Take a piece of paper and draw four lines on each side, slightly indented from the edge. Then the lines need to be pressed a little, but this must be done carefully so as not to accidentally damage the material. Keep in mind that the size of the future frame depends on the size of the sheet.
- Then, where the lines intersect, the sheet needs to be cut. After trimming, notches are marked on the outer parts, which are also cut out.
- The last step is to fold the frame and enjoy the worthy result of the work done. This product will look great in any interior.
Classic frame
A fairly simple manufacturing method consists of making a frame onto which wallpaper is subsequently glued. The work is very simple and the process does not present any difficulties:
- The frame is cut out of thick cardboard, then wallpaper is glued on top.
- A cardboard wall is installed at the back, then the product is glued and the work is completed.
- You can add decoration and coloring, for example, gilding will look great.
Among the advantages of such products is their low weight. This property allows you to attach frames without nails, using only double-sided tape.
Bonding workpieces
The ends are smeared with glue and glued together on a horizontal surface. The mutual perpendicularity of the frame parts is checked with a square, then the parts are fixed with brackets from the back side.
After gluing, the frame can be fixed in another way - using small nails and cardboard corners, or corners made of plywood (tin, sheet metal).
After the glue has dried, the gluing areas are cleaned with abrasive paper and wiped with a rag. Then the product is covered with one layer of stain.
To avoid uneven coloring, the process must be completed within the drying time. After drying, the product is varnished.
Features of interior design work with moldings
When planning to do interior decorating work with your own hands, take into account the important features and nuances of this process in order to ultimately obtain a completely satisfactory result. This will not only get rid of common mistakes, but also give the room originality, and also extend the life of the products.
Interior in a classic style Source walldeco.ua
Wallpaper sticker
The color of the molding must be chosen not only based on the shade of the wallpaper on the wall, but also depending on the overall design of the room. As a result, the entire interior should look like one whole, without unnecessary irritating elements.
In a spacious room, light shades of wallpaper will match the same light shades of planks. This combination will be very appropriate and harmonious.
If the interior contains dark shades of furniture or other objects, they can be emphasized by a contrasting combination of light wallpaper and dark planks.
Wallpapering
After all the finishing work is completed, it’s time to glue the wallpaper. 24 hours after the plank has been glued, it is painted in the required shade and left to dry. Then they grout and remove all excess. And only in the next step can you glue the wallpaper directly. The work is done very carefully to get into the joint with the frame. It is imperative to ensure that the edge of the canvas is smooth and does not go beyond the bar. Otherwise, the appearance of the product will be damaged.
General provisions
Frames have been used to highlight the contents of paintings for hundreds of years. Beautiful design allows you to highlight and present a work of art in a more favorable light against the background of the wall and surrounding furniture.
Today, their use has become much wider; now they are also used for decoration:
Mirrors;
Incredibly beautiful frame made of ceiling plinth for a mirror
Photos;
DIY frames from plinth for photos
TVs;
DIY frame from ceiling plinth for TV
Tapestries;
Frame made of plastic skirting boards with tapestry
How to make a frame from ceiling plinth
To complete this work you will need:
- ceiling plinth made of polystyrene foam;
- universal adhesive base;
- acrylic wood putty;
- well sharpened knife;
- protractor;
- acrylic based paints;
- corrugated cardboard or packaging from household appliances.
The required picture is cut out of paper and glued to the ceiling slab. The latter should exceed the size of the picture by about 1 cm on each side.
Next, work is carried out on the production of frames from corrugated cardboard or ceiling plinth. First, a template for the future product is cut out. A rectangular shape is made from corrugated cardboard, and a hole is made in the center for a photograph or picture. The size of the frame depends on the size of the desired image that will subsequently be contained in it. Then an identical rectangle with a slightly larger window is cut out from the workpiece. Then the elements are glued to each other. The result is a ready-made place for inserting a picture. If you plan to use glass or a stretcher, you will need to make a couple more of the same rectangles with a wider window to glue them to the other side of the frame. The number of products depends on the thickness of the embedded image.
When the base is ready, they begin to decorate the frame with ceiling plinth. Each edge of the baguette is cut at an angle of 45 degrees. Mark the corners and cutting lines on the paper using a protractor, then lay down the strip and make marks on it. Then the 4 elements are cut off using a sharp knife. Next, the baguette is glued to the cardboard blank from the outside. The cracks in the corners are sealed with putty and paint. The work done must be left for some time until the glue completely dries.
Kitchen interior with photo wallpaper Source design-homes.ru
Then you need to putty the areas where the baguette meets the cardboard, as well as the joints at the corners and the back side of the frame. This solution will help strengthen the product and hide all uneven finishes. The ends of the frame are puttied several times, dried, and then each layer is sanded one by one using sandpaper.
The dried putty begins to be painted. It is best to use acrylic compounds or water-based emulsion. To get a milky tone, you can add a small amount of ocher to white paint. For a dark shade, black paint is mixed with red and dark brown. Then the finished product should be treated with water-based varnish.
Lastly, fasten the product. For this purpose, you can use thick twine, from which you cut from 10 to 14 cm. Then take a dense but thin piece of cardboard and cut out a rectangle with sides 5 by 7 cm. The rope is applied to the back side of the frame. After this, glue is applied and the cardboard is glued, which is pressed with a weight until it dries completely. Now the frame for photo wallpaper on the wall is ready, all that remains is to fix it on the mount and enjoy the result of the work done.
Making without a miter box
To make a frame without a miter box you will need:
- mirror;
- fibreboard (fibreboard) according to the size of the mirror;
- ceiling plinth;
- glue for mirrors;
- putty;
- molar tape;
- acrylic lacquer.
Work process:
- We outline the mirror on the fiberboard, leaving space for the fillet at the edges.
- We measure and cut the ceiling plinth to the size of the mirror.
- We glue the mirror and fillet to the fiberboard using special glue.
- After everything is glued, we paste masking tape between the mirror and the baseboard to pre-protect the mirror.
- Now we fill the gaps that form between two perpendicular fillets.
- Apply acrylic varnish to the frame on top. The color of the varnish is up to you. After the varnish has dried, remove the tape. And the frame is ready!