Butterflies in the interior
Butterflies will easily and naturally “fly” into any style of room decoration. Regardless of what colors the room is designed in, butterflies will give it comfort and originality.
They can be placed anywhere:
- On the walls,
- ceilings,
- lamps,
- Windows,
- Stick on wooden furniture.
Paper butterflies
Most often, butterflies are made from paper. How to make a butterfly with your own hands? The best way to do this is to make a template and cut out the outline of the wings from it.
You can use any paper, depending on what kind of butterfly you want to get. A simple office one will do:
- Colored double sided,
- Parchment,
- Corrugated paper,
- Paper napkins and thin cardboard.
Selection of materials for making elegant decor
Miniature or three-dimensional figures for decorating and decorating various surfaces and objects can be made using different ideas. For the creative process, you can use traditional materials and improvised means, combine various decorations and working techniques:
- paper, skillful needlewomen use colored and office paper, corrugated paper, napkins and even thin cardboard, which are easy to process;
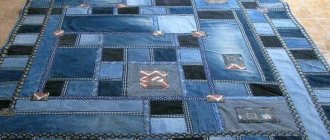
- fabric or non-woven materials, dense and thin, they can be supplemented with satin or crepe ribbons, great for working with felt and jeans;
- compositions for modeling, to make voluminous and interesting figurines of butterflies, you can use salt dough and polymer clay and even airy plasticine;
- foamiramine, using this material you can make realistic crafts, because it bends perfectly and keeps the shape given to the workpiece for a long time.
Separately, it is worth mentioning the production of decor for decorating sweets and homemade baked goods, which look great on cupcakes and cakes.
Volumetric butterflies are easy to make using special molds and mastic, and for skilled craftswomen it will not be difficult to make decorations in the shape of openwork butterflies from chocolate and royal icing.
Simple paper pattern
It is recommended to use the template halfway for better symmetry. This is done simply. On a sheet of paper folded in half like a book, only half of the silhouette is stenciled.
You need to attach it with its belly to the fold of the sheet. Cut along the contour on both halves of the folded sheet at once. Expand. The butterfly is ready.
You can find ready-made, complex templates online and print them. If you change the dimensions of the template using a graphic editor, you will get many butterflies of the same type of different sizes. This composition will look great as a panel.
Simple paper silhouettes can be completely glued onto a plane or the wings can be bent upward. Then they will look more voluminous.
How to use ready-made butterflies
Decor can be of any size and quantity.
- Cut out one or two large butterfly figures and use them as a background for a painting, clock, or poster.
- Make a large image from many small butterflies.
- Make a vortex, spiral or cloud from figures of different sizes.
- Hang the decor on thin strong threads. This will “revive” your composition at the slightest breath of wind.
- Post a motivating inscription from a swarm of insects.
- Create a picture from the figures and fit it in using elements that extend beyond the outline of the frame.
In fact, there are many options. Perhaps you will come up with your own original way of decorating the wall with paper winged butterflies.
Openwork butterflies
More difficult to perform. Made from thin cardboard or thick paper. Using the template with the applied monograms, you need to cut out the excess sections of paper. This is done with a scalpel or a sharp stationery knife with a thin blade.
Only then cut out the general outline. When working on an openwork butterfly, it is recommended to place something hard under a sheet of paper so as not to spoil the table covering with a knife.
Multilayer models
- To make multi-layer butterflies on the wall with your own hands, you need to cut out several identical blanks using a stencil.
- Then put them together, glue or pin them together in the abdominal area.
- Bend the wings nicely.
- The abdomen can be decorated with beads.
- The blanks must be identical only in shape.
- If you use different elements in color and size, you will get an original three-dimensional butterfly.
- One of the folded silhouettes may well be openwork.
Preparing the template
We take a piece of cardboard - any kind, you can even use some kind of packaging (tea, breakfast cereals, cereals, etc.) the main thing is that the cardboard is dense and not porous. Find a butterfly silhouette that you like, transfer it to cardboard and cut it out.
There are several silhouettes in the photo gallery. They can be printed, then cut out and transferred to cardboard.
Some tips for working with templates. Many butterfly contours are given with two wings, but it is better to cut off one wing - you will definitely get it symmetrically.
Decorations made from winged insects of different sizes look good. Therefore, the same contour can be enlarged or reduced using the simplest functions of graphic editors - the same Paint, which is available on any computer. Since in this case only the outline is important, the quality of the drawing is not so important, so feel free to experiment with sizes.
We cut out the printed template, apply it to cardboard and trace it. We cut it out and get a hard working template with which you can make dozens of identical elements.
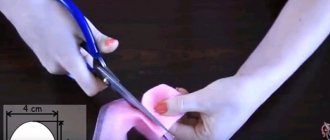
Cut and attach
Take a sheet of paper, fold it in half, attach a template, and trace it. Cut along the drawn line. Next, we bend the wings away from the “body” and get a workpiece. Having cut out a certain number of butterflies, we attach them to the chosen place - on the wall, a piece of cardboard, etc.
You can attach it with regular glue (PVA is usually the best option), or small strips of double-sided glue.
You can use wallpaper glue, etc. If you are in doubt about the result, stock up on sewing pins. They can be mounted on the wall several times without much risk of damaging the surface. When you have placed all the butterflies and you are satisfied with the result, you can glue or use tape.
Corrugated paper
Light, airy butterflies are made from so-called corrugated paper.
The manufacturing process is extremely simple:
- Cut a rectangle to the size of the future butterfly;
- Sew with thread and pull in the middle to make a bow;
- Straighten the folds of paper with your fingers and form wings;
- Cut a strip of paper from edge to middle on both sides for antennae, roll thinly;
- Form the bend of the wings.
Such airy translucent creatures in different colors look great, suspended from lamps, or in designs on hoops in the interior.
These are not all the ways to create paper butterflies. Knowing the basics of the quilling technique, you can make a craft using this technique.
From sheets of glossy magazines you will get unusual colorful fluttering beauties. Volumetric interesting models can be made from paper folded like an accordion. Craftsmen will be able to make a butterfly in origami style.
Finished products are glued to the walls with double-sided tape or attached with pins and beads. To achieve the floating effect, a piece of foam rubber is glued to the paper body and used to attach it to the wall.
We fix the decoration
To keep the prepared butterflies on the wall, you can use one of the options listed below:
Glue
Fully or partially glued butterflies will stick firmly to the wall. You can use either regular PVA or wallpaper glue. The main thing is not to overdo it so that it does not protrude beyond the edges of the butterflies. This is the easiest way to decorate a wall with butterflies.
Pins
You can use a wide variety of pins. As an additional element of decoration, you can choose pins with beautiful heads in the form of various decorations or just small balls like pearls. Pins will fit into materials such as plastic or wooden lining without problems, the same applies to cork and even drywall.
If the walls are covered with wallpaper, then you can do it differently. Using pliers or pliers, bend the tip of a pin approximately 1-2 cm long at an angle of 90 degrees. After this, the curved part is placed under the wallpaper, and thus the butterfly is secured. The easiest way to glue pins to the butterfly itself is with Momenta glue.
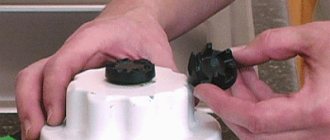
Styrofoam pieces
On one side of the piece stick to butterfly glue, and on the other side to the wall. The only bad option is that the foam itself is not a very durable material, and if it breaks, it will be difficult to remove the remaining part from the wall.
Hang on threads
This option is best suited when using origami. Using thin threads or colorless fishing line, butterflies are suspended from a cornice under the ceiling or directly to the ceiling. This method allows you to fully formulate volumetric solutions.
Finally
Although this method of decorating walls requires a lot of time to implement and perseverance, it will undoubtedly bring many new bright emotions into your life. Any interior design of an apartment can be decorated with variety using butterfly appliqué on the walls and ceiling. Choose the option that suits you and begin this exciting creative process.
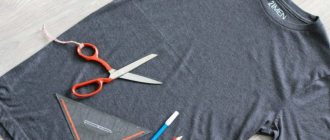
Making butterflies from fabric
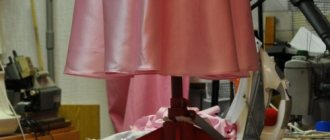
Butterflies are great as textile decor in the home. Curtains, curtains, pillows, lampshades can be decorated with them. For such purposes, it is recommended to make butterflies from fabric. This way they will look more organic. Fabric butterflies can be used to decorate clothes and women's handbags.
Good materials for work:
- Atlas,
- Velvet,
- Silk,
- Capron,
- Felt.
The principle of creating a butterfly from fabric is the same as from paper. However, working with fabric is more difficult; you need skills in working with a needle and a sewing machine.
It's fun to make a ribbon butterfly with your own hands.
- To do this, you need to take a satin ribbon and connect it into petals in accordance with the kanzashi technique.
- Form them into 4 wings, connect them together and stitch them with thread.
- Make the body from beads and beads, make antennae, and glue it to the wings.
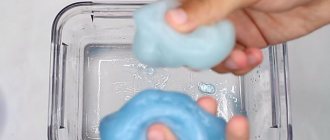
- A weightless, graceful butterfly can be easily made from simple white threads.
- On the solid outline of the butterfly wrapped in cling film, you need to wrap threads impregnated with glue in curls.
- Make a body and antennae from beads. Glue to the wings.
There are a lot of ways to make butterflies from textiles, all that remains is to find the most suitable one.
Butterflies on the wall - simple and original
The desire to update the interior often arises, and renovation is a very expensive and costly pleasure to do too often. In such cases, design elements come to the rescue, capable of not only changing the look of any room, but also creating a special atmosphere in it. Such decor will cost mere pennies, but your family and guests will appreciate the original idea.
Decorating with paper butterflies is a budget-friendly, but at the same time original option to decorate any room; a little patience and imagination - and the room will be completely transformed!
Creating butterflies for interior decoration does not take much time, but it gives inspiration and is guaranteed to lift your spirits. It is worth noting the mobility of such decor, because if you wish, you can easily move or replace elements of the composition made of paper butterflies with others almost every day. With the right choice of shade, butterflies can either become the main color accent of the room or unobtrusively complement the interior.
Many designers evaluate this method of decorating space positively and use it to decorate not only residential areas, but also shop windows, restaurant interiors and offices.
With the help of butterflies you can attract the attention of visitors, be it your friends coming for tea or customers in the store.
Non-standard ideas in decor
In addition to paper and textiles, butterflies can also be made from unusual at first glance materials for decoration.
Crafts made from vinyl film are very effective.
- Polymer clay is an excellent material for crafts.
- By mixing colors, you can copy a bright representative of the natural world.
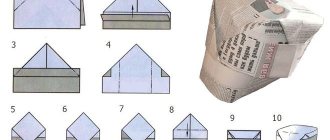
- A vintage original butterfly will be made from old newspapers.
- In Art Nouveau decor you can use butterflies made from plates. Something beautiful can be created almost out of trash.
- Aluminum beverage cans and plastic bottles will be used.
- In the photo of a homemade butterfly made from aluminum foil, you can see how exclusive it is in design.
By showing creativity and imagination, it is easy to obtain rare insects.