If you are a creative person and are not used to a trivial approach to the issue of gift wrapping, then this article will definitely be useful to you. Here we will tell you how to make a paper gift bag yourself at home.
Thanks to such packaging, you will definitely be able to remain in the memory of the hero of the occasion for a long time, and if the package is themed, then you will definitely receive the highest praise.
Here you can learn about the simplest, but most interesting and original types of paper bags and how to make them. Try it, and you will definitely end up with something very interesting and unusual.
How to do
Place a piece of craft paper in front of you and fold the smaller side down one centimeter, then apply a piece of double-sided tape to it. Then you need to fold the paper in half and carefully iron each fold.
Now you need to understand how wide the future paper bag will be. Open a sheet of paper and make folds parallel to the lines on the sides. Now connect by bending the side lines inward.Now you have to design the bottom of the paper bag. To do this, bend the bottom of the future package up so that the strip is equal to the folds on the sides.
Next, you need to bend back the part of the bag that is located at the bottom and fold the sides into the center, thereby forming the corners of your paper bag. Place adhesive tape on the folded sides and seal the bottom of the bag.
To make the bottom of the bag stronger and more durable, cut out a rectangle of suitable size from cardboard and place it inside the bag.
Take a hole punch and use it to make holes in the places where the handles will be. Now it's time for the pre-prepared ribbons. Pass them through the holes you made and secure with small, neat knots.
To ensure that your package turns out beautiful and neat, strictly follow all the instructions and be very careful and scrupulous; only if these conditions are met, the result will please you and not upset you.
Kraft paper bag
Before you start following the master class on creating craft bags, you need to collect the following materials:
- sheet of kraft paper;
- scissors;
- glue;
- hole puncher;
- ribbon, lace or rope.
We place the sheet in front of us in landscape projection. We bend one of the side edges towards ourselves. The fold width is approximately 2 cm.
Turn the sheet over and coat the top fold with glue. Glue the opposite edge to the fold.
We bend the resulting part at the sides to give the bag a square shape.
Next, you need to bend the sides symmetrically inside the bag and move on to creating the bottom.
Bend the bottom of the bag away from you, about 5 cm.
After this, we bend the corners on the fold again into triangles to the line of the previous fold.
Next, the bottom unfolds and the side edges of the narrow walls of the bag are folded inward, resulting in something like two trapezoids.
The side walls of the bag are brought into a flat position, while the mentioned trapezoids are slightly bent in the middle.
To glue the bottom, glue is applied pointwise to the sides of the trapezoids and the space between them, after which the sides of the trapezoids are bent inward. First this is done for one side of the two trapezoids, then for the other.
After the glue dries, the bottom straightens - the bag can already stand on its own. The top of the bag should be slightly bent towards the bottom and holes should be made in it with a hole punch through which the ribbon for tying is threaded. You should get a craft package, as in the following photo:
Related article: Oversized sweater with knitting needles: a pattern describing raglan knitting
You can create a craft package using the following template:
To make the top of a craft bag not folded, but with separate handles, you need to seal the edge of the top. To do this, at the beginning of the craft, you can wrap the paper inside out, gluing the resulting fold. After drying and making holes with a hole punch, you should pull the tape through the holes in a ring, tying it into a knot inside the bag, or make handles from two tapes tied inside in front of the holes in large knots.
In some homemade craft bags, in order to cover the seams of the bottom inside the product, a rectangle of paper or thick cardboard is placed according to the size of the bottom, but this is not necessary.
How to decorate the package
You can use absolutely anything to decorate your paper bag.
It can be beads, sparkles, various beads, pieces of fabric, and in general anything that your imagination tells you. When decorating, you can even use natural materials.
Auxiliary components
Depending on what kind of gift bag you want to make, you may need:
- glue stick (PVA or even Titanium);
- ruler and simple pencil;
- hole punch and scissors;
- clothesline or satin ribbon;
- small greeting card;
- cardboard or cardboard wrapper;
- decorative elements (about the same as for scrapbooking).
In addition, a hot glue gun with hot glue may come in handy. As for decorative elements, when making a gift bag you can use various cut-out flowers, geometric figures, confetti, small crocheted flowers, large sequins in the shape of shells, leaves, flowers, as well as other decorative motifs.
When choosing one option or another, it is worth considering the type of glue. For example, paper decor adheres well to regular paper glue and PVA. If you need to fix sequins or knitted decorative elements, you should use hot melt glue or Titan glue, which is often used by craftsmen involved in creative work.
Little secrets
If you use thick or cardboard paper in your work, then when bending it is better to go along the line with something sharp, then you will not have cracks or other unpleasant things.
If you are starting to make a paper bag for the first time, it is better if you find the opportunity and time to practice a little. By the way, training can be done using a simple landscape sheet.
This option for making a paper bag is classic and ideal for beginners.
But if you already have sufficient experience in making various crafts, then you will be interested in trying other variations of paper bags.
Gift bag in the shape of a cone
The original design will be a paper bag in the shape of a cone. This model will add elegance to any small gift. The heroes of the occasion will definitely appreciate it.
To make such a package, roll up beautiful paper, as you used to roll for seeds. Connect the sides with tape and decorate the paper bag according to your discretion and taste.
There are a great variety of options for making paper bags. When making them, use high-quality materials and simply follow simple recommendations.
Also, when decorating, try to ensure that it is thematically suitable for the holiday for which you are going to give a gift in this paper bag.
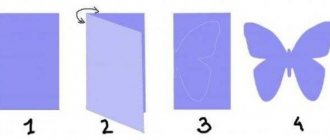
For example, if it’s an adult man’s anniversary, then flowers, hearts and butterflies are unlikely to suit him. Just like a young girl, brutal presentation of a gift using pistols and other paraphernalia is not suitable.
Let's move on to registration
The created craft bag can be decorated not only with various types of ties on the top, but also with other decorative elements.
You can apply your own design to the surface of the bag. Ink, charcoal, pastel, sepia, and sanguine are best suited for drawing on such a surface. The drawing can be either a solid composition or a set of small elements, as in the photo:
In addition to drawings, you can glue a variety of flat crafts onto paper, both from paper and from fabric, acrylic, etc.
The top of the bag can be left flat or grooved. The design with lace also looks very beautiful, in which you can paste it over a bag, or transfer a lace design to the surface of the paper using paint and a sponge.
Decorations can be made from craft paper using templates for patterns made from plain paper. Such decorations look like this:
You should never neglect natural materials when decorating craft bags: Christmas tree branches, pine cones, acorns on strings go perfectly with the light wood color of the paper.