Foam rubber material is used for various structures - furniture, toys, mattresses, sofas, to create decor, and insulate the house. Using the material for different purposes may lead to the need for gluing it. Any glue will not work for this purpose, so how to glue the foam rubber to get a reliable fixation? After all, foam rubber consists of only 10% foam, the rest is air, which simply absorbs most adhesive solutions. There is a special glue for foam rubber; how to choose it and how to work with it will be discussed below.
How to glue foam rubber at home
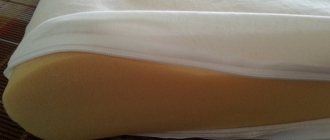
Foam rubber material is polyurethane foam, foamed in such a way that many air cells are formed. This allows the material to have high elasticity, sound insulation and thermal insulation.
It does not form mold and holds its shape at different temperatures from -40 to +90 degrees. But this material also has negative sides; it is flammable and quickly loses its technical characteristics. Although the new type of gray foam rubber, most often used for boxing gloves, lasts a long time.
There is a type of this material that is not elastic, but hard.
The characteristics of the material impose separate requirements on how foam rubber can be glued together or to other materials. The following components should not be present in the adhesive solution:
- It is impossible for the composition to contain trichloroethane and toluene, they will dilute its surface;
- The adhesive solution should not be too viscous, otherwise it will be completely saturated with the material, and there will be an increase in consumption, which can lead to deterioration of properties and long drying.
Therefore, in order to reliably glue foam rubber at home, you must first of all choose the right foam glue; suitable options will be discussed below.
Foam rubber material is polyurethane foam, foamed in such a way that many air cells are formed.
Alternative options
If you need to glue the foam rubber urgently and there is no time to buy glue, use alternative methods. For example, PVA can also glue polyurethane, although the reliability of such a design is very doubtful.
"Crystal Moment"
But Moment glue is a more suitable option for such purposes, because foam rubber is also listed among the surfaces to be bonded. In fact, the composition showed itself to be good and holds small parts tightly.
Hot melt adhesive
This method can easily be considered one of the most budget-friendly options, because the average cost of one stick is 50 rubles. It holds the foam rubber well and the only drawback can be considered only a rough and noticeable seam.
Silicone sealant
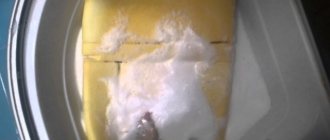
The product perfectly holds parts of foam rubber together without clogging its cellular structure. The only downside is that it takes a long time to dry.
Features of choice and types of glue for foam rubber
Choosing what to glue foam rubber with is not an easy process, because you need to take into account many factors. Only then will it be possible to obtain a strong and reliable seam that does not change its structure and properties. Therefore, you need to study the point in the instructions that describes the composition of the product; the presence of toluene and trichloroethane is unacceptable, they not only have a destructive effect on the material itself, but are also toxic substances, working in the house will be dangerous, special rules must be followed.
Choosing what to glue foam rubber with is not an easy process, because you need to take into account many factors.
General requirements for adhesive composition
In order not to make a mistake, you need to take into account a number of requirements for a high-quality solution, which will ultimately make it possible to obtain a reliable and durable fixation. These include:
- The viscosity level should not be lower than 100c, this indicator provides the necessary elasticity; with hard and hard seams, the product will deteriorate too quickly and become unusable;
- Dry residue indicator. In this case, the larger it is, the better, because the clutch will occur much faster;
- In this case, the setting speed should not be less than two minutes, because it may be necessary to shift the parts in order to obtain their correct position;
- A one-component solution, it will be easier to work with;
- High degree of heat resistance;
- Non-flammability;
- Safety for human health;
- Reasonable cost;
- Ease of application, if you use glue in balloons, the process will be much faster and easier, which is important when you do the work yourself;
- The solution should not be too viscous, this will reduce the consumption of the product and it will not completely saturate the foam rubber;
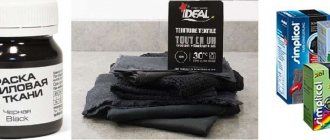
- Select a product that is suitable in shade so that there is no unsightly contrast between the product and the seam. On sale you can find different colors from white, black to red. It is possible to paint the products later to obtain a single color.
The solution should not be too viscous, this will reduce the consumption of the product and it will not completely saturate the foam.
Release forms and popular brands
To obtain good clutch quality, it is recommended to choose products from well-known manufacturers. There are a number of adhesives that experts recommend:
The article described how to glue foam rubber together and other materials. The material requires special handling when working. The choice of adhesives must be made with special attention so as not to ultimately spoil the structure of the product. Working with some types of adhesive solutions requires compliance with safety measures to avoid health problems.
How to use foam glue
The work of gluing foam rubber with different types of materials has slightly different stages. Therefore, the stages of work will be described for popular types of materials that are glued to foam parts.
To ensure reliable fixation of the foam rubber to the fabric, the following steps should be performed:
- To obtain good adhesion, the products are first moistened with water.
- Glue is applied to both products.
- Leave the parts in the desired position for 5-7 minutes so that the solution becomes covered with a film that will be sticky.
- It must be air dried, it takes ten minutes.
- Then you can proceed to applying the second layer.
- In two minutes, you can connect the parts together.
- Use a heated iron to iron the bonding areas. To prevent them from sticking to the sole of the iron, place a damp cloth or cloth between the device and the products.
Glue is applied to both products.
In the furniture industry, foam rubber is often combined with wood and plywood. This process is also used to create home decor; special compounds are used. Before gluing the foam rubber to the wood, the material is prepared, all work will include the following steps:
- The top layer of wood, if necessary, is cleaned, and the surface is also degreased or dried.
- If it is necessary to glue the foam rubber together, glue is applied to both parts, after 2-3 minutes they can be connected together, pressing tightly.
- A glue gun is used for application to wooden surfaces; it allows you to get neat and thin seams, which looks much nicer.
- The parts are prepared, a glue stick is inserted into the gun.
- According to the instructions supplied with the rods, the solution is applied; the drying and pressing time is also indicated there.
- After connecting the parts, a weight is placed on them to obtain an even coating and ensure tight fixation.
A glue gun is used for application to wooden surfaces; it allows you to get neat and thin seams, which looks much nicer.
When working with metal, adhere to the steps described below:
- The glue is applied only to the metal sheet.
- The metal must be degreased and clean.
- Leave the product for seven minutes after applying the glue.
- Afterwards, you can press the parts together, while placing an object on top that creates a press.
- For automotive parts, it is better to choose waterproof types.
You should work with gloves.
The metal must be degreased and clean.
The choice of adhesive for joining with plastic has its own nuances, because the material does not tolerate chemical exposure well. Such substances can damage the integrity of the surface. Work begins with degreasing; acetone should not be used. The adhesive composition is applied to the surface, just as in the case of wooden products with a gun. Only after the parts have been coupled together there is no need to use a press.
Only after the parts have been coupled together there is no need to use a press.
How to properly glue foam rubber
The general rules for gluing foam rubber products include a number of features:
- First, the edges of the foam are trimmed so that they become even;
- The surfaces of other materials are degreased and cleaned of all types of existing contaminants;
- The tool you can use is a roller, a brush, if the glue is in an aerosol, then the application is carried out by spraying the substance. Economical consumption is ensured by a glue gun; a brush increases consumption.
You need to work in a room where good ventilation is provided, and there should be no open sources of fire nearby.
First, the edges of the foam are trimmed so that they become even.
How and with what to glue foam parts to different surfaces?
Foam rubber is used in various fields: the textile and furniture industries, for sound insulation when creating acoustic equipment, in the automotive industry, etc. In the process, the material has to be glued to different surfaces, which can include fabric and leather, as well as metal. How to glue foam rubber at home and how to properly glue it to different materials?
Wood, plywood, chipboard, fiberboard, paper
When repairing furniture, you have to glue foam rubber to materials such as wood, plywood, chipboard, and fiberboard. You can glue the necessary parts using furniture glue. It is desirable that it be based on polyurethane, styrene or neoprene. Water-based glue can be used.
Step-by-step gluing instructions:
Acoustic or soundproofing foam rubber is often glued to plywood floors or paper, for example, to wallpaper. Such surfaces can be glued using Rapid-100 universal adhesive based on styrene-butadiene rubber. It sets quickly, lays flat, and produces an elastic seam.
To attach acoustic foam to the wall, the working surface is cleaned of dirt and, if necessary, plastered. Next you should apply glue. Depending on the area, acrylic composition, liquid nails or hot melt adhesive are used.
Small areas can be glued using liquid nails or a heat gun. The glue is applied dotted or in thin strips, and then the foam is pressed against the wall.
Fabric, padding polyester
It is easy to glue fabric or padding polyester and foam together. Such work is required when sewing clothes, making soft toys or furniture. Stages of work:
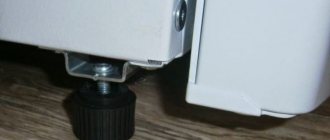
Metal surfaces
Is it possible to glue foam rubber to metal surfaces? For such work, ordinary glue will not work; you need a composition that is suitable for metal. Typically, polyurethane foam is glued to metal surfaces using Porolon-2, Sefox, and Tapicer adhesives. During work, you should follow the instructions:
Leather and leatherette
Not every glue is suitable for repairing leather items or leatherette. You cannot use regular PVA; it will become soggy after the first contact with water. You should not use the usual superglue - it creates too rough and hard seams. It is best to use one of the following brands:
Foam rubber to foam rubber
Gluing foam rubber parts to each other is the easiest way. To do this, they must be clean and new; old material loses its properties and crumbles in your hands. First, the pieces of polyurethane foam are cleaned of dust and dirt, and then any suitable adhesive composition is used.
Advantages of polyurethane stucco molding
The production of polyurethane stucco molding is based on mixing the components in a certain proportion. Substances react. The result is a foamed mass from which a product with the specified characteristics is molded under pressure. The amount of pressure, profile and dimensions of the templates determine the characteristics of the product: weight, geometry, density, color.
The stucco molding turns out to be light and sticks to the place. Has high adhesion to any surfaces. Works well with any cutting tool. The surface forms a strong connection with almost all finishing materials: paints, plaster compositions. The exception is compounds with the presence of ether group solvents.
Polyurethane is destroyed in ultraviolet rays. Decorative elements installed in areas exposed to sunlight have a special protective coating
When purchasing material, you should pay attention to this
Fastening is carried out using mounting adhesive in compliance with established recommendations.
Preparatory work
It is assumed that the material has been purchased in the required quantity. This means that the additional cost of cutting corners and joining the ornament must be taken into account - 10% of the markings.
Before gluing the surface of the polyurethane stucco molding, first prepare:
- aligned on a plane;
- uneven surfaces are plastered and smoothed out;
- Before installation, wet dust removal is carried out.
Finishing the room begins after the surface has dried. This time can be used to mark gluing areas and prepare the stucco.
Using a pencil level, lines of the outer perimeter of the decorative elements are drawn onto the surface. Using the obtained dimensions, the moldings are marked and trimmed. This is done taking into account the consistency of the surface pattern when joining parts of the ornament:
- the extreme points between the straight parts of the external contour are marked;
- the workpiece is placed in a miter box with a template angle of 45°. The position of the front side is oriented towards the surface of the tool by analogy with the mounting wall;
- Sawing is done with a hacksaw with a fine tooth. The force movement must go from itself into the material. The return movement occurs without pressure, eliminating the cutting process. This protects the decorative surface of the stucco molding from mechanical damage;
- cleaning the cutting area. Irregularities are processed with fine-grained sandpaper.
Deep defects may appear. They are eliminated after the stucco is glued, in preparation for painting. It is not considered a marriage at work.
Installation
The glue is applied along the edges on the back side of the element. After this, the product is applied to the surface and is kept at the marking site for a short time until it has sufficiently set. When joining parts of the stucco molding, the mounting compound is applied liberally to one end. The required gluing force is determined by the thickness of the seam.
The squeezed out glue is removed with a knife or small spatula. The work is meticulous
Requires patience and caution
Irregularities are puttied, cleaned and tinted to match the color of the base. After a day, the glued stucco molding can be painted in accordance with the original plan.
Assignment of material properties
This type of foam is nothing more than polyurethane glue, which is excellent for gluing polystyrene foam, as well as slabs for internal and external thermal insulation of surfaces and facades.
Among the properties of polyurethane adhesive foam, it should be noted a significant reduction in the time required for insulating and insulating facades. With its help, you can complete almost the entire volume of outdoor work in one working day. As a substance, this foam has a high degree of adhesion with most mineral materials, as well as with expanded polystyrene.
It has excellent thermal insulation properties and a high degree of water resistance. The properties of adhesive foam are so unique that they allow you to perform work even at low temperatures or at high humidity. Foam, unlike other similar building materials, does not contain freons, so it can be argued that this material is environmentally friendly and safe.
Designed mainly for fastening slabs made of expanded polystyrene for arranging the external facade during construction and insulating houses. Also useful for filling voids formed between these slabs. But, in addition to these properties, polyurethane foam can be used as a material for gluing wooden and plasterboard products to various surfaces and materials, for example, concrete and metal. Polyurethane foam adhesive is also used when installing aerated concrete structures, as well as during construction work with materials such as polystyrene foam and polyurethane or ceramic tiles, aerated concrete blocks, and so on.
Technology for arranging stucco on the ceiling
Instructions for finishing the ceiling with gypsum stucco
Decorating the ceiling in the classical way (using gypsum or alabaster) is done as follows:
- Dry plaster or alabaster is thoroughly kneaded, any lumps identified are removed, and then diluted with cold water using a 0.5-1 liter container for molding solution. The consistency of the solution should resemble thick kefir.
Mixing gypsum mortar
- The solution is thoroughly mixed, filled into prepared forms and compacted well with a spatula to avoid voids.
- Leave the molds with the solution until it hardens for at least 15 minutes. Hardening must take place at room temperature. It is prohibited to use auxiliary heating with heating devices, since the stucco molding may crack.
- After the solution has hardened, the stucco molding is removed from the mold and cleaned with fine-grained sandpaper.
- Stucco elements are glued to the ceiling with PVA glue or liquid nails, after which the joints between the elements are covered with putty and cleaned after the putty has dried.
- When the finishing is completed and no defects are found in the stucco, it can be painted if desired.
Instructions for finishing the ceiling with polyurethane and polystyrene stucco
Unlike gypsum stucco, which is more difficult to manufacture, polyurethane and polystyrene stucco is manufactured in a factory and purchased ready-made. All that remains is to correctly glue the purchased polymer molding elements to the ceiling.
Stucco ceiling: stucco, made with high quality from polymer materials by modern manufacturers, is not inferior to classic gypsum either in technical characteristics or in visual
Manufacturers offering ceiling plinths, moldings and other stucco elements also produce special adhesive solutions for attaching their products to the ceiling, connecting them to each other and filling the gaps between them, so anyone is unlikely to have problems purchasing a set of components.
Instructions for installing molded plinth on the ceiling in pictures
The finished polymer molded elements are coated with glue and attached to the site of further dislocation. After the usually white stucco elements have dried, they can be painted in a suitable color. For painting polystyrene products, only water-based paints are suitable, while polyurethane elements can be painted with any paint.
Original ceiling stucco: a ceiling with stucco molding treated with gilding looks doubly stylish
So, we looked at how a stucco ceiling is designed, what materials, tools and auxiliaries are recommended to be used. Ceilings with stucco molding turn out to be very elegant, and their production does not pose any additional tasks for the repairman. Therefore, we recommend that you take on the work yourself, even if you do not have the proper experience in repairs. By strictly following the rules presented in the article, you will certainly organize a beautiful and stylish stucco ceiling.