In order not to fill our closets with things that are not needed for daily use, we try to sort them and put them away until the right moment. For storage, many people buy special organizers, cases, and vacuum bags. It is undoubtedly convenient, and often even looks beautiful. But isn’t it nice to put your own or your household’s wardrobe items in a hand-made trunk for storing things? Don't know how to make it yourself? We'll give you some useful lessons.
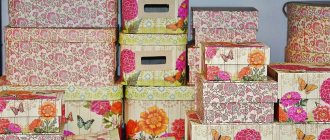
Fabric box
A budget textile box will decorate any apartment and help tidy up the shelves in the bathroom or bedroom.
The photo shows beautiful handmade fabric storage boxes.
What you will need:
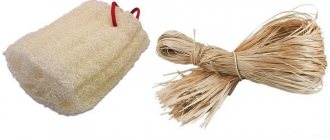
- Thick fabric (burlap and double-thread) - 17 cm each.
- Handle tape.
- Threads.
- Sewing machine, pins, scissors.
Step-by-step instruction:
- We cut out the parts according to the pattern as in the photo:
- Having folded the elements, we sew the sides:
- We make a handle by sewing a ribbon of the required length, as shown in the photo:
- We secure the resulting loop with pins along the upper part of the base, sew:
- We insert the double-thread lining into the burlap base:
- Sew both parts along the top edge, retreating about a centimeter:
- Sew an allowance to the inside to secure it inside the burlap cover:
- Let's start processing the bottom. Sew the bottom part:
- And sew the sides together as shown in the photo:
- The textile box is ready!
The photo shows one example of a textile basket that you can sew with your own hands and design it to your own taste.
DIY knitted box
This storage box will appeal to crafters who love to crochet.
The photo shows a small round knitted basket in which it is convenient to put jewelry.
Tools and materials:
- Hook.
- Yarn (you can use knitted yarn).
- Wallpaper glue and brush.
Step-by-step instruction:
- We knit the base for the future box. The larger the square, the more voluminous the product will be:
- We tie the base with single crochets, knitting each loop:
- We continue knitting until we reach the required height of the box. Cut the working thread.
- We fix the product with wallpaper glue and dry it with a hairdryer.
You can watch a detailed master class in this video:
Folding box
An original and practical case that folds and unfolds as needed. This is a convenient option for needlewomen who find it difficult to organize a workplace during the creative process.
The photo shows bright folding storage cases measuring 15x15x20 cm.
What you will need:
- Cotton fabric size 50x45 cm.
- Adhesive interlining 50x45 cm.
- Chalk or water-soluble marker.
- Sewing machine, scissors or roller cutter.
Step-by-step instruction:
- Iron the fabric onto the adhesive interlining and carefully cut it:
- Draw 4 lines at a distance of 15 cm from each side and stitch them:
- We cut horizontal lines from two edges, as shown in the photo:
- We retreat 1.5 cm from the edges and mark the holes on four sides of the rectangle with a marker or chalk:
- We draw lines for the valve:
- And we cut them:
- The next step is to cut out the valves:
- We process the edges in any way:
- We assemble the box by threading the flaps through the side slits:
- After creating your first folding organizer with your own hands, the following products will be much easier to make:
How to choose?
To choose which specific box is suitable, you should decide in advance what will be stored in it. This criterion will further determine the parameters:
Size. A small box is suitable for jewelry and jewelry, but for a spare bulky blanket you will need a large box. If you have different types of items, it will be more practical to take several boxes of different sizes. Then all the elements will lie in their places and not get confused with each other.
Material. Each composition has its pros and cons
It is only important to know whether the container will take up space on an open surface or hide in a closet? Should it protect things from dampness? How often will you need to look into it?
Appearance. You can purchase boxes that will not only be practical and convenient, but will also create coziness in the interior.
Price
Containers made from natural materials, as a rule, have a higher price, in contrast to containers made from polymer.
Practicality in care. Plastic products can be easily washed and disinfected. Containers made of fabric and cardboard are used only in dry places; they can only be wiped clean from dust.
Cardboard box
An affordable, environmentally friendly and very convenient material - cardboard - is perfect for making your own boxes for storing things. Its creation will not take much time.
The photo shows a simple cardboard box for small items that can be decorated with stamps, decoupage or photographs.
What you will need:
- Micro-corrugated cardboard (approximately 1.5 mm thick).
- A printout of the drawing or a ruler and pencil to redraw the workpiece.
- Double-sided tape or glue (PVA or second).
- Scissors.
Step-by-step instruction:
- To make a storage box with a cardboard lid, we will use a ready-made drawing. Transfer it to cardboard and cut it out:
- Carefully bend the workpiece along the dotted lines:
- And we connect the parts together using glue or double-sided tape:
And this video tells you step by step how to make a box for storing things or clothes in a closet:
How to decorate
You can decorate the boxes with all kinds of available materials:
- fabric, ribbons, colored threads;
- lace, crocheted, knitted;
- straw, rope;
- jute cord, burlap;
- napkins for decoupage;
- seeds, plant twigs, dried flowers coated with varnish;
- pebbles, shells;
- colored electrical tape;
- photographs, stickers;
- using hand painting with paints and markers.
Decoupage
A box with a lid, decorated with decoupage, looks very festive. It is completely covered with decoupage napkins, only on top, or individual details are cut out from them - pictures, letters, inscriptions, figures.
The item will fit well into the following styles:
- vintage;
- classical;
- country.
- base – box made of cardboard, plastic;
- decorative three-layer napkins for decoupage;
- PVA glue;
- acrylic varnish, paints;
- tassels;
- decorative beads, seed beads, sequins.
The necessary fragments are cut out of the napkin, the box is covered with white acrylic, and dried. Pieces of napkins are placed on the pre-carefully spread glue, and the top is also covered with PVA glue. When everything is dry, empty spaces and the edges of napkins are painted over with acrylic paint, varnished, and the structure is dried again. Afterwards, you can glue any decor - beads, sparkles, beautiful buttons, decorative insects or leaves with Velcro. This box is convenient for storing jewelry, buttons, rubber bands, and hair clips. It will fit perfectly into the living room interior, children's room, bedroom, and will become a holiday decoration.
Decoration with fabrics
For covering with fabric, choose boxes that are strong enough that they will not deform during decoration or subsequent storage. The fabric is cut to the size of the box with allowances of up to two centimeters, and attached with colorless glue or double-sided tape. The lid is decorated in the same way, if you sew a piece of decorative tape, strap, or braid onto it, you will get a handle by which the lid can be removed.
Wicker wooden box
To make a durable storage box with your own hands, you can weave it from veneer. It will be a wonderful decoration in the kitchen or living room.
The photo shows eco-friendly wicker boxes for storing various small items.
Tools and materials:
- Veneer.
- Clothespins.
- Glue.
- Masking tape.
- Scissors.
- Ruler.
Step-by-step instruction:
- Let's get to work. First, soak the veneer in warm water. Hang dry. Cut into equal strips depending on the size of the desired basket.
- Divide the number of strips in half and secure with masking tape.
- We take one strip and weave it as shown in the photo:
- Using the traditional method of weaving a basket, we continue to increase the square:
- When the stripes run out, we get the bottom of the box:
- We check which side the veneer is not peeling off. To do this, bend one strip like this:
- Using a ruler, bend all the parts in the direction where the material does not flake:
- We take a long strip equal to all sides of the box and weave it along one of the sides:
- In the same way we weave two more details:
- We bend one of the walls, starting to form a basket:
- And we weave long elements into the second wall:
- We continue to weave:
- Leave the ends approximately 5 cm long, cut off the rest:
- We bend the strips inward, embedding them under the third row:
- Glue a long strip along the inner perimeter of the box, securing it with clothespins:
- We weave the remaining strips over it:
- The wicker decorative box is ready!
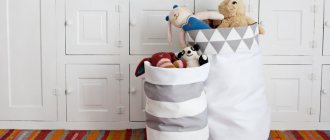
Storage shelves: tips for organizing your wardrobe
Whatever storage system you choose, you need to maintain order in it and follow certain rules for the arrangement of things to make it convenient to use the wardrobe.
Tips for organizing a dressing room:
- Use it for its intended purpose and do not store mops, vacuum cleaners, bicycles and skis in the room, turning the wardrobe into a pantry;
- A sufficient amount of air must enter the wardrobe so that the smell disappears;
- If you have a lot of woolen items in your wardrobe, be sure to use moth repellents to protect the closet space from it;
- A dressing room is unthinkable without a full-length mirror - otherwise dressing will be awkward;
- Proper zoning will help you use the structure comfortably: hats and rarely used items are usually placed at the top, shelves and rods with clothes and linen are located in the middle, and shoes are located at the bottom;
- Shelf dividers, which are usually found in wardrobe systems, will help you organize things neatly.
If the spouses' things are stored in the wardrobe, it is better to roughly divide the system into two parts: one will contain women's items, and the other will contain men's items. This will make it easier to find them and keep them in order.
A dressing room is the dream of any woman, which is quite possible to realize by arranging a wardrobe in one of the rooms or purchasing a special storage system. This approach makes the process of changing clothes comfortable and allows you to store all the elements of your wardrobe in one place.
From newspaper tubes
This interesting basket will look great in a nursery, bathroom or living room. If you have a lot of newspapers in your house, you can use them to create a useful and beautiful box with your own hands.
The photo shows a storage basket made of newspaper tubes, painted blue and decorated with fabric.
What you will need:
- Newspapers.
- Knitting needle (you can take a skewer).
- PVA glue.
- Scotch.
- Cardboard box.
- Acrylic paints and varnish, brushes.
- Textile.
- Scissors, ruler.
Step-by-step instruction:
- Cut the newspaper into equal strips measuring approximately 28x10 cm:
- We apply the knitting needle to the edge of the strip at an angle of about 45-60 degrees. We wrap the paper on a knitting needle and secure it with glue:
- We take out the knitting needle. You need to perform the same steps many times to get a sufficient number of tubes:
- We strengthen the bottom of the box with tape and paint it any color:
- We make markings for the main tubes, marking equal segments on the box:
- Glue the tubes according to the markings:
- We fix the additional cardboard bottom with glue:
- We paint the resulting workpiece. Let's start weaving. To create the first row, we braid the outermost tube-stand about the next one. We extend the horizontal tubes by inserting one into the other. We fix the vertical tubes with clothespins.
- If necessary, glue the ends. We braid the whole box:
- We glue the inner walls, securing the ends of the racks to them.
- We paint the basket in two layers, allowing the product to dry. Varnish:
- We sew a removable cover from fabric. The basket is ready!
A detailed master class on creating a storage box from straws with your own hands is in this video:
Decor options
There are many ways to transform storage boxes: you can decorate cardboard containers for shoes or equipment with your own hands, turning them into stylish interior elements. For decoration, fabric, lace, decoupage or scrapbooking techniques are used.
The photo shows a compact box with pockets, decorated with fabric and lace.
Using wrapping paper or leftover wallpaper, you can transform the box beyond recognition and store various items inside: books, toys, craft materials. You can cover a cardboard storage box with regular rope and create an excellent eco-style accessory.
Making boxes with your own hands depends not only on the availability of suitable materials, but also on your imagination. The process of creating stylish things “out of nothing” is always fascinating, and the result brings comfort and order to the environment.
Organizer for underwear
Since underwear is a personal toilet item, it requires timely care and mandatory order in the place where it is stored - in which an organizer for underwear will be a great help. It will be convenient to use and will reduce the time for getting ready in the morning and cleaning on Saturday.
There are many variations in functionality and purpose, and in shape and color. Some are designed for storing turning tools, others for bed linen, underwear, etc.
Making an organizer for underwear with your own hands is not as difficult as it might seem at first glance, since all the materials necessary for assembly can be purchased at any hardware store, and this matter does not require any special skills, it will be enough not to have problems with coordination and even understand a little geometry.