Craftswomen often wonder: how to choose a good glue for decoupage? Is it worth spending money on expensive branded products or is it better to use regular PVA glue? What type of product should I use for working with certain materials? I really want my handmade work to look neat and retain its charm for a long time! In this article you will learn what decoupage glue is, how it differs from regular glue, and whether you can replace it with something or prepare it yourself.
Which glue to choose
Since when creating crafts using the decoupage technique, the glue completely appears and covers the front side, it must meet the following characteristics:
- Have no color or smell.
- Create a transparent and elastic coating.
- Have a medium liquid consistency (so that it is easy to apply without smudges).
- It should not darken or change the color of the surface over time.
- Possess a high degree of adhesion for reliable adhesion of surfaces of different structures.
- The “life of the solution” is at least 2 minutes. To be able to correct the position of the glued element in the event of an error.
All these characteristics, of course, have a special glue for decoupage. But these compounds are not always available for free purchase, and for large-area work, the cost is significant.
Examples of decoupage
Now I offer you several pictures that demonstrate the result of a fairly simple decoupage. Which even a beginner can do.
For example, a stool, we simply cut out a round motif to fit the size of the seat, glue it, paint the legs in the desired color and fix everything with varnish:
The same thing, motifs are cut out of a geographical map to fit the panels on the front side of the desk, everything is glued and varnished.
The wood cut is primed. A picture and varnish are pasted on top.
A flower pot is first covered with newspaper, on top of which is glued an image of a bird, all the motifs are dense. therefore ideal for first decoupage projects
The lampshade of the table lamp is covered with music notes. It turned out very nice, and the cost was low. Just cut out the necessary pieces from the music book and stick them on the lampshade from the outside.
Pendant in the form of a key, the key is degreased. a floral motif is pasted and the remaining unoccupied picture key is painted blue. Varnish.
The boxes are simply covered with pictures, but it looks great.
All examples are very simple and quite suitable for initial experiments.
Rating of the best
The choice of glue for securing elements plays a leading role in preparing for the creative process. Each needlewoman empirically chooses the most suitable and convenient glue for herself. But there are indicators and characteristics that distinguish some brands from the rest:
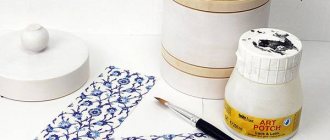
- Mod Podge PLAID - American made. In the last 2–3 years, an analogue has been produced in China. When purchasing, check the manufacturer with the seller. The original glue is universal. It can be used for finishing metal, wood, cardboard, glass, plastered and varnished surfaces. Mod Podge PLAID – suitable for securing napkins, paper, fabric. In addition to adhesion of elements, it can be used as a finishing coating. Within 15–20 minutes, you can remove the composition with soap and water. Final adhesion occurs within two days. Forms a matte finish. Package price 236 g from 1050 rub.
- Decola – . Its cost is relatively low, so it is suitable for craftsmen without experience to get the hang of it. A universal composition, used for working with wood, metal, lacquered, leather, canvas, glass and ceramic substrates. used for adhesion of napkins, paper, fabric. Does not deform cardboard bases. You can choose a glossy or matte effect. The cost of the bottle is 70 g. – from 100 rub.
- Olki is a universal component and can be used as a topcoat. Creates a matte protective layer. Used for securing fabric, paper, napkins to wood, metal, glazed and glass surfaces. Does not change color over time and does not crack. Package price 33 ml. from 45 rub. Olki adhesive varnish for decoupage loses its properties at temperatures below –3⁰С. Please take this into account when transporting.
- Glue for decoupage Ferrario LA DORATURA . Used to coat substrates with hydrophobic properties. The glue is alcohol-based, which increases the drying speed to 35 minutes. Used for finishing surfaces with gold leaf and gold leaf. Does not require additional finishing fastening. The price of a tube is 75 ml. from 570 rub.
- Daily Art glue is suitable for working with the thinnest textures (rice paper, napkins). Easy to apply, forms an even layer without creases or unevenness. The combination of a water and acrylic base allows it to be used to create crafts from glass, metal and plastic blanks. Available in matte and glossy composition. The cost of the bottle is 60 ml. from 150 rub.
Hot fixing the applique
To make decoupage on fabric with your own hands, you can use polyethylene to glue the picture. This method is especially convenient when the fabric is decorated with fabric, that is, the design is placed on the fabric.
The drawing, not yet cut out in detail, is placed on it, and a newspaper is spread down. The fabric should completely cover the polyethylene so that it does not stick to the iron. Therefore, the design itself is cut out first “with an overlap.”
Then, using a not very hot iron, iron this “sandwich” from the front side of the design so that the polyethylene slightly “grabs” the fabric. After this procedure, you need to cut out the design in detail.
It is very important to do this as carefully as possible, only then will the decoupage on the fabric look beautiful. How to make sure that the drawing is fixed firmly enough? To do this, the picture is placed in a permanent place, after which it is thoroughly ironed with a hot iron. You can do this through a cloth so as not to burn the fabric, especially if the design is made on silk or artificial fabric.
Application of universal and special composition
Glue for crafts using the decoupage technique can be of a universal or special nature. The universal composition has advanced characteristics and can be used to adhere different textures.
Special adhesives are suitable for working with certain materials and have features suitable specifically for those components.
- Textile. For crafts using textile elements (bags, decorative pillowcases, interior dolls, Christmas socks). Special fabric adhesive is suitable for different types of fabric (satin, silk, denim, chintz). It secures combinations of the thinnest segments well on the product: rice paper, decoupage napkins. After fixing the decorative elements on the fabric, it is recommended to iron the area to be treated through a layer of paper. Set the temperature suitable for ironing the main fabric.
- Glazed ceramics, glass, porcelain. Special adhesive for such surfaces has a high degree of heat resistance. After applying decorative elements, excess adhesive is removed from the surface. Then the product is fired in a kiln at a temperature of 170⁰C for two hours.
- Candles. Special adhesives containing wax are used to decorate candles. It is better to use candles with a diameter of at least 2 cm for this type of decoupage.
- Cardboard, wood. Universal compounds are suitable for covering these surfaces.
We recommend watching the video review:
Volumetric decoupage postcards
Postcards created using this technique look very original, interesting, and bright compared to simple standard postcards.
Simple instructions on how to make volumetric decoupage on a postcard, what you need to prepare:
- sheet of cardboard;
- pencil, scissors, double-sided tape;
- identical old postcards (at least 2-3 copies) or printouts of templates for 3D postcards.
Bend the cardboard in half. Cut out the necessary elements from old postcards to create an independent composition. Elements must not be in one copy, but at least 2 pieces each.
Using double-sided tape, glue the cut out element onto the cardboard, and stick the same one on top again. This way the detail will look more advantageous and interesting.
Additionally, decorate the card with sparkles, beads, braid, decorative ribbons...
Features of working with glue
Decoupage glue is distributed over the surface of the workpiece with a soft brush. It is better to choose one with column pile.
Don't use old brushes. They may leave lint on the surface. Once the glue has dried, it cannot be removed.
Instructions for working with glue:
- Distribute the adhesive component evenly over the surface of the workpiece.
- If you are using napkins, separate the image layer.
- Place pattern side down on a plastic sheet.
- Use a spray bottle to dampen the napkin. Leave for 1 minute until the paper is completely saturated with water.
We eliminate flaws
If the surface is decorated with small torn fragments, from which it is necessary to obtain a single whole, straighten the edges of the fragments with a brush or fingers. If there is color unevenness somewhere, dilute the paint of the desired shade and paint over the translucent base.
When the surface is no longer very wet, but has not yet dried, you can use thin brushes and acrylic paints to draw in the details, add brightness and clarity.
The next step is to decorate the edges of the product. There are different approaches here. In some places you have to trim the edges evenly, painting the sides, in others you can wrap the napkin on the back side and glue it there. In general, this is also a whole science.
Getting it to the finish line is an equally creative process.
After this, you can leave the product to dry. To speed up the process, you can use a hair dryer, but you need to keep it at a considerable distance, move it all the time and make sure that it dries evenly. If after drying you see that there is a fold on the glued napkin, you can still fix it. Take fine-grained sandpaper and sand it. We act gently so as not to damage the drawing around.
How to make decoupage glue with your own hands
Beginning needlewomen do not need to buy special solutions. To get the hang of it, you can make your own decoupage glue for your first projects. What can you replace:
- First option: use PVA as a base. It is believed that this composition turns the surface of the product yellow after drying. In some cases this is true. It all depends on the quality of the glue itself.
If in doubt, prepare a solution and apply it to any surface. Let it dry for 1-2 days and evaluate the result. If the dried layer turns yellow, use glue from another manufacturer. To make a PVA-based adhesive component, mix glue and warm water in a 1:2 ratio in a container. This mixture should be stored in a tightly closed container.
- Second method: protein mixture. Separate egg whites from yolks. In a bowl, combine 2 egg whites and 2 tbsp. Sahara. Stir until sugar dissolves.
Do not beat. Otherwise, air bubbles will appear, which will be difficult to get rid of.
- Third method: agar-agar solution. Combine agar-agar with water and boil the mixture for 2-3 minutes. Cool before use. If the mixture is too thick, add a few tablespoons of warm water.
We recommend watching the video instructions:
Advice from experienced professionals
The popularity of decoupage not only does not decrease, but also increases. New ideas are rapidly filling the Internet, allowing needlewomen to enrich their experience.
Helpful Tips:
Fragments of the picture should be cut out with a small margin. A few extra millimeters will protect the edges of the picture if the napkin gets very wet.- It is recommended to remove excess glue to avoid prolonged drying and drips.
- Begin to apply glue from the middle of the picture, gradually increasing the area.
- To make the picture dry faster, hang it on a rope and dry it in this position.
- Even if it seems that the drawing has already dried, it is not recommended to iron the product earlier than 24 hours after finishing work.
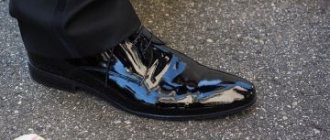
- You shouldn’t limit yourself to textiles and furniture. Cutting boards, radiators and even shoes decorated in decoupage style look great.
Decoupage is an excellent solution for those who want to breathe new life into old things. Using simple technology, you can not only restore objects, but also create new and original ones. Creative inspiration and imagination will come to the rescue with this.