Decoupage is a way of decorating various household items with fabric or special paper napkins. Recently, this type of needlework has gained immense popularity. And it is no coincidence, because, having mastered the secrets of the decoupage technique, you can turn any old, worn-out item into a real masterpiece. Among the materials necessary for creativity, decoupage glue is not the least important. A high-quality adhesive composition from a well-known manufacturer will make your work easier and allow you to enjoy an exclusive item created with your own hands for many years.
Which glue is better: special or PVA
What is decoupage? This is an interesting technique for decorating objects. The design is applied to the surface using glue, then secured with a special varnish. The attractiveness of decoupage is not only in the creation of exclusive things, but also in the budget. This type of creativity requires only the presence of glue, varnish, a decorative napkin with a pattern and scissors.
If everything is clear with the drawing and scissors, then you should pay special attention to the glue. No wonder manufacturers offer different formulations. The substance for decoupage involves a special mixture of glue and water-based varnish.
Regardless of the material for which the product is intended, it must have the following characteristics:
- A good decoupage glue dries colorless.
- A high-quality substance does not have a pungent chemical odor.
- Over time, the glue does not darken or change color (does not turn yellow).
- The consistency of the product should not be too thick or too thin.
- The substance should set gradually so that the needlewoman has time to correct inaccuracies in the work.
- When using a good composition, the drawing becomes brighter after drying.
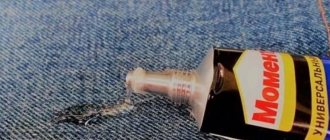
Will regular liquid PVA glue do the job? Its consistency is slightly different from the special composition. Craftswomen often complain that after PVA the product gives off a yellowish tint. However, if used correctly, this type of glue can be a worthy replacement for decoupage glue and will save your budget considerably.
Methods of applying an image
- When an image is applied wet, using an iron or dry and then coated with varnish, this method is called classic. Toning is sometimes used.
- A successful combination of background and pattern is created in an artistic way and creates the illusion of painting.
- When an image is glued to the back side of a transparent surface, the decoration method is called reverse.
- A deco patch creates an imitation of a patchwork quilt. You can choose any material as a material. For the first works, it is better to use special paper.
- The volumetric method involves the use of structural paste, fabric, and eggshells.
Terms of use
Decoupage glue has its own application nuances. It is applied in doses using a flat brush. Some people prefer to use a soft sponge. Excess glue can cause uneven gluing of a paper napkin or decoupage card. The composition is applied after the picture is prepared, for which it is cut out according to the intended shape and separated from the other layers.
Some people think that the napkin should be pre-moistened in water and only then transferred to the working surface.
However, practice proves that moisturizing is undesirable, since it is very difficult to level the napkin, and even more so to move it.
After the picture is cut out, it can be applied to the place of fixation and coated with glue on top, saturating and straightening the paper design, preventing the formation of bubbles. You can apply a little glue to the base itself and, having attached the drawing, add glue on top, leveling the image with a brush or sponge.
You can’t hesitate to straighten it out – the napkin becomes soft very quickly. You can’t move the brush over the same place many times, because this can lead to the picture breaking. You need to straighten it in the direction from the center to the edges.
After the fragment is glued, the brush is washed and put away (after drying, you won’t be able to wash it; it will be damaged).
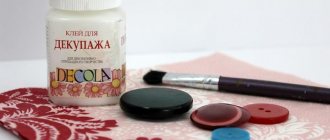
Special glue: decoupage with napkins
There are several main manufacturers of specialized glue for decoupage. Each of them produces a good product in its own way. Which one to choose depends only on your preferences. We will try to describe the glue of each company in as much detail as possible.
When purchasing glue, you should ask the seller for a certificate confirming its quality.
We recommend: Features of Oscar glass wallpaper adhesive and rules for working with it
Types of special adhesives for decoupage:
- Textile Potce is a type of fabric decoupage glue. This composition is produced by several manufacturers, including the well-known company dekola. After the decal glue has dried, the picture must be fixed using an iron, the degree of heating of which must correspond to the temperature requirements of the fabric. Unlike fabrics decorated with PVA, products decorated with special textile glue will not deteriorate when hand washed at a water temperature of no higher than 40 degrees.
- Art Potce is a universal decoupage adhesive varnish. It is suitable for wood, fabric and glass. Its main advantage is that when using it, it is not necessary to open the craft with varnish as it performs both of these important functions. Therefore, when purchasing such a product, you can save money.
- Glitter art potch is a glue that has a holographic effect. After drying, sparkling bluish-greenish particles appear on a craft made using this composition.
- Kazen potch is used to decorate candles using the decoupage technique. Its main advantage is that the picture blurred by it does not burn, but melts as the paraffin or wax base decreases.
- Procelane glue is used to decorate items that will come into contact with food during use. It dries in a hot oven, which makes it safe for further use in the kitchen of products made with its help.
- Gloss varnish adds shine to the image after it has completely dried. It is used in tandem with glossy acrylic varnish.
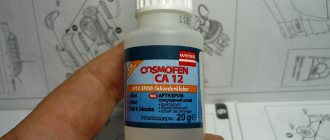
- Modarn is needed in order to glue the gold leaf as accurately as possible (an inexpensive replacement for gold leaf). It comes in water and oil base. Such glue should not be replaced with PVA or homemade analogues, as expensive decor can be ruined.
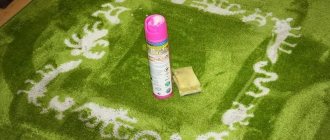
- Mod Podge is a fairly expensive spray adhesive that has the effect of preventing air bubbles from forming under the picture. Despite the high price, Podge has purely positive reviews. The spray is applied in a thin layer to the reverse side of a motif cut out from somewhere, and after 1-2 minutes a sticker is glued to it
We recommend: How to glue edges on chipboard with your own hands?
Typically, decoupage glue is produced in containers of 50 ml, 150 ml or 250 ml, this volume allows you to use the entire composition as efficiently as possible without residue.
Features of glue for decoupage
The ever-growing interest in decoupage techniques contributes to the development of new materials designed specifically for this type of work. Well-known companies compete with each other in the production of glues and varnishes used by craftsmen in home art.
It is sometimes difficult for a buyer to understand the abundance of products on offer, so it is useful to know what requirements a good decoupage glue must meet.
- One of the main signs of high-quality glue is its consistency. The composition should not be too liquid, otherwise it will flow from the brush. And at the same time, it is undesirable to buy very thick glue, as it will be difficult to apply to the surface.
- Drying speed is important for work. If the glue sets instantly, the needlewoman has no opportunity to correct the drawing or smooth out wrinkles that appear on the paper.
- Good glue becomes completely transparent after drying and does not change color for many years.
- A strong synthetic odor indicates that the glue contains chemicals that are hazardous to health.
In addition, the quality of the product can be judged by its packaging. Large manufacturers, for ease of application of the connecting composition, supply the tubes with a special device built into the lid. In order not to make a mistake with your choice, you need to ask the seller for a certificate for the product.
We eliminate flaws
If the surface is decorated with small torn fragments, from which it is necessary to obtain a single whole, straighten the edges of the fragments with a brush or fingers. If there is color unevenness somewhere, dilute the paint of the desired shade and paint over the translucent base.
When the surface is no longer very wet, but has not yet dried, you can use thin brushes and acrylic paints to draw in the details, add brightness and clarity.
The next step is to decorate the edges of the product. There are different approaches here. In some places you have to trim the edges evenly, painting the sides, in others you can wrap the napkin on the back side and glue it there. In general, this is also a whole science.
Getting it to the finish line is an equally creative process.
After this, you can leave the product to dry. To speed up the process, you can use a hair dryer, but you need to keep it at a considerable distance, move it all the time and make sure that it dries evenly. If after drying you see that there is a fold on the glued napkin, you can still fix it. Take fine-grained sandpaper and sand it. We act gently so as not to damage the drawing around.
Features of working with glue
It is convenient to apply the glue using a special brush. Often the manufacturer places it on the cap of the tube.
Advice! If the package does not provide a tool for applying the composition, then use a regular paint brush.
How to work with decoupage glue correctly:
- Using a brush, apply the substance to the surface where the design will be located.
- Carefully remove the top layer with the pattern from the napkin.
- Place the design face down on the file.
- Soak it for a minute in warm water.
- Now transfer the design to the product.
- All that remains is to fix the drawing by smearing it with glue or varnish on top and straighten it with a brush.
Some tips for working with decoupage glue and finished products:
- Instead of brushes, you can use foam swabs.
- The brushes must be extremely soft so that the napkin does not deform.
- Although the glue dries in a few hours, it is recommended to use the finished product no earlier than after 3 days.
- To speed up the drying process, you can use a hair dryer.
Manufacturers
The main producers of decoupage mixture of interest are the USA, Russia and Italy.
- Mod Podge PLAID is an adhesive varnish from the USA designed for decorating hard surfaces. Characterized by rapid drying - up to 72 hours. Before the glue dries, it can be easily washed off with warm water, but after drying, getting rid of the pattern will not be so easy. In addition to strength, the composition gives the product a pleasant matte appearance. The average price of a package is 1000 rubles.
- Decola is an acrylic-based decoupage composition produced in Russia, suitable for working on fabric, wood, glass, and metal. Dries in 12 hours. Absolutely colorless after drying. The cost is within 150 rubles.
- The Italian manufacturer offers decoupage glue La Doratura , intended for gilding work. This composition is suitable for treating glass and other water-repellent surfaces. The price per package is about 1000 rubles.
Peculiarities
Not every glue is suitable for the job, because different brands may have different composition and quality. The period of reliable fixation primarily depends on these factors. Despite the fact that we trust the manufacturer, when purchasing we have to take into account a number of nuances.
For example, few people know that the consistency of the adhesive is important. It should not be too liquid or thick, because in both cases it will complicate the work.
Decoupage compositions from different brands differ in drying speed. If it dries instantly, the craftswoman will not have the opportunity to correct the work and straighten the glued paper. She will not be able to smooth out wrinkles and remove air bubbles.
A special feature of decoupage glue is the transparency it acquires when completely dry. As a rule, a high-quality composition does not change its transparency, does not become cloudy or yellow for quite a long time, and therefore the craft looks aesthetically attractive for several years. In addition, good glue does not contain harmful chemical additives, and therefore does not have a strong synthetic odor.
Decoupage adhesive varnish has a number of its own features, for example:
- it is intended specifically for this needlework technique;
- it has an ideal consistency;
- When dry, it does not distort the color of the glued pattern;
- sold in special jars indicating the type of needlework;
- can be matte or glossy;
- different for each type of working base (for wood, fabric, glass, paper);
- creates a protective film that prevents deformation of the glued fragment;
- does not have a terrible smell, is easy to use;
- does not require dilution with water and is not synonymous with PVA glue.
This glue is sold in craft stores; it is not available at construction points of sale. The volume of decoupage glue is 50, 150 and 250 ml. Its main disadvantage is the price, which forces needlewomen to look for analogues with a budget price. That is why they replace decoupage adhesive varnish with other adhesives.
Which glue to choose
Since when creating crafts using the decoupage technique, the glue completely appears and covers the front side, it must meet the following characteristics:
- Have no color or smell.
- Create a transparent and elastic coating.
- Have a medium liquid consistency (so that it is easy to apply without smudges).
- It should not darken or change the color of the surface over time.
- Possess a high degree of adhesion for reliable adhesion of surfaces of different structures.
- The “life of the solution” is at least 2 minutes. To be able to correct the position of the glued element in the event of an error.
We recommend: How to glue edges on chipboard with your own hands?
All these characteristics, of course, have a special glue for decoupage. But these compounds are not always available for free purchase, and for large-area work, the cost is significant.
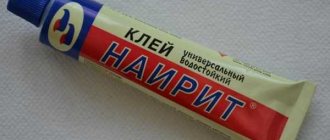
In this case, some needlewomen use regular PVA glue. To obtain the desired consistency, it is diluted with water. This solution may turn yellow over time. Otherwise, it can be analogous to specialized compounds. After applying PVA for decoupage, you need to cover the craft with two layers of varnish to protect it from moisture.
How to make it yourself
It doesn’t matter if you run out of decoupage glue or simply don’t have the money to buy it. You can always make it yourself, but you will need some ingredients.
First recipe
For this decoupage glue you will need the following ingredients:
- 200 milliliters of water;
- 100 grams of sugar;
- 1 teaspoon 9 percent vinegar;
- 100 grams of food starch.
First, mix sugar and water and bring to a boil. Add vinegar to boiling water and heat for another 30 seconds. Then remove from heat and quickly knead the starch. Use it immediately; do not allow it to harden.
Second recipe
For this decoupage glue recipe, take two chicken eggs. The whites are taken out of them and beaten until airy peaks appear in the saucepan. Next, add 2 tablespoons of powdered sugar and mix thoroughly. A teaspoon of vinegar is added at the very end.
But, alas, any homemade product cannot be compared in quality to store-bought formulations. They are used only for fastening light parts.