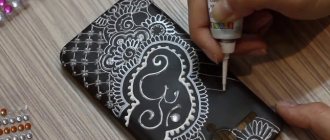
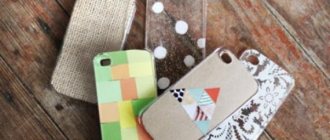
A phone case is not only a means of protecting equipment from damage and chips due to impacts, but also a decoration for the device. Many people pay great attention to the choice of this accessory. At the same time, not everyone has the opportunity to buy exactly the copy that would suit them in all respects. Therefore, many are interested in how to paint a silicone case so that it pleases for a long time, is beautiful and practical. In this article we will look at the most interesting ideas for decorating a phone case, and also reveal all the subtleties when preparing it for painting.
How to decorate a case with washi tape. Option 1: geometric shapes.
Using this Japanese colored tape (found in office supplies), you can decorate almost anything.
You will need:
- clear case
- washi tape
- stationery knife
- surface for cutting (board or special mat).
1. Prepare several types of washi tape.
2. Start cutting pieces of colored tape and carefully sticking them to the outside of the case, varying the colors as you like.
3. Use a utility knife to carefully cut a hole for the camera.
Gradient design
To give a simple silicone case a gradient design, you only need colored paints and a brush.
It's best to start with the lightest shade. After it dries, apply another color, starting from the middle. Leave until completely dry and add a third color along the bottom edge.
Bright cases for your smartphone are ready!
How to decorate a case with your own hands: use acrylic paint
You will need:
- acrylic paint
- brush
- masking tape
- clear case
— cotton swab (if necessary).
1. Apply a piece of masking tape to the inside of the clear case - it will divide the case into 2 parts.
You can cut out the shape of the cover from white paper, insert it inside the cover and then paint it. You can use a utility knife to cut a hole for the camera and flash.
2. Using acrylic paint, paint one color on the top and another color on the bottom - only paint the inside of the case, NOT the outside.
3. When the paint is dry, apply another coat.
* To keep everything neat, check the edges of the cover and, if necessary, clean them of paint using a cotton swab.
4. When the second coat of paint is dry, remove the masking tape and you're done!
Nail polish
For young girls who love glamorous things, it will not be difficult to design a case for their own smartphone using nail polish. The set of required tools and materials needed for dot painting of a mobile phone case is in this case narrower than in the previous one, and you will have to spend an order of magnitude less time.
So, for work you will need:
- Decorative nail polish in several shades.
- Transparent silicone case.
Cover the outside of the accessory with multi-colored dots of varnish in the sequence as your imagination dictates. Let the decor dry and you can use the cover.
Another variation of this decoration is the so-called “confetti” motif. It is necessary to visually divide the surface of the cover diagonally into two parts. In the lower zone, do some spot painting on the phone case using the same nail polishes in different colors.
Just place the dots not with brushes, but with toothpicks so that they are miniature. You can make them the same size, or you can make them different - it all depends on your individual preferences. Let the varnish dry and use the accessory as intended.
How to decorate a phone case with your own hands: paper with patterns
You will need:
- clear case
- colored paper
- glue
- brush
- stationery knife
- a surface on which you can cut (a board or a special mat).
1. Download a template for your phone and print it on colored paper.
2. Using a utility knife, cut out the template.
* You can draw a template for your case and cut it out yourself.
3. Print out the pictures and patterns and glue them to the template.
* You can simply draw any patterns or make a drawing on the template, you don’t have to print it.
4. Insert the pattern with the pattern into the case and put the case on the phone.
Polishing
Model made of PLA plastic, polished. Photo rigid.ink
Tools
- Plastic polishing compound
- Sandpaper on P2000
- Cleaning cloth
- Toothbrush
- Polishing pad or microfiber cloth
| Finishing | ★ ★ ★ ★ ★ |
| Tolerances | ★ ★ ★ ☆ ☆ |
| Speed | ★ ★ ☆ ☆ ☆ |
| Suitable for | all FDM thermoplastics |
Process
Once the part has been cleaned, a plastic polish can be applied to give a standard ABS or PLA object a mirror finish. After the part has been sanded with 2000 grit sandpaper, you need to remove dust from the printout with a cloth and rinse the printout under warm water using a toothbrush. Once the object is completely dry, buff it with a buffing wheel or microfiber cloth, adding a polishing compound such as that used to polish costume jewelry as you go. They are designed specifically for plastic and synthetics and provide a lasting shine. Other plastic polishes, such as those used to polish car headlights, also work well, but some contain chemicals that can damage the printout.
Professional tricks
To polish fine parts, attach a buffing wheel to your Dremel (or other rotary tool such as a power drill). For larger and more durable parts, you can use a grinding machine, just make sure that the part does not remain in one place for too long, otherwise the plastic may melt from friction.
pros
- The part is polished without solvents, which could warp it or change its tolerances.
- If sanding and polishing are done correctly, the result is a mirror-smooth surface, very similar to cast.
- Polishing and deburring plastic is extremely economical, making this method of achieving a high-quality finish very cost-effective.
Minuses
- If you want to achieve a mirror-smooth surface, the part must be thoroughly cleaned before polishing, which can affect the tolerances.
- After polishing, the primer or paint no longer sticks.
How to decorate a silicone case with watercolors
You will need:
- clear case
- watercolor paper
- watercolor paints
- brush
— waterproof handle (if necessary).
1. If you wish, you can print the cover template on watercolor paper.
2. Use a waterproof pen to draw the image onto the template.
3. Use watercolor paints to color the drawing and let the paints dry.
4. Cut out the template and insert it into the transparent case. Put a case on your phone.
Interesting ideas for decorating a case
We have selected several ideas that can be brought to life by repeating the steps from the master classes above. Anyone can make a phone case or decorate it stylishly. This does not require too expensive materials, just a little imagination and practice is enough.
How to make a beautiful case from beads and pearls
You will need:
- beads, pearls and other jewelry
- glue
- a simple case.
1. Think about what kind of bead pattern you want to depict on the case.
2. Using glue, start gluing the decorations on as you planned to create a nice and neat design.
Another version of the case, decorated with more formal rhinestones or pearls
You can use colorful neon decorations
Such decorations can be found in office supplies, and, as a rule, they already come with an adhesive surface. But if you find simple ones, then you can buy Moment glue or any other superglue.
Preparing for painting
In order for the decor to last for a long time, you need to approach with particular precision not only the decoration process itself, but also the preparation of the surface. So you need to make sure that the product is sterile. To prevent other particles from entering, you need to use nail polish remover and an ordinary cotton pad. Moisten a cotton swab with the solution and wipe the surface on both sides. Only if the surface is no longer transparent, but contains factory patterns, you need to make sure that acetone will not corrode the pattern.
Nail polish remover
Recommendations from the experts
To make the painting of cell phone cases perfect and pleasing to the eye of both the owner of a unique accessory and the people around him, listen to the recommendations of experienced craftsmen and try to put them into practice.
- First, to avoid shaking your hand, which causes uneven lines, position it so that it is completely relaxed. Try to place your elbow on the surface of the desktop.
- Secondly, never start applying a second coat or tracing the outline of a design until the previous paint has dried. Otherwise, the work may be washed out and the cover will simply be damaged.
- Thirdly, no matter how simple the decor you create, if you are working on the inner surface of the accessory, do not be lazy to turn it back towards you to see how the image looks from the outside. While the paints have not dried, any blots can be corrected using acetone.
- Fourthly, if you create a composition with acrylic paints on the outside of the case, do not forget to coat the work with a special varnish to fix it.
Be inspired by creative ideas, develop your own design motifs and feel free to start bringing them to life!
0 Comments
Painting a silicone bumper (detailed instructions)
Anyone who has a glamorous, bright silicone bumper for their phone eventually faces the problem of soiling it, which can no longer be eliminated by any cleaning products.
4. For this we need. hair dye (black). I took the cheapest one for 50 rubles.
You can buy such a case on Ali for about the same money.
5. Dump out the contents of the box with instructions. We leave the necessary bags (we won’t need the balm after coloring, though.)
7. Don't forget about personal protective equipment.
8. Squeeze out the cracking paste and mix by squeezing the bag.
9. Place the bumper in the bag.
10. Mix and wrap.
11. After some time, a reaction occurs, the bag turns black and warms up a little. I let it sit for about two hours (to be sure), stirring periodically for a more uniform coloring of small parts and holes.
12. We extract the test subject.
13. Rinse in running water. When all the nasty stuff is washed off, wash it again with soap.
14. Wipe and enjoy the result.
Handsome. Crazy idea. I took it into service.
Remember making devils out of IVs? These devils were painted in a solution of food and brilliant green.
fell out of his breast pocket. replacement touchpad
Should I delete the post?
Then we take Ukrainian-made paint
They sell glowing body paint.
We are waiting for instructions on polishing a scratched protective film on your phone
I put it in the dishwasher. It didn’t work out. And then he spat and ordered a new one from Ali for 150 rubles. I'll do it and order again.
You are a naive person. Local hucksters here in 2016 asked for between a thousand and a hundred rubles, and wait. But I didn’t give up then. And I bought the same bumper for three hundred rubles then exactly on Ali.
I just ordered this one
- I don’t give a damn about water, falls, scratches
A great idea for painting silicone, and possibly painting or restoring other materials.
Some kind of Kroilovo. Which leads you know where.
IMHO: By buying all sorts of guano up to 10k and calling it smart, narrow-minded people think that in a year it will work normally. In fact, it turns out that it starts to fail after 10 months and they throw it away. For this purpose, all this guano with films and covers.
Z.Y. In the photo is the a300f. It turned on. But the web somehow didn’t suit me. And the body moved a little, turning it black. And I gave it to my buddy when I bought a new one.
Source
