The washing machine must be connected to three networks at once: water supply, sewerage and electricity. Therefore, it is necessary to choose a place for installation so that all three systems are located nearby or there is an opportunity to bring them there. The optimal places to install a washing machine are the bathtub, toilet and kitchen - they have all the necessary communications. Most often they require a little modification, but connecting the washing machine is not very difficult. The connection process itself is simple, you don’t need to do anything super complicated, if you have “direct” ones, you can do everything yourself.
Site selection and equipment
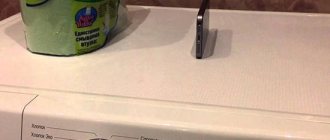
Before you go to the store to choose a washing machine, think about where you will place it. Measure the depth, width and height of the selected location, adding at least 1 cm on all sides (correction for uneven walls). Agree, the situation when the equipment is physically unable to stand on the prepared area cannot be called pleasant.
The most common options for the location of automatic machines are:
- Bathroom
It is convenient because most of the communications are nearby. In addition, the device fits harmoniously into the surrounding space. To save space, the machine can be installed under the sink. Then you will have to choose a special form of plumbing with a drain in the back.
However, experts do not recommend placing the machine in the bathroom if there is an alternative, since in conditions of high humidity the parts wear out much faster and rust appears.
- Kitchen
Also, all connection nodes are located nearby, there is no need to re-equip anything additional. If you think through the design of the headset in advance, you can install a built-in washing machine or hide it behind one of the cabinet doors.
There are disadvantages here: increased humidity and temperature effects from the stove and oven. Therefore, it is recommended to install the device away from heating devices.
- Toilet
Some originals manage to install the unit even in a small toilet. In this case, the machine is located above the toilet.
This option requires special preparation and thoughtfulness: you need to be confident in the strength of the walls, install a reliable podium, and provide a vibration damper.
- Corridor
The location in the hallway is more common in desperate situations, when there is simply nowhere else to put the equipment.
The location has few positive features: communications have to be delayed, equipment takes up a lot of space, noise can be heard in all rooms.
- Lumber room
If you have a storage closet in your home, you can try converting it into a laundry room. This way, the washing machine will not interfere with anyone, and will be preserved better.
Some houses have special rooms that are designed for washing. If you are the lucky owner of such an apartment, well, congratulations, you are lucky.
- Basement
Such placement is possible in a private house, provided that the basement is heated and has electricity, water and sewerage installed.
If all requirements are met, this arrangement is very advantageous: the unit is not exposed to moisture, and its operation is inaudible for residents.
When the choice in favor of a certain room is made, you should think about the surface on which the machine will be located. The floor in this place should be hard and level.
Small differences in height can be corrected with the help of screw-in machine legs or a rubber mat, but they cannot compensate for strong unevenness. Therefore, if the installation is carried out on a wooden or uneven floor, then it makes sense to think about filling the area under the device with a concrete screed or installing a pallet.
Types of washing units
Today, automatic machines are mostly used for washing. Manual and semi-automatic models are no longer so common in our homes. Automatic machines perform a full washing cycle, from soaking to rinsing and drying.
Connecting the washing machine to the water supply
Important! Ultrasonic devices are also produced that clean contaminants using generated ultrasound.
An interesting modification of automatic machines are bubble models. They perfectly remove stubborn stains with minimal impact on the material. However, the cost of such equipment does not yet allow everyone to purchase it.
Air bubble washing machines
Loading into the washing machine can be done either frontally or vertically. In the first case, the door is located on the front panel; such equipment can be built into kitchen units. The upper surface of the unit can be used to place items needed in the household. However, to load laundry and remove it, you have to bend over, which is not always convenient.
Front loading model
In vertical models, the hatch is located on top. Thanks to the tank being mounted on two axes, there is less vibration during washing. During the cycle, additional loading can be done. But the price of such machines exceeds the cost of frontal analogues. Moreover, they cannot be embedded.
Top loading model
Table. Comparison of vertical and frontal type machines.
| Possibilities | Vertical unit | Front car |
| Model selection | — | + |
| Price | — | + |
| Convenience for the consumer | + | — |
| Possibility of integration into kitchen modules | — | + |
| Compactness | Small machine width | The equipment is wider, but compact models can also be selected |
The operation of both types of equipment is almost the same.
Prices for popular models of washing machines
Washing machines
Getting to know the instructions
Before you start working with the automatic machine, read the instructions! It contains a lot of useful information: what kind of outlet should there be, how to connect the drain and water supply, how to adjust the position of the unit, what malfunctions occur most often and whether you can fix them yourself, and much more.
Reading technical documentation is a separate step, since rarely does anyone turn to the manufacturer's prompts before a problem arises. This is usually only done if something doesn't go according to plan. You shouldn't do that.
The instructions provide detailed recommendations regarding the model of your washing machine, compliance with which will prevent many troubles. Do not ignore the manufacturer's advice: in the event of a breakdown, failure to follow them may result in your case being considered non-warranty.
Dismantling transport elements
The first thing you need to do to install the washing machine yourself is to remove all the shipping fasteners.
They are needed only for transporting the machine, but in stationary work they will not only interfere, but also cause harm.
Most often, these mysterious elements look like bolts, bars and steel brackets.
If you connect a machine with the shipping parts installed, then after a while (1-6 months) it will simply break down.
- The tank is secured with bolts for transportation. If you don’t unscrew them, the tank will not absorb shock, and the whole machine will shake as if in a fever. After they are removed, the tank will hang on powerful springs, and this is precisely its working position. Empty bolt holes are plugged with plastic plugs, which are included in the kit.
- The brackets make the case more rigid during transportation, and also secure the drain hose and the machine connection cord.
- Sometimes (but not always) you may see wooden blocks between the tank and the body. To remove them, tilt the machine forward and pull out the bars.
Try to save all removed transport elements in case of possible transportation of the machine to another place.
At the very least, the tank will definitely need to be secured with bolts.
The dismantling of transport parts is described in detail and with pictures in the operating instructions.
Preparation of communications
The washing machine is connected to three systems: sewerage, water supply and electricity.
Sewerage
There are several varieties possible here:
- Siphon under the sink - you need to install a splitter to the drain running under the sink. It will provide an outlet for the washing machine hose.
- Directly to the sewer - in this case, you will have to make a special outlet in the pipes or attach a tee when approaching the sink or bathtub.
- In the toilet or sink - the simplest and most unreliable option. Using a hook, the hose is hung on the plumbing fixtures, and the water flows out freely after washing.
Water supply
Most often, the machine is connected to cold water, and the device itself, using heating elements, heats it to the required temperature. However, some models provide connection to both cold and hot water.
This reduces electricity consumption, but increases the cost of hot water supply. In addition, such water often contains impurities and rust, which can lead to damage. And the units are more expensive. Therefore, the most common option remains connecting to cold water.
It is quite simple to install an additional outlet for water on polypropylene, metal-plastic and plastic pipes. A tee with one transition to metal should be installed. If there is a free outlet on the water supply pipes, great, the task is greatly simplified! All that remains is to install a shut-off valve.
You can install the simplest ball one. At the same time, do not forget to apply sealant and flax tow. There is an alternative option: a tee with a built-in tap. They are designed specifically for washing and dishwashing appliances. It is more convenient to install such a part, but if one of the parts fails, you will have to change the entire element, and they cost a lot.
Electricity supply
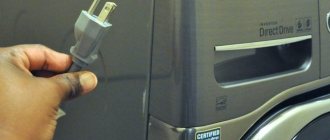
For correct and safe operation, the machine is connected to a separate grounded outlet. Please be aware that if there is no grounding, the manufacturer's warranty on the unit will no longer apply.
It must be located in close proximity to the device, since connecting extension cords or straining the wire is not allowed.
If there is no outlet that meets the stated requirements, contact an electrician. It will extend a separate power supply line from the panel with the required current parameters.
Do not attempt to install the outlet yourself unless you are properly qualified!
Connection and installation
Now all that remains is to free the unit from the packaging, remove the foam protection and unscrew the shipping bolts that are located on the back of the case.
They are designed to protect the internal parts of the device from damage during transport. Place plastic plugs (included in the kit) into the resulting holes.
Do not throw away shipping fasteners. They will come in handy when you move or need to take the device to service.
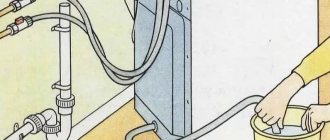
The corrugated drain hose into the sewer (usually included in the kit) must be installed in the siphon outlet and secured with a clamp. If the connection is made directly to the sewer pipe, then a rubber cuff is used as an adapter.
With any connection method, it is necessary to ensure that there are no kinks or strong kinks in the hose. But a bend at 60 cm from the floor is a common requirement. This is necessary to form a natural water seal - so that water and odors from the sewer do not penetrate into the device. A plastic clamp is used for fixation.
This rule is true for devices in which the drain hose is located at the bottom of the housing; if it comes out from the top, then the bend has already been made in the inside of the device. There are also now units with a check valve, for which you do not have to create additional “elbows”. This point should be clarified in the equipment documentation.
To connect to the water supply, we use a hose that is sold with the device. The side with the curved end should be connected to the machine: install the mesh filter (included in the kit) with the convex side towards the outlet and manually screw it on. The other end is also screwed onto the water supply tap by hand. There is no need to tighten too much, since there is a rubber seal at the joints that ensures tightness.
To make it even clearer, take a look at how this process goes in the video.
Washing machine device
To understand the technology of connecting a washing machine to a water supply system, you need to imagine its structure. Visible elements of the machines are shown in the photo.
Visible elements of the washing machine
Inside the machine there are modules that carry out the process of washing contaminated clothes.
Internal organization
How does the washing unit work?
The detergent compartment contains washing powder, conditioner, and, if necessary, rinse aid. The drum contains dirty items. The door closes tightly. The required textile processing mode is selected.
The washing cycle begins with the supply of water to the drum loaded with clothes, which enters through an inlet hose connected to the water supply. Its level is monitored by a special sensor - a pressure switch. The electronics of many models allows you to fill in a volume of water corresponding to the number of items placed for washing. The hatch cover is locked before starting work.
Factors that determine the duration of washing
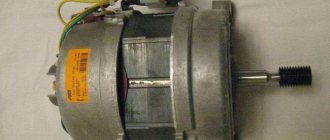
Washing clothes is carried out in heated water, using special chemical compounds and mechanical action, which ensures rotation of the drum (in different directions and at different speeds). Its inner surface has ribs, with the help of which the clothes are mixed. The movement of the drum is controlled by a power unit located below and a drive belt. Some models do not use a belt drive; the motor is connected directly to the drum. This allows you to optimize the internal space and reduce noise during operation of the washing machine.
The heating element is responsible for heating the liquid. Its operation is controlled by a thermostat that monitors the water temperature (it is different for different washing modes).
Washing machine heating element
At accelerated drum speeds, the laundry is spun.
Spin in the washing machine
When necessary, the water is drained into the sewer. To remove it, a drain pump is installed. To prevent foreign objects that often appear during washing (threads, garbage and small items from clothing pockets) from getting into the pump, there is a filter in front of it.
The brain of the washing machine is the control module. It is he who controls all processes depending on the selected program and controls the operation of the modules (water supply and drainage, heating, drum rotation speed, etc.). The data necessary to determine the cycle mode is transmitted from the control panel. The wash type is specified by the user.
Control Panel
Prices for heating elements for a washing machine
Heating element for washing machine
Alignment
To prevent the washing machine from jumping, it is necessary to adjust its position - it must stand level. If this is not done, the internal components will quickly fail and the washing machine will have to be repaired.
To carry out the procedure, a building level is used, which is laid along each side. If there is a tilt somewhere, then you need to tighten the legs until the horizon line is perfect.
When this condition is met, try to slightly rock the machine: if it wobbles, then the adjustment should be continued.
Do not place pieces of wood, cardboard or linoleum under the legs! The device will still “move off” them.
Also, the floor should not be slippery. If the device is installed on tiles, you should lay a rubber mat or use special rubber stands for the legs.
Examination
All adjustment steps have been completed, which means it’s time for the first launch. You need to run the machine without laundry at the highest possible temperature. This will allow you not only to check the correct installation, but also to clean the inside of the device from any dirt and oil from the factory.
During the debut cycle, check all the joints: is there any dripping at the joints of the pipes, are there any leaks in the sewer hose, is the housing electrocuted, how loud is the unit, is it jumping around the room?
If any of the above deficiencies are detected, it is better to interrupt the work and immediately begin to eliminate it.
If you don’t know how to get rid of shortcomings, then stop being a hero and call a specialist. The quality of washing, service life and, of course, safety depend on the correct connection.
First start of the machine.
- After all the steps have been completed, you need to check the installation is correct.
- It is necessary to turn on the washing machine in each of its modes.
- After testing operation without laundry, you need to familiarize yourself with the following:
- Tank filling time
- No leaks
- Correct drain operation
- Correct drum function
- Spin
- Good heating of water in a short period of time. About six minutes after the drum is filled with water.
- No excessive rumble or other excessively loud sounds.