With the arrival of a small child in the family, a new life begins, full of joy and pleasant troubles. The baby needs not only love and care, but also the creation of favorable conditions for full development. Healthy sleep is of great importance for the baby, so after purchasing the appropriate furniture, a logical question arises - how to assemble a children's bed, doing it correctly, taking into account the specifics of its design. Of course, the easiest way is to turn to the help of professionals, but not all families have access to this service. And sometimes such an opportunity is simply brushed aside by a man, because self-assembly is direct proof that “dad can do anything.” Despite the laboriousness of the process, the task is quite feasible; the main thing is to follow the sequence of steps laid down in the instructions.
Assembly steps depending on the type of crib
Installation features completely depend on the type of furniture. The most popular designs of cribs today are pendulum, transformer, rocking chair, and hinged models. Next, we will look at the step-by-step process of assembling each of these types.
Pendulum
The main feature of the model is its special oscillatory movements, which are very similar to rocking a baby in the mother’s arms. The mechanism starts on its own at the slightest movements of the baby, which helps him fall asleep quickly.
There are several types of pendulum:
- Longitudinal. The most popular option, perfectly imitates motion sickness. Scientific studies prove that such movements normalize intracranial pressure.
- Transverse. The shape of the products resembles traditional cradles, rocking from side to side. If necessary, you can fix the model in a stationary position. Assembling a children's pendulum bed of this type is also possible in small rooms.
- Universal. Models are able to change the direction of motion sickness and purpose. At first, babies sleep in a cradle, and when they grow a little, the sleeping place is lengthened and the walls are removed. Many products are complemented by a convenient changing table.
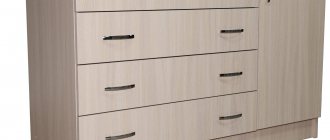
The model includes a frame, bed, legs, backrests, and a pendulum mechanism. Many products are complemented by drawers, changing pads, and chests of drawers for storing things. In what sequence to assemble a children's bed with a pendulum according to the instructions:
- The back part is connected to the side strips using screws.
- The berth is first mounted on screws, then on guides located on the sides.
- The structure is turned over to install the pendulum mechanism.
- Linen boxes are inserted, the side wall of the pendulum is fixed with screws.
- All plugs are closed.
The back and front walls of the structure are almost identical. It is necessary to pay close attention to this feature when assembling a children's pendulum bed. If you mix them up, the mechanism will not work. To avoid damaging the floor covering and parts of the furniture itself during the assembly process, cover the work surface with a soft cloth. It is desirable that it be light, then all components will be clearly visible.
Connect the back wall with the sides Install the bottom of the crib Insert the front wall of the crib and pull it together with the sides Install the runners for the box, fix the legs Install the pendulum mechanism Check for the presence of a screw for fixing the crib Assemble the box
Transformable bed
This model is optimal for baby sleep from birth to school age. Installation is carried out as follows:
- The lower sides and backs are connected.
- The fixed wall is secured with screws.
- The bed is assembled, then inserted into the grooves on the side panels and secured with screws.
- A fixed façade wall is installed.
- The cabinet is mounted and then connected to the side.
- The bottom of the product is assembled, and the side grilles are attached.
The transformer grows as the child grows. The cabinet, which is attached to the base of the furniture, can be removed, adding 50 cm to the length. The standard width is 60 cm, it remains unchanged.
Rocking chair
A popular model that sways with the child’s movements thanks to curved supports. Installing such a crib will not take much time if you follow the rules:
- All boxes are assembled using self-tapping screws.
- The bottom and side panels are mounted. At this stage you will have to make some physical effort.
- The back wall is screwed to each side panel with self-tapping screws.
- The front model is installed in the grooves on the side panels and securely fastened.
- The lower linen drawer is installed.
Many models are complemented by wheels, which are mounted at the request of parents.
Hinged
The cribs provide monotonous, smooth rocking motions that help children fall asleep quickly. The sleeping place usually has two levels and has orthopedic properties. The assembly rules are:
- The base of the product is mounted. All 3 guides are attached to the bottom of the case.
- The front and rear backrests are secured with screws.
- The bottom is installed, two installation options are possible, which allows you to change the depth of the crib.
- The side walls are screwed on, all moving parts are connected to the base.
If necessary, the rocking chair can be in a stationary position; for this purpose, special clamps located at the bottom of the side panels are used.
Preparatory work
The design of children's beds varies. For example, pendulum-type options are somewhat different than transformer models, rocking chairs or furniture with hinges. The process of assembling purchased goods occurs in 2 stages. It includes the preparation of components and installation of elements.
In order to assemble the bed in comfortable conditions and with high quality, you need to do the following:
- remove unnecessary children's items;
- move excess furniture, thereby freeing up space that is important for ease of installation.
Carry out assembly in the place where the bed will be located later. In this case, you will not need to drag it to another room after finishing work.
It is important to carefully check all metal and wooden components included in the kit. Their number must correspond to the information indicated in the instructions. If you find a missing item, you must immediately call the store.
It is also worth making sure that there are no flaws in the wooden surface. To do this, all pieces of furniture are carefully checked for integrity. If chips or old cracks are found, the product must be returned, since the damage threatens the safety of the baby.
Then you should sort all the parts. Walls, side parts and other elements must be assembled below on the floor into separate groups, taking into account shape and size. If there is no bed assembly diagram, then you need to find it in available sources of information. Following the assembly algorithm will help to avoid problems, especially for those people who are faced with such work for the first time.
Any rules described in the instructions for assembling a children's bed must be strictly followed. Each specific model has its own characteristics.
Varieties
All beds with a pendulum allow you to rock your baby directly in the cradle. However, they are divided into different types and are longitudinal, transverse and universal. You can choose the right model by determining your needs and familiarizing yourself with each type in detail.
1) Longitudinal pendulum. Its main advantage is a good imitation of the natural rocking of a child in the mother’s arms. With longitudinal rocking, the baby will calm down and fall asleep much faster.
2) Transverse pendulum. Such cribs are compact in size, so they are suitable for installation in rooms with a small area. They have been used for many years, but previously they tended to turn over to one side. In modern conditions, children's beds are equipped with special devices that prevent them from tipping over. All pendulum products have a locking mechanism, but this does not mean that it will perform its functions properly. Some manufacturers install low-quality parts on their products, so inspection and testing should be carried out during the selection process
It is also important to carry out the installation process correctly
3) Universal pendulum. Beds of this type provide users with the ability to transform the mechanism. This is convenient if you may need to change the position of a piece of furniture in the future. In this case, parents will be able to convert the bed in a short time. Such models also have the ability to remove side rails and install additional accessories.
The choice depends on the preferences of buyers. It is better to choose universal beds with a pendulum when the room area and budget allow.
Longitudinal mechanism
This option best allows you to imitate the baby being in the mother’s hands. The trajectory of rocking in this case is forward and backward, which is a more physiological way of lulling a child to sleep. As many experts note, it is these types of cribs with a longitudinal pendulum that are preferable to use, since they help normalize intracranial pressure.
And precisely due to the fact that the furniture swings back and forth, it can be placed against the wall, and it will not clutter up the space. This is very convenient, especially when the bed is located in the parent's bedroom.
At the same time, for some mothers this type of rocking may cause certain difficulties or inconveniences. From their point of view, it is much easier to rock the baby in the transverse direction. It is precisely for such cases that the next type of pendulum has been developed, which will be discussed further.
Assembly process: step-by-step instructions
You can assemble a crib with a pendulum-shaped mechanism using the following instructions.
The fixed rear part is screwed to the side elements of the crib using screws. It is enough to take 4 screws, placing 2 on each side
It is important at the time of connection not to confuse the upper and lower parts at the back wall of the bed. In the case of side panels it is simpler; they have legs that allow you to accurately determine what should be at the top and what at the bottom
Pendulum crib with chest of drawers After the frame has been formed, you should proceed to installing the bed for the child's crib. It can be in the form of a solid element or look like transverse boards that are held in place with a cord. It is not recommended to secure the baby's crib bed too tightly. To begin with, it will be enough to “tighten” the structure with the required number of screws. Baby crib pendulum made of solid wood. The side parts have special guide grooves. The front wall of the bed should be secured to them. After this, you can begin to secure the screws more firmly in the bed of the crib. White crib pendulum Turning the entire structure over, you can completely notice the presence of metal grooves into which the wheels are inserted. If you want to roll the bed, you should install them. If you plan to rock the structure with the child on the side elements in the shape of arcs, then the crib does not require wheels. Crib pendulum Before installing the pendulum, you should attach a linen rack (if available). After this, you can proceed to securing the front side part. Pendulum bed made of solid wood To place the bed on the pendulum, you need to attach plates to the side parts of the structure. White crib pendulum Then the bearing systems are installed. Upon completion, clamps are placed on the crib to avoid injury to the child.
Beige pendulum crib made of solid wood Assembling a bed with a similar mechanism is quite simple. To prevent the screws from sticking out and spoiling the appearance, they can be hidden behind special plugs.
A house-shaped bed is a preschooler's dream. You can do it in just half a day
Step 1. Making the walls of the house
We took four wooden blocks, each 1200 mm long. They will act as supports, the vertical structure of our bed.
To make the gable roof beautiful, you need to saw off the top edge of each of the supports at an angle of 45 degrees. First we marked the cutting line using a square and a pencil.
Step 2. Making the roof
For the roof, take four wooden blocks 730 mm long and repeat the same procedure: the outer edge of each block must be cut at an angle of 45 degrees.
Advice:
Go through all cuts immediately with sandpaper.
We glue the joint between the roof and the vertical support and additionally secure it with a 4.5x30 mm self-tapping screw. Screw in the self-tapping screw, departing 3 mm from the joint line of the two wooden roof parts. Screw in smoothly, without pressure, so that the wood does not delaminate.
Advice:
Use a vice to hold the structure in place while you drill. Use good drill bits and try not to drill too fast.
When you screw the two roof slats to the two supports, you should end up with a house frame like the one in the photo above. The children's bed in the shape of a house is gradually taking shape.
How to assemble a transforming children's bed?
A transformable bed allows you to increase the sleeping area depending on the age of the child. The bedside table, which is part of this design, can be eliminated. This increases the size of the bed.
When assembled, the transformer is a sleeping place that is connected to a changing table, cabinet or chest of drawers. When the baby gets older, the structure can be separated and made into a bed for a school-age child and a small locker.
The transformer assembly process is as follows:
- First you need to assemble the frame of the crib; it consists of lower sides and a backrest. After this we install the slats for the bottom.
- We attach the middle bottom to the slats. Then you can begin assembling the chest of drawers or cabinet (this element depends on the modification).
- We attach the chest of drawers to the back of the structure with screws, and install shelves inside.
- We install side grilles, top bottom, and headboard.
- After assembling the upper part of the structure, we proceed to install the lower part. In most cases, it is a rectangular container with an open top. Installation is carried out using screws.
So, congratulations to your family! All members are in joyful anticipation of a miracle. But, despite the anticipation of the holiday, someone close to you should take care of preparing a comfortable sleeping place for the newborn. Grandmothers can buy or sew bedding sets, grandfathers, uncles and aunts can give toys and clothes, but, of course, the future dad should make a crib for the baby!
This process will be both pleasant and useful, and will also help save financial resources for a young family. Convenience, environmental friendliness and safety - that’s what makes . The pendulum in her device will add functionality and comfort.
Required Tools
To assemble a crib correctly and efficiently, you will need to prepare the following tools:
- scissors or a stationery knife - for unpacking boxes;
- a set of screwdrivers and a ring wrench (a screwdriver with a set of attachments would be a convenient replacement);
- durable equipment, hexagon, cross bit;
- tape measure for accurate sizing;
- pliers for removing incorrectly inserted fasteners.
Many modern cribs are equipped with Euroscrews with hidden heads and internal hexagons, so special keys are useful when assembling them. The level will help to achieve perfect evenness of the connected parts. Depending on the type of children's furniture, the components vary, so the composition of the tool set may vary.
Which one to buy: types of bedroom furniture for babies
Girls, does anyone know how to fix a pendulum crib? The baby is already a year old and cannot sleep in his crib.
If necessary, the rocking chair can be in a stationary position; for this purpose, special clamps located at the bottom of the side panels are used.
The model includes a frame, bed, legs, backrests, and a pendulum mechanism. Many products are complemented by drawers, changing pads, and chests of drawers for storing things. In what sequence to assemble a children's bed with a pendulum according to the instructions:
- The back part is connected to the side strips using screws.
- The berth is first mounted on screws, then on guides located on the sides.
- The structure is turned over to install the pendulum mechanism.
- Linen boxes are inserted, the side wall of the pendulum is fixed with screws.
- All plugs are closed.
And I bought my crib completely unexpectedly for myself - I ran into the store 5 minutes before closing just to “feel” the material, and in the end I paid for it on the same day, and was also very pleased with it. You could store the crib with them even until the birth of the child, and delivery was carried out within 3 days after the call.
An additional function of the crib is a pendulum mechanism. It allows you to simplify the process of rocking your baby. But it should be remembered that the pendulum should be used only in the first months.
But here, it seems, the mattress is placed on boards, as they are called, chipboard, and for protection there is just such a small fence. There's a fence inside. Or is it just for the mattress?
Beech is the most durable and wear-resistant type of wood; 87% of Italian furniture is made from it. And the Italians boast of their approach to the selection of quality materials for the manufacture of furniture. Therefore, a transforming bed made of solid beech is a very reliable and environmentally friendly design
Separately, you should pay attention to the paintwork of the transforming crib
Let's start assembly. The timber was connected to the dowel using a countersunk screw and wood glue. Probably it was possible to do without screws, but I wanted it that way. All holes were filled with putty.
Assembling the frame
Let's start with a 40x95 mm board. Let's cut it for the legs. We should get 2 elements 910 mm long and 2 410 mm long.
Blanks for legs
From a 45x20 mm board we will make the perimeter of the bed and a couple of blanks for the headboard. Since the factory cut of the workpieces is not very even, I will trim the workpieces manually with a Japanese saw. The peculiarity of this saw is the presence of very small teeth and their “multi-directionality”. This saw gives a beautiful thin cut.
I trim blanks with a Japanese saw
The following frame parts: 200 cm and 165 cm. We made them from boards with a section of 145x20 mm.
Blanks for the frame
We will also prepare the parts on which the slatted bottom of the bed will rest, an element for supporting the slats and a stand. The stand will be attached to the support in the center of the bed. It is needed for greater reliability.
1. Two sidewalls on which the slatted bottom will rest; 2. a beam in the middle that will take on part of the load
All ends and rough surfaces should be sanded. We will also soften the edges of the details. Using self-tapping screws, we attach the slats to the longitudinal walls of the frame, on which the slatted bottom will rest.
I attach supports for the slatted bottom
To fix the legs to the bed, I used corners that would provide rigidity in the diagonal direction, and in some places I fastened the parts with an oblique screw.
We assemble the structure using corners and fastening with an oblique screw.
I highly recommend buying a jig for fastening “on an oblique screw”. You will need it more than once
The legs of the bed protrude 1 cm above the frame. We make the appropriate markings and attach the parts to the base of the frame. We connect all the parts of the bed frame. I assemble the parts at the headboard using an oblique screw and a corner, at the foot - only with an oblique screw.
Assembling the frame
The frame is ready
I'm trying on the slatted bottom. 6 hours have passed since the start of work
The bed frame was coated with teak oil on site. I brushed the boards for the headboard to emphasize the active wood grain. I use nylon brushes for this. As a result, we obtain a surface ready to be coated with a decorative composition.
I didn’t start dusting the apartment. Brushing boards for headboards outdoors
I connect two boards to each other “with an oblique screw” and fix them on the frame.
Connecting the headboard and legs of the bed
Cover the finished frame with oil.
How to make a pendulum for a crib with your own hands?
Let's figure out how to make a pendulum for a crib with your own hands. For these purposes you will need:
Installation diagram of the pendulum mechanism.
- bearings, the outer diametrical size of which corresponds to 3.5 cm. The required quantity is 8 pieces;
- metal bushings with 6 threads. You will also need 8 of them. You can buy these at any market that specializes in selling furniture fittings;
- countersunk head screws. With their help the pendulum will be attached. Need 8 pieces;
- strips – 4 pieces. Elements of parquet made of oak (planks) are suitable;
- washers in the amount of 8 pieces. The most appropriate choice would be to use plastic copies. They will be needed in order to avoid friction of the bed legs when in contact with the supporting structure;
- In addition to purchased ready-made materials, you will need metal bushings (8 pieces), which should be pressed quite tightly into the bearings, or rather into their inner hole. Such bushings are made only to order.
What else could you need? For the crib, it will be necessary to make a special box (frame), the design of which will serve as the basis for hanging the crib.
And now about the prices. The approximate cost of one bearing is 35-45 rubles, factory-made bushings from 6 to 12 rubles, but the price of a custom-made bushing can reach 50 rubles or more. It all depends on the master’s requests. There is, of course, the option of placing the crib using ropes, but this is not entirely safe.
There is a possibility that the ropes may fray during the rocking process. And yet, using ropes as a hanging material can give significant play when swinging, which means that your crib with a pendulum will hit the supporting frame.
We will need
Tools:
- Japanese saw,
- screwdriver,
- square,
- hammer,
- device for oblique screw,
- brushing machine
- clamps
- sanding paper (sandpaper).
You don't need a complicated tool to do the job. Let's make do with the minimum.
Materials:
- self-tapping screws 35 mm, 16 mm, Kreg 38, Kreg 51,
- galvanized corner 40x40x80x2 mm 4 pcs.
- boards 3 m 40x95 mm 1 piece,
- boards 3 m 20x95 mm 1 piece,
- boards 3 m 145x20 mm 6 pcs,
- boards 3 m 45x20 mm 13 pcs.
The wood was purchased at a nearby hardware store. The choice fell on pine
Why did I choose pine? Because you can buy ready-made boards of the required section from it. There is no need to joint, thickness, or loosen, but only saw off the blanks to the required length. But wood from hardware stores is most often under-dried. It took me about 2,500 rubles for lumber.
It is advisable to check the dryness of the wood. The raw one can “lead” over time
And although the appearance of pine is slightly inferior to hardwood, it has an interesting pattern that is well manifested during decorative processing.
Pendulum crib: caring for the baby and his parents
A crib with a pendulum system, unlike other models, is equipped with a mechanism for rocking the child to sleep. This function will be of great help to the parents of the newborn in the first months of his life at home. This option is preferable when mom and dad deliberately decided not to accustom the baby to rocking in their arms or the parents have health problems. In addition, young mothers get tired of having to go to the crib at night every time the child wakes up. Here a pendulum crib comes to the rescue of parents. All you have to do is push the smart design with your hand and it will begin to sway rhythmically, putting the restless baby to sleep.
Pendulum crib with drawers
Pendulum crib with chest of drawers and drawers
The indisputable advantage of the pendulum is the sensitivity of the mechanism to light touches, thanks to which the baby can set the crib in motion. This will ensure a good night for the baby and allow the mother to rest.
The mechanism for setting the pendulum in the crib in motion
It should be noted that, if necessary, it is quite easy to make a pendulum crib into a traditional stationary crib. You only need to lock the system with clamps, which, as a rule, come with the furniture.
Among the additional functions of some models, it should be noted the ability to adjust the height of the bed of the crib and the front wall, drawers for linen, and soft sides. The best option is a design with three levels of bottom height, which can be used in accordance with the growth and development of the baby. The front wall can be not only retractable, but also completely removable. This will allow you to move the baby crib closer to the parent's bed, then the baby will smell the mother's scent, who can quickly feed him and put him to bed. The laundry drawer will allow the mother to quickly change diapers and baby clothes, in addition, you can store toys or a first aid kit there. It is necessary to provide free space in the room for pulling out the linen drawers of the crib. Fabric sides not only play an aesthetic role, but also keep the baby safe.
The height of the pendulum crib can be adjusted
Sources
- https://kakchistim.ru/mebel/instrukcii-i-sxemy-po-sborke-detskix-krovatok.html
- https://babyplayroom.ru/mebel/sborka-detskoj-krovatki-s-mayatnikom.html
- https://weller.ru/svoimi-rukami/kak-sobrat-detskuyu-krovatku-mayatnik-instrukciya/
- https://mblx.ru/kojka/malysh/1005-kak-sobrat-detskuu-krovat.html
- https://severdv.ru/mebel/krovati/instrukcziya-po-sborke-krovati-transformera/
- https://otvali.ru/master-klassy/kak-sobrat-detskuyu-krovatku-mayatnik-instrukciya-foto/
- https://FB.ru/article/442621/kak-sobrat-detskuyu-krovatku-s-mayatnikom-instruktsiya-i-rekomendatsii
- https://berkem.ru/krovati/sobiraem-krovatku-dlya-malysha/
Lateral rocking
Externally, the entire structure resembles a cradle for comfortable rocking from left to right and vice versa. It is easy for parents to rock their baby to sleep, even while lying in their own bed. But even in this case, the baby can independently set his crib in motion, turning over from side to side.
As for the disadvantages, a crib with a transverse pendulum also has them. Such furniture requires quite a large space. Otherwise, due to lack of free space, the body of the crib will constantly hit the wall, which, in general, is undesirable.
In other words, it cannot be moved close to the wall, as is the case with a longitudinal pendulum. Another disadvantage is the lack of physiological nature of the swinging process itself.
The choice of modern parents is a children's bed "transformer"
Choosing a sleeping place for a baby is a very responsible matter, because the crib should have a lot of characteristics, but, first of all, it should be comfortable, safe and multifunctional. Of course, the appearance and color of the crib is also important, as is its price and the material from which it is made.
1. When choosing a crib for your baby, make sure that it is made of natural materials, and also has a slatted bottom (for ventilation) and safe side walls (the head should not fit between the bars). 2. Beds can be on legs, on wheels, on runners. The functionality of these nuances can be disputed. 3. For babies who are not yet 6 months old, you can use cribs as a place to sleep. 4. Children's transforming beds, as in the photo, are now very popular, as they completely replicate classic beds, but have more functional accessories. This piece of furniture contains not only a bed, but also a changing table, as well as various drawers and cabinets. 5. Transformable children's beds have different sizes, but many models turn from very tiny ones into regular beds that can accommodate a child up to 10 years old - just remove the side walls and extra drawers. Without the folding part, such beds can last your child up to three years at most.
6. Transformable beds are very convenient, since here you can “hide” everything necessary for the baby, which will make it easier for the mother to care for the child.
Transformable bed: all the pros and cons
1. The bed grows with the child - it is possible to increase the sleeping space up to 50 centimeters, thanks to the fact that you can remove the bedside table, which is built into the base of the bed. 2. Unfortunately, it is impossible to add width to the bed - 60 centimeters is suitable for a 5-year-old child, but this is not enough for an 8-9 year old schoolchild. 3. Such beds are made from a variety of materials - it can be wood, plastic, metal. 4. Children's transforming beds are made strictly according to the structure of the baby's body, so he can expect a comfortable rest. Just watch the video to study this point and find the right option for yourself. 5. Thanks to the built-in cabinet, you can be absolutely sure that all the necessary things will always be at hand. 6. If you choose a bed with a changing table, then it will be much more comfortable for the mother to care for the baby. 7. A children's transforming bed has an average cost, but its price depends on how many items are included in the furniture set: if a bed for a baby turns into just a large bed, then the price of such a set is the same, and if you add a bedside table and a chest of drawers, then the price is completely different. 8. This bed is much larger in size than a standard crib for a newborn - this should be taken into account when choosing furniture. 9. A huge plus of such beds is the drawers that are located under the bottom. Mostly bed linen and children's things are stored there. 10. The price of a transformable bed also depends on the material from which it is made. The cheaper the bed, the greater the likelihood that the material is of poor quality.
Universal option
The main feature of the universal pendulum (as you might guess) is that when assembling the crib, you can choose an active, more convenient option - longitudinal or transverse. Moreover, it is possible to alternate longitudinal movement with transverse movement. This way the baby can get used to both.
It is worth noting that if one child likes longitudinal rocking, then this option is not always acceptable for another child. And it can take more than two weeks to understand which type is suitable in each particular case. This is precisely the beauty of assembling a crib with a universal pendulum - thanks to the presence of two swing options, the baby will have a restful sleep.
Typically, parents purchase beds several years in advance, and during this period of time some changes may occur, including rearrangement of furniture. Having universal children's sleeping furniture in stock, you don't have to worry about upcoming rearrangements. This bed will take any convenient place.
Types of cribs
When choosing a crib, you need to take into account the needs of both the baby and the parents. There are several main types of cribs:
- cradle;
- classic crib;
- pendulum bed;
- rocking chair;
- playpen
Each type has its own advantages and disadvantages. In the first months of its existence, the child will feel more comfortable in the cradle. It looks like a small crib attached to two stands on high legs. As the baby gets older, the cradle can become dangerous due to increased activity.
The most popular crib model is the classic one.
It is designed for a child under 3 years old and has a variety of functions and devices: the ability to fold down the sides and adjust the height of the bottom. This is the most inexpensive and therefore the most popular option. The pendulum bed and the rocking bed are almost the same. They differ only in the retainer. The rocking chair uses wheels for fixation. The pendulum is equipped with a special mechanism that allows you to prolong the oscillation process. Instead of wheels, the pendulum has special latches that do not require daily unscrewing.
A playpen-type bed differs from ordinary ones in the material from which the walls are made. Most often, fabric is used for playpens. This type is more suitable for a child who can walk. The downside is the low bottom, which complicates the process of putting it in and taking it out.
Main element
The main element of the entire structure is the pendulum mechanism for the crib, which can be transverse, longitudinal or universal. In this case, only the child’s sleeping place swings, while the frame itself remains stationary.
In order to set the bed in motion, just touch the side of the bed with your hand and it will begin to rock. And if a mother has time, she can easily lull the baby to sleep by quietly humming a lullaby.
As for the three types of pendulum, each of them has its own advantages and disadvantages.
Solid wood bunk bed. Detailed drawings.
The question of buying a bunk bed arises in families with two or more children and a small living space. It will significantly save room space and thereby leave more space for children to play. And it’s not at all necessary to run to the store to buy something. It can be done by any craftsman with a minimal set of tools.
What models of bunk beds are there?
- Traditional model
The design is quite simple. It is made entirely of solid wood, which is important for a children's room. Such a bed must be stable, as it will serve not only as a sleeping place, but also as a playground for children's games. To increase stability, it is recommended to attach it to the wall.
Drawings and step-by-step manufacturing will be discussed below.
The design can be improved by adding drawers to it. You can store children's toys or, for example, bed linen in them.
- Bed with three berths
It has three sleeping places and is quite stable due to its widely spaced legs. The space in the room will take up exactly the same amount as a regular double bed or a fold-out sofa.
- Bed with a pull-out fourth bed.
It is an improved version of a bunk bed with three sleeping places.
The height will be like a two-tier one, and the functionality will be like a three-tier one. It has four sleeping places and will be more difficult to make than a traditional one, but it is worth it. This bed takes up a little more space than a traditional one, but it has a convenient staircase to the second tier and children will be provided with their own lockers for storing things or toys.
- Bed with table and separate work space.
They are also called loft beds. It is convenient because it has dual functionality. There is a sleeping area on top, and a spacious workspace with a table and cabinets below. This eliminates the need to purchase a separate bed, desk and cabinets. It significantly saves space in our apartments. Its disadvantage is that it has only one sleeping place. As a rule, they are made of plywood and chipboard.
A loft bed can be significantly improved by adding another pull-out bed. This way you get two sleeping places and plus a workspace area. True, there is a significant drawback here too. It is impossible to use the table until you roll out the lower berth.
Drawings of a classic bunk bed
This option is the simplest and is suitable for both children and adults. Inside the bed measures 2005 x 705mm. This size is necessary to fit a standard mattress with dimensions of 200x70cm.
Below is the simplest design, which is made without grooves and various cuts. It can be made by almost any craftsman with a minimal set of tools.
The boards can be secured using wood screws. You can use yellow galvanized screws or hex head screws. Hex screws are also called “capercaillie”. Screws will be needed in two sizes - diameter 6mm, length 110 and 160 mm. Do not use black wood screws. They are fragile and do not hold shear loads well.
If hex head screws are used, then to hide the hex head, you will need to drill holes in the boards with a feather drill according to the picture below. An oversized flat washer must be placed under such a screw. This washer has an outer diameter of 18mm and an inner diameter of 6.5mm. Taking into account the washer, the hole should be 20mm.