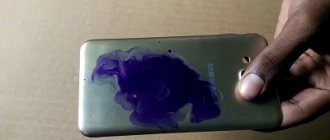
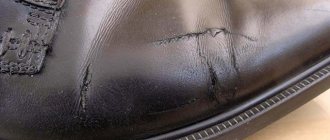
If, some time after purchasing the phone, the pictures on the camera begin to turn out fuzzy or blurry, don’t be alarmed. Most likely, the problem is simple contamination of the lens and dust getting into the body. Cleaning the camera yourself is very easy, and the quality of pictures after this procedure will improve significantly.
How to properly clean your smartphone camera
The location of the lens and the ability to clean it depend on the phone model and the features of the case. For example, modern devices often have solid bodies - in this case, only a specialized technician can help. If your phone model has a removable back cover, then you need to do the following:
- To work you will need alcohol, cotton swabs, small screwdrivers and alcohol wipes (they can be found in any pharmacy);
- Turn off the phone completely using the power button. Then we remove the back cover, take out the smartphone battery and put it aside to prevent the device from accidentally turning on. After that, take out the SIM card and, if available, the SD card;
- Using a suitable screwdriver, carefully unscrew the bolts holding the housing panel behind which the camera is located;
- After soaking cotton swabs in alcohol, carefully, with light movements, clean the phone’s camera. Then, using alcohol wipes, we wipe the protective glass of the lens, which is located on the removed plastic panel;
- We put the panel in place and fasten it with screws. We return the battery, SIM card, flash drive and close the case;
- Cleaning is complete. All that remains is to carefully inspect the smartphone for cracks and gaps, so as not to repeat cleaning again in the near future.
What means should not be used
Regular alcohol wipes or a microfiber cloth work well for cleaning, but they are not always on hand. You need to know what you should not use to clean the lens:
- Do not use toilet paper, paper handkerchiefs or dry rags. The hard surface and the wood particles it contains will immediately scratch the camera glass;
- Regular wet wipes, window cleaners and other household chemicals will not work. It contains aggressive substances that, if they get into a smartphone, can damage the display or cause damage to the device;
- Also, do not clean the camera with peroxide, ammonia, soda, solvent or bleach.
How to protect your smartphone camera lens from dirt and scratches
On many modern phones, the camera “sinks” a little inside, so it’s quite difficult to scratch it. However, on inexpensive models, the camera often does not have glass, but transparent plastic, which is easy to damage.
Basic ways to protect the lens:
- Bumper or book case. You can order it online or purchase it at a communication store. The case completely protects the lens from scratches and prevents contamination of both the front and main cameras;
- Protective film is available for sale in specialized stores; purchase it and ask specialists to stick it on correctly;
- If it is not possible to buy a case or protective glass, adhesive tape will work as a temporary solution to the problem. It needs to be glued to the wiped protective glass of the camera. The pictures will be of better quality for a while, until the opportunity to purchase a bumper becomes available. However, you must use tape at your own peril and risk - there is a high probability of damage to the lens.
We've been using smartphones all the time lately, so it's absolutely normal if after a while you notice blurry images again. Clean your smartphone using the instructions above and enjoy the quality of photos on your phone.
Pastes for polishing mobile frames
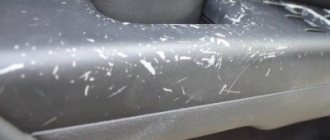
The solution to restoring the best appearance of mobile phone cases is special materials that allow us to restore the original appearance. In hardware stores as well as on web portals such as Amazon we find polishing pastes designed for window and door frames as well as cars, but which are also the ideal solution for our mobile phone.
How to use on mobile phone
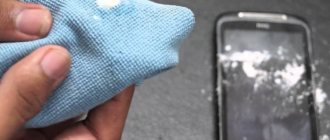
We will also need a cloth or a set of paper napkins. On them we are going to spread paste for repairing the mobile frame and begin to rub the areas where there are these marks that spoil the aesthetic appearance of the mobile. We will have to continue this process for several minutes until the paste fills the marks and gradually takes on its best appearance.
How to clean the camera on your phone
As an example, let's take the Lenovo P780 phone, which once managed to drown a little. After bathing, it was disassembled and completely dried. It was not put back into its original state very carefully. After a few months, the deterioration of the photographs was already obvious: the photographs became cloudy, the contours of objects became blurred. And six months later, the pictures did not reflect the original capabilities of the camera at all.
Upon examination, it is clear that the inside of the chamber is dusty. Let's try to fix this. Prepare a well-lit, clean surface, suitable small screwdrivers, alcohol and cotton swabs. You can also take alcohol wipes on a non-woven basis. We begin resuscitation of the camera.
- The first thing you should do is wait until the phone turns off completely. Then remove the back panel, remove and set aside the SIM cards and memory card.
- Using a screwdriver, carefully unscrew the screws securing the plastic panel of the case. The camera is hidden under it.
- Carefully clean the camera itself, and then the protective glass located on the removed panel, using cotton swabs and alcohol. We fix the effect with alcohol wipes. Once again we check the quality of the work done.
- Carefully put the panel in place and secure it with screws, return the SIM cards and memory card, and close the case.
- Be sure to visually check the integrity for random gaps and holes. Cleaning your phone is finished.
Your smartphone is your constant companion. Therefore, over time, you may again notice camera cloudiness and an unpleasant deterioration in the quality of your photos. You shouldn’t put up with this and clean the camera right away. Moreover, it is quite simple.
Content:
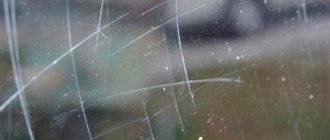
The camera is one of the most vulnerable points on a smartphone. It is not covered with anything and, as a result of improper or simply long-term use, it begins to become covered with scratches and abrasions. Minor scratches on the camera can significantly spoil the image quality, so you can and should deal with such an unpleasant phenomenon on your own. If you are interested in how to remove scratches from a phone camera, then read the rest of the article.
How to remove scratches?
To get rid of microcracks and abrasions, there are several methods, each of which we will consider in detail below. Please note that all these methods are also suitable for polishing the body of a smartphone or tablet, as well as the screen.
Paste GOI
This paste was created specifically for polishing glass and optical surfaces, so it will do our job perfectly. There are 4 types of paste, depending on its grain size, but for our purposes we need the finest-grained, most delicate paste - No. 1. It is black-green in color and sold in solid form. Instructions for use:
- Prepare a soft cloth or microfiber cloth.
- First, clean the surface to be treated with a dry cloth to remove visible dirt and stains.
- Apply a small amount of paste to a clean cloth and apply it to the surface of the camera. Continue doing this until the scratches are invisible to the eye.
- Go over again with a clean napkin and enjoy the result.
Important! This method is one of the most popular and effective for removing scratches from gadgets.
Toothpaste
What to do if you don’t know where to buy Goya paste, or for some other reason you don’t want to use the method described above? There is a worthy and very simple alternative - toothpaste. With its help you can also get rid of the smallest scratches and return your smartphone to normal condition. You don’t even have to buy this product on purpose, since everyone probably uses it for hygienic purposes. But if you don’t have it at home, for example, if you brush your teeth with tooth powder, then you can always buy the cheapest paste to polish the camera, body or phone screen.
How to use it:
- How to properly stick protective glass on your phone at home
- Using a soft flannel, microfiber cloth or special polishing cloth, apply a pea-sized amount of paste to the area to be treated and rub in a circular motion until the scratches are barely visible.
- After completing the work, remove any remaining product with a slightly damp, clean cloth.
Soda
An identical result can be obtained if you use baking soda instead of toothpaste. It needs to be mixed with water to a thick paste, then applied to the glass and carefully polished with a soft cloth. When finished, remove any residue and clean dry. Soda can be successfully replaced with talcum powder or baby powder, and in this case the processing will be more delicate, since the abrasive particles will be smaller in size.
Vegetable oil
Using this method, of course, you cannot get rid of scratches, but you can visually hide them. Use 1-2 drops of refined sunflower oil, rubbing it thoroughly with a soft flannel. The surface after treatment will become more shiny, so the oil can also be used on the body of a mobile phone.
Car polish
There are polishes to remove scratches from various surfaces. You can use car or furniture polish. There are both ready-made formulations and powdered ones, which must first be diluted with water according to the instructions. Mode of application:
- Protect openings and crevices on your mobile phone to prevent product from getting inside. To do this, use stationery or masking tape.
- Apply the product to the cloth and begin rubbing into the scratches. Please note that a long treatment period (10 to 40 minutes) may be required for the scuff marks to disappear. Everything will depend on the initial state of the material being processed.
- Get rid of polish residue on your phone using a dry, clean cloth.
Attention! Glass polish is also suitable for treating a smartphone camera.
Car polish
You can also use car polish. It is advisable to use this product only for polishing touch screens and metal cases. If you don’t have your own car, this method is not practical.
Procedure:
- Apply a small amount of gel to a cotton swab or piece of soft cloth.
- Rub the damaged surface of the touch screen with light movements.
- The rubbing procedure should be performed for 20 to 30 minutes until shine appears.
You can also use furniture polish, such as Pronto. After purchase, such a product is successfully used in everyday life. The process of rubbing the touch screen or case takes a little longer.
Important! The most effective option is to use a special polishing agent to remove minor scratches from the screens of mobile phones, TVs and computers.
Special means
You can also get rid of scratches using professional products created specifically for polishing displays of mobile devices or laptop monitors. One such popular product is Displex display paste. It does not contain abrasive particles, which means that it will deal with abrasions and microcracks carefully, without creating new ones. Typically, such pastes are sold in small tubes, which are enough for 8-10 uses. To save your phone's camera from scratches, simply apply a pea-sized amount of paste to a cloth and rub it onto the glass.
You can also purchase a polishing kit, such as Hama displex, which includes a tube of paste and 2 polishing cloths. The advantage of this set is that you don’t have to look for special cleaning devices or buy them separately. How to use:
- Apply a little paste to one of the wipes and rub it into the glass surface or display.
- Use a second cloth to polish the camera.
Fourth way. Soda
Soda is very versatile and is used not only to advertise weight loss from Malysheva, but also helps you learn how to remove scratches from your phone camera and screen.
You don’t need to do much here, you will need baking soda and water. The method of use is as follows:
- In a small container, mix baking soda and water in a two to one ratio.
- Stir until a thick, paste-like mixture forms.
- Apply a small layer of paste to a clean cloth.
- And rub the soda into the phone screen with a cloth, the main thing is not to overdo it.
- After everything, wash off the remaining soda.
As you know, soda neutralizes acids, and to prevent your phone from being “covered,” seal all openings hermetically.
How to prevent scratches?
In order not to encounter such a problem in the future, you need to take more care of your device. Here are some useful tips:
- Try not to carry your mobile phone in your pocket or bag with sharp things such as keys, hairpins, scissors or other sharp objects.
- Protect the device screen with protective glass, and the body with a case.
- Wipe surfaces frequently with a soft cloth to avoid aggravating scratches. You can also use special products for this, for example, wipes for cleaning LCD monitors.
- Take steps to reduce the risk of accidentally dropping your device. For example, do not give it as a toy to small children.
By adopting the above tips for eliminating scuffs and scratches, as well as applying preventative measures, you will know how to eliminate cosmetic defects in the form of microcracks on the device and prevent their reappearance.
Share on social media networks:
Who would have known 15 - 20 years ago that the world would become so dependent on mobile gadgets. Previously, we could only dream of them, but now everyone has them, even a child who goes to kindergarten. During the operation of a cell phone, or as it is now fashionable to say, a smartphone, small and sometimes clearly visible damage occurs on its screen. How to get rid of scratches on your phone’s display and give it a beautiful look. You don’t need to go to service centers, just read this article to the end and you will learn how to do it yourself using improvised means. Now we will offer you several methods to eliminate this problem, but choose which one you think is better and more effective for you.
- Oleophobic coating of a smartphone screen - what is it for, how to check, care for and restore
Before you start manipulating your phone, you need to:
- turn it off;
- Seal all connectors with masking tape or simple electrical tape. This procedure will protect the gadget from liquids and any foreign substances getting into it.
- be very patient, because there are some very stubborn scratches, and to remove them you will need several hours of work.
- If you have done everything described above, then you can begin removing the defect from the screen of your mobile device.
Absolutely every family has toothpaste. Yes, yes, exactly toothpaste! It copes well with damage to the glass of the gadget display. But it is necessary to make a small reservation, the paste only copes with small or minor scratches. In order to make the screen clean, you need to drop a little product onto the surface, and then rub it well in a circular motion until visible abrasions and defects disappear or are no longer very noticeable.
Baking soda, just like toothpaste, is available in everyone's home. But if you compare this method with the one described above, then using soda you can remove small and even large scratches.
To remove eye-catching defects from your phone with soda you need:
- Make a mixture of baking soda and water. Take 1 liter of soda per 2 liters of water.
- We take a piece of cloth (it’s better to use cotton cloth) and apply this abrasive mixture to it, after which we begin to polish (rub) the screen.
- At the end, remove everything that remains on the display from the manipulations.
This method is suitable for those who have small children. Baby powder can also help you remove scratches from your cell phone. It is very beneficial to use it, since it is not expensive, and the talc that is included in its composition acts as a gentle substance and reduces the risk of damaging the gadget’s display.
The mixture is prepared in exactly the same way and in the same proportion of powder + water as in the soda method. Once you have obtained a homogeneous mass, you need to apply it to the screen and rub in, after completing the process, remove all excess mixture.
You may ask, how to get rid of scratches on your phone this way? This is a very effective and simple method.
- First you need to drop sunflower oil on the gadget display;
- Then take a cotton cloth and rub in the oil until the screen shines and all damage disappears, or is not visible to the eye.
Everything that was described above can be done without leaving home, since all the necessary ingredients are available in any apartment or house. Not everyone can use the following methods, but they are much more effective. Car polish is another substance that can help you get rid of visible defects on your phone display.
- The procedure is similar to polishing a car. Apply 1 drop of polish to the display;
- After which it is rubbed with a cloth until all the scratches disappear.
This substance was developed during Soviet times to polish various surfaces (stainless steel, glass, ceramics, etc.). In our time of high technology, they began to polish smartphone screens with GOI paste. But how to get rid of scratches on your phone?
- Apply a little paste to the display;
- Then we rub it with a cotton cloth into the smartphone monitor;
- At the end of the process, we remove all residues from the screen.
As a result, the surface of the gadget is made absolutely smooth, as if it had just left the manufacturer’s factory.
The effect of this substance is very similar to GOI paste. But there is a difference: the Soviet invention is universal and can be polished on different surfaces, but Displex paste was made only to return mobile gadgets to a marketable state.
The process of removing scratches is exactly the same as described above using GOI paste.
- Take 1 egg white and 1 tsp. potassium sulfate (it is sold in pharmacies without a prescription);
- Heat to 60°C in a metal container;
- Take microfiber and soak it in this solution;
- Place it on plain foil and place it in an oven preheated to 150°C until the cloth dries;
- Then immerse the microfiber in cool water for 30 seconds.
All this must be repeated 3 times. Then leave the microfiber alone for 3 days and only then start polishing the display of your cellular device with it.
- So that you don’t worry about the question of how to get rid of scratches on your phone, after purchasing the gadget, immediately put it on and stick a protective film or, best of all, tempered glass on the display, this will protect the screen.
- After polishing the display, it also needs to be protected with something so that you don’t have to polish it again later.
From this article, you learned that there are a large number of methods that allow you to remove scratches from the screen of a mobile device. Some techniques are accessible to anyone, while some require an additional trip to the store. Take care of your device, and it will serve you faithfully for many years. Well, if you do scratch your screen, we think our article will help you get rid of this trouble. Thank you for your attention!
Did you like the article and find it useful? Share it with your friends on social networks. If you know any other methods on how to get rid of scratches on your phone, share them with us in the comments to this article.
Spread the love July 31st, 2022 Ekaterina Vasilyeva
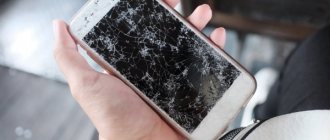
The phone screen is his face. I want it to be perfect - without scuffs, cracks or scratches. But what if scratches still appear? Is it possible to get rid of them at home or will only changing the screen help?
Is it safe to try to remove scratches yourself?
All the methods we describe are suitable for small scratches on the display. If the scratch is deep and looks more like a crack, you will not be able to remove it - you will have to replace the display itself. And for this you need to contact the service center. You will need to order a new display on the Internet - the service center workers will install it and you will have a new perfect screen.
Deep scratches cannot be removed - the display needs to be replaced
If you have a protective glass or film, you only need to change it - it will be cheaper than completely replacing the screen.
If the scratches are still shallow, before using the methods below you will definitely need to:
- completely turn off the device;
- remove the battery from the phone if it is removable;
- cover all sockets (for charging, headphones, etc.) with adhesive tape - this will protect the phone from moisture from the solution getting inside.
Service center
If your mobile phone is still under warranty, then if you have a similar problem, you can visit a service center. They can replace the screen and return you an updated device. If the warranty has expired, the screen replacement procedure will be very expensive.
Important! But the service center does not always meet you halfway, and may find you to blame for the damage that occurs. In this case, repairs become a paid service. Therefore, this method is not effective. But it's always worth a try.
If you were unable to resolve this problem when visiting a service center, then it is advisable to read all the information about the structure of your phone screen. This recommendation allows you to use the safest polishing option. Without preliminary theoretical preparation, you may not be able to save the gadget, but will only aggravate the situation.
Or maybe this is a reason to update your smartphone, change it to a newer and more reliable model? A rating of smartphones from different manufacturers with practical tips on choosing the best one based on its characteristics will help you get real pleasure from your purchase!
How to remove scratches yourself
Which methods will be effective only for very minor scratches and for more serious defects?
Quick ways using special polishes
If possible, purchase a special scratch remover. Suitable polishes for masking scratches on cars, for example, brands Turtle Wax, Swirl Remover and 3M Scratch. Before use, be sure to read the instructions on the package. Let's briefly mention what you need to do: apply a small amount of polish (usually in the form of a cream) to a soft cloth and wipe the area with the defect in a circular motion without applying strong pressure.
Swirl Remover is originally designed to remove scratches from the surface of the car.
If the polish is a liquid, pour a small amount into a bowl, dampen a soft cloth, and wipe the scratch with it. After this, use another soft cloth without polish to remove excess product.
Another option is GOI or Displex paste. They are used for various surfaces, including glass and plastic. It is produced in the form of a paste. It contains aluminum oxide. The use is similar to polishes: rub in small quantities in a circular, soft motion with a soft cloth. Before use, you can apply a drop of oil to the screen to prevent new scratches.
Apply a small amount of GOI paste to the screen and wipe it with a soft cloth
What other options could there be: professional wipes LUOEM, E-Cloth, Knightx for screens. They are made of microfiber. When wet they clean the surface, and when dry they polish the surface of the phone to a small extent. The effect is weaker than that of polishes in liquid and paste form.
Sandpaper
The most unsafe, but effective method is to use sandpaper, but only fine-grained one. First try running this paper across the screen of some old, unwanted phone - see if there are any traces left of it.
Use only fine-grit sandpaper
You need to carefully grind down the edges of the scratches. To do this, do not press hard on the screen. Movements should be light. If you miscalculate the force, even more scratches will appear on the screen, but this time from sandpaper. The method is suitable for glass and plastic screens.
Traditional methods
If you don’t have the opportunity to buy some professional product right now, use what you have at home. All of them are suitable for both plastic and glass.
Toothpaste
If the defect is barely noticeable, but you still want to get rid of it, toothpaste is suitable for you. But it is unlikely to cope with deeper damage, which is already very noticeable. Use a paste with abrasive particles, not a gel one - it won't work at all.
What to do:
- Take a clean, soft microfiber-type cloth. Apply a small amount of toothpaste to it.
- Begin to gently rub the paste on the cloth into the scratch on the display. Do this until you notice an improvement and until you are satisfied with the result of the work.
- Remove any remaining toothpaste with another slightly damp cloth.
Remove any remaining toothpaste with a clean cloth.
Baking soda
If toothpaste turns out to be powerless in your case, use a more effective method - baking soda. Here you need to be careful with water so that it does not get inside the phone through the cracks. You can also use baby powder instead of soda - this powder has similar abrasive properties.
Baking soda must be mixed with water before application.
What steps to follow:
- Combine soda and water in a ratio of 2 to 1. Mix thoroughly until smooth. You should get a thick paste. Under no circumstances start wiping the phone screen with just baking soda without water - this will cause even more scratches.
- Apply the mixture again to a clean, soft cloth (can be replaced with a cotton pad or foam sponge). Use a circular motion to wipe the area of the screen with defects.
- When the scratch disappears, wipe the sensor with a clean, damp cloth.
Vegetable oil
This method is only temporary and only applies to very minor scratches. You need to drop one drop of any vegetable oil (sunflower, olive, etc.) onto the phone screen and rub it well over the damaged area. If there are any remaining oils, remove them with a dry soft cloth.
Vegetable oil can only temporarily mask the defect
Video: how to properly polish your phone screen
Polishing with toothpaste
This is the simplest and most affordable method of removing scratches. There is only one condition - the paste must be traditional, and not in the form of a gel.
The polishing process is as follows:
- Take a cotton swab or piece of cotton wool and apply a small amount of toothpaste. You can also use a soft cotton cloth.
- Then gently rub the composition onto the area of the screen where there are scratches.
- Carry out the movements for 3-5 minutes.
- Then wipe the screen of your mobile gadget with dry cloth to remove excess paste.
- Ready.
How to protect your phone screen from scratches
What can reduce the number of scratches and the frequency of their appearance on the screen of a phone or tablet:
- Protective film or glass, which we already talked about at the beginning of the article. The film is cheaper than glass, but it must be glued very carefully to prevent bubbles from appearing. Glass can withstand greater loads than film, even a blow to a hard object. The disadvantage of glass is glare.
- Case book. The screen will almost always be covered with a cover when you are not using the phone.
- Microfiber cloth or special wipes, for example, for glasses. Wipe your phone's display as often as possible to remove dust and dirt that accumulates on it. After all, dirt usually serves as an abrasive that leaves scratches on the surface.
- Special pockets for phones in bags. Put your gadgets there instead of just throwing them in your bag, especially if there are a lot of small items that can cause scratches.
If you have small, barely noticeable scratches on the sensor, you can wipe them with a drop of vegetable oil. This will give a temporary effect. If you want to try to get rid of them forever, wipe them with toothpaste. A more effective option is to use a paste of baking soda/baby powder and water. But here you need to be more careful. You can take a special product - polish (in the form of GOI paste, Displex or liquid for removing scratches from the surface of the car).
Iron
Baby powder will help
Ordinary baby powder is also a good remedy for removing minor scratches on the surface of a gadget. The fact is that baby powder contains talc, and it is the basis for the polishing mixture.
How to remove scratches from a cell phone cover using baby powder?
You need to prepare a remedy. It consists of powder and water. Proportion 2:1. The resulting paste should have a uniform structure.
We apply the mixture obtained in this way onto a cotton swab or a piece of cotton cloth and then rub it on the damaged area of the gadget.
Please note that the polishing process can also be performed with a piece of felt or a special napkin, which is designed to wipe glasses.
When polishing, the talc gets into the uneven areas. This creates the impression that the surface structure is integral.
Once the process is complete, remove any remaining paste with a damp cloth.
Directions
IngredientsDirections[adace-ad id="5714"]
Today we are dissecting a smartphone to replace the camera glass. Worn glass is a common condition for phones that have been used without a case for a long time. If the camera is not recessed inside the body, over time the photos will turn out as if “in a haze” and no amount of megapixels will save you. Below are instructions for those who have their first try
Let's be clear - this operation is not exactly a job for jewelers, but it is better to have a certain skill and straight hands in stock, and not to order. Therefore, if the phone is expensive, and you live in Odessa and there is a tent with kebab nearby, throw this idea out of your head. Bring your Xiaomi, Huawei and Samsung phones to the ITSA service center - they do any kind of phone repair, even non-standard ones. Specialists also take on the top models, like the Samsung Galaxy Note 20. Prices can be found here - https://itprofi.in.ua/remont-telefonov-samsung-odessa.html, where you can also consult via online chat for diagnostics
How can you tell if there is a problem with the camera glass?
- Cloudy photos on the main camera (with a veil)
- Artifacts, garbage, hair in the frame
- Photos are bad even in natural light
- Inability to catch a zoom normally
- Photos are ok on the front camera
- Visually the glass looks worn out
Treatment room
We will show the process using the Microsoft Lumia 640 as an example, but in general all the steps are identical for any similar smartphone. Remove the cover and remove the battery. Unscrew the star bolts along the edge of the body
We separate the two parts of the body. When you open the phone, do not forget about the other cables on the board so as not to tear them out by the roots
Disconnect the camera cable and carefully remove it from the recess
You get the camera without glass - it will remain on the body. The glass itself is held on an adhesive base, which will remain sticky even after dismantling the old glass (but if not, then there will be problems - there is no additional glue included with the glass). Just apply a little pressure (you can do it from the inside) so that the glass peels off from the case
There is a blue protective film on the glass so that you do not smudge or stain the glass before gluing it (you can wipe the outside, but it will be problematic to do this inside
All you need to do is insert the new glass inside the camera body and pull out the protective film using the tab
