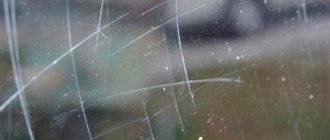
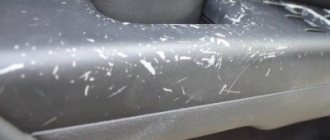
A mirror is a fragile object, but it is present in every home. If handled carelessly and improperly cared for, they break, crack, become covered with plaque, stains and stains. Scratches and abrasions often appear on the surface. It is not possible to restore a scratched mirror and completely get rid of chips or scratches at home.
But you can disguise defects. The work must be carried out very carefully so that the mirror does not accidentally crack, split or break. Let's take a closer look at how to remove scratches from a mirror at home.
Is it possible to remove the damage?
At its core, a mirror is a smooth surface whose main purpose is to reflect light . Despite the strength and thickness of the material, the mirror is fragile. If handled carelessly, scratches can easily remain on the surface.
To carry out restoration work, it is better to remove the mirror and place it on a horizontal surface. For convenience, it is better to remove the frame.
You can eliminate minor damage and add shine at home using folk or special means. But you won’t be able to deal with serious damage on your own.
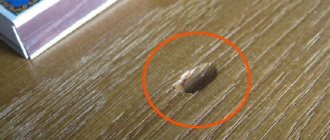
Walnut kernel
To remove a scratch or make it invisible, break the nut and remove the kernel. It's good if it's fresh fruit. It is still soft and hides chips well.
Peel off the outer film. This is easy to do by soaking it in hot water for a minute or pouring boiling water over it. Break it in half and process the glass.
Grind the dried nuts into flour and add a drop of olive oil.
Where do scratches come from?
How do scratches appear on mirrors? It’s very easy to damage a mirror surface: just accidentally run a sharp, hard object like manicure scissors or a nail file with a sharp end across the mirror – and a noticeable scratch will already appear on the mirror!
Restoring a mirror at home is not a labor-intensive task and does not require much expense or time.
Then people immediately go to the Internet in search of an answer to the question: how to remove scratches from a mirror at home? - this is the very first reaction. Then, if nothing from the proposed list is suitable for some reason, the second question comes up - how to do the same thing, but with the help of professional means? Here there may be more choice - from special materials to advice to call a mirror master (yes, there are such things not only in DC comics and the Witcher universe, but also in real life).
Before restoration, the mirror must be prepared.
Only for the latter’s services you will have to pay a considerable amount - on sites where you can call such a craftsman, the price tag reaches 8 thousand rubles for one visit, and, as is usually the case, nothing is limited to one time.
The process of mirror restoration is very painstaking.
Therefore, not all mirror lovers decide to turn to a specialist with their problems and try to fix everything themselves - using tools that can be found at home, or trying to work with professional materials that a mirror master would use.
Is it possible to learn polishing yourself?
People learn this too! True, you will have to invest a lot of time. What is the cost of choosing a quality machine and suitable paste? To learn all the details and technology, you need to be really interested and love cars! If garage talk has never inspired you, the knowledge gained will not be worth the time and pain.
If you have already decided to take on the task of putting the glass in order, approach this task responsibly and do not entertain yourself with illusions. The only more or less working “folk” remedy may save money, but it will take a lot of time and will not bring the desired result. The remaining methods are either frankly useless or unsafe! It turns out that all that remains is to master the science of polishing by purchasing a machine, discs and paste, or give the car into the hands of professionals and sleep peacefully!
What is a mirror?
A mirror is a durable cast material with a reflective surface. Externally, they can be light, colorful, classic or decorated. Also, mirrors can be decorated with frames, various decorations, and special finishes. The appearance and design of the item is determined only by the imagination of the homeowner and in which room the mirror will be located.
At the same time, you need to understand that although the strength of the mirror is not bad, it still remains extremely fragile. During use, scratches and microcracks often appear on them, which can be removed at home by choosing any of the methods suggested below.
Helpful information
Tips for removing scratches from different surfaces:
You should not continue to use an item with a scratch. The defect will increase in size over time, spoiling the appearance of the product.- Most surfaces do not tolerate contact with abrasive substances and hard brushes, so they are polished only with a soft cloth.
- Before applying a new product to a scratch, it is recommended to test it on an inconspicuous area of the item being treated.
Pros and cons of homemade restoration
Having discovered minor defects on a bathroom mirror, many people prefer to carry out the restoration themselves. This procedure has a number of advantages and disadvantages. The advantages of self-restoration include:
- Minimum costs. For processing, you only need to buy cleaning products, without spending money on the services of professionals.
- Use of available materials. Most defects can be removed using household products.
The main disadvantage of doing the work yourself is that you can only remove minor scratches. To remove deep defects, you will need the help of specialists.
Step-by-step instruction
How to restore a mirror with large amalgam damage?
You need to carefully remove the mirror from the frame and place it on a table covered with a soft cloth. Thoroughly clean the damaged surface with a brush. Then wash with glass cleaner and dry. Now degrease the damaged area with gasoline or alcohol and dry again. Using scissors, cut a piece of foil slightly larger than the size of the damaged area. Apply glue to the treated area of the mirror, apply the foil with the shiny side down and press. Use a napkin to smooth the surface of the foil from the center to the edges. Carefully remove excess glue with a sponge and dry the mirror for several hours. Place the restored mirror back into the frame.
Repairing a mirror coating is labor-intensive and requires investment, so mirror restoration will probably not be cheap.
To restore the surface of a mirror that has minor damage, grinding and polishing are used.
Types of glass cutters
There are two types of glass cutters - diamond, which is made from a piece of industrial diamond, and roller, which has a wheel made of cobalt-tungsten alloy or steel. Glass cutters are also oil-based , and make working with the surface easier. Roller glass cutters come with one or several wheels - in order to change them when one of them becomes dull.
I didn’t find any particular differences when working with a roller glass cutter and a diamond glass cutter; for some it’s easier to cut with a roller cutter, while for others the diamond one slides to the side. Therefore, it is important to buy a quality tool and practice.
Home Recipes
You can smooth out microcracks and make them less noticeable using simple home recipes. To do this, you will need simple tools that you already have in your household.
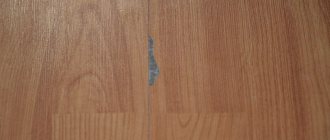
Silicone sealant
To carry out the work you will need:
- glass cleaner;
- silicone colorless sealant;
- toothpick;
- stationery knife;
- lint-free cloth or rag.
Procedure:
- Apply glass and mirror cleaner to the surface of the mirror.
- Rub the liquid in with a lint-free cloth until the surface is clean and dry.
- Using a toothpick, carefully apply the sealant precisely along the cracks.
- Let the product dry.
- Carefully remove any remaining sealant protruding onto the surface with a knife.
- Treat with glass cleaner.
Walnuts
Walnut kernels will help camouflage the defect. For treatment, you can use a piece of the nucleolus to rub the area with the crack.
But the best result is achieved when the kernels are ground into flour . Enough to work a small quantity. Just a little olive oil is added to the resulting powder so that the composition becomes paste-like. And the resulting paste is rubbed into the mirror.
Vegetable oil
To rub a mirror with cracks, any available vegetable oil can be used. Just a few drops are enough to treat a scratch.
The oil must be rubbed into the affected surface using a soft, lint-free cloth.
Vinegar and mustard
To work, you will need table vinegar and mustard powder. Both ingredients are taken in equal proportions and rubbed into the mirror surface. Polishing completes the treatment.
Toothpaste
To polish the mirror, white toothpaste without colored inclusions can be used. A small amount of paste is squeezed out of the tube onto a sponge and rubbed into the surface that requires restoration. The rubbing movements should be clockwise.
Nail polish
Use clear nail polish to disguise scratches. To hide the defect, varnish must be carefully applied to the damage and rubbed in.
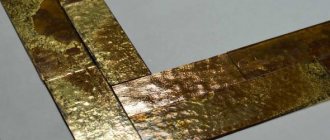
Foil
If the surface damage has affected the back of the glass, a different approach will be needed to repair the defect and restore the reflectivity of the mirror.
For restoration work, ordinary foil can be used . When preparing the surface for work, it must be cleaned, and the mirror itself must be removed from the frame and free access to the back side.
You will need a small piece of foil - a little larger than the scratch itself, which requires masking. The mirror is turned over with its back side up and wiped. Using tape, secure the foil to the area where there is a scratch on the front side. The piece of foil must be absolutely even.
Professional products
Different industries have their own professional secrets on how to remove scratches on a mirror or glass. Some of them require expensive instruments and reagents, while others are quite acceptable and affordable. In any case, they are worth adopting if you have mirrors in your home.
Paste GOI
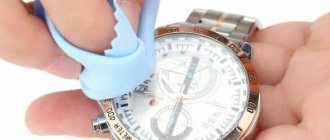
At home, it is best to use GOI paste to remove scratches. This is an abbreviation for the State Optical Institute. The paste is made on the basis of chromium oxide and has been used since the 30s of the last century. Today there are different types of polishing pastes on the market - coarse, medium and fine. Typically the color of the paste is green, and its intensity depends on the concentration of chromium oxide. The product is sold in hardware stores and auto parts departments.
At home, it is best to use GOI paste to remove scratches.
To remove a scratch on a mirror using GOI paste, first apply a transparent silicone sealant to the damaged area so that it fills the crack. Then crumble a small amount of the substance into dust, collect it in a thick layer with a cotton swab and polish the scratch for about 20 seconds. Then wipe off the excess with a clean cotton pad and do another buffing step, which should last 10 minutes. The pressure should be light so that the plastic base of the stick does not scratch the mirror. Such manipulations make it possible to disguise a scratch if it was visible to the naked eye. And final polishing will further hide the defect from view.
Cerium oxide
Another composition that can be used to treat a mirror at home is borrowed from jewelers - cerium oxide. Dilute this pinkish substance to a creamy state, then moisten the surface with water, apply the solution to it and polish. To prevent cerium oxide from hardening, the surface must be periodically moistened with water. Take a break from time to time and wipe the stripping area with a towel. If the scratch is still visible, apply paste and continue polishing.
Cleaning mirrors without streaks
How to remove remaining tape from glass?
Is it possible to wash a wedding dress at home?
Preparing for restoration at home
Before you begin restoring the mirror surface, you should perform preparatory steps. The preparation process depends on the type of mirror and the size of the existing defects.
For larger damage
If the mirror is inserted into the frame, in order to more conveniently restore the surface with large defects, you should remove it from the structure. To do this, use a small hammer and screwdrivers to unscrew the fixing screws and remove the hammered nails. In cases where it is impossible to remove the product from the frame, it is recommended to place the entire structure on a flat and hard surface to prevent movement from its original position.
Minor repairs
When planning to get rid of minor and unnoticeable scratches, it is enough to wipe the surface from dirt to better see the damaged areas. It is not necessary to remove the product from the wall, which greatly simplifies the task.
Felt polishing wheel
It is usually used to polish the body of a car. Place on a drill or grinder. The method is used for damage over a large area. This could be a mirrored wardrobe, a door or a panel.
To treat problem areas, turn on the tool at medium power. For large irregularities, do not expect results in 1-2 minutes. Polishing is a labor-intensive process.
The method is suitable for removing surface scratches. For more serious problems, grinding is combined with GOI paste.
Hide dark spots on a mirror with a frame
What you will need:
- Decorative glass beads or tiles (glass mosaic)
- Tube of contour paste (imitation lead)
- Set of paints for painting on glass
- Mirror strips (look at home improvement stores)
How to remove dark spots on a mirror:
- If stains are along the edge of the mirror, you can make a frame out of several different materials to hide the imperfections underneath. Use your creativity! Here are some ideas to get you started:
- Glue decorative glass beads or tiles (mosaics) around the perimeter of the mirror. If the dark spots are located at some distance from the edge, you can add a few accent beads in their place so that they fit seamlessly into the overall concept of the decorative frame.
- Mirror strips can be placed around the perimeter of the mirror in a frame-like manner to hide black marks and maintain the mirror function at the edges.
- If you have the opportunity to remove the mirror from the wall and place it in the apartment, you can apply the base of the future drawing (pattern) with contour paste and, after the lead has hardened, complete its creation with paints for painting on glass (stained glass paints). This will give your mirror an original look.
How to remove scratches from glass
Removing scratches from car glass, window glass, and aquarium glass is much more difficult. In this case, you cannot sand the surfaces, as you will not be able to remove an even layer. Even if the glass looks normal, grinding will distort and obstruct vision, resulting in poor vision. Polishing is used to remove scratches from glass.
Polishing removes the minimum thickness of the surface layer, while removing small scratches and making the glass more transparent. Choose the finest polishing pastes with grains up to 0.5 microns. For stains and even the smallest scratches, finishing or diamond paste is suitable. By the way, if necessary, it also removes stains.
For thick glass, large scratches and a lot of damage, you can use hand grinding with sandpaper. Choose medium to coarse grit sheets ranging from 200-800. After processing, the glass must be polished.
Recommendations
Leading furniture manufacturers claim that it is easier to protect their products from damage in a timely manner than to restore them, and recommend:
- Use protective accessories. This is especially true for wooden countertops. Tablecloths, cutting boards, and hot pads minimize the risk of mechanical damage.
- Remove excess moisture. Wood can become deformed when exposed to water.
- Use only soft sponges and rags without an abrasive layer for cleaning. They leave micro-scratches on furniture, which will become a big problem over time.
- Choose only care products intended for this material. Compositions with aggressive and abrasive components are strictly not recommended.
It is necessary to remove stains from wooden surfaces in a timely manner, otherwise damage will appear after attempting to remove old stains.
If you are interested in how to remove small and deep scratches from various surfaces and objects, take a look at this section.
How to care for a mirror
We looked at how to repair a scratch on a mirror or glass. After treatment, be sure to wipe the surface with a suitable detergent and wipe dry with a paper towel, napkin or dry cloth. And in order to avoid defects and extend the life of the product, it is important to ensure proper care.
Wipe your mirrors regularly with warm water and a cloth or microfiber cloth using circular motions. By the way, ordinary nylon effectively cleans the mirror surface. For contaminated products, use special cleaning products for mirrors and glass.
Heavily soiled products can be washed with hydrogen peroxide or ammonia, which is diluted in half with crushed soda or tooth powder. Vinegar effectively removes plaque. Mix the product with water and tooth powder or crushed chalk. The composition is left for several minutes and the paste is applied to the surface. Wait until it dries slightly and then remove the product with newspaper, crumpled paper or a napkin.
To keep your mirror from fogging and shiny, apply shaving foam evenly to the surface, then wipe off the composition and polish the product with a microfiber cloth. By the way, stains on mirrors appear mainly due to regular fogging and condensation, which is typical for the bathroom.
A solution of melted wax and turpentine or oil paint will also help prevent fogging. The back side of the products is treated with the selected product. Periodically treat the surface with glycerin, vinegar or gelatin. And how to wash and wipe mirrors without streaks, see the link https://vsepodomu.ru/uborka/kak-pochistit-zerkalo/.
Mechanical polishing methods
These polishing methods involve the use of tools and devices such as:
- polishing machine;
- Sander;
- electric sharpener;
- drill with lock.
The product for polishing metal to a mirror shine with your own hands depends on the brand of stainless steel:
- Diamond paste performed best, but it has one significant drawback - a rather high price.
- If you don’t have one, then you can use GOI paste. It comes in four types, depending on the grain size.
This is done as follows:
Apply a little product to the felt disc and add a few drops of machine oil to dilute the paste.
- Polish the surface in a circular motion, being careful not to rub too hard.
- Do this until you are satisfied with the result.
How to restore tarnished surfaces and amalgam
If the mirror has become tarnished (from time to time or for any other reason), it will be quite difficult to restore its original appearance and it will not be easy to achieve good results using home remedies.
If the reason for the loss of the previous appearance is time, then you can polish the mirror surface for a long time and persistently, then it can shine again and the mirror will look like new.
After treatment, be sure to wipe the surface with a suitable detergent.
However, this method does not always help. If the problem is a chemical reaction between the amalgam (silver layer) and the protective outer coating. Then only restoration of the mirror, carried out in a special workshop, can help. The instructions are as follows: you need to remove both layers and apply new ones.
To avoid defects and extend the life of the product, it is important to provide proper care.
IMPORTANT! You should not try to do this at home, as the mirror will be irrevocably damaged.
Rules of care
Proper care can help extend the life of your mirror. To prevent the product from deteriorating, it is recommended to adhere to the following rules:
- Products are negatively affected by excessively humid or dry air. The surface should be wiped frequently with a damp cloth, especially during the heating season in winter.
- Do not hang the mirror in direct ultraviolet rays. Due to their exposure, the coating will fade and become stained.
- When using mirrors in the bathroom, they often fog up, so they should be wiped with a soft cloth, applying a solution of 50 ml of water and one teaspoon of gelatin.
- If the mirror is located on the cabinet doors, it must be removed from the structure before processing. Otherwise, the work will be inconvenient and there will be a risk of new damage.
- When a piece is too old, the amalgam on the edges may begin to fray. You can stick a special plastic tape along the contour. You can also coat the back side with a mixture of melted wax and turpentine in a 1:2 ratio to protect the amalgam.
- It is better to mount the products not close to the wall, so that air can pass freely to the back side and the amalgam does not collapse.
- How to remove a shiny stain from an iron on a black synthetic dress asked by Dima
Reproduction of materials is permitted only with indication of the original source.
Prevention measures
Caring for a mirror surface should include the following points:
Carrying out regular cleaning using special products or homemade compounds;- exclude exposure to abrasive or other surfaces, including the hard sides of sponges;
- It is advisable to have complex damage and chips repaired by a specialist;
- mirrors do not tolerate constant moisture well, so mirror surfaces that fog up in the bathroom must be wiped dry regularly;
- Rubbing the mirror with shaving foam will help prevent the mirror from fogging.
Any dirt that gets on the mirror must be removed immediately.
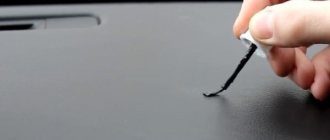
Repair kit for car glass
The top layer of the mirror is made of glass, so most glass care products are suitable for removing scratches. A deep scratch can be made invisible by filling it with transparent material.
A repair kit for auto glass is ideal for this purpose. The transparent composition will make any crack invisible. It works very effectively and easily corrects even significant damage.
Before starting manipulations, carefully read the manufacturer's instructions. Deviations from recommendations can ruin the item.
Requirements for adhesive for attaching rear view mirror
If you need to fix the interior rear view mirror, you should understand what influences are exerted on it while driving, and in what environment it has to be. Based on this, an adhesive is selected that can reliably fix the mirror on the windshield.
The first thing the rear view mirror, and at the same time the adhesive that holds it in place, has to deal with is vibrations. The car constantly “shocks” while driving on the road, no matter how well the suspension copes with road unevenness. Since the mirror is fixed to the windshield only with the help of an adhesive base, it fully feels all these vibrations, and the impact of them falls precisely on the adhesive used.
When choosing glue for a rear view mirror, you should immediately exclude their options “Glue Moment” and the like. Such adhesive bases are not designed to work in shaking conditions, as a result of which the mirror will not last long on them.
The second thing we pay attention to when choosing an adhesive base for a mirror is operating temperatures. On hot days, direct sunlight may fall on the adhesive base on the windshield, causing it to heat up. Accordingly, it is important that at high temperatures the “glue” used does not lose its properties. But at the same time, even in winter, when it is cold outside and there is snow on the windshield, the adhesive base must hold the mirror firmly.
Taking this requirement into account, there is no longer the option of attaching the rear view mirror to double-sided tape, the adhesive base of which loses its properties at high temperatures.
Another condition that you should pay attention to is the possibility of stripping the surface of the adhesive if necessary , for example, if the mirror comes off and has to be reattached. Double-sided tape, as well as “Glue Moment,” will be quite difficult to clean from glass.
Figured mirror - features and tips for cutting
Once, I had the opportunity to make an oval-shaped mirror. The task has become a little more complicated, but not much - the main thing is to make a pattern and attach it to the surface. In hardware stores you can find compasses-like glass cutters for shaped cutting with a suction cup and a scale for installation. They are undoubtedly more convenient to use, especially for cutting circular mirrors. But, for a shaped mirror, you can also use a diamond or roller glass cutter. Look for a glass cutter with a narrow head.
I recommend choosing a glass cutter with a wooden handle - it will not slip out of your hands.
So, we prepare the surface, make a pattern, and all the necessary markings on the mirror. The peculiarity of this process is that the glass must be broken off in small pieces, having previously cut them into even sections according to the degree of curvature.
In order to get wavy lines, it is best to turn the mirror over, placing it on a springy surface, and press to split.
After you cut out the shape you want, be sure to go over the edge with sandpaper.
A few more tips:
- If there are traces of oil paint on the reflective surface, soak a piece of cloth in turpentine and then clean off the stain. After this, rinse the mirror with warm water and leave it until completely dry.
Important! You can use a small spatula to remove paint. However, you need to be extremely careful not to damage the surface.
- In some cases, changing the color of the frame can completely change the appearance of the mirror. Based on what the frame is made of, choose a suitable paint and paint the frame with it.
Important! Sometimes it may be necessary to remove the old paint layer. To do this, you can use a grinding machine with an appropriate attachment or just sandpaper.
Procedure
When restoring a mirror, it is recommended to follow step-by-step instructions. Following the exact procedure will help you avoid mistakes and get the job done efficiently.
Scratches and chips
To eliminate detected cracks and chips, you can resort to different methods, using improvised and specialized tools. The most common options are the following:
- Toothpaste. A small amount of paste is applied to the product and lightly rubbed with a flannel cloth, making rotational movements. After the toothpaste has dried, the surface is thoroughly polished, as a result of which all minor defects become invisible.
- Mustard powder. Dry mustard powder and vinegar essence with a concentration of 9% are mixed in a container, maintaining equal proportions. The components are mixed and the resulting mass is applied to the damage. Excess mixture is carefully removed and the product is polished with a soft cloth until shiny.
- Cerium oxide. A specialized chemical allows you to visually hide chips and scratches. The product is often called jewelry blush due to its property of optically smoothing the mirror surface. In powder form, cerium oxide is dissolved in liquid and applied to the product. Then polishing with a damp cloth is required. If necessary, the procedure can be performed several times in a row.
- Nail polish. Deeper chips and scratches must first be filled with a substance and then polished. Due to its special consistency, transparent varnish is excellent for this purpose. First, a layer of varnish is applied to the damage, the excess is removed and wait until it dries. After this, wipe the surface until shiny with a soft cloth.
- Paste GOI. The substance is crushed to a powdery state, applied to a piece of cotton wool and spread in a thick layer over all defects. After waiting 1.5 minutes, rub the product into the surface and wipe with a clean, dry cloth. After completing the procedure a second time, the duration of polishing is increased to 15 minutes. To prevent the paste from becoming dull, you should not rub it intensively into the product to repair the surface.