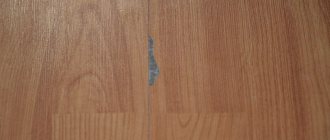
In the modern world, plastic surrounds us everywhere, be it car panels, window sills, sunglasses or a mobile phone. The distribution is due to the fact that it is light in weight and easy to handle. Nevertheless, it is susceptible to damage, so sooner or later the question arises of how to remove scratches from plastic on this or that thing.
Most often, damage can appear on car parts, for example, the dashboard or doors, this may be due to the careless placement of keys, phones and other objects on it. It's also quite easy to scratch glasses that have a plastic base when they are carelessly placed on a table or in a bag.
How and how to remove scratches from plastic: a selection of quick methods
Plastic objects surround us everywhere: car parts, household products and even sunglasses. Plastic is a popular, inexpensive, but rather fragile material, so due to frequent use it becomes subject to minor damage. There are several simple and inexpensive ways to remove scratches from plastic that will help restore the product to its original appearance.
Special means
To save yourself the hassle, use special products to restore plastic items:
- scratch removal pencils;
- abrasive gels;
- polishing pastes for filling;
- restorative towels and napkins.
Removing small cracks
The following tools allow you to quickly eliminate minor cracks and at the same time preserve the condition of your wallet. Their effectiveness is based on the principle of polishing and preparatory work should consist of thorough cleaning of the surface being treated and its further drying.
Wax
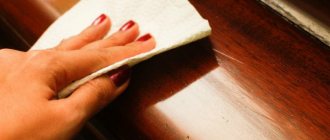
Wax is used to polish plastic surfaces. It must be used in combination with soft, dry cloth. Movements during rubbing should be circular. A cotton swab will help get rid of excess wax. A good alternative to wax is GOI paste or machine oil.
Glass cleaning products
Glass cleaning products must be used according to the same principle. In combination with a dry cloth, the action of such compositions is quite effective in relation to minor scratches.
Glass polishes
Products used for polishing glass surfaces with abrasive components are also suitable for plastic. In the case of small scratches, this method not only masks them, but removes them completely. Hydrofluoric acid can act as an abrasive component, so if there are elements on the surface that are not made of plastic or glass, refrain from using this option.
Polish for copper and silver
Copper and silver polishes can be used in tandem with microfiber or a dry cloth. Rubbing should be continued until the trace of cracks is visually invisible.
Household or construction hair dryer
A household or construction hair dryer will allow you to quickly deal with a minor defect. Be sure to clean the surface and dry it. Start heating the area with the scratch with a hairdryer, but do not hold it in one place. Wait until the plastic begins to melt slightly. Do not touch the restored surface with your hands until it has cooled down.
We recommend: Silent locks for VAZ 2107: how to install it yourself?
Computer products
Tools for computer equipment and disks also demonstrate effectiveness. They are also convenient to use in combination with microfiber.
Polish for wood and plastic surfaces
Wood polish will also work on plastic, but it should be combined with Vaseline. The damaged area will be filled with this composition and the crack will not be so visible. Continue rubbing the surface until the Vaseline is completely absorbed.
Additionally, we recommend reading our specialist’s article on how to polish a car with your own hands.
Using Dye
Minor scratches can be dealt with with a dye designed specifically for masking this type of damage. It should be applied with a toothpick or thin brush. Polishing is carried out with machine oil.
You can find more detailed information on how to choose the right paint for plastic in the article by our specialist.
Fabric paint or masking markers
Fabric paint or masking markers are also effective, but require additional finishing polishing. Felt pens, if their quality is beyond doubt, can be quite expensive, but this method is very economical.
How to remove scratches from plastic and make the surface perfectly smooth
Scratches
15.12.2017
12.4 thousand
8.3 thousand
5 minutes.
To easily remove scratches and abrasions on any plastic surface, you need to act as carefully as possible and follow the instructions for the finished compositions, since not all polishes are suitable for plastic. There are many ways to restore a damaged surface to its original ideal form. Some of them will only help disguise scratches, while others will help get rid of them completely.
There are a lot of different products on sale designed to repair damage to plastic surfaces. They can be found both in auto stores and in cellular phone stores. The choice of remedy should take into account the nature of the damage:
- Minor scratches and abrasions can be easily removed using polishing compounds.
- Deep damage requires applying a primer and then filling the scratch with a special paste.
It should be noted that for large scratches, colored pastes that match the surface tone are suitable, allowing you to mask the damage without leaving a trace. Minor scratches can be removed using colorless compounds.
To polish out minor scratches, the following products are suitable:
- CD polish “Disc Repair”.
- “Displex” mobile phone display polishing product. Also suitable for watch displays, PDAs, etc.
- Paste for polishing plastic car parts (with the smallest grit).
Before you start polishing, the surface should be degreased with alcohol. Polish with a cotton cloth until the scratches disappear.
There are several methods for removing scratches from surfaces in the car interior:
- use of a construction hair dryer;
- use of polishing compounds;
- treating scratches with a special pencil;
- major repair of a plastic part.
The choice of a specific method depends on the severity of the damage and the characteristics of the affected surface.
First, you need to thoroughly wash the surface with detergent. After the plastic has dried, you need to turn on the hair dryer, setting it to minimum power, and point it at the problem area. If nothing happens to the surface, then the power of the device must be increased so that the plastic begins to melt slightly.
As a result, the damage will either disappear completely or be significantly reduced and can be eliminated by polishing.
This method is suitable not only for car interior parts, but also for plastic parts of mopeds and other products.
For polishing you will need an abrasive paste designed for plastic.
Compositions developed for paint and varnish coatings are not suitable for this purpose.
To remove scratches from plastic, you should:
- 1. Wash the surface thoroughly and dry completely.
- 2. Apply abrasive paste to problem areas and wait a certain time specified in the instructions; the paste should turn into a hard coating.
- 3. Polish the surface in a circular motion using a special rag until the paste completely disappears.
At the end, the plastic should be carefully washed with a soft cloth.
This is the easiest and fastest way to remove scratches from plastic in the interior and on the bumper of a car or plastic parts of a scooter. If a pencil is purchased for the restoration of colored plastic, you need to choose the right tone.
Scratch removal algorithm:
- 1. Problem areas must be thoroughly cleaned and dried.
- 2. Fill in all the scratches with a pencil and wait a certain time (according to the instructions).
- 3. Remove excess and polish the surface.
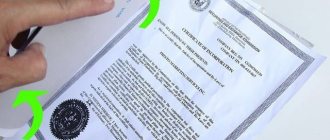
If the plastic part is severely scratched and worn, you can resort to major repairs. To do this, the damaged panel must be removed from the car, washed and sanded using sandpaper (if the surface of the part is embossed, then it does not need sanding). Further:
- 1. The part should be coated with a special primer, which comes in the form of a spray. It is applied in 2-3 layers with breaks for drying.
- 2. Next, level the primed surface with fine sandpaper.
- 3. If the scratches are very deep, they must be filled with putty.
- 4. After this, the part should be coated with paint of a suitable shade.
When is a major overhaul necessary?
It is difficult for an inexperienced driver to determine what type of damage in the interior cannot be repaired on their own; some car owners immediately buy new trim elements, which is not financially profitable. It is necessary to distinguish when plastic is truly unsuitable for surface restoration.
The main reasons why a major repair or replacement of a part will be needed are as follows:
- the presence of several deep scratches located close to each other;
- damage to a large area of a plastic part;
- deformation inside the cabin under the influence of sunlight;
- burnout of the plastic combined with the presence of scratches on it;
- rough or convex surface of a damaged part.
If the situations described above occur, it is impossible to correct the defects using simple methods, since the likelihood of worsening their appearance is higher than the ability to “repair” the surface.
If the need for major repairs arises, there are still two options for working with plastic: purchasing and replacing the old part with a new one, or its complete restoration.
By overhaul we mean the processing of plastic by deep grinding, priming and painting. The method is quite labor-intensive and requires patience and time, but it allows you to refresh the interior and significantly improve its appearance.
Progressive
You can also tidy up the interior of your car using specialized products, such as polishes. To remove unevenness, you will have to use it several times. Don't forget to buy a soft cloth so you don't have to smooth the surface with your hands. Removing scratches begins with spraying the contents of the can onto the desired surface. Afterwards you need to wait a little and rub the scratch area with a cloth. Scratches should become less noticeable. Still not satisfied with the appearance of the torpedo or other area? Then let's use the can again. You need to spray the product on the plastic until a certain result is obtained, not forgetting to polish each time. If the repair is carried out by the car owner, you will have to work a lot with your hands. Has the effect been achieved? Such cosmetic repairs can be repeated later.
Means for removing minor scratches
Small scratches can also be treated with a colorless product. A striking example of this is “Disc Repair”, or “Displex”. However, you can also take car body polish. These polishes can be both coarse, that is, abrasive, and finishing, that is, soft silicone. But for plastic, only soft polish will be used.
How to remove scratches
How to apply products to a damaged surface?
All products should be applied to the surface of plastic parts only with a soft, preferably flannel, cloth or napkin. It is optimal for these purposes to take a regular baby diaper.
Professional approach
To eliminate really serious damage to plastic in the interior or outside of the car, sometimes it is worth seeking help from specialized specialists.
But there are situations that are easy to fix yourself. At the same time, you won’t have to use any special tools or devices that you couldn’t find at home or in your garage.
As practice shows, specialists in eliminating defects on plastic automobile surfaces mainly work with the help of a hair dryer, lighters and pencils. It’s already interesting to find out what kind of hair dryer this is or what kind of lighter you’ll have to get in order to magically make scratches disappear on your dashboard or dashboard. In fact, these are conditionally professional methods, since they can be used independently, in ordinary garage conditions.
The practice of car owners who share their experience on resources such as Drive2 clearly confirms this.
If you are interested, I suggest you learn how to use professional products and what you need to remove scratches.
Use of lighters
Here you will need a very ordinary gas lighter, purchased at the nearest store. Moreover, lighters with both a regular flame and something like a turbine are suitable.
If your dashboard has chips or scratches, a lighter can help fix the situation. Open fire is used using the following technology:
- turn on the lighter on medium mode;
- move fire along the damage 2-3 times;
- do not stay at one point for a long time;
- arm yourself with a toothpick or needle;
- wait until the plastic melts a little;
- move the plastic in the desired direction;
- remove the lighter;
- let the material harden naturally;
- wipe the surface.
If traces of soot appear on the panels after using a lighter, simply go over them with soapy water.
Only wash the elements only after the surface has completely cooled. To restore the glossy shine, polish.
By the way, there are excellent anti-scratch polishes that are used when treating car bodies. I have already told you about them. Just don’t confuse it with headlight polishing paste. The composition and purpose of these products are different, and using them to work with various surfaces is not always a sound idea.
Methods with a household hair dryer
It is not at all necessary to use an industrial hair dryer. Moreover, for interior plastic, the latter can even be dangerous. Therefore, arm yourself with an ordinary household appliance, borrowing it for a while from your women.
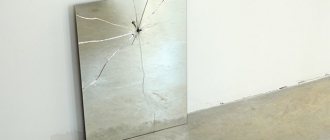
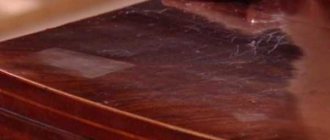
This method is relevant for situations where the damage is small and looks like a spider web.
It is important to follow this procedure:
- clean the surface to be treated;
- wipe dry;
- remove all flammable objects in the vicinity;
- plug the hair dryer into the outlet;
- select medium airflow and temperature mode;
- point the device at the plastic;
- swipe in different directions several times;
- wait until the plastic warms up and begins to melt.
In theory, small scratches will gradually heal. If they are small, the method should work.
As in the previous version, upon completion of work, wait until it cools completely and apply polishing agent.
Magic pencils
There is another special method that allows you to remove scratches on panels. Pencils are used for this.
But not the usual ones for drawing, but special ones for cars.
The use of such devices is extremely simple:
Types of Damage
We remove chips and scratches on paintwork.
Small scratches are often found inside the car, intertwining into a web of damage. As a result, the appearance of the interior is spoiled, which requires the search for camouflage techniques. Knowing your options, you can remove defects in a short time with minimal financial costs.
More serious costs will be incurred if you have to repair deep damage, since many defects cannot be hidden using simple techniques. The following are the most common methods that will help remove unwanted scratches, thereby improving the appearance of your car's interior.
Using polishes and gels
If microfiber does not give results, gels and polishes are used. The composition is applied to cotton wool; when rubbed, fragments of the gel fall into the recesses and cover them. After 30-50 minutes the polish will harden. Use abrasive pastes, a grinding machine or a rag.
Instructions:
- Apply a thin layer of polish to a clean area and rub it with felt.
- After the appearance of a light gray layer, polishing is performed until the abrasions disappear.
- You can’t wait too long; the dry mixture doesn’t grind well.
- The panels are sanded to a shine.
- The remaining polish is removed and the plastic is washed.
The glossy and transparent coating quickly becomes scuffed.
Removing scratches with wiping towels
Ways to eliminate flaws:
- Lighter.
- Construction hairdryer.
- Wax pencils.
- Polishing.
- The overhaul is carried out in a professional workshop, the plastic is cleaned, primed, painted, and varnished.
External defects can be removed using a lighter; turbocharged products with high temperatures and stable combustion are best suited. The problem area is heating up, you can’t keep the fire in one area, the hand with the lighter is constantly moving.
The flame is not brought too close; a suitable distance is selected so that the part does not melt. The abrasions will heal slowly; in a heated area, the soft plastic should not be touched with your hands. This method is suitable for smooth plastic; the structure of the corrugated surface changes after heating. Instead of a lighter, you can use a hair dryer that generates high heat. Sometimes the power of the device is enough to dry your hair. Before use, remove dirt, dust, and allow automotive cleaning chemicals or dishwashing detergent.
The hair dryer is turned on at a low temperature; if deformation does not occur, the power increases. Small damages are reduced immediately and polished for a better appearance. Microfiber cleaning towels are sometimes used. This is an effective method, the problem area is actively rubbed, all minor defects are eliminated. Dirty rags are washed and reused many times.
Minor defects appear on the panels inside the machine. If they are not restored in time, abrasions will appear everywhere, creating a cobweb that will be more difficult to deal with. You have to go to a workshop; it’s difficult to get rid of the problem on your own.
Technological process
Polishing headlights with your own hands at home is most effectively done using special kits. Compared to other methods, this gives the best possible result, which lasts for a long time.
So, what is needed for polishing:
Kits for mechanical and manual polishing of headlights differ in their contents. Mechanical include:
- A special paste is a product for polishing car headlights.
- Activator.
- Headlight varnish after polishing.
- Set of polishing wheels of various grain sizes.
- Adapters for installing wheels on power tools.
- Protective tape for headlights.
Hand polishing kits consist of:
- Activator.
- Polish for headlights and clear plastics.
- Finishing agent for headlights - varnish.
- Sandpaper – 400, 1000, 2000 (approximate grit values, there may be others).
- Napkins.
- Vinyl glove.
The main process is preceded by a preparatory stage. The headlight must be thoroughly washed with water and wiped dry.
The use of other means may damage the structure of the seals and lead to their delamination.
After this, the headlight is covered with masking tape or electrical tape, preferably in 2-3 layers. This is necessary to prevent damage to the body paint during mechanical processing of the surface of the optical device.
Now you can begin the main work. First, an activator is sprayed onto the surface of the headlight (as a rule, the labels on the packaging are in English, but for greater convenience, they are marked with numbers indicating the sequence of application of the substances). After this you need to wait 20–30 minutes.
After time has passed, you can begin machining the surface of the headlight. This is done with sandpaper or a grinding wheel with the largest grit, in this case 400.
Treatment is carried out in a circular motion for 5–10 minutes. The edges of the headlights must be thoroughly cleaned using longitudinal movements.
After completing the first stage of polishing, the headlights are thoroughly washed with water and dried. 2 more operations are also carried out using the remaining sandpaper and circles. In this case, these are first 1000 and 2000. As a result, after 3 stages of mechanical processing, you should get a smooth, cloudy surface.
Now you can start polishing the headlights. To do this, polishing paste is applied to the grinding wheel, or in the case of a manual process, to the napkin from the kit. After which it is rubbed into the surface of the headlight, which takes an average of 5 minutes. When this process is completed, the remaining paste is washed off with water and the surface of the optical device is carefully wiped dry.
The next step is to re-treat the headlights with the activator. You need to wait 2-3 minutes and repeat the operation with rinsing and wiping. The final polishing operation is to coat the headlights with a protective agent - varnish.
That's it, the optical instruments shine like new again.
It is advisable to use the materials from the kit sparingly so that they are enough for several polishings. This applies mainly to special products: activator, polish, varnish. All other consumables: sandpaper, paper, protective tape, gloves can be purchased additionally, their cost is low. On average, one set is enough for 3 polishes.
Options
Based on the type of plastic that covers the panel, as well as the type of damage present on the surface, you can choose a specific method by which the repair will be carried out. For this, improvised devices such as a hair dryer, open fire, polishing, pencils, and stripping are used. Let's look at each of the options in more detail.
Using a hair dryer
A hair dryer is a proven tool for cars aimed at removing damage. You can use not only a special tool, but also an ordinary household hair dryer. Restoration is quite simple: in the car, prolonged damage becomes invisible.
To repair a torpedo using this method, it is necessary to prepare the surface by washing it, which will allow the scratches to be freed from ingrained dirt. After going through the drying stage, you need to polish the damaged area with an air flow.
Using a lighter
Open fire is the best plastic reducer in a car. Operations using a lighter are a proven process that does not require a lot of time and money. To remove defects, you need to bring the lighter to the plastic surface and run the flame along the scratch several times.
Polishing the material
If your car has scratches, it is not necessary to carry out expensive repairs (polishing); perhaps a polishing procedure will do. To ensure high quality polishing, an abrasive paste is used. Varnish and paint products are contraindicated. Simple polishing involves a set of steps:
- the surface is washed away from dirt;
- the treated area must be dried and cooled in a room without light;
- apply a special paste to the panel manually;
- Polishing begins directly.
Thus, polishing is a proven method for eliminating problems with the interior of a car.
Polishing
The safest and most effective repair of car plastic is polishing. It will require a special dispersant. Do not use pastes to polish the car body - they will only further damage the plastic. Repairs can be carried out manually or using a machine.
It is important to know! High speeds of the grinding wheel can overheat and damage the plastic, so without proper experience it is better to polish by hand.
Helpful information
Tips for removing scratches from car plastic:
- when using polishes, you need to ensure access to fresh air in the room - inhaling an excessive amount of even the safest polishes will lead to dizziness and deterioration of well-being;
- before starting to process a part located in a visible place, you need to test the chosen method on an unnecessary plastic product;
- when using polish, it is necessary to correctly calculate the amount of the product - its excess will negatively affect the quality of the work performed;
- You need to apply the substance to treat parts on a cloth, and not on the plastic itself.
A lot of useful and important information about methods and means of removing scratches on a car can be found here
Drill or polisher
This method is based on heating the plastic surface. The source of temperature will be the polishing sponge and friction force.
- You can use a grinder, or a screwdriver, or drill. The first option is preferable; you can set the rotation speed. The latest tools do not provide this opportunity; the frequency must be controlled independently. Otherwise, the plastic will overheat;
- Apply polishing paste to the grinding wheel;
- We smoothly run the machine over the area with scratches. The rotation speed of the circle is low so as not to overheat the plastic;
- Finally, wipe with degreaser.
Flaws:
- There is a high probability of leaving glossy spots on matte plastic. They will be very noticeable;
- Deep scratches cannot be removed;
- This method does not actually remove cracks and other defects, but disguises them, which is clearly visible in the video below. After this method, it will be difficult to wash off the polishing paste from the texture of the part.