The water heaters that appeared on the market immediately became popular because they solved a serious problem - organizing hot water supply to private homes. Today we will understand how to hang a water heater on a wall, what fasteners are used for this, what requirements are imposed on the installation process, installation nuances, and also whether a water heater can be hung on all walls. The latter is in terms of the material for their construction.
Installing a boiler on the wall in the bathroom Source lifehacker.ru
How to mount a boiler on walls made of different materials
Attaching the boiler to the wall is carried out practically according to the same scheme, regardless of the design and dimensions, but there are differences.
- A metal anchor for a boiler is driven into vertical fences using a special gun - this is a reliable, but labor-intensive method. Not every owner has the necessary tool and needs to rent, borrow or purchase a new one for a one-time installation.
- Metal dowels are used, which are fixed in plastic tips. Reliability is somewhat reduced, but this method is easier. Holes are drilled in the wall monolith, plastic casings are inserted and L-shaped dowels are screwed in to hang the unit.
Foam concrete
For foam concrete it is necessary to select special wall mounts
Spiral-shaped nylon dowels are used to attach lightweight water heaters with a capacity of up to 50 liters to a wall made of aerated concrete foam blocks. Heavy units of 80 - 100 l are fixed using a boiler mount with a metal tip.
A steel plate is used, which is fixed with steel studs threaded through the thickness of the wall. On the back side of the partition, the nuts are tightened, and the dowels for the boiler are attached to the plate. There is an installation option using chemical or adhesive anchors that are securely held in the wall.
Adobe
It is not enough to drive steel anchors into partitions made of this material. For hanging, a special metal shield is used, which transfers the load from the water heater evenly to the entire wall. Hooks for mounting the unit are welded to the support.
The supporting element is attached to the partition in several places. Through threaded pins are used through the wall, and nuts and washers are screwed on the reverse side. The studs are welded to the shield or fixed with a bolted connection.
Ceramic tile
If the wall is finished with ceramics, you can hang the heater if there is a fence made of durable material under the cladding. The layer on which the tile lies must be a solid mass without voids and be no thicker than 3-4 cm. Metal anchors of the correct length are used so as to capture the ceramics, mortar and wall body by 10-12 cm. The boiler will break if it is only secured into the tiles with mortar, the layer will separate from the wall.
Plasterboard partitions
Fasteners for plasterboard walls
You can attach the boiler to drywall if you make a frame support when erecting the partition. The embedded element corresponds in area to the dimensions of the heater. A narrow pad will hold the anchors, but a heavy unit will push the plasterboard wall around the perimeter of the frame element.
Wood
The method of installation into the wall of a wooden house depends on the design of the fence. Solid walls made of logs or beams are strong and support the boiler on anchors. Over time, the dowel in the wood becomes loose, so an additional metal plate is installed. It will serve as a support and non-flammable spacer for the dimensions of the heater.
In panel wooden buildings, the frame is made of timber; between the supports there is a shingle filling with insulation. The support shield must be installed and attached to the frame to which the water heater is mounted.
Lining
The material is used for decorative finishing and is not considered as a base for fixation. A non-flammable gasket must be installed. An asbestos sheet is placed between the boiler and the lining if the finishing is on a solid foundation. Otherwise, you need a durable metal shield that will provide additional support and fire protection. The shield can be replaced with a frame made of a square pipe or another profile.
Plaster of Paris
A strong support is installed under the plaster or adobe in the wall, to which the boiler is attached
In this material, dowels and anchors are pulled out, so the plane of the ceiling and floor is used if the ceiling has a solid structure. Vertical posts are fixed on the upper and lower supports, sometimes longitudinal niches are cut out for them in the plaster. For fastening, steel anchors and dowels are used. Hooks for hanging the heater are welded to the support posts.
Brick and cinder block
The water heater is attached using an anchor screw to a wall made of sand-lime or red brick, if the thickness of the partition is more than 250 cm. Metal support pads are used if the stones in the wall have a hollow structure, with round or rectangular holes. In cinder block partitions, such gaskets are always used, since the strength of the material is inferior to brick.
Where to hang a water heater: recommendations from experts
As a rule, water heaters are installed in places protected from water freezing, close to water distribution points. If these points are located at a certain distance from each other, then several water heaters are installed. When choosing a location, you should consider the possibility of access to hot and cold water to the plumbing fixtures. It is also necessary to provide free space for subsequent maintenance of the boiler. When choosing a wall where to hang the boiler, you should take into account its strength. Often the water heater is installed in bathrooms on the back wall of the toilet. Before making a final decision, it is recommended to “tap” the wall. If it turns out that it is thin and there is a ventilation shaft behind it, you can hang a boiler up to 100 liters in volume on it; it is recommended to hang a water heater up to 200 liters only on load-bearing walls.
Before installing the boiler, it is worth finding out a number of important points, namely:
Scheme of a storage water heater.
decide by analyzing its technical characteristics and design; find out whether it is possible to shut off the water during the installation period and access to communications; where and at what height can the water heater be hung: vertically or horizontally, in the kitchen, in the toilet or in the bathroom. Before hanging the device in the bathroom, you should know that the water heater, like other household appliances, must be installed in certain areas. According to safety regulations, there are four danger zones in the bathroom
Therefore, it is important to correctly plan the location of each household appliance and choose the safest one for the boiler;
- plan the location of the cable, taking into account the characteristics of the room;
- consider how many mixers will operate from the boiler: several or one;
- will additional work be required: chiselling of main walls, installation of boxes, gating, etc.;
- where to drain water if it is necessary to constantly drain excess pressure from the system;
- consider which option is suitable for your apartment: flexible water supply to maintain aesthetics or reliable pipes;
- where to install the socket.
Boiler types
The most popular varieties are boilers powered by electricity and gas. Of course, there are also solid fuel and liquid fuel options, but they are used mainly in private homes and are installed on the floor. In addition, they are clearly inferior in terms of efficiency.
Those owners who value savings usually choose gas water heaters. Blue fuel has low cost and high availability, which makes its use very attractive. True, there are some problems associated with the use of such devices:
- strict safety requirements. As you know, gas is explosive. Its leakage can lead to tragedy, so the connection of such equipment must be carried out by specialists licensed to carry out such work. In addition, it is advisable to install an air composition analyzer in the room, which will give signals if the room is oversaturated with gas,
- the need to install a chimney. Combustion products generated during operation of the device must be removed to the street. To do this, when installing equipment, a pipe is laid through the wall, one end connected to the boiler, and the other going outside.
All this requires quite a lot of effort, so owners often opt for an electric water heater. It, of course, requires much more costs to pay for the resources consumed, since electricity is supplied at fairly high tariffs. But such equipment is much safer (of course, provided that all requirements are met - grounding, etc.), and installation is much easier. There is no need to install a chimney or involve specialists; you can do everything yourself. That is why we will analyze methods for installing a water heater on various walls using the example of an electric boiler.
Connection to communications
Connection to the general water supply network is carried out according to the following algorithm:
- Tow is wound onto the blue pipe of the boiler (designed to connect a hose with cold water), which is lubricated with Unipak.
- A tee is screwed onto the pipe, from the side of which a drain valve is then installed.
- The relief valve is screwed onto the bottom of the tee with the arrow pointing down.
- A shut-off valve and a threaded adapter are installed at the bottom.
- The second part of the hose is connected to a cold water pipe.
After this, a shut-off valve and an adapter to which the hose is connected are screwed onto the red pipe. The latter is then connected to the water supply.
Installation features
When deciding how to install and connect a water heating boiler to the water supply system, consider the following recommendations:
- According to the rules for installing water heaters, hot water pipes must be supplied to plumbing fixtures in thermal insulation with a shell thickness of at least 20 mm, its thermal conductivity coefficient should not exceed 0.035 W/m2. Fulfillment of this condition reduces heat loss in the main line, saves electricity and, accordingly, the consumer’s financial resources.
- It is also desirable to have insulation on metal pipes made of steel, stainless steel or copper in the cold water supply (CWS) line. The main purpose of thermal insulation on the cold water supply pipeline is to prevent the formation of condensation, which causes the appearance of mold and mildew, and corrosion.
Rice. 14 Indirect heating boiler in an individual house
- A common malfunction of many boilers is water leakage through the side fitting of the safety drain valve, caused by high pressure in the water main (found on the first floors of high-rise apartment buildings). Typically, water is drained into the sewer using a flexible line attached to a side fitting, which is not always convenient. One option to avoid installing an interfering hose is to install an expansion tank on the broiler that compensates for pressure drops.
- As a rule, an expansion tank is placed on indirectly heated boilers or large-capacity tanks with large amounts of water, where small temperature fluctuations cause significant pressure drops.
- When installing boilers, you should select a power supply cable with heat-resistant insulation; the electrical circuit must have a grounding circuit. The water heater's power supply system must have a residual current device (RCD).
- When operating powerful boilers with energy consumption over 5 kW, they are powered with a three-core copper wire of large cross-section (2 - 2.5 mm2) from the panel, drawing a separate electrical line, the most commonly used brands of electrical cable are VVG 3x2.5-380, PPV 3x2.5- 380.
- To increase the service life of water heater heating elements, a magnetic filter is installed in the water supply system to prevent the deposition of metal salts on the surface of the heating element.
Rice. 15 Connecting a typical boiler to the electrical network
Connecting power to the water heater
A storage boiler belongs to high-power household electrical appliances.
The device must be powered from a separate cable line coming from the common distribution panel. How to properly connect a water heater to the electrical network of an apartment or private house: The table shows the maximum power, so the cable must be taken with a reserve. For most heaters, 2.5 mm sq. wire is suitable.
- To supply voltage from the panel to the boiler, use a three-core copper cable type VVG. Select the cross-section of the wires according to the power of the unit, using the table above.
- To protect the supply line, install a differential two-pole circuit breaker with a trip current of 30 mA, as shown in the diagram below.
- Connecting a grounding conductor is a mandatory requirement of safety regulations.
- To connect the wires to the contacts of the heating element, remove the protective plastic cover (usually held on by 2-3 screws).
- It is not necessary to install an outlet for the water heater. But if the device is equipped with a factory plug, then the socket can be carefully placed on the side of the tank.
Do not mount the outlet directly under the water heater, where it could become flooded in the event of an accident.
“And I’m crazy, and I’m crazy!” (C)
alex-bs published a topic in Our work, August 17, topic
Hello, brothers in repair! I haven’t written anything here for a long time, and in general I rarely come in, it’s all a bit of a lack of time: first a drinking session, sometimes a party, and now a new “attack” has attacked me. But knowing that, despite everything, you stubbornly do not forget me, I decided not to be a pig and tell you about my new hobby. I’ll start from afar: I have worked almost my entire adult life as an electronics engineer, moreover, as an engineer developing electronic and electrical devices of the widest class and purpose, and at the same time purely in the defense industry. It is clear that the scope of my amateur radio interests was limited only by my laziness, there were simply no restrictions on radio components for me, I had EVERYTHING! Well, following the trends of the amateur radio fashion of that time, my main focus was on radio receivers and amplifiers, of course, on transistors and microcircuits. I haven’t worked in this field for a long time, and I threw everything into the landfill a long time ago, but all this time I had a dream in my soul - to make a tube power amplifier, and not a simple one, but one that would make everyone gasp. But I must say that at work I spent most of my time dealing with electric vacuum devices, radio tubes, to put it simply, so this topic was very familiar to me. And then there’s this fashion for “warm tube sound”, which people are literally going crazy about. In short, a year ago I decided to make my dream come true. I immediately decided: the mainstream, ordinary tube amplifiers with an output transformer, are not interesting to me, this is not a royal matter! Shouldn't I invent a TRANSFORMER-LESS tube amplifier? Well, I well imagined the difficulties along this path, and I had some of my own thoughts on this matter, but still I decided to consult with the radio amateurs. I found a suitable group on Facebook, started publishing in it myself, and once asked a question on the topic: could anyone tell me the circuit of such an amplifier. And they immediately give me a link: https://hifisound.com.ua. a-6s33s-otl/ (I hope I didn’t violate any Forum rules by providing a direct link here, especially since it’s from a completely different area?). I won’t talk about this scheme, if anyone is interested, I can later explain what’s what, I’ll just say that this scheme immediately interested me, both for its unusualness and for the potential opportunities that I saw in it. I decided to start. And where to start: there are 0 parts, there is a soldering iron, also a Soviet one, and a tester from Ketai. But, bad luck - the beginning: I got comfortable on Avito, on Ali Express, went to the Mitinsky radio market a couple of times, and began to acquire amateur radio junk.
Now I’ll go and take Tinka for a walk, and I’ll continue, if you’re interested, with photos. )))
First steps. Slab countertops
Sano published a blog entry in Furniture from slabs, solid wood, and various differences, October 6, 2022, blog entry
First attempts to make something from brought slabs. Although there may be some attempts, the material costs money and the right to make mistakes is as much as there is money in your pocket. Train at your own expense, as they say.
Therefore, each board is carefully inspected and tried on; the proverb about measure seven times is in action.
The work itself is not tricky, creative, there are several boards and they need to be selected so that they look beautiful and there is no overspending. All sizing and trimming is done with the minimum possible removal of material, simply sawed off a little here, cut a little there with a chisel.
Installation
What does it look like to install a water heater yourself?
Let's break the big task into several small ones.
How to secure
Unlike a lightweight instantaneous heater, the mass of a storage boiler with water can reach 130-140 kilograms. Tanks from 150 liters are available in a floor-standing version.
In general, the boiler is hung only on a permanent wall (brick or concrete). Anchor bolts are used to secure the tank.
Anchors are a standard fastening for a boiler when installed on permanent walls.
Is it possible to hang a storage heater on a partition in a frame house or a plasterboard wall?
Yes, but with a couple of restrictions:
- At the point where the boiler is attached, there must be a wooden insert that transfers the load to the floor or elements of a durable frame;
- The fasteners are not anchors, but studs. It does not screw in, but passes through the wall and is secured from the back with nuts and wide washers.
Fastening a massive boiler to a light partition: the pins pass right through the wooden inserts.
How to power
Unlike a voracious instantaneous water heater, storage electricity requires much less - no more than 3-3.5 kW. The boiler fits within the power limits permissible for a conventional European socket. This is what is used to connect the device.
The connection has several subtleties.
- Location: the socket should be out of reach of splashing water;
- Grounding: required. The soil can be taken from the body of the shield or from a steel sheet buried in the ground with an area of at least half a square meter;
Grounding will protect you from electric shock if the insulation of power circuits breaks down.
Wiring thickness: it must have a cross-section of at least 1.5 mm2 for copper wire and 2 mm2 for aluminum.
How to connect to water
It is customary to install a storage water heater using rigid pipes. To connect it to the cold water and hot water supply lines, it is most convenient to use:
| Image | Type of pipes |
| Polypropylene, intended for hot water and heating. | |
| Metal-plastic. It is advisable to use press fittings, not compression fittings. The latter have a bad habit of leaking after several heating and cooling cycles. | |
| Corrugated stainless steel. They are resistant to water hammer, have an unlimited service life and flexibility. The bending radius can be equal to the diameter of the pipe, which greatly simplifies the adjustment of the size of the liners. |
It is most convenient to connect the connections to the tank using American ones: in this case, the pipes can be disconnected to repair or replace the boiler in a couple of minutes.
Does the boiler need some kind of piping?
Necessarily. It includes:
Check valve. Its task is to prevent hot water from flowing from the tank back into the water supply when the water supply is turned off and the route is drained. The valve is placed in front of the inlet pipe;
Spring check valve device. The plastic shutter presses against the brass seat and shuts off the water. The return spring is responsible for its reverse motion.
Detonation (also known as safety) valve. The function of the safety valve is to relieve excess pressure when water is heated. As the temperature rises, its volume increases, and in the confined space of the boiler and supply line (they are locked with a check valve, remember?), this can lead to destruction of the tank or pipes.
The valve outlet is connected by a drainage pipe to the sewer system. Its installation location is between the inlet pipe of the water heater and the check valve;
Boiler installation diagram. The check valve and safety valve are combined in one housing and installed in front of the inlet pipe.
Valve appearance. The photo shows the connection to the boiler in the bathroom of my house.
Ball valves at inlet and outlet. They allow you to isolate the tank from the water supply system during its maintenance (cleaning, replacing the anode, etc.).
Taps on the inlets allow you to isolate the water heater from the cold and hot water supply systems.
How to seal threaded connections on valves?
I use Tangit Unilok, a polyester thread with silicone, for winding. In its absence, you can just as easily wrap the thread with flax soaked in quick-drying paint in an organic solvent, or with silicone sealant. Impregnation will prevent the fiber from rotting upon contact with condensate and burning out in hot water.
Plumbing flax with sealant - winding with unlimited service life.
https://youtube.com/watch?v=oHGTmvo8BSE
Types of water heaters
In a system with a single-circuit boiler, a boiler is used to heat water
Boilers are classified based on the type of energy they use and their operating principle. The storage unit contains inside a tank with a heating element, in which a specified volume of water is heated. The advantages are durability and economical operation, while the disadvantages are large weight, dimensions and the need to wait for the liquid to heat up.
Water heaters are:
- electrical;
- gas;
- indirect heating.
Flow-through models heat the water before entering the mixer. This model is mounted on a water pipe and works as a heat exchanger that passes liquid in an arbitrary flow. Cold water heats up to boiling water in a few seconds and hot water flows into the tap.
Gas
Gas boilers are almost always made in a flow-through version and contain inside a heat exchanger made of copper flat elements that transfer energy to the water tube. The burners are located under the heater and transfer heat to the plates. The collector of used gases is located above the heat exchanger, collects them and directs them to the chimney through natural draft or forced ventilation.
Electric
The heat source in the form of a heating element is placed inside or under the built-in water container. The water heating tank is protected by a thermal insulating layer of foam rubber or polyurethane and a casing. There is a control panel on the front for adjusting the temperature.
The heated water in the tank is replaced by cold water when dispensed from the tap. If the supply of warm liquid runs out, you need to wait until the device warms up. The sensor coordinates the temperature and turns on the heating element when the indicator drops below the established norm.
Indirectly heated
The water is heated using the energy produced by the boiler
The equipment operates in winter using energy generated by a heating boiler using gas, electricity or coal. The unit supplies hot water to several water points thanks to its high performance. It is a cylindrical metal tank protected by thermal insulation.
Inside the container there is:
- a heat exchanger in the form of a coil (tube) through which antifreeze or water from the heating system flows;
- magnesium anode to protect the internals from corrosion;
- thermostat to coordinate temperature and start;
- valve to protect against dangerous pressure.
What are the consequences of excess moisture in the soil?
You can see the results of this phenomenon yourself - trees and shrubs die. Why is this happening?
- the oxygen content in the soil decreases and the carbon dioxide content increases, which leads to disruption of air exchange processes, water regime and nutritional regime in the soil;
- oxygen starvation of the root-forming layer occurs, which leads to the death of plant roots;
- the supply of macro and microelements by plants (nitrogen, phosphorus, potassium, etc.) is disrupted, because excess water washes out mobile forms of elements from the soil, and they become unavailable for absorption;
- intensive breakdown of proteins occurs and, accordingly, the processes of decay are activated.
Plants can tell you at what level groundwater lies
Take a close look at the flora of your area. The species inhabiting it will tell you at what depth the groundwater layers are located:
- perched water - it is best to dig a reservoir in this place;
- at a depth of up to 0.5 m - marigold, horsetails, varieties of sedges grow - bladderwrack, holly, foxtail, Langsdorff's reed;
- at a depth of 0.5 m to 1 m - meadowsweet, canary grass, ;
- from 1 m to 1.5 m – favorable conditions for meadow fescue, bluegrass, mouse peas, rank;
- from 1.5 m - wheatgrass, clover, wormwood, plantain.
What is important to know when planning site drainage
Each group of plants has its own moisture needs:
- with a groundwater depth of 0.5 to 1 m, vegetables and annual flowers can grow in high beds;
- depth of water layer up to 1.5 m is well tolerated by vegetables, grains, annuals and perennials (flowers), ornamental and fruit shrubs, trees on a dwarf rootstock;
- if the groundwater is more than 2 m deep, fruit trees can be grown;
- The optimal depth of groundwater for agriculture is from 3.5 m.
Is site drainage necessary?
Record your observations for at least some time. You yourself can understand how much drainage is needed.
Maybe it makes sense to simply redirect melt and sediment water along the bypass channel, rather than allowing it to flow through your site?
Perhaps it is necessary to design and equip a storm drain and improve the composition of the soil and this will be enough?
Or is it worth making a drainage system only for fruit and ornamental trees?
Electrical connection
Electrical diagram for connecting a water heater. (Click to enlarge) According to the instructions, before connecting the device to electricity, you need to fill it with water. Be sure to observe the location of the phase relative to the electrical connection diagram.
After connecting the plumbing communications, the boiler needs to be filled with water, and only after that can the device be connected to the electrical network. The rules for connecting a water heater are the same as for washing machines.
If the device does not start, you need to recheck all connections according to the connection diagram and, if necessary, correct connection errors. Otherwise, you may have to invite a specialist.
Well, the unit finally started working, and hot water flowed out of the tap in a thin stream. Termex has done everything for the comfort of your life. And of course, your skillful hands, where would you be without them!
Watch the video in which an experienced user shows in detail how to install and connect a Termex water heater:
Features of working with walls
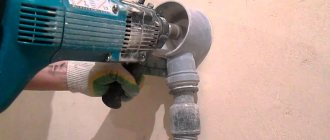
The most suitable wall for hanging a boiler is a concrete one. It is strong and not subject to fire. The equipment is secured using dowels. They can be driven into the wall using a special construction gun. However, not everyone has this device. If you do not do such work on a regular basis, then there is little point in purchasing it. Instead, you can use a regular drill or hammer drill to drill holes and drive dowels into them.
If the wall is not made of concrete, then you should take into account the characteristics of the material from which it is made. Let's take a closer look.
Cellular concrete
Quite often, the walls of modern houses are made of a type of cellular concrete - foam concrete. The peculiarity of this material is the presence of a large number of pores in the structure. Due to this, foam concrete has many positive qualities, but there is also a minus - low density. Accordingly, holding heavy equipment on such a wall is very problematic.
However, if the volume of the boiler does not exceed 50 liters, then you can get by with the usual hanging procedure using spiral nylon dowels. But to fix larger and heavier water heaters, it will be much more reliable to use steel elements:
- mounting plate. It is a sheet of steel that is fixed to the wall using dowels made of the same material. It is even better to use long threaded studs instead of the latter. They go right through the wall and are secured on the reverse side with nuts, under which a lining is installed,
- special anchors for foam concrete. Theoretically, they are manufactured to work with this particular material, taking into account all its features. In practice, it often happens that such anchors cannot withstand heavy equipment and fall out along with it,
- chemical anchors. This option is the most reliable, but only if the walls are made of high-quality foam concrete. The essence of using chemical anchors is quite simple. A hole is drilled in the wall so that its inner part is wider than the entrance. Then glue is poured there and an anchor is inserted. After the chemical composition hardens, a very powerful fastening is obtained, which by itself will definitely not fall out. But if the foam concrete is of poor quality, then there is a risk that the water heater will collapse along with pieces of the wall. Fortunately, this doesn't happen often.
These methods are suitable not only for foam concrete, but also for other cellular materials - for example, slag blocks.
Tree
A wooden wall is quite strong, so there are usually no problems with holding heavy objects on it. For fixing, both brackets and long through pins are suitable - in general, any method.
But you should remember that wood is a flammable material. Regardless of what type of boiler you purchased, the wall must be protected from possible fire. To do this, a sheet of non-combustible material is fixed to it. Steel is ideal - it will protect from fire and distribute the load from the water heater evenly, thereby making the installation of the device on the wall more reliable.
Brick
Various methods are used to mount a boiler on a brick wall. It all depends on what type of blocks they belong to. Silicate, for example, are distinguished by their high density and strength, so the same methods are used for fixation as in the case of concrete. True, for this the wall must be at least one brick thick.
As for the red ceramic blocks, they are weaker. Therefore, for fixation it is necessary to additionally install a frame or metal shield on them.
Required tools and materials
The type of tool used to fasten the water heater is selected depending on the characteristics of the walls. At the same time, a construction pistol is necessary in each case.
Hammer
A hammer drill will be required if the heater is hung on concrete walls to form holes into which dowels are inserted.
Electric drill
An electric drill is used in cases where holes are drilled in walls made of a softer material than concrete (plasterboard, brick, etc.).
Brackets are required to mount the water heater to the wall. The length of such hooks depends on the volume of the boiler.
Dowels
Dowels hold the brackets in the wall. That is, these fasteners take part of the load that the boiler creates.
High quality hoses
To connect the boiler, you will need at least two copper (not metal) hoses, one of which supplies cold water, and the second returns hot water.
Instructions and connection diagram for the device
Without instructions and a diagram, it is impossible to connect the boiler to the general network, since the device installation algorithm directly depends on the design of the heater.
Filter
A coarse filter will be required if the heating device is installed in places where contaminated water (with large particles) is supplied.
How to safely hang a boiler on the wall
Having decided on the location, you should carefully approach the mounting of the unit on the wall. The standard installation system involves anchoring, when two holes are drilled in the wall for plastic dowels, with a diameter of at least 10 mm and a length of at least 120 mm (depth of entry into the wall). Metal anchors are screwed into them, onto which the boiler is suspended through special lugs in the metal strip of the boiler.
Water heater mounting system
When marking drilling locations, you should use a tape measure and a level so that the fasteners are made in a single plane
This will allow you to hang the water heater evenly and without distortions, which is important
Typically the distance between anchors is 20 cm
The mounting height of the boiler is usually selected based on the convenience of its future maintenance, as well as the overall dimensions of the device itself
It is important to remember that the boiler should only be hung on a solid wall made of brick, concrete or wood (in a wooden house). To drill holes in a concrete wall, use an impact drill or hammer drill
In this case, the drills must have a pobedite tip.
How to safely install a boiler on a plasterboard wall
If the owners plan to hang an electric boiler in a room with plasterboard walls, then the location of its future installation should be taken care of in advance. In this place, an embedded fastening should be made in the form of one or more wooden blocks, which are attached to a load-bearing concrete or brick wall.
Holes are made in the aluminum profile for attaching drywall
Option to use multiple boards
The lumber is attached to the wall surface at those points that will not coincide with the location of the fastening lugs on the water heater housing strip.
It is somewhat more difficult to make mortgages when, when finishing the room with plasterboard, the owners did not think about the possibility of future installation of a water heater. In this case, chemical anchors are used, which are a special thick composition that, after drying, acquires high strength. After drilling deep holes, a solution is injected into it using a mounting gun, into which a metal pin with a sleeve of the appropriate length is carefully screwed. After a day, you can hang the boiler on this mount.
Screwing in a metal stud with a mesh sleeve
Such work requires extreme care and accurate calculation, since the solution must completely fill the hole, which will provide good strength and the ability to withstand the large weight of the water tank.
Wooden wall mounting
If the wooden wall is load-bearing and is a rounded or profiled beam with a cross-section of 150 mm or more, then the boiler can be freely attached to it using special dowels. To hang the water heater, a hole is drilled for a dowel, at least 100-120 mm long, and anchor-type bolts are also used here.
Typically, the need to install a boiler on a wooden wall arises in dachas, which are often built using a frame-panel type. Often, lining is used as interior decoration of a bathroom in a wooden house.
It is important to remember that when installing a water heater, the fasteners are made on a load-bearing wall, which allows you to safely support a weight of 80 kg or more
An example of installing a boiler in a country house
Rules for operating water heating equipment
It is worth noting that the key to successful operation of water heating equipment for a long time is compliance with the rules for using water heaters. Here are the main ones:
- experts advise removing the heating element at least once a year and checking it for scale deposits, and this is due to the fact that at the maximum heating temperature of hard tap water, scale forms in the heating element, as a result of which heat transfer decreases, the system overheats and stops functioning; in this case, you have to change the heating element;
- It is forbidden to hang the heating element if there is no grounding in the room, since drops of water falling on the body can damage the device, as a result of which the possibility of electric shock to a person cannot be excluded,
- It is prohibited to connect an empty storage boiler to the electrical network;
- if there is an excess pressure of more than 6 atm in the city water supply network, then it is necessary to install a pressure reducer;
- It is not allowed to connect the heater to the water supply network without installing the safety valve that comes with the water heater;
- Water must not be discharged from a storage heater connected to the network;
- The consumption of water from the water heater as drinking water is excluded.
Selecting a location
Regardless of where the boiler will be located - in the bathroom or in the kitchen - you should pay attention to a number of nuances:
- the device must be located near communications (water and electricity);
- installation is optimal in the plumbing compartment;
- compactness of the device in the case of a small square footage of the room;
- the wall must withstand the potential load, not only from the device itself, but also from the water poured into it;
- the humidity in the area of the potentially installed structure should not be high. Otherwise, the device will easily fail.
If the owner of the premises has chosen a bathroom as the location for the tank, he should keep in mind the possible inconveniences if the heater is mounted above the bathroom itself.
The elements that are needed for the installation of the boiler on the wall
Wiring bypass the boiler with a boiler / storage.
To fix the heater to the wall is better to use a gun construction, also suitable punch or electric drill.
As for fixing the water heater can be used steel hooks with a diameter greater than 10 mm and dowels which are fixed gun construction. This is due to the dimensions and total weight of the structure. If building a gun is not available, you need to drill with an electric drill or punch holes for screws for fastening.
If the wall on which you plan to mount the boiler is covered with a layer of plaster, you can use screws 8-10 mm long, with plastic part for fixing the water heater should be less than 8 mm.
For the liner to the boiler water is not recommended to use budgetary and hoses, because they quickly fail, and therefore often have to change from. It is recommended to spend more to buy quality materials for fixing the boiler to the wall, otherwise you'll have to run around in search of a replacement. It is best to perform a hard liner of pipes, which are made of copper.
It does not connect the boiler to the water supply system and with the help of a metal pipe.
List of all the necessary elements for operation:
- water heater
- steel hooks diameter greater than 10 mm;
- plugs;
- electric drill or a hammer;
- quality hoses;
- 8-10 mm long screws;
- wiring diagram;
- network cable;
- coarse filter water purification;
- pipes;
- a pencil;
- Construction pistol.
Installation of the boiler with his hands Technology
Figure 1. Plate for mounting fixed with screwdrivers.
The process of installation and as follows:
- Select a suitable location for the installation.
- Make holes for dowels. The holes in the epoxy resin or cement plugs will need to insert liners of wood or plastic. When using wooden tube, in which a drill that has a diameter smaller than the screw, it is necessary to drill holes in a length 3/4 of their length. Followed by screwing screws and leave them until the cement or resin is not completely dry. In most cases, the rear surface of the heater fixing plate is present with scalloped openings which have a keyhole shape. They should include the head dowels or screws, which are fixed to the wall. Sample plate for fixing can be seen in Fig. 1. To hang securely design, install another screw which is screwed between the two screwed. On him will rest the bottom of the plate for the fixture. This method helps to prevent deflection of the plate for fastening, which is found in certain types of water heaters. Top screw is recommended to put the puck in order to perform more reliably fixing the edge of the coupling plate.
- Produced water heater installation.
- Determined wiring possibilities apartments, the material and the thickness of the cable. If there is doubt as to whether the load cable stand, it is recommended to lay a new cable from the panel.
- Running ground.
Figure 2. Wiring the heater.
Wiring heater depicted in Fig. 2.
Installation of the heater on the wall is best done together: one person will keep the boiler, and the other mark in pencil place fasteners.
Note the marking accuracy. If there is even a slight deviation, screws or dowels, which are fixed to the wall, can not come to the plate holes for mounting the cylinder, causing the device to be installed smoothly.
If all this is done correctly, then the water heater will work properly for a long time.
The complete equipment contains a non-return valve to protect, by means of which will form an obstacle to the outflow of water from the water heater.
The safety valve is screwed onto the water inlet pipe by a few turns. This process should be given special attention, otherwise it is likely to damage the joints of the pipes from the boiler tank. By mounting it in a horizontal position, it should be remembered that the inlet for cold water should be at the bottom, and outlet for hot water is located on.
Flow or storage heater
An electric water device should be selected according to its characteristics:
| Characteristic | Water heater type | |
| Cumulative | Flow-through | |
| Electric power | from 1.5 kW | from 3 kW |
| Dimensions | large | small |
| Price | high | low |
| Hot water volume | 200 l/4 hours | 200 l/h |
| Operating mode | long | intermittent |
| Service | permanent | not required |
| Water pressure | low | high |
In 85% of cases, apartment owners in the Russian Federation choose a storage boiler:
- 30 l – for one user;
- 70 l – married couple;
- 150 l – for all water intake points;
- 210 l – large family, boiler for kitchen and bathroom.
There are storage heaters of the following types:
- wall;
- floor;
- vertical;
- horizontal;
- flat;
- short, large diameter;
- narrow elongated;
- pressure;
- atmospheric.
For spare hot water supply lines, used only at the time of shutdown of the central hot water supply or maintenance of the gas pipeline of the dispenser, only direct-acting heaters with electric heating elements are used. Indirect heating devices with heat exchangers are not suitable for these purposes.
Yak povsiti water heater additional assistance fakhvtsv
Connection diagram for a wall-mounted water heater.
If you are unable to secure the water heater on your own, you can contact the security guards for help. Their obligations are as follows:
- The specialist is responsible for transferring costs to the deputy for materials that are processed during the hour of work. The work plan and their evaluation are also to blame.
- The master is responsible for the visconty's dismantling of the old building, as it is present.
- A specialist will install the boiler mounting (mountings for water heaters can be purchased at plumbing stores).
- After fixing the connection, the master is responsible for not connecting the pipes for supplying and discharging water.
- After installation and connection of water heating to the water supply and electrical systems, the technician must check the device for functionality, and then demonstrate it to the repairman. If any problems with the construction are discovered in the near future, the contractor is responsible for immediately fixing them, in which case there is no need to pay extra for them.
- The claims specialist will provide consultation to the client on how to use it, briefly informing them about how to use the installed device.
Malyunok 3. When connected to the wall, the water heating system will look compact in the interior of the booth.
It is clear about the materials and tools that may be needed to secure the heating of water to the wall, you should know that in most cases, manufacturers will use their materials and tools. You need to pay extra for them.
I am purchasing materials to secure the heating of water to the wall on the right, because other elements will be needed. Their presence is confirmed by falsification. It is necessary to expand the situation if the sellers are trying to reach their clients. You can find out if you ask for cash in writing.
When installing the boiler, it must be installed strictly vertically. In some cases, the water heater tank cannot be reached through the loosening of the fastening plate. If this is the case, then it is necessary to place a lining at the bottom of the structure, which is made from thick gum.
The reliability of the fastening can be verified. For this purpose, hang on the frame, clinging to the dowels, in order to wash from the walls, after which the bits will crumble in the ragged sides. Since the structure is flexible, it means that a water heater can be installed, since it has more water than the average person.
Attachments to the water heating wall can be added to Fig. 3.
You can learn how to practically mount a water heater on the wall in your home yourself. We need to follow all the rules so that when the water heater goes out of service, it won’t cause any problems or problems.