If you are at least a little comfortable with a needle and thread, it will not be difficult for you to sew up clothes with your own hands. In addition, this is a significant saving, and the process will take very little time. Let's look at the example of a shirt.
Required Items
Before starting work, you should prepare all the necessary tools so as not to be distracted from the process.
You will need:
- needle;
- 15-20 pins;
- threads of a suitable color;
- sharp scissors;
- soap or colored chalk;
- sewing machine. It will greatly facilitate the process;
- measuring tape.
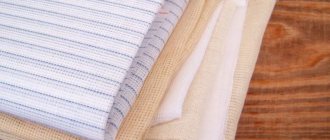
Cotton
Cotton dresses and skirts also stretch over time. This problem can also occur if you initially do not properly care for things made from this material.
For clothes to shrink, they require special care.
How to make something shrink after washing?
Cotton shrinks even at a temperature of 40 degrees. If you need to shrink the product a little, wash it in a washing machine at 40 degrees.
If clothes have stretched a lot and become several sizes larger, there is another method recommended by housewives. This is boiling water.
Procedure:
- Boil enough water in a large saucepan to completely cover the dress or jacket.
- Once it boils, place a cotton item in it.
- Keep in hot water for 10-20 minutes. The longer the clothing is in the boiling liquid, the more it shrinks. Keep this in mind and calculate how much size you need to fit the dress.
- Take special tongs, remove the clothes from the boiling water and rinse in cool water.
Dry cotton as usual, on a clothesline or towel. There will be no need to use hot air drying. After this technology, things shrink to the desired size.
Sewing a shirt step by step
Even a person without experience or special skills can alter a men's or women's shirt.
The main thing is to have the necessary tools at hand and follow the instructions:
- Step 1. First of all, you need to understand which part of the clothing was the wrong size. To do this, put the shirt on yourself or the person wearing it and assess the situation visually.
- Step 2: Once you've identified the problem areas, take your pins and begin laying the fabric along the entire length of the seam. Make sure that it is even, otherwise the item will be deformed after the sewing procedure.
- Step 3. After basting, remove the item and sew new seams. Excess material must be cut off and the edges need to be overcast using a sewing machine.
- Step 4. As a final step, iron the shirt, paying special attention to the seams.
Nylon and polyester
Items made only from artificial material will not stretch or shrink.
This is only possible if the composition contains natural fibers. Before starting the shrinking procedures, read the instructions. Study what the item is made of so that you don’t waste time and effort reducing it at home in vain.
How to make clothes fit?
If a synthetic item contains natural substances, it is possible to reduce its size. This is done in an automatic washing machine or manually.
How to wash the product:
- Load the item into the machine. Add the powder (it will wash at the same time), set the temperature higher than what is indicated on the tag. Set the spin mode to medium.
- The maximum shrinkage effect can be obtained by soaking synthetic clothing in cold liquid for a quarter of an hour. After this, you need to wash the product.
After washing, dry the item on any heating device previously covered with a thin cloth. You can also dry it outside. You can also hang clothes above the stove. This will shrink the material a little more.
That is, the faster the product dries, the better the fabric will fit.
Drying using modern technology can cause even greater shrinkage. If the usual one does not help, wet the product and place it in the unit.
Synthetic fabric quickly takes the correct shape. It’s enough to simply wash things in hotter water.
If the clothes are made of spandex and lycra, then such manipulations to shrink them will be in vain.
How to sew a shirt at the waist
Depending on the style of the shirt, there are two ways to sew it up.
European quality products
These shirts have a seam located between the shoulder blades.
When sewing this type of clothing, you will have to change the sides of the product.
However, if you just need to make the shirt a little more fitted, use the instructions below:
- Step 1. Put the item on yourself or the person who will wear it.
- Step 2: Using pins, pin the material along the back seam. At the waist, leave the fabric slightly rounded.
- Step 3. Pin the material at the waist 15-20 cm higher.
- Step 4. Check that the old and new seams are even.
- Step 5. Excess fabric must be trimmed and the edges swept up.
Shirt without seam on the back
If there is no seam on the product, the cut will be different.
In this case, you can sew the item in place using darts.
Instructions for use are as follows:
- Step 1: Put the shirt on inside out and pin the two vertical darts on either side of the middle of the back, maintaining symmetry.
- Step 2. Remove the shirt and use pins to mark the top, middle and width of the darts with chalk. For accuracy, put the item on again and check the marks.
- Step 3. The darts must be basted, checked for symmetry, and then stitched.
- Step 4: Iron the darts to the middle of the back.
Rework options
There are several different options for making your blouse smaller. The specific choice depends on the detail that turned out to be large.
To correct the cut you can:
- take the item to a professional tailor (atelier, private seamstress);
- start working on your own.
Everything is simple and clear if a specialist takes care of the clothes. You will have to come to the fitting 2 times and pay for the work.
But you can do without this if you get down to business yourself. First you need to determine what exactly needs to be done to solve the problem.
To reduce the size of a blouse, use the following work options .
- Deepen the front and back darts (on the chest, on the waist).
- The side seams are sutured.
- Reduce in the side seams, in the seam of the back flange.
- The shoulder seams are sutured.
- Reduce according to the sleeve if it is too big.
- They tighten and drape excess material.
- They rearrange and re-stitch buttons.
- Wash at a certain temperature, taking into account the quality of the fabric.
- Dried using a special method.
Sewing the shirt at the shoulders
There are two ways to change the shoulder size.
Without using ripping
You need to do the following:
- Step 1. Using a measuring tape, measure the required length from the collar to the far shoulder line, draw a line here.
- Step 2. Draw with chalk a place for the future seam, which should end at the edge of the armpit line.
- Step 3. Fold the item in half and cut the fabric along the drawn line. If the instructions are followed correctly, the sleeves and body of the shirt should become separate pieces.
- Step 4. Pin the cut sleeve with the back and front. It is necessary to connect the parts so that there are no holes. Remember that the armhole size has become larger.
- Step 5. Sew the joined parts and iron. The product is ready to wear.
By tearing
You need to do the following:
- Step 1. Determine your desired shoulder length and mark it on the fabric. It is also necessary to draw a line that will be parallel to the seam of the sleeve.
- Step 2. Remember to check for symmetry, otherwise the sleeves will be different sizes.
- Step 3. At this stage, you need to open the seams and carefully flog the sleeves.
- Step 4. After cutting off the excess fabric, connect the sleeves and openings for them. Then the parts need to be double stitched.
For more precise instructions, use this video tutorial.
In order to rip the seam correctly and accurately, use a special seam ripper. To do this, insert its thin tip under the thread and pull it up. Do this operation with each stitch.
Remember that you can only rip a seam on one side.
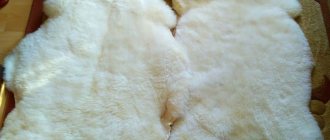
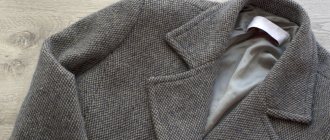
Wool
Most often people are looking for an answer to the question of how to reduce the size of clothes made from wool. Every resident probably has such things; they keep you warm in cold times, but they stretch out quickly.
Wool items are expensive, so don't throw them away. It is enough to learn a few tricks to help restore them to their previous shape and appearance.
Several ways to make knitted clothes smaller:
- Using temperature mode. The maximum temperature for washing wool items is 30 degrees. If you want her to sit down, increase the degrees. Experienced housewives advise raising the temperature to 55–60. The hot liquid compresses the wool fibers and the garment shrinks.
- By washing. There are cases when adult things turned into children's things. You can shrink a woolen item so much if you know how to wash it in an automatic machine. To make a dress, sweater or skirt shrink a little, first wash it in hot water, then set the rinse cycle to 10 degrees, and dry it using a dryer.
- Using air conditioner. After the temperature regime, you can use fabric softener. Add 1 cap of conditioner to 5 liters of water at 40 degrees. Soak in liquid for 5-10 minutes.
- Emergency. If you urgently need to shrink a woolen dress, after washing and drying it in an automatic washing machine, hang the product on a heating device (heater or radiator), just cover it with a cloth first. This way you can shrink the item evenly and avoid deformation of individual parts of the dress or sweater.
These techniques only apply to items made from 100% wool. If the composition contains synthetic fibers, these methods are not recommended. It is unknown how clothes will behave during such heat treatment.
We suggest you read How to quickly dry a jacket after washing: tips
Sewing the sleeves
If there is a need to change the sleeve size by 3-5 mm, the cutting diagram will be quite simple:
- Step 1. Turn the product inside out and straighten the seam.
- Step 2. Measure the required distance and draw a line where you want to make a new seam.
- Step 3: Sew a new line and trim off any excess fabric.
Since the material is cut on both sides, only allow half the distance from the seam. For example, if you need to trim 5 mm, set aside 2.5 mm.
Sew a blouse + sew a blouse from master seamstresses on YouDo
- Price is negotiable
Need a general cleaning of the apartmentA 2-room apartment needs general cleaning after the residents. Wash floors, bathrooms, wipe kitchen facades, appliances, refrigerator. Wash 3 double-hung windows and two single-hung windows.
Ekaterina 1st Spasonivkovsky lane, 17k2, Moscow
- RUB 4,500
spring-cleaningGeneral cleaning of a well-kept apartment after a long absence (dusty). 3-room apartment. Windows, balcony, kitchen: refrigerator, oven, hood, microwave, wooden kitchen façade, cabinets...
Ekaterina street Academician Pontryagina, Moscow, Russia
- Price is negotiable
Clean the windows in the cafeClean 13 windows
Marika Novoslobodskaya street, 4, Moscow, Russia
- Price is negotiable
Window cleaning services in St. PetersburgIt is necessary to wash the windows after repair; there are stains on the glass that cannot be washed off by yourself using ordinary means. One window of this type. The second one has a balcony and a kitchen. and balcony windows. The inventory is yours. Desirable…
Julia Strelna village, Petrodvortsovy district, St. Petersburg Lvovskaya 23 to 2.74
- Price is negotiable
Hem the dressIt is necessary to shorten the dress by 5 cm. The seam is preferably as in the photo. And maybe shorten the straps a couple of cm.
Kira K. Kedrova street, 4k3, Moscow, Russia
personal.youdo.com
Shortening the sleeves
In order to reduce sleeve length, careful measurements must be taken. Remember that the optimal length is determined by the bottom edge of the cuff: it should reach the bone that attaches the thumb to the hand.
There are several shortening options:
- First, you need to rip off the cuff and leave the folds intact using pins. Then measure the distance you need to cut. After trimming the excess fabric, sew the cuff back to the sleeve.
- Unpick the cuff and the elements that cover the cut on the sleeve. Measure the slot of the spline, mark a new one and make a cut for it. Make a triangular cut at the top of the slots, cut off the excess material at the bottom of the product. Pay special attention to the design of the corners of the cuff. Finish the cut, starting with the narrow element. Sew one surface of the cuff, not forgetting the folds on the sleeve. Then sew the second surface.
The second method is more labor-intensive and requires certain sewing skills.
If you want to shorten your sleeve size by more than 2 centimeters, do not try to simply cut off the excess fabric. This will reduce the size of the vent and make your shirt unattractive. In this case, you need not only to cut the material, but also to completely redo the slot.
Acrylic
Some synthetic materials do not shrink. These are acrylic, spandex and lycra.
No matter how hard you try to reduce the item a little by size, you won’t be able to do this with washing.
Clothes can only be altered to make them fit. It will not shrink during washing in either hot or cold water. Excessive processing in an automatic machine will only lead to stretching of things.
We suggest you read: The washing machine takes in water and immediately drains: the reason and what to do
If you want to make Lycra, spandex and acrylic items smaller, take them to a tailor. Experienced craftswomen quickly measure your volumes and adjust the item to fit them.
Or give such a product to someone and buy a new one for yourself. There are no other options for shrinking acrylic, spandex and lycra.
Shortening the length of the shirt
The easiest way to reduce the size of a shirt is to shorten its length. With a certain sewing skill, you can do without a sewing machine. Instead, use a thin needle and hem the product with neat small stitches.
More detailed instructions are as follows:
- Step 1: First, put on your shirt and look at the amount of fabric that needs to be removed.
- Step 2: Draw a chalk mark on the area on the fabric that needs to be removed.
- Step 3: After removing your shirt, lay it out on a well-lit surface.
- Step 4. Using a measuring tape, measure the desired length.
- Step 5. Subtract 1-1.5 cm from the resulting number. After this, lay a solid line along the bottom of the product.
Step 6. Cut off the unnecessary material and sew a new seam. At the end of the work you need to make a hem. To do this, you need to leave an allowance 1.2 cm wide between the seam and the bottom edge of the product. Fold the allowance in half, bringing the cut to the seam you made.
Then fold the seam allowance over to the marked seam line and tuck it completely inside the garment. Secure with hand stitching, iron and stitch using a sewing machine. To finish, go through the iron one more time.
Let's start cutting
Using the matching shirt as a guide, trim the sleeves and excess from the sides of the larger shirt you plan to mend.
Be sure to leave enough seam allowance. For a better fit, you can add extra inches to the armholes on the back of the shirt only. I didn’t do this on my shirt, but I think the idea itself is good.
It’s good to wash often: myths about shampoo and hair care that only harm
"Dad is offended." Agata Muceniece about her relationship with Priluchny after the divorce
Lost weight: what Sofia Tarasova sacrificed for the sake of “VIA Gra” (new photos)
On the other side of the shirt, also trim off any excess fabric and make sure that the pieces match.
Knitwear
Knitted products are inexpensive, so they sell out quickly. Only over time, they also require replacement, because clothes after prolonged wear become stretched and lose their attractiveness.
You can make something made from such textile material smaller at home without any problems. When performing a special method, she can shrink down to 1 size.
Let's start reducing knitwear:
- Pour hot water into a bathtub, basin or bucket. Its temperature should be 40–50 degrees, that is, 10–20 degrees more than indicated on the clothing label.
- The product is placed in hot liquid for 20–30 minutes. After 20 minutes, check whether the item is the right size or is still stretched. If the result is not satisfactory, add boiling water and continue soaking.
- Squeeze out excess moisture. Do not twist the water out as this will stretch the fabric again. Place the product along the bottom of the bathtub and press down to the bottom. This way you can remove excess moisture without damaging the material.
- Dry knitted items on a terry towel, which should be periodically replaced with a dry one so that the clothes do not stink.
If you can’t reduce knitwear at home, the second and final option is to take it to a tailor. But the work of a craftswoman will cost a little less than buying new clothes.
What determines the ideal fit of a men's shirt?
The shirt consists of several elements. The correct fit depends on how well these parts fit on a particular man. Let's explain with examples.
Armhole on sleeves
This is an important detail, because the armhole allows you to move your arms freely. It should not be wide, otherwise the fabric will hang in the armpits. Armholes that are too narrow will also not fit the figure - a man will not be able to stretch his arm forward. When trying on, you should gather the fabric in the armpit area - if there is a little space left there, literally 2-3 cm, it will fit.
Yoke
This is a seam that runs from one shoulder to the other along the back line. This stitch is below the neck but above the shoulder blades. If you look at the back of a man's shirt, you immediately see the yoke. The correct option is when the edges of the seam extend beyond the shoulder blades and humerus. This will allow you to move your arms freely, and the fabric will not bunch up on your back.
Fitting the shirt to the chest
A shirt that fits incorrectly in the chest looks untidy. The fabric will puff up and gather in folds in the armpit area. A jacket will not save the situation: as soon as you unfasten the buttons, folds and creases will become noticeable. Excess fabric will wrinkle and will not look fresh. A shirt that is too tight is also not a solution, it will hinder movement. It's easy to check if the chest fit is correct: fasten it, bend over, stretch your arms forward in front of you or put them behind your back. Do you feel that you are cramped and the bar is diverging? This is not your size. Go a little larger or try a looser fit if the collar suits you.
Sleeves
Modern models of classic shirts have tapered sleeves. Often, they are too narrow at the top of the arm. It looks attractive if a man just stands there. If he actively gestures, the fabric will squeeze his hand. You need to look for models with loose sleeves in the biceps area, which taper towards the elbow. But don’t overdo it with space. A lot of fabric on the sleeves is a problem when wearing a shirt under a jacket. The tan will gather and wrinkle, and the jacket sleeve will stop at these folds. Outwardly it will not be too noticeable, but when wearing it you are guaranteed to experience discomfort. Focus on your feelings and try on the products together with a jacket or outerwear. The sleeve should reach the base of the thumb. A longer sleeve means a closed wrist, which looks untidy; a short sleeve means it will ride up when moving. The shirt should be visible from under the jacket by 1-2 cm, no more.
Shirt length
It should reach the middle of the fly. When tucked in, it won't pop out of your pants with every movement, but there won't be a lot of excess fabric inside. It is comfortable. This length is also suitable for wearing a casual shirt. But do not forget that for graduation you should still wear shirts that do not have a straight bottom edge, but have indentations along the side seam. Tucking in a shirt with a curved bottom will also be problematic. The side seams may not be long enough to completely hide them under the trousers.
Waist circumference
If the difference in the waist and chest is too large, then it is easier to purchase a product that will fit the chest circumference and yoke. After this, take the shirt to a tailor and narrow it to the desired width. Don't forget to have a small supply, the clothes should be comfortable. If the difference in your waist is in the opposite direction, then simply choose shirts with a classic fit. What is too much fabric for some will be a comfortable option for you.
Correct collar size
An incorrectly selected collar will ruin the overall impression of the shirt. A wide collar will dangle, and a narrow collar will make breathing difficult. When choosing, you need to remember that you should be comfortable moving your head, but the collar should not live its own life. In order not to make a mistake in your choice and know how to correctly determine the collar size of a shirt, measure the circumference of your neck and add another 5 millimeters to this number. If the neck is 39 cm, then the ideal collar is 39.5 cm. To measure the size, you need to attach a measuring tape to the inside of the collar. Start measuring from the middle of the button on one side of the collar to the beginning of the buttonhole on the other. If you measure the overall length, it will be a few cm longer than the actual size. The result is that the collar will be too small for you.
The collar size of a shirt is often directly related to the size of your clothing. Data on this is given in the table below. But remember, this is more of a starting point for finding your size.
Jeans
Stretched jeans can be turned into shorts, made into pillows, or you can try to return them to their original size.
If the trousers are stretched everywhere, only boiling or processing at high temperature in the washing machine will help.
Boiling:
- Boil water in a large saucepan.
- Add laundry detergent. Add more powder, the solution should be strong.
- Turn the item inside out so that the color of the fabric does not suffer as much.
- Place the jeans in the boiling liquid and leave to cook for 30 minutes. After boiling, remove the clothes using tongs and hang them on a clothesline.
Boiling will not only shrink your pants, it will shorten them. Be prepared for the pants to be a little shorter in length.
Boiling cannot be carried out if the clothes have decor such as sparkles, patterns, or are decorated with deliberate scuffs.
Jeans can also be made smaller in a certain area. For example, if the belt, knees or buttocks are stretched.
What do we have to do?
Pour water mixed with conditioner into a spray bottle (ratio 3:1). Shake the solution well.
Spray it on the areas that need shrinkage. Then dry it in an automatic machine on the most powerful mode.