Finding a pair of shoes in which you will feel comfortable is quite difficult. Therefore, favorite shoes that have become unusable upset us. After all, you will have to search again for suitable shoes or boots. Of course, you can use the services of a qualified shoemaker, but this applies to complex repairs. In addition, not every shoe shop undertakes to eliminate minor problems, citing the fact that repairs are impossible or will cost you a pretty penny. Therefore, if you need to seal the sole or restore it, you can do it yourself. This way, you will put off throwing away your old shoes.
Tools and materials for shoe repair
To repair shoes with your own hands, you will need different tools. Some operations require a shoemaker's foot and two different hammers (a regular shoe hammer and a heavy one). Processing and finishing the bottom of the shoe will require the use of a shoe rasp. Instead, you can use a new bastard file at home.
To cut and cut shoe materials you will need a knife. It would be good if there were two types of knives: double-sided and single-sided sharpening.
Polyurethane shoes are repaired using a hammer-type electric soldering iron and a conventional burning device.
The top of the shoe is repaired using a homemade hook. These hooks are made from thick machine needles. The eye of the needle must be cut using a diamond tool (diamond cutting disc, needle file, etc.) and secured in the handle.
To hem the bottom of the shoe you will need a thick shoe hook. To make holes in the sole, you will need an awl. It’s good if there are several of them (different thickness and configuration).
- Some operations will require shoe needles. To make them, you will need a thin balalaika string and lead-tin solder for soldering.
- With all of the above tools, you can easily repair shoes yourself. But in addition to tools, you will have to stock up on some auxiliary materials.
- To sew the upper of the shoe, you will need precise six-layer cotton threads. Sometimes you can use ordinary three-layer threads or nylon threads.
- The bottom of the shoes is hemmed with special linen threads (dratva). Sometimes they are additionally rubbed with shoe polish.
- Before gluing or welding shoe parts, they are first degreased using clean gasoline.
- Also for general purposes you will need medium-grained abrasive sandpaper, nails, pliers, and wire cutters.
First way
In order to repair a burst sole at home, you will have to purchase the following materials and tools:
- shoe knife;
- sandpaper;
- degreaser;
- quick-drying superglue;
- thread and shoe hook.
Is express repair possible in this situation? If the damaged shoes do not have a special protector and have a flat sole, you can repair them yourself and put them on on the same day. This is done this way:
- Clean the surface of the sole using emery cloth.
- Step back from the heel about 5 cm and bend the sole so that the crack can open as much as possible.
- Use a shoemaker's knife to clean the inside of the remnants of factory glue and other dirt, and using acetone or another degreaser, be sure to prepare the crack for applying new glue and remove all possible grease.
- Next, seal the crack: apply quick-drying glue to its walls and press them together.
Important! Is it necessary to cure the glue before gluing the crack, how long should I wait for the glue to dry? This depends on the specific glue you will use, so read the instructions carefully.
- You have sealed the cracks, but you cannot use these shoes yet, otherwise they will come apart again. Therefore it needs to be sewn up. Using a pencil, make zigzag marks straight across the entire crack.
- Directly along the given marks, using a shoe knife or a manual mini-grinder, make cuts approximately 2.5 millimeters deep.
- Now you need to sew the crack with your own hands according to these marks, placing the thread directly into the cuts. Hide the knots from the thread in the same hollows.
Important! Stitching a sole is extremely different from ordinary sewing; it is done using a shoe hook.
- When stitching, make not one stitch, but several at once. This is necessary in order to press the walls of the crack more tightly, and so that the top layer of thread protects the first from possible damage during contact with a rough surface, pebbles, glass, and the like.
Done - the sole that burst is now repaired and the shoes can be used!
One day I went to buy heels for boots at a shoe repair . Since the heels on the shoes were worn out, it was necessary to fill them with new ones. At the shoe shop where I came there was quite a long line. While standing in line, I witnessed a dialogue between the master and an old grandmother.
From a dialogue I involuntarily overheard, I learned that my grandmother had brought the winter boots of her grandson, who lives with her, for repair. The elderly woman narrated one of many family tragedies, as a result of which the grandson lost his living parents, for whom the “green serpent” was more valuable than their own son.
The grandmother said that she had not seen her son and her daughter-in-law for many years, and there was no news from them. Then she sadly said that her pension was not enough to buy a new thing for her grandson and therefore she turned to the workshop. After examining the shoes , the master said that they would not be able to repair the shoes , since they had become unusable and could not be repaired and advised them to throw them away.
The grandmother pleaded with me to somehow repair the shoes so that they would be enough to wear until spring. However, the master retorted that even if he wanted to, he would not be able to repair them. With a sad look, the grandmother put the shoes in a bag and left the shoe workshop. She looked confused and there was sadness in her faded eyes.
Yes, it was a problem for her; her grandson wouldn’t be able to go to school with holes in his shoes , and he was in his senior year. It was already my turn, but I left the line and followed my grandmother. I felt sorry for her and had a desire to help her. After examining the boot , I said that I would try to repair it.
Looking at me with a puzzled look, she asked: “Are you a shoemaker ?” I replied that I was a shoemaker . And mentally I corrected myself, what kind of shoemaker . Without examining the shoe , I put it in my bag. The elderly woman looked at me with gratitude, as if at her savior.
I promised her to repair the shoe and invited her to come to the shoe repair shop in two days. Although I was not a shoemaker , I once had to repair the shoes of my household. I also learned shoemaking skills as a child from my father, who was a jack of all trades.
He sewed the boots himself; the tops were high and protected the knees. the boots was lined with felt or a kind of felt stockings were made, which were inserted into the boots . In the harsh steppe conditions there were no better shoes . And what is noteworthy is that wooden nails were used to fasten the top and sole.
Having not bought what I came to the shoe shop for, I headed home. I promised my grandmother that I would repair the shoe , but can I do it? The boot was truly beyond repair. But as they say, there are no hopeless situations, since “even after being eaten, there are two ways out.” (Of course, it is not advisable to be eaten).
If the sole has come off
Do-it-yourself shoe sole repair in this case can be in two options, depending on the sole (rubber or polyurethane).
Shoes with rubber soles must be cleaned of dirt and degreased. Apply glue to the workpiece and the sole, let it dry a little and press the boot. Pressure testing occurs according to the following scheme: the shoe must be stuffed with newsprint and placed in an inflated football chamber with a nipple. There you need to keep the boot for about 10 hours.
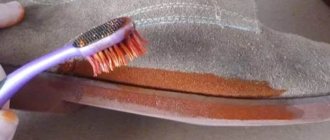
Shoes with polyurethane soles also need to be cleaned and degreased. Remove the top layer of skin using a flat file and degrease again. Cut a small piece of polyurethane from the old sole and spread it over the gluing area with a hot electric soldering iron. After this, press the sole to the top of the shoe and run it with a hot burning tool.
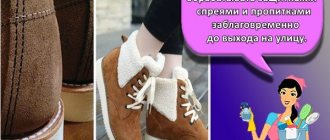
Suede
In case of severe contamination, it is recommended to use a soap solution: add a little liquid soap, shampoo or grated toilet soap to the water. Add ammonia (1 to 5) and stir until foam forms. Wipe the shoes with a sponge soaked in the solution, then remove any remaining soap with a damp cloth, treat with a clean damp cloth, and dry at room temperature. This method can also remove stains and greasy areas. There are various special products for cleaning suede shoes (sprays, foams) that are more effective.
If the shoes have lost their color, you need to use special coloring agents that should be chosen to match the color of the shoes. If you can't decide on a shade, there is a clear dye for suede. All these products can be purchased in specialized stores.
To eliminate scuffs and restore the pile, you should dissolve vinegar in water in a ratio of 1 to 4. Clean the desired areas with this solution, then wipe them with a damp cloth. After drying, treat the shoes with a slightly damp sponge dipped in a weak solution of vinegar (1 teaspoon per liter of water).
To update light suede shoes, you need to prepare a solution of skim milk (1 glass) and soda (1 teaspoon). Then apply the composition to the sponge and wipe the product.
If the top of the shoe, which is adjacent to the sole, is torn
Using a flat-head screwdriver, you need to disconnect the upper from the sole, clean and degrease everything. Prepare a patch: it should be approximately 15 mm larger than the torn area. From the inside, the patch must be cut to nothing with a single-sided sharpening knife (the cut should be about 8 mm thick).
The area on the boot where the patch will be is sanded using a flat file. The patch must be degreased and dried. Then glue the patch to the top of the shoe and dry it. Coat the lower part of the patch and the space between the sole and the shoe with glue, tuck the patch there, dry it and press it.
Use leather filling
Leather filling can be purchased at any shoe store. It can be used to fill even large cracks. The composition of the product usually includes colorless acrylic paints on a water base. They cope well with small and medium-sized creases. Don't expect to be able to completely remove a crack from your shoe. Unfortunately, you can't get rid of it, you can only disguise it.
Yogurt, fruit and other popular foods that you shouldn't eat for breakfast
For walks and comfort: everyday spring looks for all occasions
Salaries of citizens in January decreased by 29% compared to December
Apply the filler to the skin and leave it to dry for half an hour. The exact drying time will depend on the product chosen. You can find out by reading the instructions. I prefer to leave the shoes to dry for 24 hours. During this time, the filler completely hardens. Spare no expense. If the crack is still visible, apply more filler. Each hall must be filled. You can leave the shoes on for 30 minutes and see how they look. If cracks remain, add the product again and leave the shoes to dry. Repeat the procedure until they become less noticeable.
DIY heel repair
To glue the heel onto a rubber heel, one side of it is treated with a rasp, making it rough. The heel is straightened using a rasp. Everything needs to be degreased, the heel and heel should be coated with glue, glued and trimmed.
To change the heel on a leather heel, do the same steps, only you need to additionally pierce the heel with nails (9-10 pieces).
Repair of heels on women's shoes. Wide and not too high heels are repaired in the same way as described above. The heel is pierced with 3-5 nails.
On thin high heels (stiletto heels), the metal and metal-plastic heels are replaced. The old heel needs to be removed and a new one installed on the heel. To do this, there are mounting holes in the heel, and pins on the heels.
Thus, you can easily repair your shoes with your own hands, giving your shoes a second life.
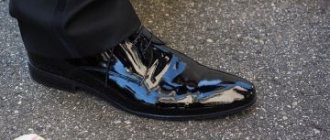
How to repair cracked leather on shoes?
Road dirt, dampness and improper storage - all this greatly wears out even natural leather. The color becomes faded, and cracks and scratches appear along the fold lines. These shoes look untidy. If you don't have time to take your shoes to a repair shop, try solving the problem with the following tools:
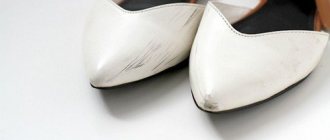
- Transparent nail polish. This method is suitable for gluing large and thin pieces of leather. Apply a little varnish to a cotton swab and apply it to the torn piece on the back side. Gently smooth the skin over the area of the tear and hold for 2-3 minutes. To prevent your finger from sticking, perform the action through a cloth. Upon completion of the procedure, use shoe wax that matches the color.
- Super glue. A shallow crack can be filled with superglue. After drying, all you have to do is paint over the uneven spots and rub the boots with a special polish.
- Acetone. If cracks appear on the shoes in places where there is a natural crease (rise of the toe), use acetone. Moisten a cotton swab with the product, and then use light and slow circular movements to walk along the crack. This action will help smooth the surface of the skin and eliminate minor imperfections.
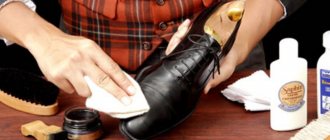
To prevent the leather from deforming and cracking, pay attention to care. After each wear, wipe your shoes with a damp, clean cloth and then apply water-repellent cream. If your shoes are very dirty and you cannot do without a thorough wash, use a brush previously steamed in warm water. You need to dry your shoes naturally, away from direct sunlight.
Reference! Before the existence of special creams, people took care of their shoes using fish oil and castor oil. These oily products protected shoes from moisture and gave the skin a well-groomed shine.