People buy expensive shoes and hope that they will last a long time, at least for three years. A new pair should maintain appearance and functionality, but in reality everything turns out differently. A new pair quickly loses its previous shape, the sole breaks, and sometimes cracks. What is the reason for this phenomenon and what to do in such situations?
A method that includes applying a patch
This method is somewhat different from the past.
The crack is cleaned with sandpaper. The surface must be degreased. Acetone or gasoline is suitable for this. You should prepare a shoe knife. It is used to trim the edges of the surface. The depth of the cut is one millimeter. It is important to step back five millimeters in each direction.
The next step is to measure the depth of the crack and add 1.5 centimeters to the resulting number. If you have an old bicycle tube, you shouldn’t throw it away. You can cut an excellent patch for shoe soles from it. You will get a rectangle that covers the length of the crack. The patch strip is protected with sandpaper. After this, this segment is degreased. The strip is treated on all sides with glue. One side is completely coated with glue, the other is almost completely processed, you only need to leave the edges dry. The indentation will be 4-5 millimeters.
After the work has been done, it is necessary to fold the sole so that the crack becomes visible. The edges should be coated with glue
It is important that the edges of the burst part of the sole do not stick together. The rubber strip must be placed exactly in the crack space
After this, the surface should be fixed with a special quick-adhesive glue. This method is excellent for repairing shoes and boots. You can glue almost any shoes yourself.
What do you need to buy for repair work?
If a person asks what to do when the sole of a shoe bursts, experts advise urgently starting repair work. This defect can be corrected with your own hands without leaving home. To do this you will need to buy:
- Special glue designed for shoes of this type.
- Sandpaper (preferably fine grit).
- Rubber. You can use an old bicycle tube. If you don’t have one, you can use a car one.
- Instead of abs, you can use any heavy object in the house, for example, put a leg from a dining table on a taped-up shoe.
Methods for repairing cracked soles
The option for repairing the sole depends on the shape and material of its manufacture, the depth of the fracture, and the nature of the damage. Several methods are most often used:
- using gluing and subsequent stitching;
- using a piece of rubber from a bicycle inner tube;
- using a soldering iron and nylon;
- using special shoe glue.
Without protector
If the burst sole does not have a tread, it can be repaired at home using the express method, after which the shoes are put on after a few hours. To do this you need:
- Clean the sole with sandpaper.
- Bend it in half so that the crack opens as wide as possible.
- Degrease the repair area with acetone.
- Apply quick-drying glue to the break and connect tightly.
- Using a shoemaker's knife, make shallow slits across the seam for zigzag stitching.
- Sew the sole using a shoe hook, placing the seam and knots in the slot.
With protector
When repairing a sole that has a tread, it is necessary to apply an additional outsole, which experts call “prevention.”
The procedure in this case is as follows:
- Clean and dry the sole.
- To make access to the crack easier, carefully cut off the protector.
- Treat the repair area with acetone.
- Glue the parts of the crack with a quick-drying compound.
- Apply a suture to the fracture.
- Make a pattern for the outsole, choosing a material that has the thickness of the cut tread.
- Degrease the sole and outsole.
- Cover them with glue and wait 15 minutes.
- Apply a second coat and wait 20 minutes.
- Warm up (activate) the glue using a hair dryer.
- Connect the sole and the “prevention” and put it under a press.
How to seal small cracks
If, while caring for your shoes, small cracks are noticed on the sole, it is worth making repairs, although so far they do not cause inconvenience and do not leak. On a corrugated sole, after degreasing, cracks are filled with glue using a small brush or the spout of a dispenser, after which the composition is allowed to dry for 24 hours.
Taping sneakers in the sock
Damage to the toe area of sneakers is quite common. In order to repair sports shoes, perform the following algorithm of actions:
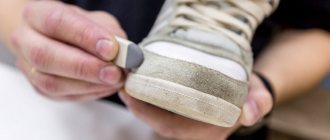
- The damaged area is cleaned, degreased, and treated with sandpaper.
- A patch of different thicknesses is cut out of rubber or polyurethane according to the shape of the sole.
- Apply glue and press with a press. The thicker part is applied to the site of damage, the thinner part to the sole.
Glue selection
When choosing a glue, there are several nuances to consider:
- the material of the sole that burst;
- durability of the proposed connection;
- moisture resistance;
- UV resistance;
- elasticity of hardening glue;
- correspondence of the price to the quality of the composition.
Nairite
Nairit glue for shoe repair is based on rubber resin, synthetic additives, and solvents. Its water-repellent properties are quite high. When working with the composition, two methods are used - cold and hot.
Each of the methods provides reliable fixation and is used depending on how heat-resistant the sole is, which is being repaired.
The glue is produced industrially in small volume tubes or in tin cans. The former are most often used at home, the latter in specialized repair shops.
Polyurethane
The glue is prepared on the basis of polyurethane and is used for repairing shoes in workshops, factories and at home.
The advantages of the composition include:
- waterproof;
- transparency and inconspicuousness of the hardened glue;
- heat resistance;
- durability of fixation.
See also
Causes of sofa creaking and how to fix it, what to do at home
The adhesive is used for rubber and polyurethane soles. It is capable of increasing in volume when applied and reliably bonding materials with a porous structure.
Artificial rubber
Glue based on rubber is called rubber. It has a viscous consistency and is beige, white or yellowish in color. The translucent appearance of the composition is obtained after mixing its two components. Hardening occurs as a result of evaporation of the solvent. Both wet gluing technology and contact gluing under press pressure are used. The compound is moisture resistant, but is inferior in strength to synthetic-based compounds.
Synthetic rubber adhesives create a stronger bond through the vulcanization process.
Prevention
The sole does not have to be restored if the shoes are used carefully. To extend the life of your favorite model, you need to take preventive measures. They are as follows:
- To avoid abrasion of summer models, you need to glue outsoles to their base. For a sedentary lifestyle, stickers 1 millimeter thick are considered the best option. For frequent walking on asphalt, it is better to give preference to two-millimeter rolls.
- It is recommended to install protection with high wear-resistant and thermal insulation characteristics on winter shoes. Such measures will also prevent slipping on a smooth surface in icy conditions.
- To prevent moisture from getting into the seams of demi-season shoes, their soles must be treated with water-repellent aerosols for shoes. A budget option is castor and linseed oil.
In most cases, the soles of shoes crack due to lack of proper care. Regardless of the type of model, all wet products must be dried in a timely manner. In this case, the use of heat sources is not allowed. It is better to let the boots dry on their own at room temperature. Shoes also need to be cleaned regularly to remove dirt and dust. However, it is strictly prohibited to wet the products excessively.
Knowing the reason why the sole of a shoe burst and how to restore it at home, you can solve several problems at once. Firstly, no longer make the mistakes that led to the deformation of the product. Secondly, by carrying out repairs yourself, you can save a lot.
To avoid abrasion, you need to stick on the soles. Install anti-slip protection on winter shoes.
Treat with water-repellent aerosols for shoes Regularly clean from dirt and dust Dry promptly
How to glue the sole at home using improvised means?
After choosing the glue, you can try one of the ways to repair the sole of your shoe if it has burst. To do this, you need to carefully follow the instructions and follow the technology. Otherwise, you will not be able to achieve the result. Follow the algorithm:
Clean your winter shoes from dirt and dry everything thoroughly so that no wet marks remain. Inspect the work surface for integrity. If the leather on the sole is cracked in several places, it is recommended to completely tear it off and glue it back. Also consider the surface texture
This is very important as the procedure will be different for different types. Clean the surface from any remaining old adhesive. Treat with alcohol to degrease the surface. Take something to seal the sole with
Apply to surface according to package directions. The adhesive layer should not exceed a few millimeters. Wait a few minutes for the surface to set. Press the sole down so that there are no untreated areas. Now leave the shoes under high pressure. To prevent it from deforming, place pieces of newspaper inside. You can use clothespins to secure the seam. Do this carefully so as not to damage the leather on your boots.
This is a cold technology for gluing winter shoes. The hot methodology is as follows - you need to heat the adhesive and carefully press the surface of the shoe. After this, you can wear your favorite pair of shoes after a few days.
Which adhesive is not recommended to be used?
The substances listed in the previous section are the best options for gluing shoes yourself. There is also a group of products that are not recommended to be used if cracks have formed on the sole of your shoes. Do not buy these products:
- Super glue. A fairly hard material that roughly fixes and deforms the sole. Repairing the sole with such material is not recommended, as you will completely ruin the shoe.
- Ceiling tile adhesive. Can handle rubber and leather. This will leave traces that will be difficult to remove with improvised means.
- PVA. It is not stable. It is not recommended to seal a crack in your shoes, as it will immediately fall apart.
Recommendations for sole repair
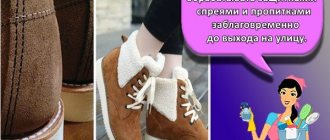
Before starting work, the sole must be cleaned, dried and degreased. For degreasing, use a special solution, gasoline or acetone. After processing, the product is dried again.
Select the load so that the shoes do not become deformed. An L-shaped block with additional weight is ideal. Keep the product under pressure for at least ten hours.
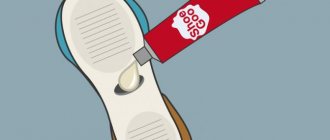
The adhesive is applied up to three mm thick, then left for ten minutes and only then the parts are glued together. Choose only high-quality and proven glue. A suitable option would be classic Moment glue, a product with polyurethane or epoxy sealant. You can also use special rubber shoe glue or shoe glue.
According to experts, polyurethane glue will be the best solution due to its strength and elasticity. It provides a secure fit and can repair any type of shoe. In any case, these are toxic compounds, so ensure safety when working. If the product gets into your nose or eyes, immediately rinse your mucous membranes with running water.
Be careful when working, as the adhesive composition can damage the material of the products, especially if they are suede boots, leather or patent leather shoes. The glue is quite difficult to wash off. Now let's figure out what to do if the soles of your shoes crack.
How to repair shoes if the sole is cracked
There are many options for restoring a damaged product. The simplest solution is to glue a piece of rubber or other suitable material to the crack. But this method is not suitable for all types of shoes.
You can also glue the areas of the cracked sole with special glue. In this way, you can eliminate small cracks that are located near the heel. It is better in the part where there is the least load. The damaged area can also be replaced.
Classic renovation
This method is suitable for soles made of plastic rubber or polyurethane. No special skills or knowledge are needed here. The product must be glued and sewn properly.
Repairs are carried out as follows:
- Pour glue into the crack, which dries quickly. Press well.
- Draw a zigzag on the sole.
- Cut through with a shoe knife.
- Sew the cracks with short stitches along the slits.
- The edge of the nylon thread can be slightly scorched with hot fire.
Partial replacement of the damaged area with a patch on a smooth sole
If cracks appear, for example, on the soles of dress shoes.
Repairs are carried out as follows:
- Pour literally a couple of drops of glue into the crack and hold the sole under pressure for a while so that the glue sets well.
- The area requiring repair must be degreased. Acetone is suitable for leather material.
- The crack is treated with sandpaper.
- Next, the shoes are placed on the material of the future outsole, the shape of the sole is outlined, then the workpiece is cut along the line.
- Process the workpiece and get rid of irregularities.
- Apply glue to the sole in an even layer. In this case, it is recommended to use a spatula so that the product lies evenly (the same operation is carried out with a new heel), then dry the glue.
- Reapply the glue again, and only then glue the patch.
- Use force to press the patch. It is necessary to ensure that the material does not move from its place.
- Press down the shoes with a weight and leave for a day. The glue should harden.
Repair of high tread products
Shoe repair is carried out using the same method as on smooth soles. But instead of dense additional material, a small piece of rubber is used. The thickness of the patch should be less than the tread or at the same height. This method is suitable if the crack is longitudinal or transverse.
Sports shoe repair
Most often, the soles of sneakers and sneakers wear out, as they are more susceptible to mechanical damage. For repairs, the method of gluing two overlays is used.
- 2 patches of different thicknesses are cut out of rubber or polyurethane.
- Shoes and material are pre-degreased. You can use sandpaper.
- The thicker material is glued to the crack, and the thinner material is glued to the entire sole.
- A weight is placed on top of the shoes and left for 24 hours.
The most common and unpleasant reason for people turning to shoe repair shops is torn soles. No one is immune from this problem, but the methods listed will help restore the product at home
The main thing is not to deviate from the instructions and not to forget about precautions. Also, for a new pair to last for several years, proper care must be taken.
Gromova Anna, professional in the shoe business. Owner of a small store and shoe restoration and repair workshop.
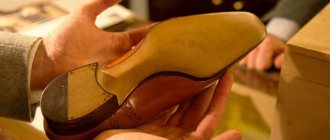
A crack in the sole of a shoe is not such a rare occurrence. This situation is especially unpleasant when the product warranty has already expired. And although it will not be possible to carry out high-quality repairs at home, it is possible to partially restore shoes. Sometimes repaired shoes or boots can be worn for several more months.
Next, we will talk about methods for self-repairing cracked soles.
How to glue the sole of a shoe?
To ensure that the repaired pair of shoes does not fall apart on the first day or, even worse, does not deteriorate completely, you need to choose an adhesive suitable for shoe repair. Below are adhesive compositions that can be safely used:
- “Desmokol”
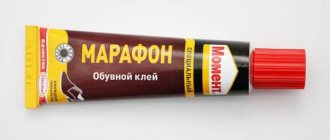
is a transparent adhesive composition with polyurethane, intended for gluing PVC, repairing leather and suede products, including gluing shoe soles. This composition has earned the trust of professionals and is sold in specialized stores. - Moment Marathon glue
is specially designed for repairing shoes. It is water and frost resistant, as well as elastic and resistant to negative environmental influences. Not suitable for gluing a number of materials (styrofoam, polyethylene, polypropylene, plasticized PVC). Consumers love this glue for its ease of use. Within a day, the shoes are ready for use. - Epoxy resin (B7000)
- after drying, the composition turns into a durable, elastic, waterproof layer, which is excellent for shoes that, by their nature, are always in motion. When mending shoes, it produces minimal shrinkage, but may require 1-2 days to dry completely. - “Nairit”
or
“Sapozhnik”
adhesives contain polychloroprene rubber, adhesive enhancers and organic solvents. Designed primarily for shoe repair. These compounds glue the leather upper of shoes well to rubber soles (except for polyurethane), and are also suitable for gluing insoles, linings and other elements. You will be able to wear the repaired product only after three days. - Kenda Farben
and
Bonikol
are special compounds for the footwear industry from European manufacturers. Guarantees reliable adhesion. Suitable for gluing leather and leather substitutes, as well as heels, insoles and cork.
Causes of cracks
The basis of the shoe is its sole. That is why special requirements are placed on it. According to operating conditions, the sole must be durable, sufficiently flexible, comfortable and stable. But despite this, it is often deformed.
There are several reasons why the sole of a shoe breaks.
| Main Factors | Negative influence |
| Poor quality materials | Very often, shoe soles are made from low-cost raw materials. These are PVC, ethylene vinyl acetate and polyurethane. Such materials are elastic and weightless, but they have low performance qualities. |
| Mechanical damage | Domestic roads are littered with sharp objects. When you step on them, small cracks appear in the sole. With further use of the shoe, minor deformations grow, and a gap forms between the insole and the wedge. |
| Climatic conditions | Temperatures below 20 degrees, rain, snow, and dampness negatively affect the properties of the sole material. Therefore, it wears out faster, which subsequently leads to cracks. |
| Damage to the instep support | If demi-season or summer shoes are chosen incorrectly, the heel becomes loose. This phenomenon leads to breakage of the instep support. When it is damaged, cracks first form on the sole, and then the product breaks. |
The cause of deformation of the base of the shoe can be loads. For example, some people have the habit of squatting. Frequent intense bending may cause the sole to crack.
Climatic conditions
Mechanical damage
Poor quality of materials Damage to the instep support
What do you need to repair soles at home?
How to properly seal the sole with your own hands at home without the help of a specialist, as well as what you need to have on hand during the repair process, you will learn from this section of the article. Recommendations regarding the order of work to eliminate gaps of varying complexity will also be given here.
It is important to remember that all work should be done in a room with good ventilation and away from heat sources. You also need to take into account that the process of repairing soles at home is a very dirty job, and it also requires concentration and enough time. Please remember that you only need to glue a clean sole.
To do this, the entire shoe, and especially the sole, should be washed and dried, and only then can you begin to repair it
It should be remembered that you only need to glue a clean sole. To do this, the entire shoe, and especially the sole, should be washed and dried, and only then begin to repair it.
To fix a problem with a sole, a home handyman will definitely need patience and:
- shoe knife;
- sandpaper from “three” to “zero”;
- gasoline or any other degreasing compound;
- special glue;
- awl;
- matches or lighter;
- hair dryer or heat source;
- a sole of the required size, a piece of rubber or hard leather for the sole to replace the cut out (damaged) area;
- pencil or felt-tip pen
- shoe hook;
- nylon threads.
Also, every home craftsman will need a heavy object that will act as a load, which will speed up the gluing time and improve the quality of the work.
In some cases, you may need a mini-grinder or a regular angle grinder.
Be responsible when choosing glue! After all, the final result of the work will depend on its quality. Choose shoe glue on sale in hardware stores, and be sure to read the information about whether this substance is suitable for gluing the material from which the sole is made. You can also use a generic product.
If all of the above devices and materials are available, then you can begin to repair the burst sole. You should not hope that a DIY repair will cost less than fixing the problem in a workshop, because all the necessary tools and substances will need to be purchased at retail prices.
Materials and tools to fix the problem
According to safety regulations, shoe sole repairs must be carried out in a prepared room. To prevent ignition of the material used, as well as to avoid the toxic effect of the glue, the work area should be well ventilated and away from heat sources.
To quickly patch a cracked sole, you will need to prepare the following materials and tools in advance:
- sanding paper from 0 to 3;
- degreasing agent;
- shoe knife;
- awl;
- pencil;
- hair dryer;
- special threads;
- metal hook;
- adhesive;
- matches;
- raw materials for patching;
- heavy item to load.
The final result of the work directly depends on the type of working material. For patching the sole, it is better to choose a piece of hard leather. Prefer gasoline as a degreaser. And the glue must be selected so that it matches the type of material from which the base of the product is made.
Getting rid of the hole on your own
How to seal the soles of winter or autumn shoes? As a means at hand, glue “Moment”, epoxy sealant “Crazy Hands”, and a product with polyurethane “Desmokol” are suitable. Each glue comes with instructions that you need to follow when working.
It should also be borne in mind that these products are toxic. If it gets on mucous membranes, it should be washed off immediately with a stream of running water.
Work algorithm:
- Since winter or autumn shoes in most cases have soles of a honeycomb structure, you will first have to deal with the honeycomb. The rubber that covers them will have to be removed to such an area to remove all the accumulated dirt from the holes. Sometimes access to the honeycombs is from the insole, which has to be completely removed when cleaning the holes;
- The honeycombs need to be filled with small scraps of micropores and filled with silicone sealant, sealing well;
- Before sealing a broken sole, you will need to wait for the sealant to dry and harden;
- Next, cut out a piece of rubber or micropore that fits into the hole - if it is voluminous, or press small holes with a mixture of micropore sawdust and sealant;
- The sole is cut out of thin rubber according to the size of the shoe, and glued using an already prepared adhesive over the entire area of the shoe;
- Place shoes or boots under the press.
How long it takes for the glue to dry completely is indicated in the instructions.
How to seal a hole in the sole of a summer shoe? You should follow the same algorithm, only there will be less hassle.
If the sandals are adhesive, then it is better to purchase a rubber sole from a workshop and glue it on your own using rubber glue. This can be done when the shoes have a solid base. Sometimes soles are attached to light summer shoes only along the contour. In this case, the sandals will have to be thrown away.
Sports shoe repair
How to seal the sole of your sneakers when they have a hole because you stepped on something sharp? If the training process takes place in the gym, you won’t have to give up your favorite pair of sneakers.
Of the domestic adhesives, it is best to use epoxy, designed specifically for shoes. Its cost is low.
The edges of the hole in the sole must be thoroughly cleaned and degreased with a solvent. When everything is dry, apply properly diluted epoxy.
If the hole is large, it is necessary to put a fiberglass mesh into it - it is called a serpyanka. While the glue dries, it is better to seal the outside of the hole with masking tape so that the sole remains level.
The ideal adhesive option is the American Seamgrip glue. They use it to seal rubber boats. If you manage to purchase it, you won’t have to part with your favorite pair of sneakers for long. This is the only glue that completely solves the problem than gluing a rubber or polyurethane sole.
But if it is possible to purchase glue of this brand, then it is unlikely that you will not have money to buy shoes. Its cost is quite high.
Imported epoxy mixtures like Done Deal are better than domestic adhesives, but the durability of sneakers cannot be promised when using them.
How to repair a torn skate sole? It all depends on the material from which the skate sole is made and the location of the hole.
Cheap skates are secured practically to cardboard, and any epoxy glue will help to cope with the problem if the hole in the sole is not where the blades are secured. In this case, the shoes will have to be thrown away. Torque will reduce all efforts to zero.
You will have to do the same with expensive skates - even the most expensive glue will not be able to ensure strong fastening of the blades after repair.
You can still try to seal holes on the side of the boot or on the toe yourself, but a deformed boot does not guarantee stability. Home repair of sports shoes should only be carried out in case of minor damage.
Expensive skates with leather soles are sealed with special shoe glue for repairing leather products. If the area to be sealed is thoroughly degreased, the hole is filled with a mixture of leather scraps, and pressed in, then the integrity of the sole will be restored.
When repairing expensive sports shoes, it makes sense to purchase expensive glue. High-quality sports shoes cost much more than a package of adhesive.
There is no need to think about how to seal the sole of a shoe that is cracked across. It is impossible to cope with repairs at home. And you shouldn’t trust private shoemakers who promise to solve the problem by installing preventative measures. After such repairs, you only have time to get to the door of the shoe shop. When repairing, a complete replacement of the “spare part” is required.
Review of the best brands
Today, the choice of glue for shoe repair is very large. There are both domestic and foreign brands, distinguished by high technical characteristics. Several of them are among the most famous.
"Moment Marathon"
This type of glue is designed specifically for shoe repair. It is resistant to moisture, low temperatures, and aggressive environmental influences. “Moment Marathon” has a gel consistency, so it does not spread. The tube is equipped with a thin spout, making it easy and simple to apply. After 24 hours, the shoes are worn. The composition is not recommended for gluing products made of polyvinyl chloride and polypropylene. It is quite suitable for repairing soles made of leather, cork, felt and other materials.
The advantages of “Moment” include:
- efficiency;
- economical consumption;
- Possibility of purchase in packaging of different sizes.
"Nairit"
Many experts recommend Nairit glue for shoe repair. It is suitable for different materials - leather, rubber, wood, textiles, leatherette. When using glue, a strong, moisture-resistant seam is formed, characterized by elasticity. Hot application technology involves using shoes after 5 hours, cold application requires waiting for 2 days after repair.
When using Nairit, difficulty can be caused by the increased viscosity of the composition, which can be reduced with gasoline or acetone.
"Eva"
Eva glue has been sold on the domestic market for more than 10 years and has proven itself well during this time. It is resistant to water, retains its properties at low and high temperatures, leaves no marks after use, and is transparent. The seam formed by "Eva" is strong and durable. The bottle has a dispenser, thanks to which consumption is economical. The manufacturer warns that EVA is not intended for gluing products made of polyurethane or vinyl.
See also
Rules and methods for restoring artificial stone countertops with your own hands
Kenda Farben
The glue is universal and is capable of joining natural and artificial leather, textiles, polymer surfaces, polyurethane, and rubber. Hardening and hardening occurs quickly. The result is a strong seam. Use repaired shoes no earlier than after two days.
Among the advantages of Kenda Farben glue:
- Possibility of use at home;
- heat resistance of the mixture;
- no unpleasant odor.
"Contact"
Special shoe glue “Contact” is created on the basis of synthetic elastomers. It is used for polystyrene, leather, rubber, polyvinyl chloride. Not intended for fixing styrofoam or polyethylene. Contact glue has the following properties:
- high strength;
- elasticity;
- wear resistance;
- optimal fluidity.
To maximize the effect, you should use a press. After repair by Contact, the product is used after 24 hours.
UHU Schuh & Leder
Glue is most often used for shoes. Once applied to the surface, it dries quickly. The advantages of the composition include:
- resistance to moisture, alcohol, acid and alkaline solutions;
- when wearing shoes, the seam does not lose elasticity, does not dry out or crack;
- does not leave stains after use;
- repaired shoes can be used in the temperature range from -30 ⁰С to +100 ⁰С.
Among the disadvantages of UHU Schuh & Leder glue, users note an unpleasant, pungent odor and an inconvenient tube.
Gluing the soles at home?
To glue the sole on yourself, you need to follow simple instructions:
- Thoroughly clean the damaged boot and dry it completely.
- Carefully inspect the sole; if it comes off in several places, it is better to tear it off completely and re-glue it. In addition, some shoes have honeycomb soles, which require special care.
- Using a spatula, clean the surface of old glue and degrease (acetone or alcohol).
- Apply sole glue to both surfaces according to the instructions. Most often we are talking about a thin layer of glue - no more than 3 mm.
- Wait a few minutes and press the sole firmly against the shoe so that there are no gaps between them.
- Secure the boot in this position for at least 10 hours. You can put a weight on top, having first tightly stuffed the boot with paper or newspapers so that it does not lose its shape. The second option is to fasten the seam with clothespins, just be careful not to scratch the skin.
The described method is called cold. The hot method differs only in that the applied composition must be left until completely dry (about half an hour), and then heated with a hairdryer and pressed firmly onto the surface for 20 seconds. You can wear repaired shoes after two days.
Video instruction:
Combination top repair
On sneakers with a combined upper made of synthetic material with foam padding or natural and artificial suede, the fabric most often damaged is in the toe area, where the shoe comes into contact with the toes. On the outside, this area can be protected by a rubber insert around which there is a mesh, which is typical for running models of sneakers.
If there is minor damage to the front of the shoe, a patch can be sewn on. If there are large holes, you need to prop up the seams, adjust the size and shape of a piece of durable nylon fabric and sew it in place.
Methods for sealing summer and winter shoes
Spring and autumn, demi-season and winter shoes are often characterized by a honeycomb or lattice sole design. If the sole of such products bursts, as well as with prolonged wear, it gradually wears out. Voids form inside and the heel may fall through.
To restore such products, you must first remove the rubber that covers these honeycombs. To do this, tear off the insole and thoroughly clean each hole of dirt, debris, cardboard and glue residues. Then the empty honeycombs are filled with small micropore scraps and filled with silicone sealant.
Restoration continues once the sealant has dried and hardened. Prepare new insoles, soak them with sealant or glue, glue them to the sole of the shoe and press with a weight for the time specified in the instructions for the adhesive.
For summer shoes, sneakers, sneakers and other light shoes, you can buy a separate thin rubber sole and glue the products with rubber glue. This method is suitable if the products have flat soles. When gluing rubber to leather shoes, first make a 45-degree edge.
To ensure that the rubber sticks firmly and permanently to the polyurethane or nylon base of the shoe, first cut a template from cotton fabric to size and weld it to the base using a hot iron. Then glue on the new sole.
After repairs, it is important to monitor the shoes and care for the pair. Wash and dry items regularly
Which shoe polish is better to choose, see here.