Sooner or later, shoes begin to leak as the sole bursts or cracks. If you want the pair to last for a long time, it is better to take the products to a workshop.
Home methods will help repair boots only for a short period of time. But if you want to repair the products yourself, we offer methods on how to seal the soles of shoes at home.
How to properly seal a broken sole
A cracked sole is a common reason for contacting a shoe repair specialist.
Repairs should be carried out in a room with good ventilation, away from heat sources. Before gluing, you need to wash your shoes and dry them.
Materials that will be needed for the work:
- shoe knife;
- sandpaper;
- surface degreasing composition;
- glue;
- matches;
- source that gives off heat;
- felt-tip pen;
- a piece of rubber (to replace the damaged area);
- boot hook;
- nylon threads (for strength);
- heavy object (to improve the quality of work).
Sequence of actions if the sole bursts:
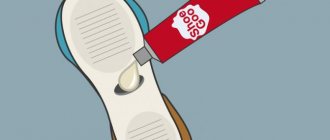
- Add glue to the crack itself.
- Apply a zigzag pattern with glue to the crack.
- Make slits with a knife along the drawn lines.
- Sew the sole along the marked holes using an awl and a hook.
- Singe the edges of the thread with a match.
The method has a number of disadvantages:
- difficult to implement;
- the sole can allow water to pass through;
- The thread will fray over time.
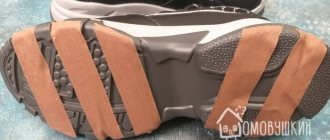
Repairing high-tread shoes has a number of differences.
Description of the process step by step:
- Cut a rubber patch.
- Degrease the problem area.
- Cut off the thorns. The required distance is 1.5 cm from the fracture site. The procedure is performed with a shoemaker's knife.
- Sand the problem area.
- Apply adhesive to the workpiece and sole.
- Fix the hole.
Method 1
To repair a broken sole, prepare:
- shoe knife;
- sandpaper;
- a degreaser such as acetone;
- instant glue that sets quickly;
- hook;
- threads
Repair technology:
- Sand the surface of the sole with sandpaper.
- Bend the sole until the crack opens. From there you will need to remove all dirt and remnants of old factory glue, using a shoe knife.
- Degrease the broken area with acetone or gasoline, apply instant glue and press the walls together. Note: shoemakers recommend using Desmakol or Nairit glue. To repair the sole, you can also use Moment rubber glue and Crazy Hands epoxy sealant.
- The crack was sealed, but the repair was not completed. In order for the shoes to be worn, the broken sole must also be stitched. Using a pencil, draw zigzag lines across the entire crack. Using a hand grinder or shoemaker's knife, make shallow furrows, about 2.5 mm, along the entire marking. Now, using a hook, sew the break, placing the stitches in the grooves made. It is advisable to perform several rows of stitches: this will be more reliable, and the top layer will protect the lower threads from abrasion.
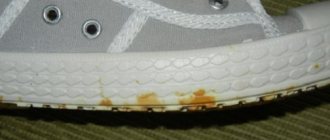
How to seal a sole with voids
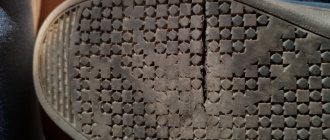
Sneakers with honeycomb-shaped soles are often found. In such shoes, voids may appear.
Repair algorithm:
- Bend the insole.
- Fill the resulting voids with scraps of elastic.
- Secure the filler with sealant.
- Degrease the surface after the sealant has hardened.
- Glue the insole in its original place.
Read more ► Tips on how to clean light (white) and dark suede sneakers: special products and brushes
Sneaker heel repair
If the tread is thoroughly worn out, it is carefully torn off from the surface of the sole, cutting it precisely in those places where it is impossible to tear it off. You can moisten these areas with solvent so that the protector comes off.
Transfer the outline of your sole onto cardboard, draw in the erased edges, and then cut out the pattern. You can make a new protector from any rubber mat that can be found in any hardware stores.
Important! During gluing, thoroughly clean the surfaces to be joined, but otherwise, the gluing technology itself is the same.
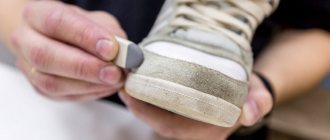
How to tape sneakers to the toe
How to seal sneakers if there are holes in the toe:
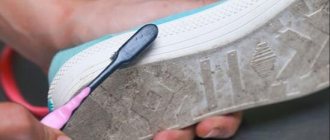
- Sand the break area with sandpaper.
- Degrease the surface using a special product.
- Cut out the patch.
- Sand the edges of the workpiece with sandpaper.
- Apply adhesive to the surface of the sneaker and patch.
- Press the workpiece against the shoe for 20 seconds (maximum time – 1 minute).
- Leave the product under pressure for 24 hours.
The method allows you to extend the service life of sports shoes for a long period.
Method 4
Thick, broken soles on winter shoes can be repaired as follows:
- Clean and dry your shoes thoroughly. Clean and degrease the crack itself.
- Apply a layer of Desmokol glue to the inside of the fracture and leave the product for 10 minutes.
- Coat the crack again, since usually the material from which the sole is made is porous and easily absorbs various substances. Wait 10 minutes, during which time a glossy film will form on the surface.
- Warm up the glue using a hair dryer and press firmly on the sides to be glued.
Note: when using Desmokol glue, the quality of gluing depends on the pressure on the surface.
How to fix a hole in the sole of a shoe
Instructions for fixing a hole in the sole of a boot:
- Remove the insole from the shoe.
- Press the hole from the inside using a small piece of leather.
- Squeeze glue into the hole. The resulting hole should be completely filled.
- It is necessary to hold the piece of leather until the glue hardens. It is important to firmly squeeze the gluing area. Approximate time – 10-15 minutes.
- Turn the boot over to distribute the glue evenly.
- Wait for the adhesive to completely harden.
- Cut off the layer of leather inside the shoe.
- Place the insole in its original place.
Important point: when working with glue, you should use gloves and a respirator.
You can repair damage to the sole of a shoe using a soldering iron.
To do this you need:
- Wash the boot thoroughly.
- Degrease the surface.
- Run a hot soldering iron inside the crack. As a result, bubbles will appear on the top of the material.
- Fill the hole with melted nylon.
The method with a piece of leather is suitable for a hole of several millimeters:
- Clean the sole from dirt.
- Treat the surface with acetone.
- Sand the sole using sandpaper.
- Cut a patch from leather.
- Glue the workpiece to the damaged area.
- Wait several hours: the glue must dry completely.
The advantages of the method are speed, simplicity, and low cost. Disadvantage : fragility (the leather will quickly deteriorate).
Recovery methods
There are several ways to seal a sole if there is a crack in the bend. Each method involves preliminary work. To effectively eliminate defects in shoes, it is recommended to clean the base from dirt, wash it with a degreaser and dry it thoroughly with a hairdryer. Further, the technological process depends on the type of model and the complexity of its deformation.
Installing a patch
The method of repairing a burst sole using a patch is not as simple as it might seem at first glance. However, using it you can achieve the best results. The work begins by carefully separating the top of the shoe from the sole using a screwdriver. Such an event will simplify further actions and also contribute to high-quality fixation of the glue.
It is recommended to glue a cracked shoe in this order:
- the shoe material is disconnected from the granite by 1 cm;
- prepare a patch - its length should correspond to the size of the hole;
- the internal through void of the shoe and the flap of the patch are coated with glue;
- half of the patch is inserted between the material and the granite;
- to quickly fasten parts together, dry the joint with a hairdryer;
- Using acetone, clean the inside of the sole;
- then it and the second part of the patch are coated with glue.
The shoes are left in this position for 12 hours. After this time, the parts of the product with glue are dried with a hairdryer. Next, with careful but quick movements, glue the second part of the patch and the inner surface of the sole. At the end of the work, the insole is connected to the base of the shoe using rapid. This option is rational to use if the soles of summer and demi-season shoes are cracked.
Gluing the area with special glue
This restoration method is used for smooth soles made of polyurethane or elastic rubber. Restoring the operational characteristics of products depends on certain knowledge and skill in carrying out work. In addition to gluing the cracks, they will also have to be sewn up with nylon threads.
The repair procedure consists of the following steps:
- a layer of quickly hardening glue is applied to the crack in the sole;
- with strong pressure, glue the edges of the hole;
- draw a zigzag along the contour of the crack with a pencil;
- Slots are made along the line of the drawing with a shoemaker's knife;
- Using an awl and a hook, the sole is sewn together using small stitches along the cut holes;
- The edges of the nylon thread are first scorched with fire and then attached to the welt.
This repair option allows you to wear shoes immediately after their restoration. However, it is worth considering that the bonded surface will partially allow moisture to pass through.
Partial replacement of the damaged area
If the sole of a model without a heel is cracked, it can be patched by partially replacing the damaged area. To do this, a number of actions are carried out:
- a small amount of glue is poured into the cavity of the crack;
- for maximum bonding, the deformed edges of the sole are compressed together;
- the section requiring repair is degreased with the selected product;
- The crack site is first sanded with zero sandpaper, and then with troika;
- shoes are placed on the outsole material, the outline is outlined with a pencil;
- use a knife to cut out a blank for a partial replacement of the sole;
- the outsole material in the places where the glue is cut and applied is treated with sandpaper;
- the outer part of the sole with the outsole is lubricated with an adhesive;
- the glue is dried with a hairdryer and reapplied to the repair parts;
- a heel is applied to the sole;
- The products are placed under a load until the glue dries completely.
Regardless of whether the sole of the second product of the pair bursts or not, similar measures are taken with it. Otherwise, the shoes will have different heights, which will cause inconvenience when wearing them.
Express sole repair
This sole repair option involves patching cracks with rubber or nylon without subsequent stitching. Therefore, it is relevant for waterproof boots, boots and winter shoes. Partial replacement of the damaged area of the sole using rubber is carried out in the following way:
- The edges of the cracks are treated with sanding paper.
- The holes are degreased with a special product.
- A piece of rubber is cut out of a bicycle inner tube. Its size should be twice the depth of the slot.
- The rubber strip is first treated with sandpaper and then degreased.
- The sole of the shoe is bent so that the crack widens as much as possible.
- The sections of the resulting hole and the strip of rubber are lubricated with glue.
- The rubber piece is inserted into the groove of the crack.
After the procedures are completed, the boot is placed under pressure for 24 hours. After this, it is used for its intended purpose.
The stages of repairs for partial replacement of a section of the sole of winter shoes will be slightly different:
- A heated soldering iron is applied to the edges of the crack. At high temperatures, the rubber will begin to melt and fill the recess of the sole.
- A piece of nylon thread is placed into the molten damage.
- When using a soldering iron, the nylon begins to melt.
The repair operation is continued until the synthetic polyamide fiber reaches the edges of the base of the winter shoes.
Which shoe glue is best?
Which shoe glue is better
Qualities that a good glue should have:
- strong bonding of surfaces;
- resistance to water and frost;
- long service life after repairs;
- possibility of gluing surfaces of different thicknesses;
- no trace after work;
- heat resistance;
- elasticity of the seams: a condition necessary for free bending of the leg when moving;
- maintaining the original quality of shoes after using the adhesive.
Read more ► How to soften your shoes so that they don’t cause calluses on the back; you don’t want to throw your shoes away?
Initially, you need to define the purchase task:
| Parameter | Possible options |
| Type of proposed repair |
|
| |
| Life time |
|
On the glue packaging you can find all the necessary information that will help you decide on the choice of one or another composition.
What you need to pay attention to:
- types of work performed;
- a list of materials for which the substance can be used;
- an inscription indicating that the composition is suitable for shoes (a product without this inscription may damage the surface);
- confirmation that the glue is resistant to temperature and moisture.
The cost of the glue is affected by the popularity of the brand and the volume of the bottle. If you plan to use the adhesive once, a small amount of the product will do.
The choice of composition can be considered successful if:
- after using it, the seam remained flexible;
- shoes were worn for several seasons after repair;
- the boots have retained their original appearance.
Types of glue are presented in the table:
| Variety | Description |
| Nairite | Suitable materials:
Advantages: resistance to low temperatures, quick gluing |
| Artificial rubber | The product is used for minor repairs. Disadvantage – poor strength when temperature changes |
| Polyurethane | The level of adhesion is high, it is important to apply the composition carefully because it is difficult to remove |
Most popular brands:
| Name | Description |
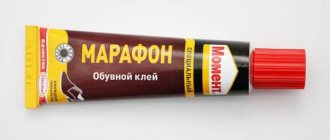
| Moment Marathon | Advantages:
|
| Nairit | The seam is flexible, resistant to water and heat, durable. The main advantage is the absence of harmful compounds in the composition.Repair methods:
|
| Eva | Suitable for any shoe repair.Advantages of the composition:
|
| Kenda Farben | Requirements for work:
|
| Contact | High quality product, significant savings |
| UHU "Schuh & Leder" | Distinctive features of the glue:
|
For the repair to be successful, you need to know the general rules for working with shoe glue:
- Proper surface preparation (cleaning off dirt, degreasing with acetone, wiping with a dry cloth).
- Applying the adhesive composition in a thin layer (2-3 mm).
- Mandatory fixation of glued parts.
- The minimum drying time is 3 hours.
- Shoe repairs are carried out in a well-ventilated area.
Important! You should remember the fire safety rules: glue is a flammable substance.
What should I use to glue the sole?
If you do not want to ruin your shoes, it is recommended to select a special adhesive. Usually the packaging contains a corresponding mark. You can choose one of the following options:
- "Moment Marathon". The substance is intended specifically to repair broken soles. It is characterized by high resistance to humidity and other adverse weather conditions. Can be used in hot or severe frost. For some types of manufacturing materials, use is not recommended. This list is on the packaging, so please read it carefully before purchasing. Quite easy to use. You can wear the boots within 24 hours after gluing them.
- "Desmokol." Used for shoe repair. Helps against burst soles. More suitable for synthetic materials and suede. Sold only in specialized stores. Used in practice by professional workers.
- "Shoemaker" or "Nairit". The composition uses natural materials that provide high adhesive properties. Makes it possible to easily glue a broken shoe sole. Can be used for gluing the inside of boots, as well as small cracks. It is recommended to leave the work for several days to dry completely. Otherwise, rapid re-breakage is possible.
- Epoxy resin. Is a powerful adhesive. It has a high density, which is suitable for boots that are actively used every day in aggressive conditions. It will take several days for the damp surface to dry completely. After this, the shoes can be worn at your usual pace.
- Bonikol or Kenda Farben. Industrial imported products that are used in professional crafts. Suitable for problem areas, gluing heels, soles, socks, insoles. One of the best options for how to seal shoe soles at home.
Caution must be exercised when using the materials listed. Keep products away from open flames as they are explosive. It is also advisable to keep children away from the composition due to its high toxicity.
Shoe upper repair
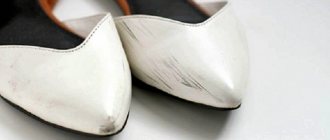
When repairing a sneaker upper, a lot depends directly on its material. If the upper is made of natural or artificial leather or suede, then they crack at the bend or simply wear out.
Glue or sew patches made of a much thinner and more elastic material than the top, for example suede or artificial leather, onto cracked and burst areas.
Important! But it’s better not to allow cracks to form. To do this, lubricate the natural leather with shoe polish, clean the suede with a dry, stiff brush, as well as a school eraser, trying to lift the pile.
In order to clean natural leather and suede from dirt, it is better to use a slightly damp cloth and under no circumstances wash them with running water. By the way, try not to wear shoes that are made of artificial leather in sub-zero temperatures.
How to properly care for rubber boots
If you choose the right glue and carry out the procedure carefully, you will be satisfied with the repair. And in order for your boots to last longer, you need to organize proper care for rubber shoes and repaired products. After use, thoroughly clean and wash your boots in running water.
We offer a few simple rules for the care and use of rubber shoes:
- Wipe the outside of the rubber surface with a clean cloth. For very dirty shoes, first rinse in water and then wipe dry;
- Colored boots are cleaned with Vaseline. It will retain color and shine, and the boots will not burst or become cracked;
- Be sure to use shoe insoles, preferably warm ones. Wash insoles every two to three months;
- Do not wear rubber boots in hot sunny weather, as the rubber deteriorates and fades;
- Periodically lubricate the surface of the products with oil varnish with rubber glue or glycerin. This will keep the boots shiny;
- Before long-term storage, be sure to lubricate your shoes with glycerin. Then wrap the items in newspaper or paper and place them in a cool, dry place;
- You can remove dark spots and streaks from rubber using a regular school eraser. It should be soft and clean;
- If your foot does not fit into the narrow top of the boot, lower the elastic stocking inside and put on the shoes. Then the leg will fit in without any problems, and the stocking can then be easily pulled out.
To keep your shoes shiny and attractive in appearance longer, lubricate the surface with oil varnish and rubber glue or wipe with a damp cloth containing glycerin. By the way, glycerin is an excellent product for caring for leather items. It will help smooth out a genuine leather jacket and give the product a presentable appearance. Read more about how to care for a leather jacket here.