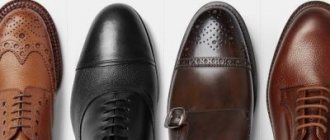
What is this text about? In this text we will answer the following questions: how to restore yellowed plastic how to repair a torn boot how to repair leather boots How to remove scratches and cracks on patent leather shoes
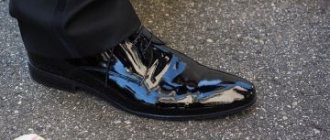
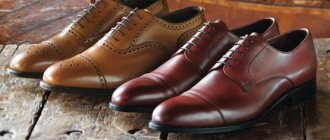
Almost every modern person has a patent leather pair of shoes or boots in their wardrobe. Such products look elegant and stylish. But over time, due to various reasons, the surface begins to crack and looks unsightly. However, there are effective ways to remove scratches from patent leather shoes yourself. They will help restore your favorite things to a well-groomed and attractive appearance.
How to repair cracked leather on shoes?
Road dirt, dampness and improper storage - all this greatly wears out even natural leather. The color becomes faded, and cracks and scratches appear along the fold lines. These shoes look untidy. If you don't have time to take your shoes to a repair shop, try solving the problem with the following tools:
- Transparent nail polish. This method is suitable for gluing large and thin pieces of leather. Apply a little varnish to a cotton swab and apply it to the torn piece on the back side. Gently smooth the skin over the area of the tear and hold for 2-3 minutes. To prevent your finger from sticking, perform the action through a cloth. Upon completion of the procedure, use shoe wax that matches the color.
- Super glue. A shallow crack can be filled with superglue. After drying, all you have to do is paint over the uneven spots and rub the boots with a special polish.
- Acetone. If cracks appear on the shoes in places where there is a natural crease (rise of the toe), use acetone. Moisten a cotton swab with the product, and then use light and slow circular movements to walk along the crack. This action will help smooth the surface of the skin and eliminate minor imperfections.
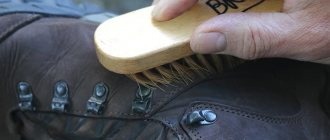
To prevent the leather from deforming and cracking, pay attention to care. After each wear, wipe your shoes with a damp, clean cloth and then apply water-repellent cream. If your shoes are very dirty and you cannot do without a thorough wash, use a brush previously steamed in warm water. You need to dry your shoes naturally, away from direct sunlight.
Reference! Before the existence of special creams, people took care of their shoes using fish oil and castor oil. These oily products protected shoes from moisture and gave the skin a well-groomed shine.
Carefully remove all dirt
Take another cloth soaked in warm water and try to remove all the dirt from the surface of the shoe. Pay attention to creases and cracks, this is where it accumulates the most.
But don't wet the cloth too much. Water should not flow down the surface of the shoe. This can negatively affect the condition of the skin. When the dirt is washed off, take a special shoe cleaner. Apply it to both shoes. It is best to use saddle soap. It contains oils and beeswax that nourish the skin and make it softer. It also helps prevent new cracks from appearing. Rub soap into your skin until it is completely clean. You can replace it with other cleaning products, but also avoid those that contain alkali. It may damage natural leather.
Repairing boots at home
Despite the abundance of different workshops, many people prefer to repair shoes themselves. This saves not only money, but also time, because you don’t have to wait in line. Let's consider professional methods of “resuscitation” of shoes, which can be applied at home.
Using Liquid Skin
Liquid leather is a polymer mixture based on rubber resin, alcohol and water that fills the “voids” on the surface of the shoe, creating a new, elastic material. A repaired product takes on the appearance and properties of a new one.
The product visually resembles gouache, packaged in metal tubes or plastic “washers”. Unlike the usual shoe polish, liquid leather is intended specifically for repair, and not for daily care. The operating rules are as follows:
- Choose a color. Modern ones have a fairly wide color palette, but if your boots are a rare color, you can try mixing several shades.
- Clean your shoes. Remove all dirt and degrease the surface of the shoes. This step is necessary for better and better adhesion of the composition to the skin.
- Protect your hands. “Liquid skin” is a very sticky and viscous substance that easily settles on the palms at the slightest contact. Be sure to wear disposable medical or household gloves. If contact with skin cannot be avoided, immediately wash your hands with soap.
Instructions may vary depending on the manufacturer and the specific product, but the main points are the same in most cases.
- Scuffs . Cover problem areas with a thin layer of “liquid skin” and smooth with a piece of cloth or a dry sponge. Leave until completely dry. Repeat if necessary.
- Cracks . Use your fingers to connect the edges of the crack and apply the compound with a brush. Level, and without waiting for complete drying, repeat the procedure.
Important! Remember that “liquid skin” dries out very quickly, so make sure that the container with the product is tightly closed. Two to three hours is enough for the tube to dry completely.
Restoring leatherette after reagents
In winter, roads are sprinkled with special anti-icing agents. These chemicals have the most detrimental effect on the condition of shoes, especially if they are made of leatherette. Even new boots can take on a worn and worn look. During this period, special attention should be paid to preventive measures: daily cleaning, treatment with water-repellent compounds and drying. If you cannot avoid damage to your shoes, adhere to the following rules:
- Try to keep the original drawing . A small damaged area can simply be painted over with a thin brush. If we are talking about treating a large area, use a dry sponge - it better imitates the roughness of leatherette.
- Apply “liquid leather” in two stages: the first layer will fill the voids, and the second will level the surface of the product and create a water-repellent film.
- Don't neglect protection . If you need to use an aerosol pigment, wear a respirator or protective mask. You can wear plastic gloves on your hands.
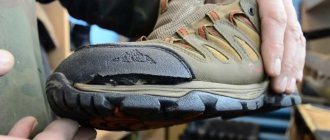
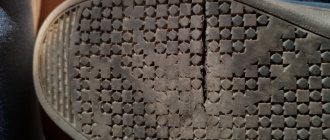
Sole repair
Cracked soles are a common occurrence and, although it is no longer possible to properly restore shoes at home, it is still possible to extend their life for several more months. To do this, use one of the following methods:
Sizing
You will need:
- sandpaper;
- open the knife;
- degreaser;
- glue "moment"
Step-by-step instruction:
- Bend the shoe, exposing the crack. Using a knife, scrape off all the dirt and remnants of factory glue.
- Degrease the crease area - acetone or gasoline are suitable for this purpose.
- Apply instant glue to the walls of the sole and press them together. Fix for 3-5 minutes.
Note! To repair soles, professional shoemakers use Desmakol and Nairit glues. In the absence of such, it is permissible to use “Moment”.
Patch from a bicycle tube
You will need:
- shoe knife;
- sandpaper;
- rubber glue;
- piece of bicycle tube;
- degreasing agent (gasoline or acetone).
Step-by-step instruction:
- Clean and degrease the surface of the sole.
- Trim 5mm along each torn edge.
- Measure the depth of the break in the sole and add 15 mm to this measure - this is exactly the width you need to cut a strip from a bicycle inner tube.
- Degrease the cut strip and apply rubber glue to it.
- Bend the sole so as to completely open the crack, and holding it in this position, coat it with glue.
- Bend the prepared strip from the chamber in half, insert it into the crack and straighten the sole to its previous position.
- Press down the edges of the strip protruding from the crack and place under a press for about a day.
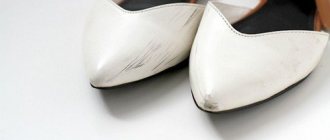
Removing scratches from shoes
It is better to get rid of scratches on shoes immediately, even if they look like very small stripes. They tend to increase over time and spoil the appearance and quality of the shoes. You can do this in several ways:
- Acetone . Soak the sponge in a small amount of acetone and squeeze. Rub the damage with light, circular movements. When the leather is smooth, wash the boots with soapy water and wipe dry.
- Candle wax. This method is suitable for patent leather shoes. Apply a small amount of wax shavings to the scratches and use a directed stream of hot air to melt it with a hairdryer. When the wax becomes soft, take a cotton cloth and begin to rub it into the surface of the shoe. After the shoe wax is absorbed, warm the shoes with a hairdryer again and polish with a dry cloth.
- Olive oil. Soak a cotton swab in the oil and rub into the damaged area using soft, circular movements. Leave for an hour to take effect. After time has passed, wipe off excess oil with a dry cloth.
- Using an iron. This method is suitable for restoring small creases and scratches. Moisten the cloth and apply it to the damaged area. Walk the heated iron over the surface, holding it in one place for no longer than 5-10 seconds. Repeat the process until the scratch disappears. Upon completion, thickly lubricate the shoes with cream and leave for 12 hours to soak.
Why you need to care for leatherette
Leatherette has many advantages - its price is significantly lower, but its strength is higher than that of genuine leather. High-quality synthetic materials can withstand even several years of wear. Contrary to myths, they conduct air well and your feet feel comfortable in such shoes.
Leatherette items have good wear resistance, but even they become unusable over time. Small cracks and scratches on the surface can lead to large holes in the product. Therefore, this type of material should be repaired in time. If you regularly check it for damage and repair it, the product will serve the owner for a long time.
Monitoring the condition of your boots, shoes, and sneakers is the key to their faithful service. There is a high risk of damaging an artificial leather product when using inappropriate products and improper shoe care techniques.
Types of glue that are often used for shoe repair
Before answering the question of how to glue boots, you need to decide which sole glue will be better in a particular situation. Manufacturers offer a wide range of high-quality products, thanks to which you can easily and reliably repair any defect. What glue should I use to glue damaged shoes?
- Desmokol is a transparent polyurethane-based option recommended for gluing PVC, suede and leather elements. Professionals have already proven its reliability and actively use it in their work.
- Adhesive Moment was created specifically for eliminating defects on boots, boots and other wardrobe items. Moment for shoes is a water- and frost-resistant product that will allow you to securely fix the main element. It withstands the negative effects of the environment. However, it is not suitable for gluing products made of polyethylene, polypropylene and styrofoam. It is often used as glue for repairing shoes at home, because it is available for purchase at any household store. Within a day after gluing, you can put on your boots.
- Epoxy resin . This is the optimal composition that will help glue a broken sole. After all, after hardening, it turns into an elastic layer that does not allow moisture to pass through. However, the hardening process is quite long. If we glue shoes with it, we need to wait until it hardens completely, and this can take up to two days.
- Shoemaker. It contains rubber, organic solvents and special adhesive enhancers. Designed for gluing shoes, because it reliably fixes the rubber sole and leather upper. It can also be used to glue linings and insoles.
- Bonikol . A unique composition created specifically for shoe factories and workshops. Benicol provides reliable adhesion of all elements made of various materials.
It is worth noting that the well-known PVA glue and superglue, contrary to the opinion of many, are strictly forbidden to be used for restoring footwear. These products are intended for fixing completely different materials, and therefore do not provide reliable gluing of holes and the bottom of the shoe. Moreover, these substances can cause irreparable harm to your boots.
Questions and answers
Is the described method only suitable for natural leather?
Initially, it was invented specifically for the repair of products made from natural cow and pig leather. Whether it will be possible to use it on a specific eco-leather is unknown, because much depends on the composition of the material and the method of its production, and these parameters can differ significantly from one company to another.
How long does it take for liquid leather to dry?
From several hours to a day. You can speed up the process by directing a stream of warm air from a hairdryer to the restored area.
Can I use this product to repair a deep cut or tear in the skin?
No, homemade liquid skin only helps eliminate visual defects.
Now you can probably repair leather shoes, clothes and other things at home. But if you do not have experience in such matters, you should not restore expensive products yourself - in order not to completely ruin them, it is better to entrust this work to professionals.
Source
How to glue shoe soles?
Before sealing your boots, you should assess the damage and choose the most optimal remedy to repair the damage. An effective shoe glue must have the following qualities:
- long service life;
- reliability;
- water resistance and frost resistance;
- reliable gluing regardless of the thickness of the materials used;
- minimal rigidity;
- elasticity.
It is true that, in the absence of more suitable means, shoes can be sealed with sealant. However, with its help you will not achieve the necessary adhesive strength. In addition, if used carelessly, it can ruin the appearance of the product.
Many types of glue have the necessary properties, but not all of them can glue leather to polyurethane, rubber or PVC. Therefore, before purchasing adhesive of a particular brand, carefully read the instructions for use.
Shoe glue: brands for various materials
Wondering which adhesive is best for shoes made of a certain material? Let's take a look at the rating of high-quality special compounds for reliable bonding.
- KENDA FARBEN is a good shoe glue from an Italian manufacturer. It is considered universal and is excellent for gluing synthetic and natural leather. Copes with rubber, textile, wood, plastic, shotgun and metal products. It is often used by craftsmen when repairing boots, because the materials adhere quickly, and the seam is durable and moisture-resistant.
- UHU “SCHUH & LEDER” - this glue is actively used by shoemakers for gluing hard and soft materials. The seam has been characterized by increased elasticity for a long time. Resistantly withstands the negative effects of moisture, alkali and acid. It does not dry out for a long time and can withstand high and low temperatures. If the sole has burst, then using Uhu glue you can glue the separated parts together using the contact method. Use solvent reactivation or heat activation.
- Use professional EVA glue if you don’t know how to seal a hole in your shoes. It reliably connects corner and side cuts, porous surfaces of breaks. In addition, they can be used to glue the insole. This is a reliable waterproof product that does not flow under the influence of ultraviolet radiation and does not leave adhesive marks. Suitable for all types of materials except PVC.
- You can glue the polyurethane sole with Nairit Shoemaker. It is actively used in their work not only by shoemakers, but also by ordinary people. It has high strength and water resistance. Does not contain hazardous substances, therefore completely harmless to humans.
- Russian-made Contact glue has been popular for more than 10 years. This product is suitable for repairing leather, rubber, ceramic and porcelain products. With its help, it is possible to fill all the cracks and gaps. If we glue even heavily damaged parts, the seams will be almost invisible.
- The Henkel company suggests using Moment Marathon for repairing boots. This is a universal adhesive that is highly effective. Economical in consumption and convenient to use. It has fast adhesion and will only take a few hours to completely harden.
How to glue the sole of a shoe with your own hands: cold and hot method
Now that a high-quality adhesive composition has been selected, it’s time to start repairing shoes yourself. In practice, there are two most popular and effective ways to properly glue shoes.
- Cold technique . It is quite easy to use and does not require any special skills from the master. If the sole bursts in half, then just clean the joint, apply adhesive to it and firmly press the two halves. It is important to ensure that there are no voids left in the seam. After the parts are securely connected, the product is placed under pressure and left for at least 10 hours.
- Hot technique . How to glue parts this way? The manufacturer advised using glue to repair shoes using this method only in cases where the sole is very hard. You need to apply the adhesive to the top of the shoe and leave for half an hour. Afterwards, the sole is heated using a burner or hair dryer, pressed to the top and held for at least half a minute. You can put on shoes after such gluing only after two days.
Both of these methods make it possible to ensure high bonding strength of parts. The seam resists moisture and frost.
Sports shoe repair: sealing the soles of sneakers
Most often, sports shoes, namely sneakers, tear during wear. Are you wondering how to glue the sole to sneakers for which, at first glance, nothing will help? Repairing the soles of sneakers with your own hands is not a difficult task, but you need to do everything correctly. Due to their specific nature, such shoes have a soft bottom part, so holes easily appear on them.
To seal worn shoes, you should thoroughly clean the hole from dirt and debris. Then treat with a degreasing agent, and only after that pick up the glue. If the hole is too big, we first glue a fiberglass mesh. Next, you need to fill the hole with glue, and then secure it with construction tape so that the surface remains perfectly flat.
The specifics of how to seal the soles of sneakers are simple and clear. To reliably glue sneakers, you can use domestically produced epoxy resin. If the sole of your sneakers often peels off in the toe area, then before gluing, the area should be well sanded and degreased. Then cut out the patch, process it as well and apply glue to both surfaces. Press the sole onto the top of the shoe and hold for 15 seconds, then place under a press for 24 hours.
What shoe glue to use to fix a hole in a sneaker?
What kind of adhesive should be used to seal the sneakers yourself at home? Fixing a hole in the sole is not difficult. But as for the glue, it must be strong, elastic and abrasion-resistant. For these purposes, we recommend using Seam Grip from an American manufacturer. It has ideal seam elasticity, so it can be used to securely seal rubber. In addition, the following adhesives are suitable:
- Polyurethane adhesive Desmokol;
- EVA;
- Secondary glue Super Moment for shoes;
- Kenda Farben SAR 306.
Professionals recommend using Desmokol at home; it is easy to use for DIY shoe repair. To do the job correctly, we recommend watching a video on how to glue a hole in a shoe:
How to repair winter boots at home?
Most often, the sole of winter boots resembles a honeycomb, and voids form in them over time. It is difficult to seal boots with such problems, but it is possible. Empty honeycombs are filled with micropore scraps or another type of rubber, but only porous. To carry out this work, you will have to bend the insole, and then fill everything with sealant.
Sometimes you also have to replace the insole, because it shrinks over time. Therefore, we glue it after filling all the honeycombs. When the sealant has completely hardened, the surface must be thoroughly degreased and the PVC boots must be sealed using the usual method. Then coat it with a thin layer of glue, press it and put it under pressure. Before you get started, we recommend watching the video instructions on how and with what to seal the rubber sole:
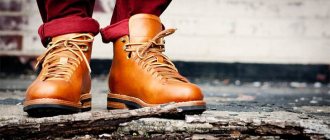
Leather boots: how to restore their appearance?
Often, when wearing leather shoes for a long time, cracks and tears appear on their surface. How to seal boots and restore their original appearance? There are several ways to solve this problem. But first you need to find out the level of damage, and then begin to fix the problem.
Liquid skin will help restore a beautiful appearance. It can be purchased at a shoe store. Before applying this product, you must carefully cut off the skin in areas of severe damage. Next, clean all areas, degrease, and only then use the product.
How to seal boots if the tears are very large? You can use shoe glue, which is applied to the torn piece with a cotton swab. The tear site is smoothed out well, pressed with a finger and held for a couple of minutes. We recommend that you wrap your finger in a rag first, otherwise it may stick.
Resurrecting rubber boots
Before you start working, you should decide what to seal your rubber boots with so that they can serve you for some time. For rubber boots, glue based on neoprene or polyurethane is suitable. The methods of their use are very similar. We glue the elements, strictly following the instructions.
- First, you should thoroughly clean the material from dirt and degrease it with acetone.
- Next, sand the entire surface onto which the adhesive will be applied. There is no need to touch the textiles.
- Apply glue to both surfaces. You don’t have to think long about how to glue the soles of rubber shoes. Desmokol or Nairit are perfect. After application, you need to wait about 5 minutes, because this will only be the first layer.
- When it has dried, apply another one and wait a quarter of an hour. Then you should wait until it dries completely.
- How to seal a rubber boot more securely? Using thermal activation. To do this, the glue on both parts is heated with a hairdryer, and then the damaged parts are connected.
- Press them well together and wait for them to dry. This will take at least 24 hours.
How to save a couple after getting wet
The most common problem in autumn, and sometimes in winter, is that boots and shoes get wet. Ideally, it’s good to have spare shoes so you can change into them and put the damaged pair in order in a day or two.
First of all, take out the insoles (and it’s better not to buy shoes with insoles glued to the sole - this is low-tech and perhaps the manufacturer has something to hide). Insoles can be dried on a radiator, and it is better to do this regularly, but shoes - under no circumstances. Even a hairdryer and hot air from a vacuum cleaner are not recommended - the material can dry out, become hard and begin to leak water.
Wipe your shoes or boots from dirt, fill them with napkins or install form holders in them and place them in an open place. You can place a sock filled with rice, silica gel cat litter, or even sawdust inside. In addition, this will help get rid of the unpleasant odor. When the shoes are dry, treat them with cream or wax.
A mess in the house = a mess in the head, or What is the cause of the mess?Is the clutter in your apartment or desk related to personality problems? And how serious is this problem? Read more |
The nuances of repairing shoes with voids
To reliably seal the sole of a shoe, you need to carefully examine the rubber that covers the honeycomb of the base. In places where it is damaged, it must be removed. Clear all cavities of debris, fill with sealant and pieces of porous rubber.
Before gluing, it is mandatory to degrease the shoes with a special product that is safe for the material. Do not neglect this point, otherwise the seam will be unreliable and will quickly come apart.
conclusions
Wearing repaired shoes with your own hands is comfortable and pleasant. And saving on paying for a shoemaker’s services is even better. We hope that the recommendations in the article helped you figure out how to seal sneakers and other types of shoes with your own hands so that they last for many years. Before starting work, we recommend watching training videos on how to properly glue rubber and other popular materials in order to understand all the intricacies of the work.
The article discusses the best types of glue for shoe repair. Follow the recommendations on how to repair soles at home, stock up on the necessary tools and get to work.
It is better to repair shoes in a workshop. But if you don’t have time, a replacement pair, or there are other reasons why you should wear these particular shoes, you’ll have to repair them yourself. Let's look at how to seal shoes at home and what to pay attention to.
What you need for work
The procedure does not require any special preparations. But you need to prepare something.
Here's a short list of everything you need.
- Iron.
- Rags (newspapers, or wrapping paper) and cardboard that are placed in shoes.
- Old towel or cloth napkins.
And, of course, the shoes you want to update. Before processing, shoes or boots should be thoroughly washed and dried. Shoe laces must be removed during the procedure.
Advice! Before you perform the procedure on your favorite shoes, practice on unnecessary things: old sneakers, children's shoes that the baby no longer wears.
This way you will understand how it is more convenient to work with your iron model.
How to glue the sole
All elements of the shoe body are sewn together; only the sole can be glued. Even if it is additionally stitched, it will not prevent it from coming off if you trip or get caught badly. Before gluing shoes, you need to choose an adhesive. It should be:
Some types of glue, such as super glue in small tubes, boil upon contact with leather and leatherette, forming a hard, brittle joint. The skin seems to burn, and a hole forms at the joint at the first use. If you need to glue the joint between the sole and the leather upper, we recommend using:
rubber glue – universal and suitable for all types of materials;
Nairit (polychloroprene glue) – a special composition for professional use, recommended for gluing leather to rubber;
polyurethane glue - allows you to both glue leather and repair textiles, approved for PVC, rubber and polyurethane.
You can buy material to glue the soles of shoes in hardware stores and places that sell consumables and furniture fittings. If you haven’t found a suitable option, turn to compositions for household use - Moment adhesives, for example. Compare the descriptions on the packaging to correctly choose which glue is best for gluing - the manufacturer indicates the scope of application.