Washing machines, also known as “washing machines,” are an integral attribute of any comfortable home, because they make life much easier, eliminating the need for heavy hand washing.
Over time, these assistants break down or become outdated, after which the question of their further disposal arises.
Selling scrap metal will bring pennies, but washing machines have a huge potential for turning into other items or tools that are in demand in the household, and all this can be done independently, using a minimal set of tools.
What does a washing machine consist of?
Any technique of this type consists of the following elements:
- There is a drum only in automatic or semi-automatic machines with horizontal loading; in machines with vertical loading, its role is played by the rotor.
- The water tank used to be made of stainless steel, but now plastic is used.
- An electric motor with a power of 150–350 W, and on older non-automatic devices it is an asynchronous AC motor, and on modern automatic and semi-automatic machines it is a brushed or brushless DC motor.
- The case made of steel or plastic depends on the size and cost of the equipment.
Each element can be adapted to something useful and necessary in the house or garden. For example, a motor can be turned into a sharpener or a lathe, and the tank can be turned into a container for technical water. Therefore, the use of elements depends only on your imagination and tinkering skills.
Manufacturing instructions
After all the preparatory work is completed, the actual process of assembling the barbecue begins. First, using a grinder, a rectangular hole is cut in the flat wall of the drum body. This will be the hatch of the future barbecue. Using a hacksaw, you can trim the edges, making them smoother. If the drum is initially too large, it can first be divided into two parts with a grinder. Then one part needs to be inserted into the other and the joint welded to avoid the risk of heat loss.
Then, at the corners of the resulting rectangle, holes are drilled for bolts with a diameter of about 10 mm. Using the resulting holes, metal corners are attached to the edges of the hatch and secured with bolts. This will allow the skewers to be evenly distributed when frying the kebabs.
This completes the process of making a roasting pan. Further manipulations to decorate it can be done at your discretion. The most common option: attach three short tubes (about 10 cm long) to the top of the body, on which the grille is installed. So, the grill will also serve as a barbecue.
After this, you need to prepare the stand. If you use a ready-made product for this (flower stand, rack, finished legs), then you just need to check its stability and install the roaster on top. If a pipe is used, it must first be secured to the ground, and then the drum body must be screwed on. You can use a thin metal pipe, dividing it into three parts, making a tripod. In this case, they do not have to be welded to each other; they can be tightly fastened with bolts and an angle, and made removable.
Installation of the barbecue body will be similar to using a ready-made stand.
Some drum models have factory-installed holes for attaching it to the washing machine body. They can be bored to the diameter of the pipes used, and threads can be cut on the pipes themselves. Then all you have to do is screw the pipes into the holes, getting a folding version of the legs for the barbecue
It is worth paying special attention to fitting the pipes to the holes so that they do not dangle when screwed in, otherwise the grill will not be stable. This can be done even if you have no experience in such work at all.
For this purpose, profile pipes and angles are used, from which a tripod is assembled, which is attached to the axis of the drum. After assembly, the grill will rotate, independently inflating the coals as it rotates through the side holes.
Another option for making a barbecue: make a rectangular hole in the side round wall of the drum. Then the grill will perform the function of a grill, but its operation will require a certain skill. Moreover, such a barbecue definitely needs doors to maintain the internal temperature of the chamber. And also the drum body can be cut crosswise and bolted together - you get a full-fledged portable barbecue for camping enthusiasts.
You can paint the stand if it is not made of stainless steel. As a decoration, you can consider options for various useful devices: make a canopy for the barbecue so that it can be used in rainy weather, attach holders for equipment (forks, skewers, tongs), upgrade the stand for the grate or skewers on top of the body.
Such a fireplace does not require constant adding of firewood, but functions due to the constant circulation of air inside. If you also give it an aesthetic appearance, it will add some romanticism to outdoor recreation.
The original look will appeal to your loved ones and acquaintances, and the knowledge that it was made with your own hands will give the kebabs cooked on it a special taste. A smokehouse from a machine tank is an original idea that will appeal to many.
To learn how to make a barbecue from a washing machine drum, watch the video below.
What can you make from a drum?
Here is a short list of what can be made from a drum:
- decorative lamp;
- coffee or coffee table with lighting;
- protective container for bulbs and other plants;
- smokehouse;
- barbecue;
- feather removal machine.
Decorative lamp
To make a decorative lamp from a drum:
- place a lamp or other light source in it;
- place it on a beautiful leg (floor lamp) or hang it from the ceiling near the bed (night light);
- Take the power cable and plug out.
Coffee or coffee table
In such a table, the drum serves as a cabinet on which the tabletop is fixed, which opens up enormous scope for creativity. For example, the tabletop can be made of natural or organic glass with a pattern on the back side , and a backlight lamp can be installed in the drum.
You can make the tabletop opaque, but place a lamp inside the drum, covered with a colored diffusion dome; after turning on the lamp, the cabinet will begin to glow, creating a feeling of mystery and romance.
Protective container for bulbs and other plants
If moles or any other pests damage ornamental or fruit plants in your area, dig a drum into the ground, then fill it with fertile soil .
Thanks to the small holes, water with nutrients dissolved in it will penetrate into such a protective container, and pests will not damage them, because they will not be able to get through the stainless steel walls.
Another method is to plant plants in a drum filled with soil and located on the surface of the site as a decorative flower bed.
The only drawback of such a container is that it slows down the soil regeneration process , so it is advisable to update the soil in it every year or every other year.
Smokehouse
If you need a smokehouse, then do this :
- make or use a ready-made smoke generator (for example, a potbelly stove); for hot smoking, a steel barrel with a diameter equal to the diameter of the loading hole of the drum is suitable;
- in the back of the drum, where the pulley is located, cut a hole whose diameter is equal to the diameter of the stove chimney;
- if you are using a barrel stove, then cut a hole equal in diameter to the loading hole;
- attach the drum to the smoke generator, then fix it;
- make submersible trays for storing food, you will lower these trays into the loading hole;
- make a steel lid to cover the loading hole (do not use the standard washer lid for this, because it is made of plastic).
Brazier
To make a grill from a drum:
- disassemble the semi-automatic machine;
- remove the tank with the drum from it;
- cut the tank and pull out the drum;
- remove all plastic parts from the drum;
- Place the drum on a flat dirt or concrete area.
To use the grill, load it with charcoal, then light the fire. Thanks to perforations in the bottom and walls, the coal will receive enough air for combustion .
If you prefer to heat the barbecue not with coal, but with wood, then cut them to such a length that you can lay them across the drum and they will not rest against its walls.
Feather removal machine
Such a device will be useful to everyone who raises poultry for food or for sale, because it reduces the time of plucking each carcass several times, and also eliminates the need to perform this operation manually.
are not very efficient due to their low engine power , so before plucking the carcass you have to soak it in boiling water, which is not always convenient.
The most efficient machine is made from a drum and tank from a semi-automatic machine and a 500-1000 W motor.
The principle of operation of the feather removal machine is that a rotating rotor with rubber fingers mounted on it causes the carcass to rotate along unpredictable trajectories, tearing some of the feathers out of it.
The additional fingers installed on the tank perform the function of a kind of brake, while also tearing out the feathers.
Tools and materials
To make such a machine you will need:
- an unnecessary activator washing machine with a working motor and belt drive or a tank and drum from a semi-automatic machine with a 500–1000 W motor;
- finger-beats 50–100 pieces, they can be ordered in the online store;
- plastic pipes or rubber hoses for the hearth
- steel pipes for making the frame;
- drill with a set of drills;
- Screwdriver Set;
- set of wrenches;
- grinder and welding inverter (only for converting a semi-automatic machine).
Procedure
To turn an activator machine into a pen removal machine, proceed as follows :
- Remove the activator, then drill 10-15 holes in it for the fingers, placing them at approximately equal distances.
- Make sure the drain works and clean it if necessary.
- Mark the body (tank), drill 4–5 rows of holes for the fingers on each side, 4–6 holes per row.
- Insert your fingers into all the holes so that they point upward on the rotor and inward on the housing.
- Replace the rotor.
- Modify the power switch so that the activator motor and the water drain electric motor are turned on at the same time; if they operate from the same motor, then modify the system for turning them on.
To turn a semi-automatic washing machine into a feather removal machine, do the following :
- Disassemble the device, remove the tank and rotor from it.
- Cut the tank crosswise to remove the drum.
- Check the condition of the bearings and replace them if necessary.
- Cut the drum so that only the bottom part remains, remove the rest.
- In the lower part, drill holes for the beat fingers, the optimal distance between the holes is 5–7 cm, space them evenly.
- Drill 4–6 rows of holes for fingers in the tank, the distance between rows and holes is 7–10 cm.
- Insert your fingers into the bottom of the drum and tank.
- Insert the drum into the tank, then install the drive pulley onto the shaft.
- Weld a frame from steel pipes on which the tank will stand vertically, with the loading hole facing up.
- Select an electric motor of sufficient power with such a number of revolutions that the drum rotation speed is 200–400 rpm.
- Install the engine, tension the drive belt.
- Mount the motor control device.
- At the bottom of the tank, tightly cut a pipe to drain the water.
- Attach a clamp for the supply water hose to the top of the tank (you can hold it in your hands, but it is easier to work with a fixed one), and position it so that it does not interfere with loading or removing carcasses.
- Make sure that the entire structure is firmly on the floor and install standard weights on the tank; if this is not done, the device will vibrate strongly during operation.
Remember, before pulling out a plucked carcass, be sure to turn off the engine and wait for the drum to stop completely, and while plucking, water the carcass with water , this will speed up the process of removing feathers.
After finishing work, be sure to clean the drum and rotor of feathers, and rinse with plenty of water to wash off the blood.
Dismantling the machine
The design of this household appliance is quite complex. If you carefully remove the components, they can be used to create new mechanisms and useful household items. What kind of spare parts might be useful?
- The heart of a washing machine is the engine; if it is in working order, it can become the basis for various new appliances for the home.
- Drum - manufacturers make it from high-quality stainless steel, because the main load during washing falls on it. We disconnect all the pipes and wires, pull the tank out of the car and remove the drum from it.
- The loading hatch is a very useful thing; we carefully dismantle it and place it on a rack in the garage.
- We also don’t throw away small parts - they will come in handy around the house.
- Compact and heavy counterweights and powerful springs - there is always a use for them, which we will discuss below.
- The case itself will also come in handy, so we put the walls and lid in place.
If you are knowledgeable about electronic devices, then the analog board will also be useful - there are many different components needed for repairing electrical appliances in the house.
Now let’s look in more detail at what useful mechanisms and things can be made from an outdated automatic washing machine.
Tank craft ideas
From a plastic or steel tank you can make :
- heater for summer shower;
- water dispenser;
- expansion tank of the heating system.
To turn it into a heater, do the following :
- paint it black on the outside so that it heats up more strongly under the sun's rays;
- place a summer shower on the roof;
- supply water to it with adjustable flow and a drainage pipe through which excess water will drain;
- connect the faucet with the sprayer;
- plug extra holes;
- Cover the top with a lid to protect the water from dirt.
To make a washbasin:
- raise the tank using a metal or wooden frame to a convenient height;
- connect the tap;
- plug extra holes;
- cover the top with a lid.
To make an expansion tank:
- lift the tank into the attic and connect it to the supply pipe (direct) of the heating system;
- connect a drainage pipe or hose to the hole located at the highest level;
- close the tank with a lid, even the standard lid of the washing machine will do;
- insulate the tank with mineral wool or polystyrene foam.
Preparation
Dismantling
First you need to remove the drum and dismantle all the plastic parts.
A grinder, a screwdriver, a hacksaw, and pliers will come in handy.
The crosspiece is used to make a stand
Cleaning
To give a presentable appearance, a heavily soiled tank needs to be tidied up: cleaned of dirt and limescale. This can be done using a torch and a wire brush.
You can also wipe the drum with a brush dipped in 9% vinegar, use a special anti-plaque agent, or soak it in a 1-2% warm solution of citric acid and water.
What can be made from an electric motor?
This part is often used to make:
- lathe;
- sharpener (grinding machine);
- grinder;
- juicers;
- drive for a manual meat grinder;
- feather removal machine;
- vibrator for concrete compaction;
- lawnmowers;
- feed cutters.
Wood lathe
Due to the insufficient power of the washing machine engine, it can only be used to make a wood lathe. With the help of such a tool, you will be able to carve or polish wood products yourself , which will not only be an interesting hobby, but will also be beneficial for your home.
Some DIYers suggest making a frame from wood, but such a machine will not last long, unlike a metal one, so we recommend making it only from metal.
Materials and tools
To make the machine you will need materials :
- steel pipes of various shapes and sizes;
- nuts, bolts and studs M6–M10;
- a conical stop for the tailstock, you can make it yourself or order it on the Internet;
- pieces of sheet steel 2–6 mm thick;
- a spindle from an electric drill or a pulley from a motor to create a headstock;
- motor driver;
- starting device.
And also the following tools:
- drill;
- Bulgarian;
- welding inverter or semi-automatic (if you decide to make a cone stop yourself, then both devices are needed);
- level;
- protractor;
- roulette;
- set of dies and taps;
- scriber;
- center punch
Procedure
Here is the general procedure:
- Determine the difference between the engine speed and the optimal machine speed; if they differ, then make a gearbox or use a ready-made one. You can increase the efficiency of the machine using an electric motor rotation speed controller; these devices are produced for DC and AC motors.
- Weld a frame from a steel pipe on which the motor with gearbox and headstock, tailstock, and workpiece will fit, so the length depends on the design of these elements and the size of the workpiece.
- Make a headstock; it can be made either from a drill spindle, into which a cutter for metal or concrete with a diameter of 15–30 mm is inserted, or from a pulley, into which 3 screws with sharpened edges are screwed. The headstock transmits the rotation of the part, so take its manufacture as seriously as possible.
- Attach the motor with the gearbox and the headstock to the frame, and the axis of rotation of the headstock should be parallel to the frame, otherwise you will not get good performance from the machine.
- Make a tailstock, its task is to hold the part and form the point of the axis of rotation. In terms of efficiency, the homemade tip and the part available on Aliexpress are the same, but the Chinese product will cost 300–400 rubles, although you will have to wait several weeks for it. Remember, the tip must move along the frame so that you can fix and remove the part, so provide for movement of both the axle with the tip and the entire headstock.
- Attach the tailstock to the frame and make sure that the guide and the tip are on the same axis.
- Set up a support for the chisel.
- Cover the motor and gearbox with any casing.
- Connect the device to a power outlet and ground it.
Forums and videos
Here are links to forums and video reports:
- www.chipmaker.ru.
- forumcnc.ru.
Sharpener
The main problem faced by everyone who converts a washing machine engine into a sharpening machine is related to rapid wear of bearings due to lateral loads .
After all, in a washing machine, the motor motor is connected to the drum, rotor (activator) or centrifuge through a belt reducer, which has its own bearings, which means the lateral load on the electric motor is minimal.
In addition, some washing machines produced after 2000 are equipped with electric motors whose shaft rotation speed exceeds 10 thousand revolutions per minute (rpm).
In this case, the maximum permissible rotation speed of the grindstone is 1500 rpm, and the optimal one is 1000 rpm. Therefore, installing an adapter sleeve with a cartridge for attaching a stone directly to the shaft is pointless - the stone will fly apart and damage the equipment , and perhaps even injure you. To reduce speed, a gearbox is needed.
The easiest way is to make a belt reducer with two pulleys, and the ratio of the pulley circumference should be equal to the gear ratio. A small pulley will be on the electric motor shaft, and a large one on the gearbox shaft, which is also the shaft of abrasive elements.
In order for such a gearbox to work well, consider changing the distance between the pulleys or adjusting the belt tension with an additional roller, because the tension during operation and when replacing the belt is very different.
Since the instrumental base and source materials are different for everyone, we will describe only the general procedure :
- Determine the location of the future machine and how it will be attached to the wall or table.
- Determine the configuration and gear ratio of the gearbox, as well as the number and method of fixing the abrasive elements.
- Draw up a drawing to determine the size and shape of the frame, taking into account the gear ratio and the method of attaching the bearings of its second axis. Don’t forget about the elements for fixing to the table or wall and the support areas in front of the abrasive elements.
- Using this drawing, make a gearbox shaft with support bearings, fasteners for abrasive elements and a drive pulley.
- Make a frame according to the drawing.
- Attach the motor and gearbox to it with the ability to change the belt tension. Remember, both belts must rotate in the same plane.
- Connect the power cord; some motors will require a driver or capacitor.
- Put on and tighten the belt.
- Run it without any abrasive elements.
- If there is no vibration, secure the machine at its permanent location; if there is vibration, determine and eliminate its cause.
- If everything is fine, install abrasive elements.
Grinder
The basic steps required to make a grinder are the same as in the previous section, the only difference is that instead of a sharpening disk you will install a sanding belt .
To ensure its normal movement, attach a feed roller to the gearbox shaft, and also place tension rollers around the perimeter.
A grinder with a washing machine motor can work with belts of different sizes, but the shorter the belt, the less friction loss, which means more motor energy will be spent on grinding or turning the product.
Juicer
This tool can only be made from a washing machine that has a spin function through a drum or centrifuge, so old Soviet washing machines, in which spinning was done manually with two rollers, are not suitable for making a juicer.
The principle of its operation is the same as that of conventional juicers - a grater rotating together with the drum grinds the vegetables or fruits that fall on it, and the crushed fragments fall on the walls of the drum, where under the influence of centrifugal force the juice is squeezed out of them.
Materials and tools
Here are the materials you will need:
- An unnecessary stainless steel pan or a scrap of this material measuring approximately 15x15 cm to make a grater out of it.
- Plastic or stainless steel pipe with an internal diameter of 50–100 mm (the larger the diameter of the drum or centrifuge, the larger the pipe can be used) for the product loader.
- Plastic tube and tap with a diameter of 20–40 mm for draining juice.
- Steel pipes or wooden blocks to create the frame.
- Alcohol or vodka to sterilize the drum and tank.
- Gauze for better filtration of juice. You can do without it, but then there will be a lot of pulp in the juice.
Here is a list of tools needed for such a conversion:
- a set of screwdrivers (flat and Phillips, different sizes);
- set of wrenches;
- metal scissors;
- Bulgarian;
- drill with metal drills;
- a set of cores of different diameters;
- riveter or welding inverter with a carbon dioxide cylinder;
- welding inverter;
- a wooden log or block to fill holes in the grater.
Procedure
Here is the procedure by following which you will turn the washing machine into a juicer:
- Disassemble the washing machine and remove the tank and drum assembly, as well as the counterweights (weights).
- Wash the tank and drum thoroughly, then steam and treat with alcohol or vodka.
- Make a frame that is sufficiently stable from bars or steel pipes. Remember, sometimes the drum or centrifuge creates strong vibrations and can overturn an unstable structure.
- Secure the tank so that the filling opening is directed upward.
- At the lowest point of the tank, drill a hole and cut a drain pipe with a tap into it at an angle of 45 degrees. It is desirable that the drain pipe extends beyond the frame, and the distance to the ground is enough to install a bucket or pan there.
- Make a grater from a piece of stainless steel, the diameter of which is equal to the diameter of the feed pipe (loader).
- Place a grater on a log or block and punch several hundred holes with the thickest core, forming sharp teeth on the other side.
- Attach the grater in any convenient way to the bottom of the drum strictly in the center. If you do not have a semi-automatic machine with a CO2 cylinder, then use a riveter and stainless steel rivets.
- Cut a piece of thick pipe of such a height that the lower edge rises 3–5 mm above the grater, and the upper edge rises 3–5 cm above the top of the tank.
- Make a quick-release fastener with which you will fix the supply pipe above the grater. Remember, while the grater is rotating, the products will bounce off it, hitting the walls of the pipe, so the fastening should provide reliable and rigid fixation, and its removal, for example, to clean the juicer, should take a minimum of time.
- Install the washer motor and put it on, then tighten the drive belt.
- Install a standard motor driver that ensures operation in spin mode. If there is no standard driver, use a purchased one or a homemade one. The best results are obtained by a device that regulates engine speed.
- Connect the structure to the power supply and start the engine, make sure that the drum rotates without vibration, otherwise replace its bearings.
Drive for manual meat grinder
For older people, using a manual meat grinder often becomes a problem, because muscles and joints do not tolerate such loads well. Therefore, a drive made from a broken washing machine will turn a hand tool into an electric one , thanks to which the process of turning meat into minced meat will take place without stress on muscles and joints.
The main problem that needs to be solved for this use of an electric motor is related to the optimal rotation speed of the meat grinder shaft and the possibility of its reverse.
If the engine of old Soviet or foreign washing machines produced 1.5–3 thousand rpm, then the optimal rotation speed of the meat grinder shaft (auger) is 100–300 rpm.
The engines of modern washing machines produce 10–15 thousand revolutions per minute. That is, for electric motors of old cars you need a gearbox with a gear ratio of 8:1-10:1 , and for more modern ones - 80:1-100:1.
The problem is that a belt drive with a 10:1 ratio and a small pulley diameter of 6 cm will require a large pulley with a diameter of 60 cm, which is not always convenient. If a transmission ratio of 100:1 is required, then a six-meter disk will be needed, which is generally unrealistic.
Therefore, they do it in two ways:
- several belt reducers are installed in series, but such a scheme leads to a large loss of power;
- They use a worm gear, that is, a gear wheel and a worm (a shaft with a thread of a certain pitch).
That is, for a worm with a diameter of 2–3 cm with a thread pitch of 2 mm, a gear of approximately the same diameter will be required, so such a gearbox will not take up much space. You can do it yourself, by providing a grease dispenser for supplying lubricant, or you can use a ready-made mechanism from some equipment.
Having found or made a gearbox, make a convenient stand for mounting all the equipment so that your parents can comfortably use such a meat grinder, and close the engine with any casing, leaving only the control buttons outside.
Vibrator for concrete compaction
The main problem that arises when pouring concrete is related to its viscosity, because the thinner it is, the weaker it will be after the concrete stone hardens .
Therefore, due to the high viscosity, air cavities are formed in the pouring, which reduce the final strength of the stone, and it is impossible to fill the voids manually, because you cannot see where they are and what shape they are.
The most effective way to compact a concrete mixture is vibration, which can be created using a vibrator, that is, a device that generates shocks with a frequency of 30–100 Hertz.
To make such a device, you need to solve 2 problems:
- turn the circular rotation of the motor shaft into vibrations;
- reduce the load on the motor shaft to extend bearing life.
The easiest way to do this is with an eccentric connected to the motor through a belt drive, so next we will talk about the general principles of manufacturing such devices, because each has its own set of materials and tools.
Here's the procedure:
- Make a frame from wood or metal; the size of the frame should be sufficient to install an electric motor, gearbox and eccentric shaft on it. Also, provide for the installation and fixation of both pins for sealing at depth and holes for fastening to the formwork.
- Place the eccentric shaft on the bearings, then attach the bearings to the frame.
- Place belt drive pulleys located in the same plane on the motor and eccentric shafts. If the engine speed is too high, install an additional gearbox. Remember, when installing two gearboxes, their coefficients do not add up, but are multiplied.
- Put on and tighten the belt.
- Connect the driver or engine starter.
Remember, the most effective is impact through the formwork, however, this method of compaction greatly increases the requirements for it . If you attach several steel pins to the frame, you can lower them into the concrete and transmit vibration through them.
Lawnmower
Despite the fact that a homemade lawn mower made from a washing machine is much inferior to purchased models in terms of cutting quality and ease of operation, it is suitable for mowing clearings and lawns covered with wild but well-groomed grass.
The basis of such a mower is a plywood or wooden platform with wheels, on which an electric motor with a starting device is installed.
A homemade or purchased knife with 2–4 blades with sharpened edges is attached to the bottom of the motor shaft through an adapter. There is a handle attached to the back of the platform, with which you can push it around the area and direct it in the desired direction.
The main problem that will have to be solved during the manufacturing process of the device is related to protecting the motor bearings from dust particles and cut grass getting into them, because in a washing machine there is no such threat, which means there is no protection against it.
In addition, homemade or purchased knives are not designed to rotate at speeds exceeding three thousand revolutions per minute, so a high-speed motor will need to be connected through any type of gearbox .
One of the options for solving both problems is to lengthen the platform and install a motor and gearbox (belt drive) on its upper part. In this case, only the gearbox shaft comes down from the platform, and its bearings can be closed with any suitable seals, for example, from cars.
Wheels for garden carts mounted on a common (front and rear) axle can be used as a chassis. Thanks to their large diameter (10–20 cm), they will provide the mower with high maneuverability and will easily move through any grass.
You can adjust the mowing height using two platforms , located one above the other, with the wheels attached to the bottom, and the motor and gearbox installed on the top. Both platforms are connected by pipes entering each other, with holes drilled in them for clamps - steel pins.
The advantage of this design is that an additional sliding bearing filled with grease can be installed in the lower platform, this will reduce the load on the main bearings of the gearbox.
If the motor of your washing machine produces optimal speed, then the additional bearing will sharply reduce the load on the main ones, so even without a gearbox such a motor will last for many years.
An adapter for installing knives will have to be ordered by a turner, because it must match the diameter of the motor or gearbox shaft, and also securely hold the knives. Also, be sure to balance the blades before installing them on the mower, and then balance the unit assembly. The less vibration, the longer this garden tool will last.
Feed cutter
Due to insufficient power, the motor from the washing machine is only suitable for making one type of feed cutter - a grater, which does not cut the feed, but rips off the top layer from it like a regular grater.
The disadvantage of this type of apparatus is that it is not suitable for chopping grass or hard products. However, it does a good job with fresh fruits and vegetables . The basis of the feed cutter is a grater disk, the manufacture of which requires stainless steel 1–1.5 mm thick.
Tools and materials
Due to the low power of the motor, the optimal disc diameter is 10–20 cm, so the device will be able to chop fruits and vegetables whose size does not exceed 5–10 cm (half the diameter).
Since all elements of the feed cutter are made of metal, the main tools will be :
- Bulgarian;
- welding inverter;
- drill with a set of drills;
- taps and dies;
- all kinds of wrenches and screwdrivers.
Procedure
Here's the procedure:
- Turn it yourself or order a turner a shaft for the disk with flanges and threads for the fixing nut, as well as two bearings - one in front, the other in the back. The distance between the bearings is 5–10 cm. Choose the diameter of the shaft so that common oil seals from Zhiguli or other inexpensive cars fit it. For example, the internal diameter of the gear selector rod oil seal from the G8 is 16 mm, and its average price is 30 rubles, and you can buy it in every car store.
- Cut a circle with a diameter of 10–20 cm from a sheet of stainless steel, then drill a hole strictly in the center for installation on the machined shaft.
- Using a drill with a diameter of 4–8 mm, drill holes on the disk in increments of 1–2 cm.
- Make a stand from hard wood or metal for forming blades, for which, on a flat surface, make a groove 5–10 cm long and 1–2 cm deep, while the width of the groove is 1–3 mm larger than the diameter of the holes.
- Insert a nail or drill into the hole, then tilt the disk against the direction of rotation until it stops and, placing it in the stand through a mandrel or spacer made of soft metal, strike the drill or nail to push through the stainless steel and form a float tooth. Do not confuse the direction of rotation of the disk, otherwise the feed cutter will not work.
- From sheet steel 2 mm thick, weld a round knife casing, that is, 2 disks with a diameter 3–5 cm larger than the diameter of the knife, as well as a sidewall connecting them 3–5 cm wide and 10–20 cm long less than the circumference of the disk.
- Weld the sidewall to one disk, then install any removable fasteners that would securely fix the second disk to the sidewall, but would not interfere with its removal if necessary.
- In the center of each disk, cut holes according to the diameter of the tubes into which you will insert the shaft bearings. Come up with a way to fix the bearings. These can be either inserts (rings), the outer and inner diameters of which are equal to the same parameters of the outer race of the bearing, attached to the pipe with screws or welding, or anything else.
- Weld tubes with bearing retainers into the holes of the disks.
- Insert and secure the bearings.
- Not far from the center of the removable (outer) disk, cut a feed hole and weld a feed tray to it in the shape of a truncated tetrahedral pyramid or cone (depending on the shape of the hole). The length of the feed tray is 30–40 cm, the expansion angle is 30–50 degrees.
- Weld legs (4 pieces) to the rear disk at an angle of 20–45 degrees to ensure maximum stability, as well as a platform for mounting the engine. Consider the dimensions of the drive pulleys, and for high-speed motors, use a worm gear so that the rotation speed of the grater disc is 100–200 rpm.
- Insert the shaft with the grater disc, then secure it with the outer disc.
- Install the engine and both pulleys with the belt (tension it with the necessary force) or gearbox.
- Connect the motor control device and carry out a test run.
- Place the crushed products in a tray, and collect the finished mass from below into a bucket or other container.
How does the machine work?
The washing progress will be as follows. The laundry is placed in the tank, and washing powder or liquid detergent is poured here. Next, the items are filled with water at the required temperature.
The amount of water and clothing that the electric motor will “pull” is calculated experimentally.
The device is immersed in the tank. The plugs located on the lower surface of the disk are located around the circumference of the tank on the outside. Then you should start the engine. There is no additional need to secure the operating system in the container. The speed of the electric motor shaft will be high, this will ensure high quality laundry washing.
A significant disadvantage of a homemade washing machine in this case will be its low performance. Due to the modest power of the electric motor and the small volume of the tank, you can wash about 1 kg of dry laundry at a time, which is equivalent to, for example, five men's shirts. If you load more things, the quality of cleaning will be much worse. To increase the performance of the washing machine, you can look for a more powerful engine and increase the tank capacity.
Interesting:
- Homemade honey extractor from a washing machine
- Is it worth buying a dishwasher?
- Return the washing machine within 14 days
- How to choose and buy a used washing machine
- How can you recycle your washing machine?
- Reviews of Candy washing machines
Reader comments
- Share your opinion - leave a comment
Case products
The washer body can be used to make:
- a box for various small items or tools;
- porthole window;
- lockable dog house;
- flower beds for various plants.
Box for various small items or tools
Any semi-automatic machine with a horizontal load is suitable for making such a box.
To get a box from it, do the following:
- remove the top and back covers;
- remove the motor and tank with drum;
- measure the interior space;
- Make shelves according to these dimensions, taking into account the door protruding inward;
- in the upper part of the shelves, install a pair of 3-5 W lamps and connect them to the switch in the door lock, to reduce the load on the switch, use a relay;
- put the machine on its feet;
- insert the box inside it, secure it and replace the back and top covers;
- lay hidden wiring to the nearest outlet.
In the same way, you can make a minibar, then instead of light bulbs, install a New Year's LED garland with a controller. When the door opens, the garland will begin to flash, creating a unique play of colors.
Porthole window
To make such a window, you will need the door of a semi-automatic washing machine with horizontal loading and a part of the body with hinges and a lock.
The advantages of such a window are its unusual appearance, somewhat reminiscent of a ship's porthole, and its tightness when closed due to rubber seals.
To make such a window, disassemble the washing machine, taking out all the insides, then use a grinder to cut out the part of the body with hinges and a lock .
The cut piece can be of any shape, however:
- the round one looks more stylish, but cutting it out will require more effort;
- The square one is easier to cut, but it looks less interesting.
Remember, the size of the window opening into which you are going to embed the porthole must be larger than the rubber door seal. After installing such a window, carefully seal all cracks and voids with foam, but do not stain the sealant.
You can decorate the inside of such a window and hide the cut edges of the frame using wooden or plastic decorative overlays.
Closable dog house
The washer door and part of the frame with the lock and hinges can be used to create a lockable kennel for a small to medium sized dog. To do this, it is enough to cut out part of the body with the door and nail it to the booth in the area of the manhole.
Now you can close the dog so that it does not scare guests or dig up flowers in the garden. The animal's intelligence is enough to grasp the connection between digging up flowers, the owner's dissatisfaction and the inability to leave the booth.
Flowerbed-pot for various plants
The body of a washing machine, both semi-automatic and activator type, is a good flowerbed. To do this, remove all the contents from it and remove the door, then drill several dozen drainage holes with a diameter of 8–10 mm in the back wall.
Lay the body with the loading hole up and load it with a layer of crushed stone with a fraction size of 20–50 mm , then a layer of sand and fertile soil in which any plants can be planted. If you paint the body, the flowerpot will become even more interesting and attractive.
Do not use such a flowerpot without a layer of stones and drainage holes, otherwise you will not be able to properly regulate the level of soil moisture.
On the surface, under the influence of sunlight, the earth will dry out, while below, next to the back wall, excess moisture will begin to accumulate, which will lead to the appearance of pathogenic microflora and damage the roots of plants.
In addition, excess moisture will negatively affect the condition of the metal body of the washing machine, which will cause corrosion processes to begin in it and soon rust will eat through it so much that it will be visible even from the outside.
Ultrasonic washing devices - 21st century technology or a scam?
Let's hit with ultrasound
How to practically use ultrasound was invented not so long ago - about a hundred years ago. As with most necessary and useful discoveries, the scope of ultrasound was initially limited almost exclusively to military needs.
But pretty soon it became clear that in addition to espionage and military-industrial tasks, ultrasound can also perform many absolutely peaceful functions. One of these useful properties was the ability to clean a variety of surfaces from heavy contamination.
Ultrasound generators placed in a liquid medium create acoustic waves and special effects (microbubbles) that can thoroughly wash metal parts with the most complex shapes.
Moreover, you can be sure that the most inaccessible corners and bends will be cleaned as thoroughly as the outer surfaces.
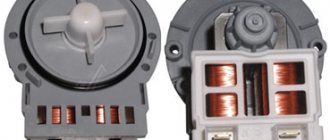
Ultrasonic generator IL10-0.4 (board)
In dentistry, instruments are cleaned and disinfected using ultrasound. It is also used to perform medical operations. You may have had to undergo professional ultrasonic teeth cleaning - a procedure that is not very pleasant, but quite effective.
So the very idea of washing household laundry using an ultrasonic generator lowered into a basin is quite reasonable. If boilers at thermal power plants and boiler houses can be cleaned with ultrasound from a thick layer of scale, then what does it cost for advanced technologies to cope with a pair of dirty socks?
They don’t do anything with the help of ultrasound today. You can, for example, restore the whiteness of your teeth
Distance from idea to implementation
It's no secret that when it comes to actually implementing the most exciting idea, the wings of that very idea have to be severely clipped. So much so that sometimes there is little left of it. Let's find out if this case is an exception to the rule?
On the website of one of the manufacturers of ultrasonic machines, I found an explanation of how such devices work: “The operating principle of an ultrasonic washing machine is based on the conversion of electrical voltage that enters a piezoceramic element (ultrasonic generator) into high-frequency sound vibrations (ultrasound). During our usual mechanical washing, the speed of the layer of liquid closest to the surface of the fabric is very low (relative to the fabric itself), which prevents the penetration of detergents into the fibers of the fabric. This makes the washing process more difficult and slow. Under the influence of ultrasonic vibrations, water molecules “accelerate” and the direction of their movement changes with high frequency. As a result, the speed of movement of the soap solution in the near-surface layer increases, enhancing the interaction between it and the product immersed in it (but this does not mean that everything in your basin will bubble up and splash out “overboard”). During ultrasonic washing, a huge number of microscopic bubbles are also formed in the soap solution and the pressure inside them briefly increases. Bubbles penetrate between the fibers of the fabric; upon contact with them, microexplosions occur, which disrupt the adhesion of dirt particles to the fibers of the product and facilitate its removal. And since the size of these bubbles is comparable to the size of the molecules, they easily penetrate not only between the fibers, but also through them, cleaning the threads of the fabric from the inside and renewing it. At the same time, washing is gentle, and the laundry is not deformed, that is, it is not damaged by mechanical action (friction), as during the normal washing process.”
The “Declaration of Intent” turned out to be impressive. What do we actually get?
Ultrasonic washing devices, or “handheld washing machines” as they are also called, are, of course, not industrial ultrasonic generators. Among their main advantages are low power - from 5 to 15 W, safety and relatively low cost - from 1 to 2 thousand rubles.
This is what a regular ultrasonic washing “machine” looks like
I asked my dentist Nina Aleksandrovna how powerful professional ultrasonic systems are for cleaning teeth.
It turned out that the smallest cleaner with a capacity of 0.8 liters is at least twice as powerful as the device that promises to wash blankets in the bathtub. Ultrasonic cleaners for 10 liters have a power of 150-550 watts.
“But they’re standing - wow!” and Nina Alexandrovna spread her arms like a real fisherman. “This little one is 300 euros, and the larger ones are generally a four-digit sum.”
Ultrasonic washing (bath) for pre-sterilization cleaning of medical instruments
It is clear that high power for a household ultrasonic washing machine will significantly reduce its safety, so manufacturers had to make a compromise (read: reduce power).
Such devices do not consume a lot of energy, so they won’t electrocute you.
However, you should not expect that the ultrasonic radiation of a low-power machine will be able to wash a mountain of laundry in a large container with an equally excellent effect.
But maybe a low-power machine in a small basin will be effective? Maybe the 5 W power of the Retona machine is enough to wash at least one shirt? I wanted to test these theoretical calculations in practice.
Useful videos
We bring to your attention a video about how you can make an automatic machine from the electric motor of an old machine, namely, how the engine from such a device helped create a band saw machine:
Detailed video instructions on what can be made from a drum (tank) removed from an old washing machine, namely, how to make a barbecue:
How to make a sharpener (emery) from a car engine:
Another idea on what can be made from a washing machine motor, namely, how to make a grinder and use the engine for this:
And here’s how a lawn mower works, which can be made from the engine of a Malyutka car:
How and from what is it more profitable to make?
Trying to make things easier for yourself, the first step will be to try to fix the broken equipment. On the one hand, this is correct, but on the other hand, in most cases you will still have to organize a trip to the store to purchase replacement parts. If there was an activator washing machine of the “Malyutka” type at the dacha, then repairing it is too tedious and economically impractical.
What to do if there is no opportunity to go to the city? You can assemble a washing machine with your own hands from parts lying around in a country shed, taking some elements from worn-out equipment. Ideally, the designed product should eliminate the need for welding and turning. Assembly will take several hours.
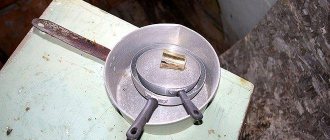
Assembling the press
Making your own structure for obtaining grape juice is not as difficult as it might seem at first glance. The algorithm of actions is very simple, but it will require patience, hard work, and in some cases even ingenuity.
Take a corner and form it into a U-shaped frame onto which the chassis will be attached. Drill through the metal frame to attach a cast iron circle to it. Make a tray from a meter-long sheet of metal to collect the leaking juice. The ends of the sides must be bent upward, and a gutter must be provided on one edge for draining grape juice. Attach the U-shaped “horizontal bar” to the pallet
It is important to attach the frame tightly, since it is, in fact, the main element of the grape press. Place the washing machine drum under the bar. Insert a threaded pin into the hole drilled on the frame, and weld a smooth metal rod to its upper end, which will serve as the handle of the press. Weld a cast iron or steel circle to the bottom of the threaded rod. Check the stroke of the pressing mechanism. Adjust the position of the drum so that the heavy pancake fits into the bowl without any obstruction. Weld the tank to the pan.
The grape press is assembled. All that remains is to place it on the work surface at a slight angle so that the squeezed liquid drains out without any problems, and place any container under the groove to collect the finished juice.
As you can see, you can make a press with your own hands to obtain berry juice quickly and on a budget. After installing the mechanism, you should check the device for functionality. To do this, fill the drum bowl with ripe fruits and start moving the press handle. This activates the work surface intended for crushing berries. The resulting juice will begin to pour out of the holes and flow into the prepared container. The container for collecting grape juice must be made of inert material. It is acceptable to use wooden, enamel bowls or stainless steel containers.
Carefully! Antiviral drugs and children!
I would like to share a lecture by a clinical pharmacologist about our popular antiviral drugs. Let me start with the fact that clinical trials of new drugs on children are prohibited in our country, but! You've probably all noticed that as soon as a new drug appears in the pharmacy, pediatricians (not all, but many) start prescribing the drug, and then see if it helps.
. . I'm talking about trials (everyone understood).
| What would you do if you found out your husband was cheating? |
In our native lands, less than a week ago, a rather high-profile crime occurred, which received publicity in the press. No matter how wild it may sound for our time, the murder occurred against the backdrop of jealousy. And I thought, what would I do if my husband cheated?
| 2 weeks of active weight loss! Subtotals! |
Reluctantly, I am publishing this post with a photo, because I am very embarrassed about myself. But let this post be a memory, an incentive and a little boast for me! At the beginning of the month I started losing weight.
Sluggishly, reluctantly. I started going to strip plastic surgery. Then she took charge of herself thoroughly.
In general, I have 2 weeks of normal active weight loss. What do we have? 2 times a week active dancing with a furious warm-up, currently 11 sessions of anti-cellulite massage.
| My “fashion verdict” |
In March there was filming with my participation in the “Fashionable Verdict” program. I can’t remember anything good about this program, although there were many pleasant moments. But the worst thing is that my hair was cut off. And now I’m sitting, looking at myself in the mirror and realizing that this is all I remember.
The end of summer, the beginning of autumn is the time to collect fruits, vegetables, apples, and grapes. And if the harvest is large, then a regular electric juicer will not cope. In this case, the garden needs a press for squeezing juice from fruits. Now there are a lot of offers on the Internet for various presses and crushers, hydraulic, screw, pneumatic, wooden, but the biggest disadvantage of these products is the high price. Making a juice press with your own hands is not difficult; you need a little skill as a mechanic or welder. And the cost of a homemade press for grapes or apples is several times lower than a purchased one.
For a winemaker, such a device will make his work easier and save a lot of time. The simplest version of a home juicer is based on squeezing juice from the pulp of fruits or vegetables. The apples are first crushed with special crushers, a grape crusher is used, and then the juice is squeezed out of this mass. With this technology, pure juice without pulp comes out, ready for fermentation, or for pasteurization and further storage.