A bearing unit failure in a washing machine is one of the most important problems. As a rule, changing a bearing is very difficult, since the machine will have to be completely disassembled and before doing such complex work, you need to be 100% sure of a breakdown. You can preliminarily determine whether a bearing is faulty by external signs without disassembling the machine, but to make sure that you have determined it correctly, you need to partially disassemble the machine. We will tell you how to identify signs of bearing failure in this article.
Where are Atlant washing machines made?
Washing machines Atlant
— country of origin: Belarus
Interesting materials:
How to set your default printer? How to make your printer networked? How to make your own handwritten font? How to make your own dog toy? How to make a watering can with your own hands? How to make your own air freshener? How to make a bird repeller with your own hands? How to make your apartment cozy and stylish? How to make a table in a laptop? How to make a kitten fall asleep?
Diagnostics without disassembling the machine
Only a professional technician can 100% determine if a washing machine bearing is damaged without disassembling the machine. And if the bearing has just begun to deteriorate, then without disassembling it will not be possible to understand anything at all. However, there are several signs that may indirectly indicate this breakdown.
- Extraneous noise during washing and rinsing. During the spin cycle, extraneous sounds are more difficult to distinguish, so listen to how the machine works during the wash and spin cycle. What sounds can we talk about? Usually this is a clanging sound on metal, knocking, grinding, etc.
- The machine does not spin clothes well. Due to the destruction of the bearings, the drum cannot gain sufficient speed in the spin mode, which means the quality of this spin decreases.
- There may be a slight imbalance. If the bearings are destroyed, the balance of the machine may be partially disrupted, and it will begin to sway more strongly from side to side. The imbalance will be minor, so you need to be more careful.
- Pay attention to the edges of the cuff, if they are damaged - this indirectly indicates problems with the bearings.
We continue to diagnose the washing machine without disassembling it. Disconnect the machine from the power supply, open the hatch door wide, stick your hand in and place three fingers on the top edge of the drum. Let's shake the drum. It should swing with the tank on springs, but there should be no play between the tank and the drum.
If there is play, it means the bearings have already begun to deteriorate.
Now we spin the drum with our hands as much as we can. The drum should rotate relatively freely, producing a slight hum. If instead of a slight hum you feel a beating, or even more so hear a clanging sound, there is most likely a problem with the bearings. There are not so many reasons for the failure of these parts. This is either simple wear and tear or a factory defect, so draw your own conclusions.
The nuances of performing work on machines from different manufacturers
To repair some models from individual manufacturers, you need to know about the nuances determined by the design of these units. Washing machines of such brands as Indesit and LG, Samsung and Atlant have such features.
"Indesit" (Italy)
When repairing cars of this brand, it is initially necessary to clarify the design of the tank, because it may be different. New models are produced with a non-separable tank, and older ones with a collapsible one.
This determines the volume and sequence of operations performed. In addition, on some models the pulley mounting screws may have left-hand threads (W 84 TX), which must be taken into account.
The water doesn't heat up
This type of malfunction occurs quite often. Place your hand against the washing machine door. If the door glass becomes warm 15-20 minutes after the start of washing, the heating element is working. If the glass does not heat up, the Tubular Heater may be burnt out. But the machine may not heat the water for various reasons. Much depends on the model of the washing machine. In most cases, the machine will display an error code when turning on the water heating. Some models are washed with a faulty heating element. From time to time, the water level relay or control module breaks down, which means you need a washing machine repairman.
Common replacement mistakes
Please carefully study the following recommendations so that replacement does not become an expensive repair:
- the pulley is broken, you can’t pull it, just rock it slightly to the sides and pull lightly;
- breakage of the bolt heads; if the bolt does not fit, spray WD-40;
- break in the temperature sensor wire, be careful with the tank lid;
- the moving unit is damaged;
- The gasket of the moving unit has not been replaced;
- All sensors and wires are not connected during assembly.
So, you are convinced that replacement is quite a labor-intensive task, but doable if you have at least a little experience working with equipment.
If this process is difficult for you, we advise you to contact professionals, for example, an official service center; check the price on the website.
Water does not drain
The washing machine may stop with the tank filled with water and the water will not drain. This may have happened due to a clogged filter. The cause could also be a failed pump. Sometimes the washing machine drains water during the rinse cycle, but does not do so during the spin cycle. It happens that the washing machine works normally only periodically. This may occur due to pumps in which the armature is cooled by water coming from the machine. Self-cleaning pumps are a rather complex design and cannot be repaired. Such pumps last about 3-5 years. And if the service life has expired, you should change the pump without hesitation; the washing machine will need to be repaired.
How to replace a bearing: step-by-step instructions
Bearing replacement for models Indesit WISL 82, WISL 102, WISL 105 X, IWSD 5085 and others is carried out according to a general algorithm. The only difference may be the order in which the tank is opened. In devices of this brand, both collapsible and solid elements are installed. In the first case, getting to the bearing will be easy; you just need to disconnect the tank mounts. If the washing machine is equipped with a non-separable element, the plastic sheet will have to be sawn and then the two parts re-glued.
First you need to remove the top cover from the unit. This is easy to do by unscrewing two screws from the back of the washing machine and carefully sliding the lid back a little. Then it needs to be lifted and removed from the support. In some Indesit models, the lid is additionally held in place by plastic latches at the front. If there are any, use a hammer and lightly tap away from you to remove the cover from the latches.
Before removing the top cover, you need to unscrew the screws
Next, dismantle the back wall . To do this, unscrew the 6 screws on it, after which the panel should come off without any extra effort. You will see a motor behind it, but it will need to be disconnected at the end of disassembly. If the machine is equipped with a drive belt, it must be removed at this stage so that it does not interfere with further actions.
Then proceed to disconnect the dashboard . First, remove the powder receptacle by pressing the lock inside the element. In the compartment free from the hopper, unscrew the bolts that secure the instrument panel and remove it from the holders. The connecting wires must be removed and the completely separated part placed aside so as not to damage it during operation.
Experienced craftsmen advise beginners to photograph each step of disassembling the unit in order to facilitate the assembly process after completion of the repair.
After removing the dashboard, it is necessary to remove all parts located in the upper part . These include a concrete counterweight, a pipe located between the tank and the powder compartment, a pressure switch and a water inlet valve, as well as their contacts.
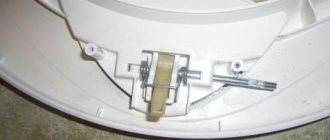
Before removing the front wall, unscrew the hatch door and remove the rubber cuff. First, use a screwdriver to bend the seal and carefully wrap it into the tank so as not to damage it. Unscrew the bolts that hold the hinge in place and remove the door.
From the rear side below, you need to disconnect the electric motor and heating element, shock absorbers, drain pipe and counterweight from the housing. To remove the motor from the machine, disconnect the power supply and ground wire, then unscrew the bolts that secure the element. Using the same principle, disconnect the heating element wiring.
After removing the back cover, disconnect the heating element and the motor
Using pliers, remove the clamp and disconnect the drain pipe from the pump . It is recommended to unscrew the filter before doing this. To release the shock absorbers from the fastenings, you need to unscrew the nuts on the left and right sides. When all elements are removed, make sure that nothing is holding the tank and dismantle it. Then unscrew the pulley using a T40 hex key. Loosen its fastening by gradually loosening the bolt. If this is not easy to do, use WD-40 to soften it.
To get to the bottom to disconnect the pipe and shock absorbers, you need to place the machine on the front or side panel.
Next, you need to disassemble the dismantled tank to get to the drum and bearings. In a collapsible tank, it is enough to unscrew all the bolts around the circumference and carefully separate the two parts. The solid part must be cut in half at the joint using a hacksaw or grinder. First, you need to drill holes around the perimeter of the tank, the distance between which should be no more than 4-5 cm. This manipulation is necessary in order to assemble the tank after completion of the work and secure it with bolts.
This is what the tank looks like after being removed from the machine body
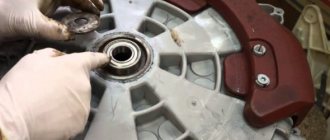
After this, remains is to unscrew the bolts holding the tank to the drum , unfasten the retaining latches and remove the plastic walls of the tank. Then you can proceed directly to replacing the bearing on the drum of the Indesit washing machine. The procedure is carried out in the following order:
- Remove the worn oil seal from the socket and carefully knock out the metal washers.
- Place the drum on the side of the hatch.
- Place a chisel on the rim of the outer bearing and knock out the part with a hammer.
- Repeat the manipulation of the inner bearing, making sure that the chisel does not hit the drum body and damage it.
- Clean the sockets and treat them with lubricant and WD-40.
- Drive the new elements into the vacated spaces until they stop, hitting the outer edges of the parts with a hammer.
- Treat the oil seal with lubricant and install it on the inside of the tank.
- Reassemble the washing machine in reverse order.
Do not forget to treat the bearing installation area with protective lubricant.
Replacing bearings is a labor-intensive and time-consuming process, but by doing it yourself, you can save on the services of a service center. We hope that our article will be useful to you.
Spin noise
After a certain period of service, the machines begin to rattle when spinning. The sounds may resemble a jet plane. If you hear extraneous noise for the first time, stop washing immediately to avoid more complex damage. Bearings can cause this problem; a washing machine repairman can figure this out. As a rule, this happens after 4-5 years of operation. Unfortunately, everything can happen earlier. Bearing wear after 5-7 years is considered normal. The early wear of drum bearings is also influenced by the quality of materials. Manufacturers often install Chinese bearings or do not lubricate the seal that covers the bearing . This speeds up premature repair of washing machines. Water gets into the bearing and it begins to rust. Replacing bearings is a very labor-intensive process in which the washing machine is almost completely disassembled. And if there is a soldered tank, this makes repairing washing machines even more difficult.
Water does not fill
First, check whether there is water supply to the machine. Make sure there is cool water in the water supply and that the water supply tap is not closed. Check whether the washing machine door is closed and whether the lock lock is faulty. A faulty inlet valve or heating element in most cases means that water will not fill.
The drum does not rotate
Such a breakdown often occurs when the machine is overloaded or when the drum drive belt breaks. This is not uncommon with Indesit and Samsung models. Washing machines with direct drive are not affected by this. With this breakdown, you can often hear the engine running. If you cannot hear the engine running and the drum in the machine does not rotate, it is worth checking the serviceability of the engine. You will need qualified diagnostics and repair of your washing machine. The drum will not rotate due to a loss of voltage to the motor, faulty wiring inside the machine, or a broken control module. Kharkov, as a big city, can provide washing machine repairs in many specialized services. We also repair washing machines at home.
READ How to turn off the remote control on a washing machine
Let's analyze it, check it, make sure
Partial disassembly of the washing machine and identification of direct evidence of bearing failure will help to verify the correctness of our preliminary conclusions. In this case, you won’t have to disassemble the drum with the tank; we’ll try to make do with “little blood” for now. What are we doing?
- We disconnect the machine from all communications and take it out into the middle of the room.
- We go in from behind and unscrew the back wall of the case.
- Pay attention to the rear wall of the tank so that you can better see how to remove the drive belt.
When a bearing fails, in almost all cases a lubricant leak occurs, and parts without lubrication are susceptible to corrosion. Accordingly, what can we find on the back wall of the tank? And we can detect rusty streaks and traces of lubricant. If this is the case, it means the bearings have fallen off; you don’t even have to put the machine back in place, since it cannot be operated with such a malfunction.
Interesting:
- Replacing a bearing in an Electrolux washing machine
- How to change a bearing in an Indesit washing machine
- Replacing a bearing in a Zanussi washing machine
- How to change the seal of a Bosch washing machine?
- How to change bearings in a Whirlpool washing machine?
- How to change a bearing in a washing machine
3 reader comments
- 06/10/2019 at 18:11
Natalia:
Grease leaks with rust and stains remain on the laundry after washing.
Answer
- 08/07/2020 at 16:14
Faith:
But no. We had an Italian Indesit, so it washed, wrung out and there were no stains, no rust. And the bearings flew. The master replaced it and the machine worked for many more years, but these are old SMAs, this was about 20 years ago.
Answer
- 02/03/2021 at 16:20
Sos:
Of course this is true, if the oil seal is intact then nothing will leak inside.
Answer
Drum jamming
The sizes of the bearings used vary markedly; sometimes you can find so-called “mono bearings” - a double-row bearing assembled in one housing, which is pressed into the tank. This solution guarantees the durability of the unit, but is extremely inconvenient in terms of repair.
If a breakdown is identified during diagnostics, measures must be taken to correct it. There are two possible solutions to the problem: you can take the washing machine to a workshop, you can remove the tank and replace it yourself. Do-it-yourself repairs are possible, but you must be aware that this is a difficult task that requires experience and perseverance.
