These fault codes are suitable not only for Candy, but also for washing machines from Hoover and ZEROWATT, since Candy owns these brands. They all use a Cuore (Italian for "Heart") control board, which is used for program selection and is welded directly to the PCB.
The new Cuore control module is installed on washing machines where the first few characters of the model number begin with the following letters:
- CO
- COS
- GOF (Fuzzy) Candy GO
- SMART (Fuzzy) Candy Smart
If your model number begins with these letters, then the Kandy error codes below will apply to your washing machine.
Determining the error code in a car without a display
Manufacturers produce various models of washing machines, some of them are not equipped with a special display to display information about the status of the unit.
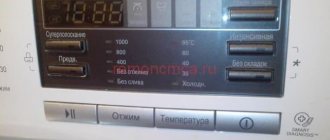
The presence of a display greatly simplifies the diagnostic process. Units without a display are also capable of self-diagnosis. In this case, the LED indicators located near the function buttons flicker.
To start the testing process on machines without a display, you need to perform several preparatory operations:
- Completely remove water from the washing machine tank.
- The washing mode switch is set to off.
- The dedicated advanced functions button must be pressed and held.
- Next, set the washing program switch to the first position.
- After five seconds, all the LEDs on the machine panel should light up.
- After the indicators light up, you need to release the additional functions button and press “Start”.
The number of blinking indicators (before the pause) indicates the nature of the washing machine malfunction. By counting the lighting of the indicators, it is easy to determine the error code. So, if three fires occurred before the pause, this indicates the presence of error E03 in the Candy washing machine.
Call the master
Ignorance of the internal structure of the Candy washing machine, lack of or unsuccessful experience in self-repair is a good reason to turn to service center professionals for help.
When leaving a request on the campaign website or by phone (contacts are easy to find through Internet search engines), you must provide the washing machine model and error code (if the washing machine does not have a display, then external signs of a malfunction).
Depending on the complexity of the repair, the cost of services can vary from 1,500 rubles. up to 4500 rub . The technician will be able to announce the exact amount to be paid only after a thorough diagnosis of the household appliance.
Upon completion of the repair, the technician starts the washing machine, checking the quality of the work done. Only after this can a full calculation be made. Under no circumstances should you pay in full for work not yet completed. Otherwise, there is a high risk of being left with an unresolved problem.
Errors in the system that you can fix yourself
If a breakdown occurs during operation, the Kandy washing machine will inform the owner in one of two possible ways:
- If there is a display, Activa series appliances will display an error in the form of a digital code.
- In Aquamatic models there is no display; the machine will provide information about the problem using a flashing light on the front panel. By the number of times the light flashes, you can judge the malfunction that has befallen your washing machine.
Error code E01
Before starting the wash, the unit fails to lock the door in the closed position. The appearance of error E01 on the equipment display may be a consequence of the hatch not being tightly closed. The first step is to check if clothes are stuck in the gap. If this is not the problem, the door lock has probably failed. It is also necessary to inspect the wiring for integrity. It is also possible that the electronic controller is not working.
Code E02
Water intake error. By the appearance of such a code on the display, the machine notifies that either its level after a set time is below or above the nominal mark.
If the problem could not be detected, then most likely the filling valve, which is responsible for drawing water in the required quantities, has failed. The code may have been displayed due to a faulty operation or electronic controller.
Error E03
Indicates that the water drains from the drum very slowly, which does not comply with the technical requirements (more than 3 minutes), or does not drain at all.
It is necessary to inspect the hose and make sure that it is not pinched or clogged anywhere, and that the drain filter and siphon are not clogged with scale. It is likely that the problem is caused by a faulty drain pump or pressure switch.
Be careful, as some errors that appear on the display are due to the carelessness of the equipment owners.
- If so, check to see if there is a complete power outage in the entire house, or you have not inserted the plug into the socket.
- Water does not fill into the drum because the delayed start mode is set by mistake.
- much stronger than usual. Probably, the vibration is caused by an imbalance of the unit relative to the floor surface, or the laundry is unevenly distributed throughout the tank during the rinsing process.
- The appearance of abundant foam may be due to the use of washing powder for hand washing.
- At the end of the working cycle, the equipment does not drain the water and does not spin - perhaps due to inattention, the mode “without draining water”, “light ironing”, “without spin” was set.
- All indicators are on or flashing - this may be due to a malfunction of the equipment. Restart your machine by turning it off for a couple of minutes and then turning it on again.
additional information
If the washing machine stops working before the end of the washing program or refuses to turn on and perform certain actions, you should immediately pay attention to the presence of an error code.
In addition to the list of the above symbols, which occur most often, there are other signals that appear less frequently. In some cases, words or certain symbols appear on the display. For example, the following.
- Snowflake image. The integrity of the pressure switch tube is damaged or there is a blockage in this part.
- PROG. CONTINUE. This inscription indicates that the previous program was not completed.
Owners of washing equipment with vertical loading of laundry most often encounter the following two problems.
- E14. The contacts going to the heating element of the machine have oxidized.
- E16. The heating element burned out, without which the washing machine would not be able to operate.
Models belonging to the Aquamatic series have 3 error codes.
- The hatch of the car is jammed or blocked. The controller is not working properly.
- The tank does not fill with water.
- Problems when draining waste fluid. This may be due to blockage or equipment failure.
Washing machine motor tachogenerator
A small note. Attempts to restart the car were unsuccessful. Water is poured and drained, but the drum does not spin, because the motor does not start.
To diagnose a tachometer generator, you can, in principle, not remove the engine, but only remove the contacts with the cable. But because...
The reaction of the washing machine was a little confusing, it was decided to conduct a full diagnostic of the engine. And she was worried because if the tachogenerator malfunctioned, the engine should have tried to start, which did not happen.
So, when ringing, it turned out that the resistance of the tachometer is 45 Ohms - this corresponds to the norm. It does not penetrate the housing, and when the motor shaft is cranked, it produces a constant voltage of approximately 0.2-0.
4 volts. What's the matter? Is the machine giving the wrong error code?
The engine was completely checked. The rotor and stator resistance is normal. No leaks were found on the housing. No interturn short circuit was found in the motor windings.
On a top loading washing machine
First, let's give an example of a Kandy washing machine. It has a rare self-diagnosis system, which includes the E16 code we are interested in - the Candy CTD8766 washing machine. This is a rather stylish machine with top loading, electronic control, a simple backlit display and a maximum load of 6 kg.
How is the E16 code deciphered on such a washing machine? Literally, the decoding sounds like this: “...a short circuit has occurred in the heating element circuit...”. What does it mean?
- The heating element of the washing machine simply burned out due to scale or a short circuit.
- The wiring has burned out or the contacts have oxidized, which is why the heating element is not receiving power.
- The control board triac, which is responsible for the heating element, has failed.
In rare cases, such an error can be caused by a short-term failure in the control board. You can fix this problem by restarting the washing machine. If disabling and re-enabling the home assistant does not help, you will have to resort to repairs, the nuances of which we will talk about a little later.
On Aquamatic series washing machines
The Candy Aquamatic washing machine, of course, will not show you the E16 code, since this washing machine does not have a display. And those Aquamatics that have a display also cannot show this code, since it is not built into their self-diagnosis system. However, displayless Candy Aquamatics show error 16, which is essentially similar to error E16.
Error 16 is also interpreted as a malfunction of the heating element (short circuit, open circuit, insulation damage), but recognizing this code is not so easy. To determine this or that error on a Candy washing machine without a display, you need to count the number of blinks of a special indicator, which is located in the lower left corner of the machine’s control panel near the toggle switch. If the washing machine has stopped working and the indicator blinks 16 times, this means that the machine is generating error 16.
How to fix the error?
To eliminate error E16 on top-loading washing machines, you will first have to check the heating element and the electrical communications that go to it. First, as usual, you will need to open the case and visually inspect the part of interest, and then check it with a special device - a multimeter. So, let's do the following.
- Let's disconnect the washing machine from the water supply, sewerage and electricity, then pull it out and turn it towards us on the right side.
- We unscrew the two screws that hold the right side wall of the machine, and then remove this wall to the side.
- Next to the large pulley at the bottom of the tank we see the contacts of the heating element, to which a bundle of wires fits, however, working with the heating element is inconvenient, since the drive belt gets in the way. In one easy movement, pull the belt off the pulleys.
- We photograph the location of the wires so that later we don’t forget how to connect them.
- We remove the wires and inspect them, as well as the contacts for melting or oxide.
- We measure the resistance of the heating element with a multimeter.
- We take out the old heating element and put a new one in its place.
- We put the machine back together and connect it to communications - you can check it!
The Candy Aquamatic series can be repaired in much the same way, only in order to get to the heating element, you will have to remove not the side wall, but the back one. If you are interested in other malfunctions of washing machines of this brand, read the publication Error codes for Kandy washing machines.
In conclusion, we note that the rather rare error E16, however, can spoil a lot of blood for the owners of Candy washing machines, especially considering that it is quite difficult to find its decoding on the Internet. But we tried to correct the situation by writing this short article, we hope the information it contains will be useful. Happy renovation!
Trouble-shooting
If the washing machine stops working correctly, diagnostics should be carried out.
Before starting work, you must prepare your equipment by following these steps.
- Remove all items from the tank. If necessary, it must be freed from water.
- Close the hatch tightly.
- Make sure that the “Drum Balancing” mode is disabled.
- Turn off the equipment and disconnect the power.
The automatic testing mode is carried out according to a specific algorithm.
- The first step is to press the key for the main (first) wash or additional function. This key is on the left.
- While holding the selected button pressed, you should move the program selector to 60 degrees, stopping it at prewash.
- Release the first key immediately after all the indicators on the machine panel light up. If all actions are performed correctly, it will take 5 seconds.
- Click the "Start" button.
Note: If the program fails to start, try again by changing the first key.
During automatic diagnostics, a number of operations are performed.
- The washing machine takes up 6 liters of water. The liquid is collected through a container for household chemicals used in pre-washing.
- The heating element starts working and operates for 20 seconds. Before starting there is a pause of one second.
- The next step is adding water, which also occurs through the compartment for gel or powder.
- The machine starts the drum at a maximum speed of 55 revolutions per minute. It spins counterclockwise for 16 seconds.
- After this, the equipment stops for 4 seconds.
- Add liquid and start the drum again at the previous speed.
- After 16 seconds the drain pump starts working.
- The final stage is a spin for 15 seconds.
When the test has come to an end, the machine will notify the user of completion using light indicators. They will light up at the same time.
If the equipment has carried out diagnostics from start to finish, then it is working properly. If the unit stops at one of the stages, you need to carry out an additional check, during which you will have to disassemble the washing machine.
As a rule, each error indicates a problem with a specific part that needs to be checked for functionality and then repaired or replaced. Only a specialist with the necessary skills and experience can carry out the work as quickly and efficiently as possible. Otherwise, it is not recommended to carry out the work - you can further aggravate the problem.
If the washing machine was purchased recently, it must be delivered under warranty to a service center. In this case, company employees must repair the equipment or provide a new, working model.
For information on what to do if the Candy washing machine display shows error E 03, see below.
Error codes
Washing machines with display
| Code | What does it mean | What's going on with the machine? | Reasons for the error | What to do |
| E01 | Problem with hatch locking | The door does not lock and there is no button indication. | The locking device does not work or there is a problem with the electrical controller. There may also be a wiring problem. | Check the hatch blocker and wiring, and then inspect the electrical controller. Repair or replace non-working parts. |
| E02 | Problem with water filling | Water does not fill inside the machine at all, or its level does not reach the required parameters within 210 seconds. This error is also displayed when the water level is very high, which does not allow the command to be executed. | The fill valve is not working. The electrical controller has stopped functioning. The filler system strainer is clogged. The pressure switch stopped working or there was a leak in its pipes. | Check the condition of the valve, the function of the pressure switch and the functionality of the controller. If necessary, clean the filter in the filling system. |
| E03 | Problem with water drainage | The water does not drain at all or is released from the machine for more than three minutes. | The drain pump does not work or the contacts in its circuits are broken. The pressure switch has become unusable. The drain path is clogged. | Check the drainage system pipes and hoses, as well as the pump and water level sensor. Replace faulty parts with workers. |
| E04 | Fill valve problem | The volume of water inside the tank is higher than the required parameters, as a result of which the pressure switch signals that the tank is overfilled. | The fill valve is broken (it remains open all the time) or the electrical controller is damaged (often the triac is to blame for the malfunction). | Check the triac and fill valve by repairing them or replacing them with serviceable parts. |
| E05 | Water heating problem | The water does not heat up. | The temperature sensor, electrical controller or heating element does not work. The program selector motor has failed or the control unit circuits have broken down. | Assess the performance of the heater, measure the resistance of the temperature sensor and the program selector motor. It is also worth checking the electrical circuits and functionality of the controller. Replace faulty parts with new ones. |
| E07 | Engine problem | The engine rotates quickly and sharply. After three attempts to start it at maximum speed, the wash stops. | The tachogenerator does not work (most often the problem lies in its core). | Check the resistance of the tachogenerator winding, and if it is faulty, replace this unit. |
| E09 | Engine problem | The shaft stops rotating. | The entire control unit does not work or the triac has burned out. | Assess the operation of the control unit and the condition of the triac, and if faulty parts are identified, replace or repair them. |
Washing machines without display
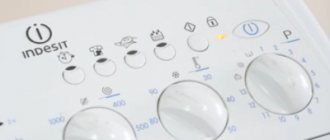
In models without a display, errors are determined by the number of blinks of the indicator located at the bottom left:
| Code (number of flashes) | What does it mean | Reasons for the error |
| The indicator is always on | Problem with the control module | The control module does not work or its program has failed. |
| 1 | Problem with hatch locking | The locking device does not work or there is a wiring problem. |
| 2 | Problem with filling the machine with water | The fill valve or pressure switch has become unusable. The fill hose is dirty or kinked. The water pressure in the pipes is too low. |
| 3 | Problem with water drainage | The drain pump does not work or the contacts in its circuits have become unusable or broken. The drain path is clogged. |
| 4 | Fill valve problem | The valve has become unusable (does not close). The pressure switch does not work or its wiring is broken. |
| 5 | Problem with temperature sensor | The sensor has become unusable due to a short circuit or break. |
| 6 | EEPROM problem | A memory error has occurred or the control module is not working. |
| 7 | Engine problem | The drive motor is blocked. The hatch lock is stuck (the hatch is closed). |
| 8 | Problem with the tachogenerator | The tachogenerator has become unusable due to a short circuit or break. |
| 9 | Drive motor problem | The triac burned out. |
| 12 and 13 | Communication problem | The connections connected to the control module are damaged. |
| 14 | Control problem | The control module does not work or its wiring is broken. |
| 15 | Control problem | The control module does not work or its program has failed. |
| 16 | Problem with heating element | The heater is damaged due to a short circuit. The insulation is damaged. |
| 17 | Problem with the tachogenerator | The tachogenerator transmits incorrect signals. |
| 18 | Control problem | The control module does not work or the power supply parameters are unsuitable for machine operation. |
Reasons for appearance
The most common reasons that the SM issues error E03 are the following:
- clogging of the drain hose from the pump to the siphon or other equipment used to connect to the sewer system;
- breakdown or complete failure of the pump;
- damage to the contacts in the water level sensor - pressure switch.
Failure of E03 in SM Candy may also indicate interruptions in the heating circuit. Often the cause of the error is a malfunction in the control unit. Error E03 often appears due to the negligence of washing machine users when the washing mode is set incorrectly. To fix this problem, you just need to make sure that the selected program is correct before clicking the “Start” button.
How to fix it?
To fix the problem, it is necessary to carry out repair work depending on the cause of the problem.
Broken valve
In the production of Candy brand washing machines, original filling valves are used, which are not similar to elements in the products of other companies.
Valve failure may be due to the following problems.
- The filter located between the hose and the valve is clogged. This is a small mesh that prevents debris from getting into the water.
- In some cases, a special coil located on the valve burns out. It needs to be rewound or replaced.
- To control the fluid pressure, dense plates are used. During use they may become dislodged and fall out.
Problems with the pressure switch or module
If the error appears due to incorrect operation of the sensor responsible for the liquid level, you need to do the following.
The first thing you should do is find the pressure switch. It is located in front of the washing machine. Diagnostics begins with checking the tube, its integrity and tightness. If there is a defect, this element must be replaced. Using a special tester, the pressure sensor contacts are checked
It is also worth paying attention to the serviceability of the wire through which the power is supplied.
Pay
Control boards also fail. Individual elements placed on it are responsible for filling the tank with water and draining it. They definitely need to be checked for serviceability, but only a specialist will find the necessary elements on the board. It is better to entrust the repair to a professional. If you carry out repairs yourself, you can damage the board.
In the production of equipment, the company uses boards of various models, so this part may differ in different washing machines.
General troubleshooting tips
- If the washing machine refuses to start washing due to insufficient water pressure, this problem can be solved by installing a pump. Its installation is not difficult to cope with even without professional knowledge. The sediment will maintain the required pressure. If the insufficient level persists, you should contact the water utility to solve the problem.
- When drawing water, the shut-off valve must be fully open. Close it only after the washing program has completely stopped.
- Check the integrity of the hose through which water flows. Any leak must be repaired.
- If the mesh filter becomes dirty, it must be carefully removed, washed and reinstalled.
- As a preventative measure, experts recommend periodically cleaning household appliances inside and out. Do not forget to thoroughly rinse the compartment for washing powder and other chemicals.
- If the water in the tap water is saturated with heavy metals and other foreign impurities, you need to use special softening compounds. Modern household chemical stores offer a wide range of products designed specifically for automatic washing machines. Compliance with this simple rule will significantly increase the service life of your equipment.
- If you notice that the washing machine begins to draw water more slowly, you need to diagnose the equipment as soon as possible. If the problem is not corrected in time, a malfunction may cause other malfunctions.
- Flashing can help eliminate control board faults, but this can only be done by a qualified technician. In the event of a serious breakdown, you will have to replace part of the microcircuits or purchase a new board.
For information on how to identify errors by indication in a Candy washing machine, see below.
Features of the cipher manifestation
Error E01, in most cases, is issued in Kandy washing machines at the very beginning of the wash cycle. The user places dirty laundry in the drum, closes the door, but after selecting the desired mode and starting the device, the hatch does not lock. Code E01 is displayed on the screen. In models of a particular line, the error can be displayed in different ways: E1, Err1, Error1, etc.
In Candy manufacturer's technology without a display, you need to pay attention to the indicator lights. If an error is present, the light flashes once, followed by a long pause (up to 15 seconds), and the LED flashes again. Which indicator will light up when an error occurs depends on the device model. In the Grand line appliances, the washing machine displays code E01 with the “Intensive Wash” mode LED and the very first left LED in the wash time calculation display (in most cases this is the value “90”).
Models of the Smart line are signaled by the “Intensive wash” indicator and the upper LED indicating the countdown system. More often it is “90” or “Start”. In the Holiday and Aquamatic model household appliances, the cold water wash mode light blinks.
Important! The intensive washing mode is indicated by the image of a shirt, washing in water without heating is indicated by a snowflake.
How to determine an error in cars without a display
Candy Aquamatic series models do not have an information display, which usually displays an error message. In this case, the problem can be recognized by the blinking of the lower left indicator. The user needs to count the number of diode flashes in one of the series, the interval between which is 5 seconds.
In cars without a display, you can determine the nature of the breakdown by the glow of the indicators
Information about the causes of errors is collected in the following table.
| Number of indicator flashes | Possible causes of malfunction |
| 0 (steady lit) | Control module malfunction, electronic module program failure |
| 1 | Failure of UBL contact connections, breakdown of the locking device |
| 2 | No water inlet. The filler valve is closed, the pressure in the water supply is low, the solenoid valve or pressure switch is out of order, the intake hose is broken or damaged |
| 3 | No water drainage. Clogged drain hose or filter, broken drain pump, lack of contact in pump connections |
| 4 | Activation of protection against leaks (emergency level of the water level sensor). Damage to the fill valve, pressure switch or its contacts |
| 5 | Failure of the temperature sensor (NTC), short circuit of the temperature sensor, problem with the program selector |
| 6 | Malfunction of the EEPROM memory, failure of the control module or its contacts |
| 7 | Based on the MDL control system - motor blocking. Based on INVENSYS – hatch locking device jammed in the closed state |
| 8 | Short circuit or break in tachometer |
| 9 | Failure of the drive motor triac |
| 12, 13 | Lack of contact between the control unit and the display module. Lost connections |
| 14 | Failure of the control module or its contacts (for the MDL system) |
| 15 | Control board program failure, control unit malfunction |
| 16 | Insulation failure, short circuit of the heating element |
| 17 | Incorrect tachometer signal |
| 18 | Incorrect power supply parameters, control module failure |
Above are the general code values for machines without a display. Before you fix the problem, it is best to check the decryption for your specific Candy model. Values may differ depending on the characteristics of all modifications of the unit. You can find reliable information about fault codes in the official user manual for your washing machine.
Possible breakdowns when professional repairs are indispensable
Error E02 can indicate not only minor problems, but also serious breakdowns that require the intervention of a technician. Here are possible faults that require repair.
Filling valve - from 1500 rubles*
The most common breakdown of Candy is error E02. It occurs in approximately 70% of cases. The water supply valve device includes a housing, a membrane and an electromagnetic coil. Old Kandy models are equipped with single-type valves; modern machines use two-section valves: one section is responsible for collecting the water needed for washing, and through the second section water enters the tank during the rinsing stage.
The valve cannot be repaired; it needs to be replaced.
Control unit - from 1900 rubles*
The firmware fails or the board elements in the fill valve control circuit fail. Usually the malfunction occurs immediately after turning on the wash, sometimes during the wash process or during the rinse.
If the problem is in the “firmware”, it is enough to reprogram the control unit memory. If during diagnostics the technician identifies defects in the board, you need to resolder the faulty elements, solder the tracks and contacts. In some cases, the module cannot be restored, so the control board must be replaced.
Water level sensor (pressostat) - from 1600 rubles*
The main task of a water level sensor or relay is to determine the filling level of the tank. If the pressure switch is faulty, water:
Failure occurs due to clogging of the pressure sampling chamber, damage to the pressure switch tube, or failure of the sensor itself.
The troubleshooting option is selected only after diagnosis. The main methods are: removing and cleaning the pressure sampling chamber, checking the pressure switch hose and replacing it with a new one. If the sensor fails, the pressure switch is changed completely.
Wiring or contacts in the water supply valve circuit - from RUB 1,500*
The breakdown occurs due to mechanical damage to the wiring and interruption of the signal supplied to the fill valve. The wires fray due to vibrations during the spin cycle. Rodents cause damage in private homes.
Damaged wires are restored or the entire cable with wires is replaced. Burnt or rotten contacts are soldered or replaced with a new contact group.
*The cost of repairs consists of two components: the amount for the repairman’s services and the price of new components. The parts used are new and original, each spare part comes with a warranty.
Step-by-step inspection of parts
In principle, any error can cause a basic failure. Try rebooting it. A few minutes after stopping work, hold down the power button and remove the cord from the electrical outlet. After that, put everything back in place and try to start the wash again. If nothing works, then something is really wrong.
Alternatively, the cord or outlet itself may be faulty. Check them with a tester. Although rare, this does happen. Analyze the appearance of your “home assistant”. It is quite possible that some defects will emerge during a visual inspection. If not, you will have to diagnose the insides of the unit.
- Let's start with the engine. It is placed in a special hatch by Kandy manufacturers. Open it.
- Hold the drive and turn the pulley in parallel. Thus, the belt itself will be removed from the large and small pulleys.
- Take an 8mm wrench and remove the motor mounts.
- Before completely removing the engine, remove all wires from it. It is advisable to somehow fix their location.
- Inspect the motor. Surely you see two bulky plates. So, these are the motor brushes, remove them.
- Carry out a thorough inspection of the brushes. If they have severe abrasions or other visible defects, then they need to be replaced with new ones.
- Reinstall in reverse order and test the unit.
After replacing the brushes, the machine sometimes makes cracking sounds during washing. These plates fall into place and rub against each other. The problem does not always lie in the brushes; for example, the control module may fly off. What to do then? Here you cannot do without the intervention of a specialist, but you can diagnose the breakdown yourself. Just take a multimeter and check all elements of the control module.
Occasionally, motor windings burn out. Repair in this case is extremely unprofitable; experts say that it is cheaper to purchase a new washing machine. However, it is worth noting that for Kandy machines the situation with motor breakdown is extremely unusual.
Checking the tachometer and engine
Unfortunately, the attached instructions do not include a detailed description of error E08. It only contains information that it occurs when the motor tachogenerator breaks or when it shorts out. It can also occur when the engine fails, and less often when the control module breaks down. Based on the information provided, first of all you should check the functionality of the following parts:
- motor;
- tachometer;
- control module.
Verification requires compliance with a certain algorithm. At the first stage, the motor with the tachogenerator is removed, and then the following steps follow:
- disconnecting the machine from power;
- removing screws from the rear panel;
- dismantling the panel itself;
- removing the drive belt while simultaneously pulling it towards yourself and turning the pulley.
Then you should remove the engine. To do this, it is recommended to put marks on the wires coming from the motor in order to prevent difficulties during connection. Then we unscrew the bolts that hold the engine and remove the latter from the housing. Now we inspect the Hall sensor in the machine: strong vibrations could lead to loosening of the fastening or loosening of the contacts. In such a situation, you only need to tighten the mounting bolts and restore the connections.
If this is not the problem, you will need to check the resistance of the tachometer. There are two methods for this.
- Setting the tester to resistance determination mode. It is necessary to release the wire connectors and remove them from the sensor contacts. Then the probes are adjusted to the contacts to check the resistance. The normal range is considered to be from 60 to 70 ohms.
- Switching the tester to voltage detection mode to understand whether current is being generated or not. To check, probes are applied to the sensor contacts while the engine is cranked. If the values change (approximately 0.2 Volts), then the part is in working condition.
It is imperative to check the wiring for integrity, because Often it is this that leads to breakdown of the tachogenerator. And if the part is in a faulty condition, it will need to be repaired or completely replaced.
If the breakdown has not yet been identified, you should start checking the motor. At the starting stage, we check the brushes, and if it turns out that they are worn out, we replace them.
So, using a multimeter, we check the wiring supplying the tachometer and the motor for breakdown. If no breaks are found, you will need to check the rotor and stator resistance. Then we check whether there is a current leakage to the housing, followed by testing the turn-to-turn short circuit in the winding. A breakdown means that the engine cannot be repaired due to the high cost of repairs, and the best option would be to install a new engine.