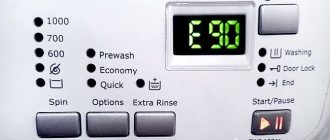
All washing machines produced in recent years are equipped with a special module. It notifies the user when problems occur. Depending on the design features, information is reported in the form of a code on an electronic display or transmitted by flashing indicators. Ariston washing machines also provide this function. Therefore, knowing how the error codes of Ariston washing machines are deciphered, it is not difficult to independently determine the breakdown.
Trouble Code Determination
Hotpoint Ariston washing machines have self-diagnosis that detects problems and notifies the user of the situation with a special code. If the owner understands the meaning of the code and is able to decipher it, he can independently determine and try to fix the problem. In this case, you do not need to use the services of specialists.
Important! For devices that do not have an electronic display, information is provided by flashing indicator lights.
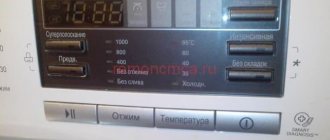
The number of short flashes of the light corresponds to the code number. After a cycle of such signals, a longer break occurs. Then the cycle of short signals is repeated. For SMA with a display, the code is displayed on it in the form of numbers. It's much more convenient.
Once you receive information about the code, the device user is able to determine where the failure occurred. After assessing the severity of the problem, the car owner can try to fix the problem themselves or call a specialist for more serious repairs. It is important to understand that troubleshooting the problem yourself requires special knowledge. Therefore, people who do not have experience in handling complex equipment are better off contacting a service center for repairs.
Without display
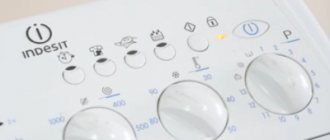
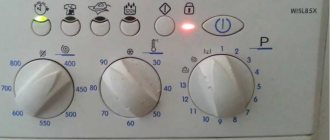
Error codes for an Ariston Hotpoint washing machine without a display can be determined by the light indicators:
- “Additional rinse” and “Key” flashes - F1;
- “Power” blinks and “Key” or “Lock” lights up - F2;
- flashing “40°C” - F04;
- “Key” and “Drain” or “Wash in cold water” and “40°C” flashes - F05;
- “No heating”, “30°С” and “40°С” are flashing - F07;
- flashing “50°C” - F08;
- “Wash in cold water” and “50°C” lights up - F09;
- “End”, “Spin” and “Key” flash simultaneously - F11;
- “Rinse” and “End” flash simultaneously - F18.
Malfunction of the motor or control board
Such problems are usually detected at the start of the cycle. If after loading dirty laundry into the drum, selecting the desired washing mode and pressing the start button, nothing happens, then the motor has broken down. Also, the source of the problem is often the control controller. The Ariston machine will signal that a breakdown has occurred with codes F1, F2 or F18. Such problems sometimes occur in the middle of a wash cycle.
An option suitable for solving all problems is to turn off the machine from the network for a quarter of an hour, and then turn it on again. In this case, the system reboots and, in the event of a simple failure, stops generating an error.
Problem with f1 code
This signal is displayed on the screen in the event of a malfunction with the motor, which starts the rotation of the washing drum. The device does not turn on when there is no response to the signal sent by the control module. Then, when switching to other programs, the code for this problem is still displayed.
To get rid of the problem yourself, perform the following steps:
- The cause of error code f1 is sometimes a power surge or a broken plug or cord. Then you need to refrain from simultaneously connecting the AVR to the network at the same time as other energy-intensive devices.
- You should check the plug, power cord or socket for defects. Perhaps the problem is due to their breakdown.
- Also, the explanation for the malfunction in the engine control circuit lies in the significant humidity in the bathroom. The contacts on the board should be dried and the humidity maintained at no more than 70%.
- The error is also caused by loose contacts on the motor control circuit. If you have experience working with electronics, you can fix this problem yourself by checking all suspicious areas with a multimeter.
Important! If independent attempts to fix the problem did not lead to success, it means that the control controller, electric motor, or cable with wires has broken down. The workshop will help you fix these problems.
Problem under code f2
Typically, this code is displayed at the very beginning of the wash or when trying to spin out wet laundry when the device increases speed. Then the drum twitches or an intermittent whistle is heard. Then the symbols f2 are shown on the display, and the soap solution is drained at the same time. This code appears when the engine circuit or tachogenerator breaks down. This part has a small ring and regulates the speed of the SMA motor.
To troubleshoot the problem, follow these steps:
- Check the option with drum blocking. In normal condition it turns easily. When, during the execution of a program, a foreign object enters the tank space behind the drum, it interferes with rotation. The interference is removed and the device is restarted.
- Damage also occurs due to faulty contacts. Then check the wires from the motor to the board and tachogenerator.
Sometimes, when fault f2 occurs, you have to completely change the engine, control board or tachogenerator. This can only be done in a specialized workshop.
Ariston f9 or f18 error codes
Code f18 appears when the electronic controller breaks down on models with an asynchronous motor. Devices with a commutator motor cannot generate this error. The failure manifests itself as follows:
- the engine operates with fluctuations, at very high or low speeds;
- when the program is turned on, the drum is motionless;
- the machine does not spin;
- water is drawn in and immediately drained, displaying a fault signal on the screen.
Error f09 appears due to power surges, but also indicates a controller malfunction. If the standard option of disconnecting from the network does not help eliminate the failure, check the microcircuits of the board.
A heating element
Freezing of the washing machine and failure of program settings can occur due to a malfunction of the heating element. Because the control unit sets the required water temperature for a certain washing mode, but the heating element does not execute the command. To get to the heating element, it is necessary to dismantle the back wall and conduct a visual inspection.
If the heating element has a large amount of scale, then the best solution would be to replace it.
The machine does not heat the water
Problems in the heating circuit are indicated by constant freezing of the device during washing, lack of heating of water, or constant filling and draining. Then the signals f4, f7 or f8 are displayed on the display of the washing machine.
Problems with the heating element or pressure switch, indicated by codes f4, f7
Such errors, indicating a malfunction of the heating element, appear in those modes where washing is carried out with hot water. This happens immediately at start or after filling the water. Those programs where water heating is not needed operate as usual.
In addition to the standard method of solving the problem, there are several more effective methods to cope with this problem. If the problem manifests itself immediately and even water does not fill, then the heater is broken. It burns out or breaks through to the housing due to loose contacts. To troubleshoot the problem, check all connections of the heating element and measure its resistance.
Important! If the liquid is drained immediately after filling, then the pressure switch has broken down. Then the controller receives information that the heater is not in the water. Because of this, the water does not heat up.
To eliminate the malfunction, check the hose with the pressure switch. It sometimes gets clogged, bends or jumps off. It would be a good idea to inspect the sensor contacts. They may need replacing. If code f4 appears, then the pressure switch itself needs to be changed.
Sometimes problems are more serious. Therefore, to be sure, check all the parts in the area from the controller to the heater and the sensor responsible for the liquid level. If necessary, burnt parts are replaced.
Malfunction of the heating circuit under the designation f8
Fault symbols f8 appear when the heater circuit is not operating correctly. Usually the cause is a broken pressure switch. The failure occurs due to high humidity. Therefore, the board is thoroughly wiped and blown with a hairdryer.
It is also recommended to check the contacts, they may have come loose or need cleaning. This happens especially often when the device is started for the first time after transportation. In other cases, it is not possible to solve the problem on your own.
Faults indicated by f8:
- If the program is interrupted immediately after start or the water does not heat up, you need to replace the heating element.
- If the machine stops after starting or when going to rinse, some chips on the board have failed and need to be replaced. There is also a chance that flashing the board will help.
- The machine “freezing” in different modes indicates a faulty wiring or contacts. The reason may also be a broken pressure switch.
Important! If, when checking all the elements, the fault could not be identified, then the control module of the machine itself will have to be replaced with a new one.
DIY repair
Knowledge of the structure and circuitry of the Ariston automatic washing machine will help you determine the breakdown. The picture shows the location of the main nodes of the MCA.
Let's figure out how to independently repair the Hotpoint Ariston washing machine.
Removing blockages during washing machine repair at home
It is easy to remove the blockage with your own hands. You need to check the drain filter, which is located at the bottom right under the panel.
By cleaning the filter, you will eliminate the cause of the washer malfunction. The drain pipe becomes clogged less often because it is thick.
The pump may become clogged, but this is rare because there is an additional filter in front of it.
The drain hose only becomes clogged if you installed it incorrectly.
Check the drain, it may also be clogged. Disassemble the unit, remove the pipe, loosen the clamps, and wash it. Remove the pump by unscrewing the fasteners and disconnecting the sensors.
Fill valve broken
If the fill valve in Ariston is broken, then water constantly flows into the washing machine, even when it is not working and is disconnected from the network.
To check the fill valve, you need to unscrew the fasteners and remove the top cover. The valve is located where the drain hose connects to the body of the electromechanical unit.
Check the gaskets first. If they have not lost their functionality, measure the valve resistance. Place the probes on the contacts of the filler valve and check the resistance to see if it corresponds to the optimal value (from 30 to 50 Ohms).
If it is less or more than expected, it means that the water intake valve is not working. To replace it, you need to unscrew the old valve from the body and screw in a new one. Be sure to connect the sensors.
Water inlet valve malfunction
If the filling valve of an Ariston washing machine is broken, it does not shut off the water, and it flows into the tank itself, even if the equipment is unplugged from the outlet. This malfunction can be determined by the murmur of water, which is heard when the machine is turned off. To repair the part, you must disconnect the washing machine from the network and water supply and remove the top cover.
The water inlet valve is installed at the top, in the place where the inlet hose connects to the washing machine. First, you should inspect the gaskets for integrity, and then take a multimeter, switch to resistance measurement mode and install the probes on the sensor contacts. If it is working properly, the display will show a value ranging from 30 to 50 ohms. A broken valve cannot be repaired, so the part must be replaced. The process is very simple, just disconnect the wires, unscrew the faulty element and replace it with a new one.
Ariston heating element repair
To get to the heater, you will need to remove the back wall of the Ariston washing machine. There is a heating element at the bottom, as shown in the photo.
Before removing the electric heater, measure its resistance with a multimeter. An indicator of 1 Ohm indicates an open circuit, about 0 Ohm - a short circuit has occurred. A working device will show 25-30 ohms.
Attach the tester as in the photo:
If the part is faulty, replace it. Video to help you:
Bearing repair
The bearing in the drum may break and wear out. It needs to be replaced. You only need to buy a bearing of the appropriate brand in a specialized store or order it on the official website of the Ariston washing machine, or perhaps purchase it at an equipment repair shop.
Using a metal rod and hammer, knock out the bearings. If they are defective, replace them. If the drum is deformed, replace it with a new one.
Reassemble. If the fault is in the plastic fin, then there is no need to disassemble the tank. The washing machine door can be removed. Take a metal rod whose diameter is smaller than the holes in the plastic rib of the drum.
The rod is inserted into one of the holes on the edge, the latch is opened with the help of it, and the plastic part is removed. A new plastic rib is placed in its place. Slide the plastic edge along the groove until the latch fits into the hole and closes.
Bearing replacement: procedure
To replace the bearing, you need to get to the washing machine drum on which it is installed. The car is disassembled, gradually removing all the parts from it.
Emptying the washing machine tank
The body of the unit begins to be disassembled from the cover by unscrewing two bolts located on the top on the far side. To do this you will need a Phillips screwdriver. Once the bolts are removed, the cover must be pushed forward towards the scoreboard and then removed.
To remove the dashboard , open the detergent compartment and remove it by pressing the latch in the center. In the resulting niche you can see several bolts and several more on the opposite side of the panel. The bolts are unscrewed, all the plastic latches are opened, after which the wires are disconnected and the panel is removed to the side.
To get to the washing machine tank, first remove the lid and dashboard
Next, remove the back panel - unscrew the bolts around the entire perimeter and remove the cover to the side. By carefully rotating the pulley wheel, remove the belt that connects the motor shaft to the pulley mounted on the tank.
The next step is to remove the back panel and the belt connecting the motor shaft to the pulley
Then they move on to releasing the top of the tank . Disconnect the pipe that leads from the powder compartment to the tank, remove the contacts of the valve that lets water into the washing machine. Remove the valve and pipe to the side.
Take photographs of the location of contacts, bolts and parts before proceeding with dismantling. After completing the repair, this will help you quickly and correctly reassemble the washing machine in reverse order.
Next, unscrew the bolts that secure the counterweight and remove it. Disconnect the hose connecting the pressure switch to the tank.
To free the washing machine tank, you need to remove all the parts located in the upper part of the body
The next step is to dismantle the front panel . First, remove the rubber cuff from the hatch of the washing machine, carefully prying it off with a screwdriver. Then unscrew the bolts located next to the lock mechanism and disconnect its wiring. The hatch door is removed by first unscrewing the screws that hold its hinges.
To remove the hatch cover, you need to unscrew the bolts that hold its hinge
All that remains is to unscrew the bolts located around the perimeter of the front panel and remove it.
Next we move to the back of the installation . Disconnect the wiring of the heating element and the washing machine motor. The heating element is left in its place, but the motor is dismantled, having first removed all the bolts that hold it in place. Then remove the counterweight installed below.
To get to the washing machine tank, you will have to remove the engine.
Finally, the shock absorbers on which the tank is attached are disconnected and removed from special hanging hooks.
The shock absorbers are disconnected from the tank last.
Now the tank can be removed from the body, unscrew the bolts and remove its front part.
In the photo you see the open tank of the washing machine, in which the drum is located
A shaft (metal axis) is inserted into the rear wall of the drum, passing through the bearing, the wall of the tank and connecting to the pulley. To get to the bearing, the pulley must be disconnected.
Usually the bolt securing the pulley is not just tightened, but also additionally set with glue. Before unscrewing, spray it with WD-40. If this doesn't help, you can use a hammer and chisel.
Unscrewing the bolt that secures the pulley can be very difficult
After removing the pulley, unscrew the bolts attaching the drum to the tank, unfasten the latches and remove the tank wall. Now you can proceed directly to replacing the bearings in the drum.
How to open a non-separable tank
Most Ariston washing machine models are available with a non-separable tank. Making a one-piece tank is easier for the manufacturer (no screws and fasteners), but this is not the only reason for producing non-separable parts. If a drum, bearing or other elements located inside a solid tank fail, the manufacturer recommends replacing it entirely.
However, there is a way to replace the bearings in this situation. This allows you to minimize repair costs.
If, when a bearing fails, you are offered to completely replace the washing machine tank, it may be worth turning to other specialists who can save your budget and make a spot replacement.
If you take out the tank and find that it cannot be disassembled (there are no bolts connecting the two halves), you will have to spend time opening it. Let's look at how to disassemble a solid tank, step by step with photo illustration.
First of all, using a drill, holes are made around the perimeter of the weld at a distance of approximately 5 cm from each other.
The next, most important step is to carefully cut the tank along the seam using a hacksaw. In order not to spoil the part, you should not rush when doing the work.
Before closing the tank (after replacing the bearing), silicone is applied to its sawn edges
The two parts of the tank are connected and bolted together using previously drilled holes.
Bearing replacement
When you get to the bearing, you will most likely see signs of deformation and contamination on it. How to change a bearing? First, the old parts need to be removed.
Start with the bearing located closer to the outside of the drum. The part is laid with the hatch hole down, the chisel is placed on the outer rim of the metal ring and hit with a hammer.
Carefully monitor the position of the chisel when knocking out the bearing - if the tool slips and the blow hits the inner ring, it may fly out, and it will be very difficult to remove the remaining bearing from the seat.
The inner bearing is removed in the same way, after which the oil seal is removed.
The bearing housings are treated with WD-40, dirt and rust are removed, and then lubricated with grease.
The new part is driven into place, hitting only the outer edge. The bearing must fit into the seat all the way.
The bearing must fit into its seat all the way
The oil seal is placed on the inside of the tank, having been pre-treated with lubricant.
It is important to correctly install not only the bearings, but also the oil seal. If the latter is not given due attention, it will quickly begin to leak water, which, in turn, will lead to deformation of the bearing.
The oil seal is also treated with lubricant before installation.
Now that the bearing replacement is completed, you can begin reassembling the machine. Before installing the drum, you need to clean the bushing from rust, scale and dirt.
Let us repeat once again that replacing a bearing on a washing machine yourself is a complex process that requires special skills. Proceed with repairs only if you are firmly confident in your abilities.
Repair of fasteners in an Ariston or Hotpoint-Ariston car
Your washing machine's door may not close or lock. The problem may be that the door is skewed, as a result of which the hook does not reach the hole. It is enough to tighten the side loops. If the locking tongue is worn out or the handle on the door is loose, only replacing the elements will help.
Replacement and repair of the control module
How to remove the control unit:
- Unplug the plug from the socket, turning off the power to the machine.
- Remove the top cover.
- Pull out the dispenser by pressing the latch in the center.
- Unscrew the front panel.
- Release the clamps and disconnect the board.
- Remove the selector and place the new board on it, then reassemble in reverse order.
Installing a new unit is not difficult. It is more difficult to repair and clean contacts. If you decide not to call a specialist, but to do the work yourself, watch the video:
Once you understand the main causes of malfunctions of the Ariston washing machine, you can fix them yourself. Be attentive to details and do not neglect safety precautions.
DIY Ariston washing machine pump repair
To find out if the pump is not working in the unit, the filter is acting up or the drain hose is clogged, you must be familiar with the signs of pump failure.
Signs of pump failure:
- The drain pump hums, but the water does not drain.
- The machine may stop while the system is running.
- Water flows out slowly.
Repairing the Ariston washing machine pump should be done as follows:
- Turn off the power to the washing machine and drain the water completely by lowering the hose to the floor, while placing rags to absorb the liquid;
- You can get to the pump through the bottom, because in models of this brand it is located at the bottom of the washing machine. To remove the pump, you need to turn the machine over onto the side wall and remove the bottom bar of the bottom;
- disconnect the wires going to the drain pump, loosen the clamps and pull out the pump;
- Now we need to disassemble it. To do this, use a Phillips screwdriver to unscrew the screws on the snail. On some models of the Ariston washing machine, clamps, rather than screws, are used to secure the pump. Lightly press the snail while turning it counterclockwise. It will unscrew;
- Mark with a marker the location of the engine in the snail in order to subsequently assemble it correctly. Pull out the engine with the impeller. The impeller in the pump should rotate abruptly, and not slowly and smoothly, because it contains a magnet rotating in a coil. It provides interaction between the rotor and stator of the washing machine;
- If no debris is visible, but the impeller still does not rotate, then continue to disassemble the pump. There are latches on the motor body that need to be pressed a little with a screwdriver to remove it from the reel. Having removed the motor from the body, you will see a monolithic part - a cross. Using a construction hairdryer, be sure to wear gloves, heat the shank of the part (its long part) at low power;
- pry up the crosspiece with a screwdriver and remove it from the body along with the magnet. There is a lot of debris on the magnet and in the case from which the part was removed. Parts must be thoroughly cleaned or washed;
- Next, remove the magnet from the shaft. You will see a bearing, which you will clean from debris and lubricate;
- start assembling the pump. When assembling, make sure that the O-ring under the blades is firmly in place. When assembling the parts, lightly press them until they click.
- Sometimes bearings not only get clogged, but fail. Failure of the bearings causes runout, causing the impeller to rub against the volute casing. We hear the noise and hum of the pump, but no water comes out. The washing machine may stop. Buy bearings at a service center in Moscow, St. Petersburg or other cities of Russia, or in specialized stores. If the seals are not in order, replace them too;
- Reassemble the pump in reverse order, and then the entire washing machine. Ariston washing machine fault repair
If a Hotpoint malfunction occurs, Ariston generates an error that is displayed on the screen. It is important to know the error codes in order to determine what is wrong with the device and find out the reason for its failure.
Ariston washing machine drum repair
The high-quality and durable material from which the drum of household appliances is made also becomes unusable because solid foreign objects get into it, which can damage the unit, forming cracks on it.
The plastic rib located inside the drum may become deformed. To replace the drum, you need to remove it.
To remove the drum yourself, you need the following set of tools:
- a set of screwdrivers, especially a Phillips screwdriver and a slotted bit are needed;
- screwdriver;
- pliers;
- hammer;
- hexagons of different sizes.
Before you begin disassembling the drum, you need to turn off the power to the machine, disconnect the drain hose, and turn off the water supply.
Using a Phillips screwdriver, remove the bolts from the rear, front and top walls, and then remove the panels themselves.
Remove the powder container. Use a slotted screwdriver to remove the module. The control unit does not have to be unscrewed completely, the main thing is that it does not interfere with removing the drum.
Remove the hatch cuff, pull out the bottom bar, unscrewing the screws. Electronics, shock absorbers and other parts must be removed from the loading tank.
Remove the drum from the device and disassemble it. Remove the screws holding the two sides of the drum together. Use a screwdriver to pry off the seals and remove them.
Problems with drum rotation
Another problem that can cause the machine to stop working is the drum not rotating . There are several reasons that can cause this situation: engine failure, electrical wiring problems, control panel malfunction, or filter clog. However, the most common cause is wear or excessive stretching of the belt. In this case, you need to replace it; there shouldn’t be any special problems with replacing it yourself.
If the reason is different, then it is best to call a professional to your home to identify the cause of the machine breakdown.
Malfunctions during draining or filling of water
When the device does not fill with water or stops operation with a full tank, codes f5, f11 or f20 are visible on the screen. The first of these errors appears when the tank is full. But attempts to empty the tank lead to nothing, and a signal remains on the screen. This is often accompanied by a crackling or buzzing sound. A similar breakdown occurs frequently in Ariston Artf 1047 machines; you can get rid of the problem yourself.
The reason here lies in a clogged drain filter or hose. To correct the situation, drain the liquid and clean the blockage. This can be done through a hose. If it is clogged, you will have to bail out the water through the tank.
After this, open a small hatch at the bottom of the device and disconnect the drain filter. Check its condition and rinse the pipe under pressure of water. Additionally, the condition of the sewer system is inspected. Perhaps the blockage is there.
How to make your washing machine last longer?
Naturally, every person, when buying new equipment, wants its service life to be as long as possible and to have no malfunctions at all. This is completely normal. This is why most people don't do anything.
It is important to realize that in 99% of all washing machine breakdowns, the owner himself is primarily to blame. For maximum protection against such troubles, you must adhere to a few simple rules:
- When choosing Ariston, you need to study the data sheet in detail. To understand in what cases the manufacturer's warranty is valid.
- Installation of equipment should be carried out by professionals. This minimizes possible malfunctions. You cannot install hoses and drains yourself. This will void the manufacturer's warranty.
- Compliance with washing rules. If the instructions indicate that no more than 6 kg of things should be loaded at a time, this does not mean that 6.5 kg falls under this category.
- Choosing the right powder.
Decoding other errors
In total, there are 19 errors found in Ariston automatic machines. After a detailed look at the most common ones, let’s briefly look at the rest. These problems are signaled by the following codes:
- F3 indicates a breakdown of the temperature sensor. To solve the problem, check the condition of the circuit up to the controller and measure the resistance on the sensor itself. For normal operation, its value should be 20 ohms. Broken parts found during inspection are replaced.
- Error f6 appears only in models made on the Arcadia platform. It indicates a problem with the drum door locking system. This code also appears in Dialogic models when the control buttons are broken. If there is a problem with the drum, check the door for foreign objects and close it tightly until it clicks. Button failure occurs due to stuck or damaged contacts.
- Code f10 appears when there is no response from the water level sensor. The problem occurs due to improper connection to the sewer, lack of water in the water supply, or a break in the circuit going from the control board to the sensor.
- The f12 symbols appear on the display when communication between the display module and the control unit is lost. In this case, these parts and their connections are checked for defects.
- Error f13 occurs due to a broken sensor responsible for the drying temperature. Eliminate the malfunction by replacing the part or worn contacts.
- Codes f14, f15 indicate a breakdown of the heating element or contacts on it.
- Error f16 appears on SMA with vertical linen laying. She says that the sensor responsible for blocking the drum has broken down. This usually occurs due to the valves not being tightly closed. But the sensor or the contacts on it may fail.
- Code f17, also known as door, appears when the door is not closed tightly enough. The device is checked for interference. If there is none, then the fault is in the part that blocks the hatch during the cycle. It is replaced with a new one.
Conclusions on the topic
If you are well versed in repairing household appliances and are planning to troubleshoot your dishwasher yourself, then you should try it. True, there is a sure way to avoid such troubles - compliance with operating rules.
The Ariston Hotpoint dishwasher is a faithful assistant that, with proper care and proper operation, will serve without problems or breakdowns for many years. However, if you still encounter a problem with the electronics or control module, it is better to immediately contact a qualified technician without wasting time on independent experiments with equipment repair.
Would you like to tell us how your dishwasher code system helped you identify the cause of a malfunction in a timely manner? Do you have information that is worth sharing with site visitors? Please write comments in the block below, post photos related to the topic of the article, and ask questions.
Features of operation of Ariston Margarita 2000
Models in this series have a wide range of functions and are distinguished by fairly high quality washing, rinsing and spinning performance, and consume a minimum of electricity and water. They belong to washing class A, because even when the water is heated to 40 degrees, they consume only 0.15 kilowatts of electricity per kilogram of dirty laundry.
This washing machine is equipped with a rather interesting program called “Golden Cashmere”, which allows you to wash only delicate fabrics and avoid the formation of pilling. But the daily wash function assumes a cycle duration of only 30 minutes, and you can load items of any color into the drum.
A quick wash in just 90 minutes allows you to wash moderately soiled items. If desired, you can delay the start of operation of the “ariston margherita 2000” als109x device for the required time. Malfunctions rarely occur in its operation, but they all require attention and, in most cases, the intervention of specialists.


