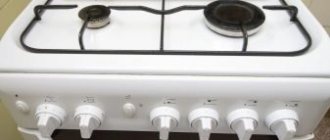
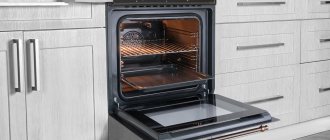
Today, electric or induction cookers are usually installed in houses and apartments. Therefore, many housewives do not know how to use gas equipment. When they encounter such units, many questions arise. One of them is how to turn on a gas oven? This process requires compliance with certain rules, violation of which leads to breakdown of the device.
Engineers of the Unified Service Service "A-Iceberg" repair gas stoves of all models and manufacturers (Ariston, Indesit, Hephaestus, Electrolux, etc.). The necessary work is performed at the customer’s home: the equipment is not transported to the service center. You can call our employee by calling 8(495) 213-33-33
or by leaving a request on the website.
Some features of the operation of stoves of various brands
Before buying a gas stove with the Hephaestus logo, you should find out how its oven works, what functions and protective systems the equipment is equipped with.
It is necessary to check whether its technical parameters and settings correspond to the type and pressure of gaseous fuel in the network. Using a gas stove in an apartment or country house requires the owner to strictly adhere to safety rules.
We invite you to read: Which is better: a stove or a hob and an oven?
The operation of a gas oven is allowed if:
- the stove is installed in a fire-safe place, grounding is carried out;
- the gas stove and, in particular, the oven are in good working order, all structural elements are without damage;
- the baking tray and wire rack are not overloaded - permissible weight up to 6 kg;
- The operating oven door is closed.
The device should be used only for its intended purpose - heating the room or drying flammable items is not permitted. If there is a smell of gas, first of all the common valve of the fuel supply pipe must be closed, and then all the burner valves. Emergency services are called to eliminate the leak.
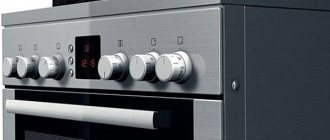
There are three main plate control systems:
- mechanical;
- electronic;
- combined.
The principle of mechanical and combined control is described above.
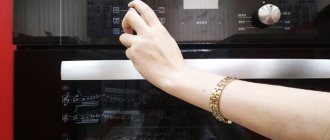
How to turn on an oven in a stove with an electronic programmer using the Gorenje brand as an example:
- The time is set by simultaneously pressing buttons 2 and 3, then and -.
- The selection of functions on the clock on a programmer with an analog display is carried out by pressing the “A” button.
- Press twice to confirm your choice.
Press and hold the thermocouple button for several seconds and at the same time press the electric ignition button with the other hand (a spark or light is shown next to it). If piezo ignition is not provided, use matches.
To use the ARDO electric oven:
- Select the desired mode using the button or adjusting knob.
- Light it with a match or electric ignition.
- They don't close the door for a couple of minutes.
- Warm up the cabinet for 15 minutes.
The Bosch stove is equipped with a knob for timer, temperature, upper and lower heating. There are models with and without electric ignition. Set the temperature, select the heat, place the dish in the preheated oven and set the timer.
To turn on the Greta oven, turn and press the knob, hold it in this position for 15 seconds, then release. If necessary, no earlier than 1 minute later, repeat the procedure with the oven door open.
Be sure to read:
How to connect a gas stove with your own hands: step-by-step instructions, installation rules
In Indesit models with piezo ignition, just turn the knob towards the maximum temperature and press. In models with manual ignition, you must hold the knob down for 15 seconds, otherwise the oven will not light.
Be sure to read the instructions and study the safety rules.
The most important:
- Do not store cleaning agents, detergents or any other chemicals inside the equipment due to the risk of fire.
- Do not allow children to play with the device.
- Use special dishes for cooking.
- Use oven mitts: the equipment gets very hot.
- If you smell gas or smoke comes out, turn off the oven.
- Do not leave the oven running unattended.
- When the cooking process is complete, turn off the stove and remove the dish using oven mitts.
This is interesting: How to properly use a gas cylinder at home: a detailed instruction manual
Heating modes
An electric oven has more functionality and a range of options than a gas oven.
Therefore, it is important to know how to use an electric oven correctly, getting maximum convenience and benefit from it.
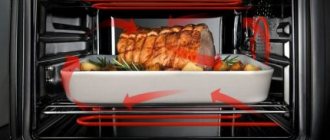
In a gas device, at best, there is only bottom heating and a fan. In an electric one, there can be three heating modes at once - lower, upper and ring.
In combination with a fan, they provide a huge number of cooking possibilities - from defrosting and stewing to frying kebabs and drying crackers.
An electric oven can have three heating modes at once - bottom, top and ring.
Top and bottom heating
The combination of two heating methods at the same time allows you to fry food to the highest quality and at the same time prevent it from burning. With this mode, dishes are prepared very quickly and the result is a fragrant, crispy crust. Suitable for meat, vegetables, potatoes.
These heating modes allow you to quickly fry food on all sides at once.
Top and bottom heating plus fan
These modes, when operated simultaneously, ensure fast and even frying of food. In this case, the heat is distributed evenly throughout the entire volume of the oven.
When both heating elements are turned on at medium temperature, a drying mode is obtained, intended for preparing dry berries and fruits. At low temperatures, this combination is used to heat and defrost food.
With the help of a fan installed in the oven, heat is quickly and evenly distributed throughout the entire volume of the oven.
Bottom heating
This type of heating is suitable for bulky dishes that require a long time to fry. Ideal for cakes or pies. With this option, biscuit and yeast dough is prepared well, resulting in delicious pies, buns, and buns. Once a large cake is cooked, you can “brown” it using top heat.
This function is well suited for preparing a variety of baked goods.
Bottom heating plus fan
This mode allows you to fry large volumes of baked goods well. Thanks to the fan, heat is distributed more evenly. In addition to baking, it is suitable for semi-finished products, fish, and frozen foods.
This heating will allow you to cook large volumes of baked goods.
Top heating
This mode is necessary for frying meat, potatoes, vegetables and fish. Can be used to give a beautiful crust to already prepared dishes. Using this mode, the upper part of the dish is warmed up well and actively, while the lower part does not burn.
The top heating function is suitable for dry baking and drying.
Top heating and fan
This combination is suitable for preparing dry baked goods – cookies, brushwood, crackers, waffles. Products are quickly heated, fried and dried at the same time.
Ring heater and fan
The ring heater is located in the vertical part of the oven around the fan. Its work is necessary both for heating food and for preparing delicate stews - meat in a pot, soups, stewed potatoes and others.
This function in the oven is necessary for heating and cooking delicate dishes.
Ring heater, fan and bottom heating
The combination of these cooking options is suitable for stewing large volumes of dishes, as well as for preparing stewed food.
Ring heater, fan plus bottom and top heating
The maximum combination of heating options gives a good and fast frying. At low temperatures, this option can be used effectively for defrosting and heating food. At medium temperature, this combination will effectively dry meat and mushrooms.
At low temperatures you can quickly defrost and reheat food.
Grill
The oven option is necessary for cooking large pieces of meat, chicken, and kebabs. It browns food well, especially on the top level. This makes the meat soft and tender. The grill makes it easy to cook toast.
You can use the grill to cook meat, vegetables and toast.
Grill and top heat
The cooking method makes it suitable for kebabs, steaks, and large pieces of meat. Gives the meat a crispy crispy crust and creates a “charcoal-grilled” effect.
Grill and fan
With this type of oven operation, the heat is evenly distributed throughout the entire volume of the cabinet and the dishes turn out soft, but crispy. Effective for meat and fish recipes.
With the help of a fan, hot air is evenly distributed throughout the oven and the dishes turn out soft but crispy.
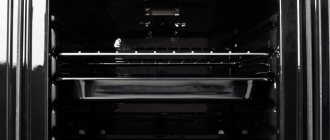
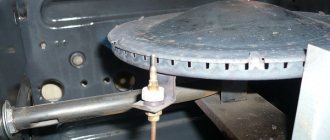
The principle of operation of a gas oven
To properly light the oven, we recommend studying the features of its operation.
Usually the air is heated from below. Next, the hot streams rise, evenly distributed over all areas of the oven.
On many devices, the oven has a separate burner through which gas flows. Engineers recommend purchasing panels that have diffusion burners installed. In them, gas and air are mixed naturally, without oxygen being sucked in.
The principle of operation of the technology is quite simple. To enable it you need:
- smoothly turn the tap responsible for supplying propane to the burner;
- open the door and use the auto-ignition button (older models use matches or a lighter) to light the fire;
- place a container with food inside, set certain parameters (temperature, mode, time, etc.).
Depending on the type of unit, the activation principle may differ. Therefore, technicians at technical centers recommend that you carefully study the operating instructions for the device before starting work.
Important elements of the Hephaestus oven
Hephaestus contains elements that are often needed when cooking, namely:
- electric grill;
- turbo grill;
- kebab maker;
- telescopic shelves;
- convection;
- grease filter;
- thermostat;
- double backlight;
- touch timer.
The grill burner is a heater installed on top of the oven. It allows you to fry food without coming into contact with a hot surface. A very useful feature is the built-in timer, through which the time is set. This mechanism can be mechanical in the form of a rotary switch or electronic, set using buttons.
When purchasing any model of oven, you can find instructions from the manufacturer included in the kit, which thoroughly describes how to turn on the Hephaestus oven.
How to quickly and correctly light a gas oven
Gas stoves have recently been replaced by electric appliances, this is most relevant for large populated areas. Therefore, some housewives, when faced with a gas-powered appliance for the first time, find themselves at a loss. Almost everyone can light the burners, but turning on the oven is much more difficult for them. Therefore, it is worth figuring out how to properly light the oven in a gas stove.
Features of operation
In reality, there is nothing complicated when operating gas stoves. The manufacturer prescribes all the main points in the instructions, but if there are no such instructions, for example, when moving to a new apartment, when the stove was inherited from the old residents, you can use the standard recommendations, which are almost the same for each model.
Based on the principle of its operation, the oven is a potentially dangerous device, therefore, when operating it, it is very important to take into account all the rules of use and safety precautions. In most modern models, lighting gas is not difficult, since there is an electric ignition system, and the oven has a gas control safety system
Red arrow - electric ignition, blue arrow - gas control
But some ovens still require manual lighting. Let's look at the question of how to use the oven in more detail.
Similar instructions
So, in the absence of instructions, you can use the following sequence of actions, which is standard for each model - Hephaestus, Indesit, Darina and others.
- Initially, it is worth checking that the device is connected correctly to the gas hose and the electrical network (if there is an electric ignition system).
- Next, it’s worth studying the diagrams that are located on the appliance panel: they will help you figure out which switch is responsible for the burners and which for the oven.
- If there is no electric ignition for the oven, then you will need to light it with a match or lighter.
By carefully examining the bottom of the oven, you need to determine the location of the holes through which ignition occurs. They can be located on either side or on both sides at once. A lit match or lighter is brought to the hole, while the relay on the panel is simultaneously turned. If there is an ignition button, then the process is a little simpler. The temperature regime is set and the gas supply starts. At the same time, the electric ignition button is pressed. If you fail to light the oven using the automatic button, then you should stop the gas supply and then try to repeat the procedure, but without the automatic button, but using a match or lighter. The electric ignition may be faulty and needs repair.
For your own safety, if the stove is turned on for the first time, you need to wait a while and leave the lid ajar while the burner is on. After a few minutes, place the dish and close the lid.
Some nuances of using stoves of various brands
If, after following the recommendations described above, it was still not possible to light the oven of a gas stove, then the problem may be a malfunction of the stove or individual functional elements. Since gas equipment is potentially dangerous, immediate fault detection and repair are required.
Owners of devices from brands such as Greta, Darina, Gorenje may encounter difficulty in lighting during operation. When you turn on and press the relay, the burner lights up, but when you release it, it stops. This moment occurs as a result of prolonged use when the thermostat fails. Due to the breakdown, it does not detect the temperature in the cabinet, so the fire goes out immediately. Another common problem that consumers encounter is the gas control contacts coming off in the oven. Most often it occurs in slabs of the Indesit and Hephaestus brands.
Elimination of any cause is prohibited to be carried out independently. To do this, you need to call gas service specialists; they will not only determine the cause of the breakdown as accurately as possible, but will also quickly eliminate it.
Ignition method
Modern stoves are ignited using two methods, depending on the functionality of the device. You can turn on the oven:
- Electrically.
- Manual.
The first is applicable in expensive slabs and is considered much more convenient than the first. Electric switching is also safer, since the housewife does not have to be in direct contact with the burner.
The second method requires dexterity and skill; there is a high probability of getting burned. Stoves equipped with a manual oven are cheaper.
Electric ignition
It’s easy to turn on the oven electrically, to do this:
- Turn the tap so that the gas output is maximum.
- While pressing, hold the electrical power button.
- About 10 seconds after the flame appears from the burner, remove your finger from the power button.
If the flame does not want to appear or the burner burns incorrectly, turn off the gas supply and leave the stove door open to allow the gas mixture to ventilate. After 2-3 minutes, repeat the steps.
Holding the power button is a mandatory action due to the safety system of the stove. The gas sensor requires time and certain temperature indicators to correctly monitor the functioning of the equipment. Holding the button prevents the formation of unnecessary sparks, which is possible if pressed accidentally.
Remove your finger from the button and set the temperature to the optimum temperature for cooking.
Manual
This method of turning on the oven is more complicated:
- Open the oven door a couple of minutes before cooking to ventilate the interior.
- Light a match. Bring it to the burner.
- Turn on the propane outlet valve. Hold it like this for about 10 seconds.
- After the flame appears and stabilizes, remove the match.
- Close the door. Set the required cooking parameters.
To quickly turn on the oven, it is recommended to find the pilot hole. It is cylindrical and goes out to the front panel. Look either at the bottom or on the side. If the oven is intended for grilling, the opening is at the top.
Gas burner does not light or goes out
The cause of a malfunction associated with turning on the oven and igniting the burners may be clogging or wear of parts, or failure of the sensor that controls the state of the flame.
Methods for solving a problem problem can be as follows:
Faulty (tip misaligned, clogged or worn) thermocouple. Leads to insufficient voltage being supplied to the solenoid valve. As a result, it cuts off the gas supply to the oven burner. Replacing the part will help fix the problem.
Solenoid valve failure. In case of malfunction of the gas valve, the control sensor transmits voltage. However, the valve is not held open - the burner operation is interrupted immediately after the gas valve is released. The valve must be replaced.
Nozzle clogged. Prolonged use or contact of products with the nozzle leads to partial or complete blocking of the gas outlet channel. To fix the problem, the burner is removed and cleaned.
Failure of the TUPA crane. The cause of the breakdown may be damage to the rotating mechanism located inside or one of the links in the gear. The part should be replaced with a new one. If the cause is clogging of the turning mechanism of the faucet, it should be cleaned.
The oven goes out after heating. Poorly adjusted minimum combustion mode, which the oven goes to after the highest heat, causes the flame to be too weak. The control sensor does not warm up sufficiently and turns off the gas supply. A technician can fix the problem; the burner needs to be adjusted.
Gas ovens are not always equipped with a gas control function; sometimes they do not have electric ignition. Therefore, the rules of operation, ignition and the reasons for the extinguishing of the fire must be considered for each model of gas stove separately.
Algorithm for proper engine warming up
Car owners often make a common mistake: after parking the car for a long time, they start the engine and then turn on the heater to maximum, which, in their opinion, should heat up not only the engine, but also the air in the cabin. However, in reality, in such a case, the load on the engine increases significantly, which reaches the minimum temperature regime for a long time.
The speed of warming up the engine and the interior are interconnected. At the same time, you need to understand that it is possible to ensure the flow of warm air into the cabin only when the engine is hot. Effective heating of the engine and interior is possible only when the coolant warms up to the required levels, after which hot antifreeze is supplied to the heater radiator, which allows you to quickly heat the interior of the car.
Modern cars can be equipped with several heating systems, programmable electronic climate, as well as one, two or three-zone heaters. Often car owners do not read the instructions for their car, which detail how to use such heating, how to properly warm up the car and how long this procedure takes on average.
According to statistics, in winter, when the outside temperature is minus 10 degrees, heating the engine usually takes 15 minutes, and it takes 30-35 minutes to raise the temperature in the cabin. Whereas in winter we often warm up the car for at most 5 minutes, which is spent on cleaning the windows from ice. After which the car owner sets off on a virtually cold engine, which leads not only to increased fuel consumption, but also to serious wear and critical breakdowns of the power unit.
To properly warm up the engine of a car, you need to set the heater fan intensity switch to minimum, then start the engine and leave the car running for at least 10 minutes. With the heating circuit closed, the engine quickly heats up; as soon as the coolant temperature begins to rise, you can start driving the car, simultaneously turning on the heater and heating the interior of the car itself. If your car is equipped with a W ebasto heater or autostart, you can immediately turn on the heater at maximum power, quickly warming up the car interior.
Let's sum it up
In winter, it is extremely important to properly warm up the car, which not only reduces fuel consumption, but also prevents increased wear and critical engine malfunctions. With such a mileage, you will need to start the engine, setting the heater control to minimum efficiency, or completely turn off the interior heating
This will allow you to warm up the engine faster, only after this you can turn on the interior airflow, and warm heated air will immediately begin flowing from the air ducts.
Instructions on how to properly light a gas oven
A gas stove with an oven is available in almost every apartment. In most cases, the process of use does not cause any particular difficulties. The simple design is understandable to any user. If the stove is new, it is recommended to study the instructions from the manufacturer, which describe in detail the process of ignition and selecting the desired temperature mode. If you don’t have instructions at hand, we recommend that you read the advice of experts regarding the use of gas ovens.
Step by step instructions
These recommendations are standard and can easily be applied to ovens from the brands Darina, Hephaestus, Greta, Brest, Indesit and others.
- First you need to make sure that the gas device is connected correctly to the electricity and gas networks.
- Then, we study the connection diagrams for each burner and switches.
- If the oven is not equipped with electric ignition, you will have to light the fire in the oven or on the burners manually using matches or a lighter.
- If you look at the oven Hephaestus, Indesit, Darina, Greta. You can find a hole at the bottom. There may be one or several of them. The ignition occurs through them.
- To light a fire, you need to turn the switch knob on the control panel and at the same time bring a lit match to the hole at the bottom of the oven.
- For models with electric ignition, set the required temperature on the control panel and turn the gas supply switch. Simultaneously with these actions, the ignition button is pressed.
Gas stove INDESIT I5GG0C
The nuance of using ovens of different brands
If it is not possible to light the oven in the Hephaestus 3200 gas stove, there may be a factory malfunction of the device. To protect yourself from an accident, it is recommended to immediately contact gas service specialists who will check the functionality of the new device. Remember, the sooner a breakdown is detected, the higher the likelihood of preserving the device and avoiding an accident. Users should not forget that gas equipment requires care during operation.
Gas stove with electric oven
But in addition to the general rules for operating gas appliances, there are certain nuances inherent in a particular model. For example, owners of Greta, Darina, and Hephaestus ovens often note the following problem. When you press the ignition button, the burner lights up, and after you release the button, it stops burning. Experts explain this fact by the long service life of the device, which leads to breakdown of the thermostat. As a result, the regulator cannot determine the exact temperature inside the cabinet and turns off the gas.
If you cannot light the Hephaestus or Indesit gas oven, the gas control contact may have come loose. You can fix the damage by contacting specialists. It is not recommended to repair gas ovens yourself, especially if the device is still under warranty.
A few words about modern gas ovens
To light the oven in a gas stove Hephaestus 3200, Indesit, Darina, Greta, Brest you do not need to have any special knowledge. Modern models are especially easy to drive. Manufacturers simplify things as much as possible and at the same time equip ovens with a lot of useful functions.
Gas stove Darina
Thanks to electric ignition, the housewife does not need to think long about how to properly light a fire in the oven. Many users speak well of Darin's oven. Using this device is not difficult. The design is intuitive and therefore loved by many housewives.
Don't forget about safety
To use the Indesit, Gefest, Brest, Greta oven, it is important to remember the safety rules:
- Before turning on for the first time, check that the connection to the gas network is correct.
- Constantly monitor the flame in the Indesit oven.
- Regularly wash and wipe the device from the outside and inside.
- Do not use the oven as a room heater.
In the video, a gas company specialist talks in detail about the correct and safe use of modern ovens.
Thus
Modern housewives do not have a question about how to light a gas stove and oven. Innovative models of household gas equipment have a simple and understandable design. Particularly convenient are units with electric ignition. If you follow the rules of use and safety, the process of operating the oven will be simple and easy.
General requirements
Regardless of whether natural gas is used by connecting to a centralized gas system or a cylinder is used, the operating approach is the same.
It is important to remember that gas burners not only give off heat, but also actively burn oxygen in the room where they are installed. During operation, combustion products are released, the most dangerous of which is carbon monoxide.
There are also a number of harmful impurities (nitrogen oxides, formaldehydes, sulfur dioxide and others) that can negatively affect well-being and immunity. These components appear in the air in the event of incomplete combustion of the gas mixture, as well as poor ventilation of the room.
Therefore, before purchasing a gas stove, it is worth exploring the possibility of installing an electric or induction model. Of course, such heating devices will be more expensive, since the cost of electricity often exceeds regular payments for gas. But the quality of life in your own home is hardly worth assessing in terms of money.
If it is not possible to switch to a safe cooking method and you have to use gas equipment, then you must adhere to the following important rules.
Each time after finishing the cooking process, it is necessary to close the tap on the pipe or the valve of the cylinder.
Before leaving the house, check the taps on the stove and on the gas pipe. In the event of an emergency, this will help block the flow of gaseous air into the room. When installing in a private house, allocate a room for the kitchen with a window so that, if necessary, use a source of fresh air in close proximity to the place where the gas is burned. In an apartment with a ready-made layout, try to install the stove closer to the opening of the window or window frame. Determine whether there is access to the ventilation shaft or a place in the external wall into which the air duct can be routed. It is imperative to install a hood above the future cooking area, the area of which will cover the perimeter of the stove. If possible, install a flow-through mechanism for the release of combustion residues (when warm air and burned gas are removed outside the home). If there is no access to ventilation and external walls, then the minimum safe step would be to mount a recirculation model
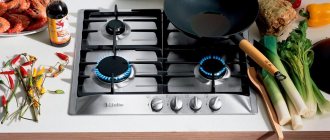
She will be able to clean the air through a filter system. In the event of unsuccessful culinary experiments, when food burns and a strong smell arises, simultaneously with turning on the hood, you need to open all the windows and organize a draft for the free exit of contaminated particles. After installing a new stove, it is important to check the quality and color of the flame on each burner. Maximum combustion of harmful impurities occurs with a uniform blue flame
If the fire has a yellow tint, then you need to turn off the gas supply and check if there are any obstacles or blockages in the fire supply path. When you cannot detect the problem yourself, it is better to call gas service workers to receive recommendations on the correct operation of the equipment. A yellow tint of the flame is a signal of a problem
Similar help from specialists will be required if you notice a specific smell of gas when the burners are not working. For the safest possible use of gas burners, it is recommended to observe the restriction of continuous operation of two burners for no more than three hours. If you plan to cook a large number of dishes, then you should take at least an hour break with full ventilation of the room. Even if only one burner is working, there is no need to leave other dishes on the stove. It will prevent free air circulation and trap combustion products in the kitchen.
Causes
Gas is a source of extreme danger. When mixed with air, it becomes highly flammable and explosive, so there are only a number of steps you can take when repairing it yourself without calling a qualified technician. You can identify some possible reasons for what is happening. The main ones are as follows.
- Lack of oxygen. May cause fire problems. Try starting the device with the door open.
- The burners are clogged. Perhaps this part is simply contaminated with combustion products, then the heat is uneven or there is simply not enough of it. The gas control system can shut off the gas supply, believing that there is no flame; the fire will go out immediately after releasing the handle. The problem is easily solved. Remove the burner, clean it and reinstall it. When cleaning, use a liquid product; powdery substances damage the equipment.
- The burner has become misaligned. If the burner is incorrectly positioned or misaligned, it will result in uneven flames and heat and soot. Check the position of the part and adjust it if necessary.
- The fuel pressure in the gas pipeline has decreased. Check: perhaps there is no need to call a specialist, and the cause of the trouble lies in an almost empty cylinder or problems in the supply of gas to the gas pipeline. Weak flame intensity may prevent the system from starting.
- Doesn't hold the regulator. Do you turn the knob, but it doesn't turn on? To check, try lighting without it. Carefully dismantle the handle, keeping all small components that will be difficult to find later. Arm yourself with pliers, lightly press down and turn the valve stem. When gas comes out, try to light it.
- The auto-ignition function is broken. If gas flows, but the flame does not ignite, do not hold the knob for a long time and pollute the room. In the front center of the oven there is a hole for ignition with matches.
- The temperature sensor has moved away from the flame zone. Then it is necessary to return it to its previous position to resume operation.
When your baked goods are not baking well or the heat in the oven is low, it may be time to change the rubber door seal.
Despite the fact that ovens are “long-lived” among household appliances, and some of them work for more than 50 years, malfunctions still occur due to breakdowns of parts inside the device. Sometimes gas control components wear out. The contacts in the system may have oxidized and need to be cleaned. During operation, the thermocouple also constantly heats up, which leads to its destruction. Sometimes this part cannot be repaired. It is simply replaced with the same new one.
The temperature is maintained thanks to a mechanical thermostat. It is a container with liquid filler. The appliance is placed inside the oven. At high temperatures, the cylinder filler expands, pushing the valve, which closes the gas supply. If your oven is constantly not heating well, the thermostat may need to be replaced.
One of the reasons why the device cannot be turned on may be wear on the ignition unit or a faulty solenoid valve. The longer the service life, the greater the likelihood of such troubles occurring. The valve is usually simply replaced. The functioning of the unit can be checked. Turn off the lights in the room at night. Turn on the electric ignition. Look at the result:
- there is no spark at all - the wiring is damaged;
- the spark goes to the side - a crack in the spark plug;
- a yellow or red spark means the block has tripped.
Possible faults
Due to the fact that equipment begins to break down from prolonged use, you need to know what to look for in order to quickly deal with breakdowns. If we are talking about electric ignition, then the following signs of malfunction may include:
- lack of response after pressing the ignition button or the burner knob after using it;
- auto-ignition is fully usable and is triggered by touch and constantly clicks, but does not provide the necessary spark to ignite the burner;
- continuation of auto-ignition even after the contact with the button or switch handle has ceased;
- the device begins to work independently without pressing a button or burner knob.
If the electric ignition stops working, there are a number of reasons for this:
- lack of contact with the electrode, which ultimately does not produce a spark;
- the presence of any type of contamination or moisture that gets onto the inside of the system or sparks;
- violation of the integrity of the ceramic shell of the candle in the form of a crack appearing on it or its complete destruction;
- the transformer burned out, therefore no spark is generated;
- oxidation of the contacts of the auto-ignition button has occurred;
- the appearance of carbon deposits on the contacts due to a short circuit.
To understand the cause of the problem and find out why the stove does not ignite well or the process does not occur at all, it is necessary to do a full inspection of the device. Once the problem is identified, if you have knowledge and experience, you can solve it yourself or call a technician as soon as malfunctions in the operation of the device are discovered. The most likely causes of failure may be the following:
- charger malfunction;
- problems with a device that is powered by electricity;
- problems with the arrester.
Malfunctions of the charger can begin after contact with soda, core or detergents. You can cope with the situation without outside help, for which you will need sandpaper, which is used to clean the charger, after which it is left to dry completely. If such actions do not lead to the desired result, you should seek qualified help. If a problem is discovered with a device that is powered by high-voltage charging, that is, a transformer located inside the stove, then there is no point in repairing it; you need to buy a new part and replace the damaged one. Such replacement blocks can be universal, they are suitable for any stove, and there are those that are made specifically for a specific brand of household appliances.
If the spark gap is damaged, a spark is formed not only inside the structure, but also comes to the surface to the burners. In this case, you should not do the repairs yourself, since the problem may be serious and only a knowledgeable person can solve it.
If there is a spark on the device, but the stove cannot be ignited, you should pay attention to such possible reasons as:
- violation of the integrity of the housing, due to which the spark will go in a random direction and will not fall into the electrical ignition area; if the charger deteriorates, it cannot be repaired, you will need to replace the part with a new one;
- the gas pressure is too high, which interferes with the stable operation of the ignition - to cope with this situation, you need to adjust the gas supply parameters so that they are optimal for the full operation of the device and its comfortable use;
- checking the condition of the nozzle - a malfunction of any elements can lead to problems with ignition, so you need to check whether there is any grease, moisture or dirt on the parts; Using a simple wire you can clean the burner and fix the problem.
To understand whether the burner itself is working correctly, you need to light it and look at its operation. The flame after ignition should have a purple color, but if it is yellow or orange, then there are some deviations. Another important point is the correct distribution of fire, which should be uniform and have the same height. If there is fire on one side but not on the other, or the height is not the same, it is worth checking that the divider is installed correctly. In addition, the reason may be incorrect installation of the stove itself, which was placed on an uneven floor, as a result of which the operation of the device is impaired.
If the stove is still under warranty, you should not touch it at all; the service center specialists will do this for free. If the fault lies somewhere inside, you should contact a specialist who will quickly fix it without the risk of damaging the device or harming your health.
To learn how to correct problems with the electric ignition of a hay stove, see the following video.
Rules for turning on gas and electric ovens, safety measures
Modern stoves are equipped with reliable safety systems. In addition to them, you must comply with a number of requirements:
- The oven should only be used by adults who do not suffer from disorders associated with distraction.
- If the gas supply is from cylinders, make sure that the hoses and valves are in good working order and that there is no smell of gas.
- Before turning on, the oven door must be held open so that any remaining gas that has accumulated there can escape.
- After each use, the cabinet walls and doors should be cleaned of any food particles or splashes that have fallen on them.
- The state of the flame should be checked periodically. Do not leave the oven turned on unattended.
- The oven should not be left open for a long time when it is turned on. It is completely unacceptable to use it for heating premises.
- When the oven is turned off, you can cool it only with the door closed to prevent children and pets from getting into it.
Under no circumstances should you use a faulty oven. This may result in gas poisoning or fire. If a malfunction is detected, you need to contact a home repairman or service center.
Review of gas burners
| Name | Characteristic | Price, rub |
| Gas burner for vertical tandoor. Russia | Rated power - 15 kW Pressure - 30mbar Consumption - 1.4 kg/hour | 7 500 |
| Gas burner G-60. Türkiye | Rated power - 21 kW Pressure - 30mbar Flow - 1.8 kg/hour | 7000 |
| Gas cast iron burner | Power up to 30 kW Pressure - (30mbar) Adjustable power | 12000 |
| Gas burner 600 mm | Power 21 kW, Pressure - 37 mbar Three circuits | 10860 |
| Gas burner for tandoor 60 cm | Rated power - 21 kW Pressure - 30mbar Consumption - 1.8 kg/hour, adjustable power | 7000 |
As you can see, the prices and characteristics are quite similar. And the choice is yours. See which suppliers are located in your region and what additional advantages they have
Pay attention to certificates and permits
Safety first
A domestic gas leak is an extremely dangerous situation that can lead to serious poisoning, explosion, property damage and death. This happens infrequently, and the cause of accidents is usually common - errors in connecting devices and violation of their operating conditions.
The set of rules and safety standards boils down to ensuring that all connections of gas pipes and appliances are sealed; the number of such components must be kept to a minimum. Having studied the rules for installing gas household appliances, even a home craftsman can cope with this task.
High-quality equipment is not cheap, so you should not skimp on properly connecting the device. Installation work will cost approximately 2,000 rubles including materials
During the work, it is necessary to follow the procedure for connecting the equipment, use suitable materials, and strictly follow the instructions. Upon completion of work, all connections are checked. Compliance with the rules will allow you to get the desired result - a safely installed and connected gas oven.
When installing a built-in gas oven with your own hands, the most common violation is the use of a tee for a gas pipe to which the hob is already connected.
Inexperienced craftsmen believe that if it works with a water supply system, then it will work for a gas supply system. The result is three joints that must be carefully sealed.
According to the rules, connecting the oven and hob should be done separately, connecting each device to its own pipe. The number of connections in this case will be reduced to two.
In practice, using a tee can be quite safe
If the threads are properly sealed, it does not really matter whether two connections are made when connecting or three
You cannot connect gas appliances through a tee without using a dielectric gasket and a shut-off valve for each individual consumer.
But this method contradicts the existing rules for installing a gas oven. If during an inspection a gas service representative discovers such a tee, the owners of the apartment or house will face a completely legal fine.
Therefore, from the very beginning it is necessary to take this point into account in order to connect the oven correctly. In addition, a dielectric gasket should be used, and a shut-off valve should be installed for each gas-consuming appliance.
Methods for determining temperature without a thermometer
If there are no documents left for the stove and it is not possible to determine the temperature in a gas oven by the numbers on the regulator, since there are no minimum and maximum heating parameters, you can use several simple but effective methods. Their main essence is to determine the temperature of the flame inside the gas stove at a certain position of the thermostat.
This is a kind of check with which you can make sure that the correct mode is selected for cooking certain dishes.
Paper
This can be plain white office paper or notebook paper. Newspapers, napkins and baking paper are not suitable for these purposes. The error in the indicators will be 5-10 °C. It is best to carry out the experiment several times to avoid gross errors and inaccuracies.
A regular sheet of paper is suitable for determining the temperature.
The oven is turned on by setting the regulator in the desired position; After 10-15 minutes, when the oven heats up and reaches the desired parameters, a sheet of paper is placed inside. It should be placed on a baking sheet or wire rack in the area where food is usually located. You need to wait until the paper begins to char
At this stage it is important to control the time. The table shows the ratio of temperature to the period of time that the sheet was inside the cabinet.
| t, °С | Time |
| less than 180 | more than 10 minutes |
| 180-200 | 5 minutes |
| 200 | 1 minute |
| 230-250 | 30 seconds |
| 250-270 | 15 seconds |
| 270-300 | 5 second |
If even after 15 minutes of being inside the oven the paper is not charred, but only slightly changed its color, then the temperature inside the oven is no more than 150 degrees.
Sugar
How to determine the temperature in an already working oven if food is loaded there. For example, there is a charlotte inside and there is a suspicion that the pie is browning too quickly. To do this, use lump sugar, which is placed on a sheet or foil and placed inside on a baking sheet or wire rack, in close proximity to the pie. The melting point of sugar is 180 °C. Accordingly, if the pieces begin to melt, it means the heating level inside the cabinet is higher than this indicator.
Sugar melts at 180 degrees Celsius Note! This method is most convenient for checking the temperature when preparing baked goods. To ensure that it does not burn and bakes well, it is recommended to heat the oven to 180-200 °C.
It doesn’t matter if lump sugar is missing, granulated sugar can easily replace it. Their melting points are exactly the same. Using both types of sugar, you can quite accurately determine in what temperature range the oven operates. Due to the higher density, lump sugar will melt with a slight delay, while granulated sugar will flow immediately. If the temperature inside the cabinet is very high, more than 200 ° C, both types of sugar will begin to melt instantly.
Flour
How can you find out the temperature in the oven without a thermometer, having only flour available? The method is as simple as the previous two. The only difference is that using flour you can determine the maximum heating of the oven:
- First, the baking sheet is covered with baking paper, onto which flour is poured in a small layer. The oven is turned on and preheated for 10 minutes, after which the baking sheet is placed inside. Next, it remains to detect the time after which the flour begins to change its color;
- if after 1 minute the flour has not changed color, the temperature is below 200°C;
- slight yellowing after 30 seconds - temperature about 200°C;
- turned sharply yellow after 15 seconds and gradually darkened - heating to about 250°C;
- a few seconds after placing the baking sheet in the cupboard, the flour turned black - the oven is working at maximum, the temperature inside is more than 280°C.
Despite the simplicity of the method, it has some features. So, for testing you should use only white flour, by which you can easily track the color change. The amount of flour should also be measured. If there is a lot of it, the darkening will be uneven and it will be difficult to determine at what point the flour has warmed up to its maximum temperature.