- How to remove using stencils
Stencils
What you need to remove a crack on a mirror with your own hands
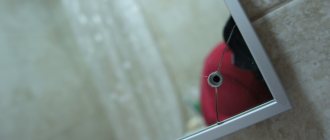
If a mirror cracks, it always upsets the owners. The search for a solution to the problem begins. There's just one caveat. It will not be possible to completely remove a crack in the glass. At home, not a single available remedy will help with complete restoration.
The question often arises - how to decorate a crack in a mirror with your own hands.
It is dangerous to carry out complex work at home, since a mirror is a rather whimsical object and only loves careful professional handling. But you can always find a way out of any situation.
If you can’t remove the crack, you can decorate it beautifully. This will not only save the mirror, but also refresh the interior. This may require various materials.
The most common techniques used for decorating a reflective surface are stencil designs, or their framing, the craquelure method, applying various designs and interesting frames. As you can see, there are really many ways and each of them is good in its own way.
What are the advantages of do-it-yourself mirror restoration?
Not everyone immediately decides to restore a mirror with their own hands. This most often occurs due to ignorance of all the advantages of this process. But independent mirror restoration has a lot of positive aspects that can encourage you to carry it out. These include such aspects as:
- In small towns, or even villages, you can rarely find a master who can properly repair a mirror. Not everyone can restore amalgam. Decorating small flaws yourself is much easier than looking for a specialist restorer of this profile.
- Repairing damage to a cracked mirror is not a cheap pleasure. Most often, such a procedure will cost more than buying 3 new mirrors. And decorating with your own hands involves spending only on a minimum set, which often consists of one stencil.
- If a crack on a wooden surface can be easily covered with wax and this does not require special skills, then restoring glass is a completely different matter. Therefore, again, it is much easier to repair the crack with an interesting pattern that would match the interior. This definitely doesn’t require any special skills or knowledge, just paint and desire.
- It's no secret that a small scratch can turn into a big chip. This most often happens due to the transportation of the mirror to the workshop. And when the piece of furniture has already been delivered, it turns out that it cannot be restored. It is for this reason that it is better to leave the structure in its original place and take advantage of interesting ideas for independent restoration.
How to repair a crack in a mirror with your own hands
Not everyone knows how to repair a crack in a mirror with their own hands. There are several ways to fix the problem. To do this, you will need a minimum set of tools, a little time and desire to bring the mirror into proper shape.
You can try to disguise the crack using various decorative elements.
Important! Since the methods involve the use of decor, you need to choose the right one for your interior.
How to remove using stencils
Stencils are a universal thing that can save you in different situations, and a crack in glass is no exception. There are many variations of stencils and they will suit every interior. To bring the idea to life, you need to purchase brushes of a suitable size, acrylic paints, a simple pencil, a regular sponge, masking tape, acetone (you can use nail polish remover) and, of course, a patterned stencil.
One of the most effective and simple ways to disguise small cracks in a mirror is to cover them with paint.
You can use this method as follows:
Stencils
As you can already see, the method with stencils is quite simple and effective. Under a layer of paint, cracks and even small chips will become less noticeable. The advantage of this method is that the stencils can be different, from flowers to cartoon characters. No special drawing skills are required, since the task will only be to paint a finished drawing.
This is one of the most effective and inexpensive ways. An undeniable advantage is that the drawings can be changed whenever you want. They can be easily washed off if you use acetone.
In order for the pattern to be clear and not smudged during the process, the stencil must be firmly glued to the mirror with masking tape.
Important! If the stencil is attached to the mirror with ordinary tape, then traces from it will have to be wiped off for quite a long time and using chemicals. They, in turn, can erase the applied drawing.
Craquelure
Craquelure is one of the most popular and beautiful methods. In addition to mirrors, it is also used for aging furniture. The method is suitable for those who are not afraid to add more cracks to the mirror surface, only this time artificial ones.
As you know, it is best to hide something in a visible place. You can also hide defects on the mirror in this way.
The craquelure technique is to give the mirror texture in the form of small irregularities. This way you can not only hide the resulting flaw, but also add an independent object to the interior, which gives it its own peculiarity and sophistication.
This is done using craquelure varnish and acrylic paint. The color of the paint should harmonize well with the wall or mirror frame. Although the technique does not involve complex machinations, it still requires caution in performing all actions.
This decoration technology is quite simple, but it must be performed with special care.
The first layer of paint is applied to the mirror surface. It must dry completely. Only after this the second layer of craquelure varnish is applied. The two components will begin to interact, forming artificial cracks. The mirror is not damaged in any way. It looks very beautiful, since the mirror surface will look out through the new irregularities, reflecting the light.
Removing a crack using a drawing
The method with a pattern is almost identical to the method with a stencil. Only here you will have to come up with the plot of the picture yourself and draw it.
Anything can be depicted on mirrors. These could be trees, birds, flowers or ordinary geometric patterns. If you used acrylic paints before, now you will need stained glass ones. They are made specifically for painting mirror surfaces.
You can also cover a crack or scratches on a mirror using a drawing.
Frame
If a crack appears on the side, then it can be covered in an original way using a frame. She can be anyone. There are no restrictions in this type of decoration. The main thing is to build on the possibilities of the mirror surface. It is better to refrain from decorating with large massive objects. And they won’t look very nice on a light reflective surface.
Materials such as buttons, beads, shells, decorative stones, clothespins, textured rope threads and even antique coins are often used. The pattern is arranged in such a way as to cover all defects. For fastening, it is better to choose reliable glue.
An original frame will help hide the damaged area on the mirror.
How to remove scratches from a mirror
In addition to decorative designs, you can also use the good old traditional methods of getting rid of cracks. True, as has already been said, they will not remove it completely either, but will only disguise it.
You can use toothpaste and flannel cloth. The product is carefully rubbed into a shallow scratch. Then it dries and polishes. And for deeper cracks, colorless silicone sealant or foil is suitable.
It is quite possible to hide problem areas on your own.
Beautiful ways to decorate a mirror
A beautiful mirror decoration will not only cover cracks, but will also interestingly complement the interior. For this you can use any means and materials. You can often find ways to decorate using shells. They look beautiful next to the mirror surface and give it a special mood.
They are not attached to the mirror itself, but to a specially made frame that will match the shape of the mirror.
Additional Information! By decorating with filled frames, the mirror can be visually enlarged or reduced. Its dimensions will depend on how exactly to place the beautiful frame.
In addition to shells, wine bottle corks can also be used. They are also placed on the mirror in any order, creating beautiful patterns. If you want to add a little depth to the mirror surface, then the plugs are attached in their original form without cutting. A mirror framed with hemp rope looks beautiful in all interiors.
In this process, it is important not to get carried away and not to overdo it with the number of elements so that the frame looks organic.
Mirror care rules
The rules for caring for the mirror must be followed. Otherwise, there is a risk of re-appearance of various cracks and chips. It is important to follow the following rules:
- The mirror surface does not like humidity.
- It is better not to place mirrors in direct sunlight.
- Mirrors can only be wiped with soft, lint-free cloths (it is better to purchase a specialized one, this will reduce the risk of scratches).
- There is a thin layer of silver on the mirror, so the surface should never be wiped with products designed to clean glass. They contain ammonia, which harms the surface.
After familiarizing yourself with all the possible ways to decorate a mirror, everyone can easily repair a crack in a mirror with their own hands.
The result can pleasantly surprise and even bring some novelty to the design of the room.
Video: do-it-yourself resuscitation of a broken mirror
Variety of options
Before you start attaching the mirror to the cabinet yourself, you need to understand the design features. Standard straight-format devices can be equipped with two, three, or four leaves. Built-in products are installed in wall niches. This arrangement method saves space. Often such models do not have a floor or roof. In this case, the cabinet shelves are fixed directly to the wall.
What you need to remove a crack on a mirror with your own hands
If a mirror cracks, it always upsets the owners. The search for a solution to the problem begins. There's just one caveat. It will not be possible to completely remove a crack in the glass. At home, not a single available remedy will help with complete restoration.
Some try to correct the situation with sanding, foil or even toothpaste, but all this will not make the crack disappear, but will only mask it for a while. For some, this will be an excellent way out of the current situation.
The question often arises - how to decorate a crack in a mirror with your own hands.
It is dangerous to carry out complex work at home, since a mirror is a rather whimsical object and only loves careful professional handling. But you can always find a way out of any situation.
If you can’t remove the crack, you can decorate it beautifully. This will not only save the mirror, but also refresh the interior. This may require various materials.
The most common techniques used for decorating a reflective surface are stencil designs, or their framing, the craquelure method, applying various designs and interesting frames. As you can see, there are really many ways and each of them is good in its own way.
How to remove deep scratches
A successful result and visible gloss effect is achieved by using the product according to the stated instructions. For example, car polish is an ideal option. The brands Turtle Wax, Swirl Remover and 3M Scratch are especially valued. To save your phone from damage you need:
- apply polish to a cotton pad;
- rub the liquid into the glass for ten minutes;
- if cracks remain visible, continue rubbing until
- until the result is satisfactory.
It should also be remembered that scratches can result from contact of the screen with hard objects - for example, keys, a lighter, and even small change.
Scratch remover
In addition to the above polishing and mechanical rubbing, there are more modern solutions, such as chemical mixtures. Their effects are manifested at the molecular level. The composition includes the main active ingredient, the so-called “jewelry powder” - cerium oxide.
High purity cerium oxide glass polishing powder, used for polishing various glasses.
Polishing powder is ideal for polishing scratches and treating smartphone screens to achieve a glossy effect. The effect of chemicals is gentle, without damaging the surface of the screen.
Dilute cerium oxide with a little water to the consistency of sour cream.
Soda with water
Baking soda paste sounds a little surprising. But, it is suitable for removing the “worn plastic” effect. The correct procedure to mask the protective screen:
- Proportion 2:1. Soda and water are mixed in a small container.
- A homogeneous paste is formed, without clots.
This is the most affordable and easiest way to polish glass.
Apply the paste to a clean, soft cloth and lightly wipe the screen in a circular motion. The remaining mixture is removed with a slightly damp cloth.
Toothpaste
Toothpaste is a tool that everyone has.
For polishing, it is better to use whitening toothpastes. Whitening paste usually contains more abrasive particles.
Note! To get rid of scratches and glass grout, you need to use only regular classic paste; grouting with a gel consistency is prohibited. Instructions for eliminating micro-scratches:
Instructions for eliminating micro-scratches:
- Use a cotton swab or a clean, soft, lint-free cloth. Microfiber will do.
- Apply a small clump of paste to the tampon.
- Rubbing the paste in a circular motion, move towards the part of the screen where the cracks are visible.
- After rubbing, wipe the display with a damp cloth. This action will remove excess paste.
Despite the seeming absurdity of this idea, toothpaste actually shows good results when polishing.
Paste GOI
The paste of the State Optical Institute is a specially developed polishing agent suitable for processing optical surfaces and glass. Initially, its scope of application was limited to lens polishing. Today, the purpose has been significantly expanded.
GOI paste is a universal cleaning product that can be used to successfully grind and polish any surface.
The application procedure is quite simple:
- Take a chamois/cotton pad. Apply GOI paste on it in small quantities.
- Place a spot of machine oil on your smartphone display.
- Rub the substance over the entire surface of the screen.
- After 5 minutes, wipe the smartphone sensor with a clean, dry microfiber.
The methods described above are not a limitation of the current means. There are also proven mixtures:
- Displex Modern development, using innovative technology. Requires the use of light fabric. Packaged in a convenient tube with a narrow spout. This makes the process faster and safer. In this case, the product is applied pointwise. Take a cloth and rub it into the screen until dark spots appear on it. This completes the sanding.
- Abrasive This subtype of smartphone polishers includes pastes and mixtures that contain an abrasive. The particles are applied with a felt wheel using a sander. GOI is also suitable for this; you can use diamond pastes.
Polishing with GOI paste is simple and effective.
Proper preparation of the gadget for the procedure is the key to a successful effect. To do this, you need to disconnect the phone from the power supply and turn it off completely. Wipe off dust from the screen. All parts of the case that have open connectors must be sealed with tape to prevent liquid from getting inside.
Before you begin removing scratches from your touchscreen, cover all ports on your phone to prevent moisture or foreign objects from getting into them.
Bathroom mirror repair
Are you planning to renovate your bathroom mirror? The mirror is the most fragile item in the bathroom and damage to it is not uncommon. For example, you accidentally hit it with something or hit it with a sharp object, and cracks appeared on the mirror. This also happens due to the fact that a large load falls on the mirror if it is built, for example, into a cabinet. Also, the mirror canvas fades over time, loses its original appearance, and scratches may appear on it. Sometimes even one small crack or scratch on the mirror spoils the entire look of the bathroom, and, of course, you want to resolve this issue as soon as possible.
If it is possible to change the mirror, then it is better to do it right away. The bathroom is one of the rooms that especially needs a mirror. But it happens that the mirror is built into the cabinet and the entire cabinet has to be replaced. And this comes out expensive. Or the mirror is of some value, and it’s a pity to part with it. Therefore, in some cases, repairs are justified.
What to glue the mirror on?
Before gluing a mirror to a mirror, you will need to carefully select the substance that best suits all its characteristics. To do this, you should first understand how the adhesive mixture differs and what tricks you need to know for gluing to be successful.
Today in stores there is a wide range of different products from domestic and foreign manufacturers.
The solution can be divided into 2 types according to its composition:
- “Acrylic” – cannot be used everywhere. This type only works on porous substrates and is not suitable for use on metals or bonding ceramic tiles. Due to its high water solubility, it is undesirable to use it in places with large accumulations of moisture. The acrylic-based mixture is environmentally friendly, but is not resistant to high temperature changes.
- “Neoprene” - the base consists of synthetic rubber. Thanks to increased adhesion, the composition is able to glue the mirror with various coatings, even with tiles. It is often used for bonding ceramics and porcelain. However, this species has one feature - a strong chemical smell.
In addition, these funds are divided into 3 categories:
- compositions containing solvents;
- silicone liquids;
- hybrid specimens.
“Solvent-based” is one of the most budget options. It can also be divided into 2 types: for gluing glass and bonding mirrors. Although, the first type is not recommended for use for elements with a reflective coating. Over time, amalgam can deteriorate and stains may appear, which can ruin the appearance of the bonded surfaces. The advantage is that this substance dries quickly.
“Silicone mixture” is distinguished by its chemical neutral composition. It forms a strong layer and very firmly bonds the mirror to the surface. But compared to solvent-based glue, it takes much longer to dry and the cost is an order of magnitude higher.
“Hybrid option” will allow even a beginner and those who do not have skills in repair work to cope with it. This type of glue is more expensive than the previous two, but has very good gluing quality.
How to prevent scratches and cracks
So that you don’t have to look for steps to remove many scratches, you just need to carefully prevent their occurrence. This can be done using simple recommendations:
- It is worth purchasing a bumper or case that will protect not only the back panel of the phone, but also the top. Such cases are not sold in every store. They resemble a folding bed;
- It is necessary to use a protective film, or better yet, glass;
- You cannot carry your phone in the same pocket with keys or other metal items;
- You should not give your phone to others if you are not sure of their accuracy.
These four simple rules will help avoid deaths.
What are the advantages of do-it-yourself mirror restoration?
There are several simple ways that anyone can do.
Not everyone immediately decides to restore a mirror with their own hands. This most often occurs due to ignorance of all the advantages of this process. But independent mirror restoration has a lot of positive aspects that can encourage you to carry it out. These include such aspects as:
- In small towns, or even villages, you can rarely find a master who can properly repair a mirror. Not everyone can restore amalgam. Decorating small flaws yourself is much easier than looking for a specialist restorer of this profile.
- Repairing damage to a cracked mirror is not a cheap pleasure. Most often, such a procedure will cost more than buying 3 new mirrors. And decorating with your own hands involves spending only on a minimum set, which often consists of one stencil.
- If a crack on a wooden surface can be easily covered with wax and this does not require special skills, then restoring glass is a completely different matter. Therefore, again, it is much easier to repair the crack with an interesting pattern that would match the interior. This definitely doesn’t require any special skills or knowledge, just paint and desire.
- It's no secret that a small scratch can turn into a big chip. This most often happens due to the transportation of the mirror to the workshop. And when the piece of furniture has already been delivered, it turns out that it cannot be restored. It is for this reason that it is better to leave the structure in its original place and take advantage of interesting ideas for independent restoration.
Even a slight blow is enough for a crack to appear on the surface of the mirror.
If a crack appears while driving
On the freeway, even the most careful driver is not immune to pebbles hitting the windshield. And if such an unpleasant phenomenon as a crack in your car glass catches you on the road, then you need to follow a few simple rules. First of all, you need to reduce the speed of the car to a minimum so that body vibration does not aggravate the situation. Also, to eliminate temperature changes, it is necessary to turn off the windshield defroster.
Windshield repair
The “twisting” effect of the body puts additional stress on the damaged glass, so when choosing a route, preference should be given to the most flat road possible. Therefore, driving on rough terrain is not advisable. Once you get home and examine the extent of the damage, you can begin car glass repairs.
What to do if a crack appears on your windshield
Mirror mosaic on the fence
What could be better than turning an ordinary fence into a work of art? This mosaic mirror fence is definitely one of the most creative things I've ever seen. And it's not as difficult to do as you think. Even if you don't have enough shards, you can buy old cracked or otherwise damaged mirrors for next to nothing and create a piece of art out of it in your backyard.
How much will it cost to change the screen on your phone?
With the cost of work, everything is simple; inexpensive service centers charge an average of 1000-2000 rubles for glass replacement for most phone models. The price may be higher if it is very difficult to change the glass for a particular phone model.
Interesting materials:
What is the time difference between Moscow and Khabarovsk? What is the time difference with South Korea? What is the time difference with Canada? What is a person's body temperature during sleep? What are the 5 best inventions of all time? What character traits make Pechorin a hero of his time? What wonders of the world have been created in our time? What films were made during the war? What verbs form the present tense? Which of the seven wonders of the world have survived to this day?
Frame
An original frame will help hide the damaged area on the mirror. You can use various materials for it: glass balls, buttons, beads, shells, flat stones, etc. The selected parts should be glued along the edge of the mirror so that the defect is covered. In this process, it is important not to get carried away and not to overdo it with the number of elements so that the frame looks organic.
What to do if the mirror is cracked: how to safely get rid of a cracked mirror
It’s good if the mirror never breaks in careful hands. However, for the most careful owners, it can unexpectedly crack on a cabinet door, in a large frame, or in a small cosmetic bag. Sometimes, when sorting out dacha “stocks” or things left over from previous owners, people come across a darkened antique mirror in a frame. And also with a mirror product that had a large part that had broken off.
Bewilderment arises: what to do with this thing that has already served its purpose. Questions and doubts are not random. On the one hand, signs and warnings associated with a broken mirror come to mind. On the other hand, the correct technology for eliminating breakable items or fragments is of concern.
Mystical "through the looking glass"
Beliefs about the mirror arose a long time ago. Reflection is the information that people looking at it receive. Reflection is always important.
Fortune telling makes it possible to see something more in the displayed world. Many myths and fairy tales tell about what happens on the other side of the plate glass. The most famous magical images associated with mirrors:
- endless reflection;
- cracked or broken;
- curtained;
- inverted:
- reflected candles.
Some people are helped to concentrate by the simple act of looking at their reflection when forced to return after leaving the house. It is especially carefully studied by people with mystical intuition that one should not do in front of a mirror, where it should not hang.
A cracked, broken mirror, according to old folk wisdom, portends trouble.
Reference. There is some wise advice: do not look into a damaged mirror, try not to be reflected in the swept away fragments.
Interestingly, seeing a cracked mirror in a dream is also not good. The details of such a dream tell you who to expect trouble from: strangers or loved ones.
One useful recommendation is not to become discouraged by the prediction, but to think about what this attribute was trying to warn about impending circumstances. We must look for strength and ways to resist possible everyday complications.
How to Safely Get Rid of a Cracked Mirror
If any mirror in the house is cracked, you must try to remove it in its frame from the house carefully, without breaking it into pieces. It is enough to pack it in an unnecessary piece of fabric, durable polyethylene, cardboard .
For city residents, unfortunately, the old advice - to bury this object or its fragments - is not at all suitable. But they also need forethought.
It would not be a bad idea to place such a fragile item in the safest corner near waste containers to protect it from accidental damage . No matter how convinced a person is of the validity of mystical predictions, another very real fact is also important for him: let no one get hurt by a thrown dangerous object.
A cracked mirror is a sign
Almost every person knows that mirrors have mystical powers and are often a magical tool in various kinds of rituals, acting as guides between worlds. That is why they should not be perceived as ordinary interior items. There are many rules about placing mirrors in different parts of the house and they should be followed. If the mirror cracks on its own, this is a very bad omen. It means that there is a lot of negative energy in your home. Perhaps there is an evil spirit living in the room. Some consider a cracked mirror a harbinger of severe damage. It is believed that to some extent a mirror can protect its owner from negativity, but if the object cannot withstand an energy attack, it may become unusable.
There is another sign that foretells that in a house where a mirror has recently cracked, one of the family members will become seriously ill. If it does not crack, but falls and breaks, or you accidentally dropped it, the meaning of this unpleasant superstition does not change
In any case, a damaged mirror is considered a harbinger of illness and other negative energy, and you will have to pay attention to your health and magical protection. This is especially true for antique things of this kind, which in general are not recommended to be kept at home.
What to do to avoid consequences
To neutralize the negative meaning of the sign about a cracked mirror, to protect yourself from troubles, you need to properly get rid of the mirror cloth. Esotericists advise the following:
- Perform a ritual on the waning moon.
- Before throwing away a mirror that has cracked due to a fall or by itself, it should be placed glass side down for a week.
- Rinse the item under running water to remove the information stored in the mirror surface.
- It is recommended to take the item to the landfill in the dark and alone.
- The abandoned item should be sprinkled three times on all sides with salt blessed on Maundy Thursday.
An even more preferable option is to throw the item into a river or other body of water with running water.
Upon returning, it is necessary to cleanse the place where the reflective surface previously hung from bad energy. For these purposes, you can use candles or incense.
Superstitious people who are alarmed by a broken or cracked mirror should perform a simple ritual that can completely eliminate all possible adverse consequences of this incident. The item must be carefully washed with water, christened three times with a church candle, and then say a prayer, ask for forgiveness and say goodbye to the worthless item.
If the mirror is cracked, signs warn of illness, loss and separation. By performing a cleansing ritual and getting rid of the damaged item, you can neutralize the negative consequences of the incident and avoid possible troubles.
Preparing for restoration at home
Before you begin restoring the mirror surface, you should perform preparatory steps. The preparation process depends on the type of mirror and the size of the existing defects.
For larger damage
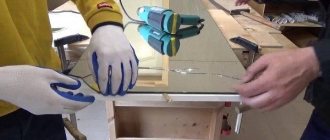
If the mirror is inserted into the frame, in order to more conveniently restore the surface with large defects, you should remove it from the structure. To do this, use a small hammer and screwdrivers to unscrew the fixing screws and remove the hammered nails. In cases where it is impossible to remove the product from the frame, it is recommended to place the entire structure on a flat and hard surface to prevent movement from its original position.
Minor repairs
When planning to get rid of minor and unnoticeable scratches, it is enough to wipe the surface from dirt to better see the damaged areas. It is not necessary to remove the product from the wall, which greatly simplifies the task.
How to repair a crack in a mirror with your own hands
Not everyone knows how to repair a crack in a mirror with their own hands. There are several ways to fix the problem. To do this, you will need a minimum set of tools, a little time and desire to bring the mirror into proper shape.
You can try to disguise the crack using various decorative elements.
Important! Since the methods involve the use of decor, you need to choose the right one for your interior.
How to remove using stencils
Stencils are a universal thing that can save you in different situations, and a crack in glass is no exception. There are many variations of stencils and they will suit every interior. To bring the idea to life, you need to purchase brushes of a suitable size, acrylic paints, a simple pencil, a regular sponge, masking tape, acetone (you can use nail polish remover) and, of course, a patterned stencil.
One of the most effective and simple ways to disguise small cracks in a mirror is to cover them with paint.
You can use this method as follows:
- Preparation of the workplace. It is necessary to lay out all the tools and materials in front of you at once so as not to be distracted by missing ones. Everything should be conveniently located so that work does not cause discomfort.
- It is more convenient to use ready-made stencils purchased in the store. If you wish, you can make them yourself. To do this, you will need the selected pattern and thick cardboard that will not allow paint to pass through.
- Before applying paints to the surface of the mirror, they are checked for color matching. It often happens that the shade in the jar is very different from the applied stroke. This can be done on any piece of paper.
- The stencil is attached with masking tape to the selected area. If the drawing suggests the presence of several colors. Then, for accuracy of execution, they are sealed with tape to prevent other paint from getting in. Without tape, only the place that will be signed first remains.
- There are two ways to apply paint: with a brush or sponge. Many masters who have already done this note that doing this with a sponge is much more convenient and faster. After applying all the colors, you need to correct the contour. A thin brush is used for this.
Now on the Internet you can find a lot of beautiful stencils with butterflies, flowers, patterns and various ornaments.
Stencils
As you can already see, the method with stencils is quite simple and effective. Under a layer of paint, cracks and even small chips will become less noticeable. The advantage of this method is that the stencils can be different, from flowers to cartoon characters. No special drawing skills are required, since the task will only be to paint a finished drawing.
This is one of the most effective and inexpensive ways. An undeniable advantage is that the drawings can be changed whenever you want. They can be easily washed off if you use acetone.
In order for the pattern to be clear and not smudged during the process, the stencil must be firmly glued to the mirror with masking tape.
Important! If the stencil is attached to the mirror with ordinary tape, then traces from it will have to be wiped off for quite a long time and using chemicals. They, in turn, can erase the applied drawing.
Craquelure
Craquelure is one of the most popular and beautiful methods. In addition to mirrors, it is also used for aging furniture. The method is suitable for those who are not afraid to add more cracks to the mirror surface, only this time artificial ones.
As you know, it is best to hide something in a visible place. You can also hide defects on the mirror in this way.
The craquelure technique is to give the mirror texture in the form of small irregularities. This way you can not only hide the resulting flaw, but also add an independent object to the interior, which gives it its own peculiarity and sophistication.
This is done using craquelure varnish and acrylic paint. The color of the paint should harmonize well with the wall or mirror frame. Although the technique does not involve complex machinations, it still requires caution in performing all actions.
This decoration technology is quite simple, but it must be performed with special care.
The first layer of paint is applied to the mirror surface. It must dry completely. Only after this the second layer of craquelure varnish is applied. The two components will begin to interact, forming artificial cracks. The mirror is not damaged in any way. It looks very beautiful, since the mirror surface will look out through the new irregularities, reflecting the light.
Removing a crack using a drawing
The method with a pattern is almost identical to the method with a stencil. Only here you will have to come up with the plot of the picture yourself and draw it.
Anything can be depicted on mirrors. These could be trees, birds, flowers or ordinary geometric patterns. If you used acrylic paints before, now you will need stained glass ones. They are made specifically for painting mirror surfaces.
You can also cover a crack or scratches on a mirror using a drawing.
Frame
If a crack appears on the side, then it can be covered in an original way using a frame. She can be anyone. There are no restrictions in this type of decoration. The main thing is to build on the possibilities of the mirror surface. It is better to refrain from decorating with large massive objects. And they won’t look very nice on a light reflective surface.
Materials such as buttons, beads, shells, decorative stones, clothespins, textured rope threads and even antique coins are often used. The pattern is arranged in such a way as to cover all defects. For fastening, it is better to choose reliable glue.
An original frame will help hide the damaged area on the mirror.
Removing scratches from a mirror
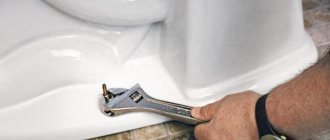
Before removing scratches, you need to carefully remove the mirror and pull it out of the frame.
If the scratches are not very deep, they can be masked as follows.
Using foil:
- Cut a small piece of foil. It should cover the scratch and be perfectly smooth.
- Glue it with tape to the back of the mirror.
Cerium oxide
If you have shallow hairline scratches, then cerium oxide will come to your aid - a fine, odorless powder that can be of different colors, ranging from shades of white to brown.
It is used for polishing and grinding glass as follows:
- Dilute it in water in a ratio of 1 to 20.
- Use for polishing mirrors in tandem with a felt wheel. This will allow you to complete the polishing process to perfection.
Using silicone sealant
This method can mask a deep scratch. Before filling the scratch with sealant, you need to pre-treat the surface with glass cleaner:
- Apply your product to the surface and wipe thoroughly with a lint-free cloth. The surface must be dry and clean.
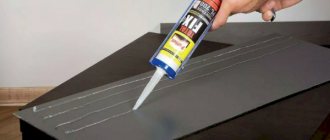
- Apply silicone sealant directly to the scratch and spread evenly using a toothpick.
- Wait for the mixture to dry completely, then remove the excess with a knife, holding it at a 45-degree angle.
Paste GOI
If you are willing to spend a little more money, purchase GOI paste. This universal product will help you not only remove scratches from a mirror, but also from the screen of a mobile phone or other touch device, clean jewelry and a collection of expensive old coins.
Application:
- Crumble the paste.
- Use a cotton swab to pick up the product.
- Apply a thick layer to the damaged area.
- Polish the surface for a minute, then wipe the area with clean cotton wool.
- Repeat the polishing cycle again. But this time polish for 10-15 minutes.
As a result of your careful actions, clearly visible scratches will become almost invisible to the naked eye.
Epoxy glue plus plus GOI paste
To improve the effect, you can combine epoxy glue with GOI paste. How it's done?
- First you need to treat the scratch with alcohol.
- Then you need to apply clear epoxy glue to it with your finger. You need to rub it in so that no air bubbles form.
- Excess resin must be removed with a solvent.
- The next stage of work will be possible only after 4 days, when the glue has completely crystallized.
- Then we take a piece of felt or other soft fabric, apply GOI paste and carefully polish the surface.
As a result of this treatment, the spider web from the scratch will be almost invisible. A light trace in the form of a transparent strip may remain.
Every home has mirrors. They are used not only to clean themselves up, but also to decorate the interior of their home. However, over time, scratches may appear on the mirror. They can occur due to improper care or mechanical damage. You can seek help from specialists or try to remove scratches from the mirror yourself.
What will you need for work?
Some tools for gluing mirrors
When performing installation, you cannot do without special materials and tools. You will need:
- mirror;
- degreasing composition;
- devices for implementing the chosen fastening method;
- sandpaper;
- gun for performing installation work;
- pencil, ruler.
If you plan to mount a bronze mirror, you will need to additionally take a drill, a set of drills, and fasteners.
Beautiful ways to decorate a mirror
A beautiful mirror decoration will not only cover cracks, but will also interestingly complement the interior. For this you can use any means and materials. You can often find ways to decorate using shells. They look beautiful next to the mirror surface and give it a special mood.
They are not attached to the mirror itself, but to a specially made frame that will match the shape of the mirror.
Additional Information! By decorating with filled frames, the mirror can be visually enlarged or reduced. Its dimensions will depend on how exactly to place the beautiful frame.
In addition to shells, wine bottle corks can also be used. They are also placed on the mirror in any order, creating beautiful patterns. If you want to add a little depth to the mirror surface, then the plugs are attached in their original form without cutting. A mirror framed with hemp rope looks beautiful in all interiors.
In this process, it is important not to get carried away and not to overdo it with the number of elements so that the frame looks organic.
Method No. 4 Sliding wardrobe with stained glass windows - economical option
Only very wealthy people have the opportunity to decorate wardrobe doors with stained glass windows. We offer a decoration method that will allow you to experience all the delights of stained glass decoration without significant costs.
The technology is extremely simple. A translucent stained glass film with an adhesive surface is applied to the mirrored door of a sliding wardrobe. The film transmits light, which returns to us through reflection. The result is a glowing effect similar to reflection from colored glass. Applying stained glass to a wardrobe mirror is as easy as a regular vinyl sticker. Check out the decorative effect.
Stained glass films from the Crystal Frost series are perfect for decorating wardrobe mirrors, glass doors and partitions, and shower stalls. An exquisite translucent pattern will make the glass surface attractive and open up space zoning possibilities. Several surface patterns are available to order
Requirements for adhesive for attaching rear view mirror
If you need to fix the interior rear view mirror, you should understand what influences are exerted on it while driving, and in what environment it has to be. Based on this, an adhesive is selected that can reliably fix the mirror on the windshield.
The first thing the rear view mirror, and at the same time the adhesive that holds it in place, has to deal with is vibrations. The car constantly “shocks” while driving on the road, no matter how well the suspension copes with road unevenness. Since the mirror is fixed to the windshield only with the help of an adhesive base, it fully feels all these vibrations, and the impact of them falls precisely on the adhesive used.
When choosing glue for a rear view mirror, you should immediately exclude their options “Glue Moment” and the like. Such adhesive bases are not designed to work in shaking conditions, as a result of which the mirror will not last long on them.
The second thing we pay attention to when choosing an adhesive base for a mirror is operating temperatures. On hot days, direct sunlight may fall on the adhesive base on the windshield, causing it to heat up. Accordingly, it is important that at high temperatures the “glue” used does not lose its properties. But at the same time, even in winter, when it is cold outside and there is snow on the windshield, the adhesive base must hold the mirror firmly.
Taking this requirement into account, there is no longer the option of attaching the rear view mirror to double-sided tape, the adhesive base of which loses its properties at high temperatures.
Another condition that you should pay attention to is the possibility of stripping the surface of the adhesive if necessary , for example, if the mirror comes off and has to be reattached. Double-sided tape, as well as “Glue Moment,” will be quite difficult to clean from glass.
Professional products
Indeed, there are special products that are designed to eliminate scratches. Many users really rely on it, since such substances are sold in professional stores, where they should know a lot about it. In fact, sometimes it really works. The main thing is to find a quality product.
After purchasing such a professional solution, it must be applied to a microfiber cloth, and then applied to the display in a circular motion. After this, you can start polishing the device. As it hovered, 10 minutes is enough for minor scratches to become smaller and some to disappear.
What materials will be useful?
What can be used to turn an ordinary boring mirror into a real miracle? Here we can only say that everything can be used - you need to give free rein to your imagination. Children's toys, bottle caps, paper, fabric, all kinds of natural materials, from pebbles to pine cones - absolutely everything will do. The main thing is to choose the option that can be made depending on the person’s creative skills, as well as one that will simply fit harmoniously into the interior.
DIY mirror frame
Most often, wood is used to create original frames , as it is easy to process and suits almost every interior style. The material is time-tested, durable and environmentally friendly. Yes, and it looks very beautiful.
To decorate mirrors of square, rectangular and similar shapes, the easiest way is to use ordinary wooden borders, blocks, and plinths. Round and oval canvases are ideal for experiments. Here you can use wooden spatulas, natural driftwood, twigs and much more.
Original mirror frame
On a note! Round mirrors are often turned into original suns or unique nests using wood.
Some craftswomen who love to work with paper also use it to decorate mirrors. Often used are egg cartons that easily turn into flowers. Special stickers or decoupage techniques can be used. Don’t think that paper is a completely useless material. With the correct working technique, it will not quickly lose its appearance. But the mirror will turn out to be very unusual.
On a note! Sometimes very unusual objects are used - metal rulers, children's toys. In the first case, the rulers can be placed around the mirror like rays of the sun, in the second, toys are glued along the perimeter of the mirror in a certain pattern. This is a great option for a children's room.
Homemade mirror with a metal frame As for natural materials, you can use stones, cones, and shells. The latter will look great in the bathroom. Moreover, the products can be glued both symmetrically and in different places, depending on desire.
Rating of the best mounting adhesive
ARTFORMAT 100 ml
Excellent adhesive that shows high resistance to mechanical stress. Suitable for surfaces: porcelain, mirror, ceramics, wood, etc. Has good adhesion. The main purpose of the product is decoupage. For more serious work, it is better to find a higher quality product that will not deteriorate over time.
Sold at a price of 105 rubles.
adhesives for mirrors ARTFORMAT 100 ml
Advantages:
- High-quality composition;
- Does not emit pungent odors;
- Well suited for decoupage;
- Small price.
Flaws:
- Not suitable for complex operations.
VGT 250 gr.
A high-quality product for universal use. Designed for interior and exterior work. Provides tight fixation. Resistant to moisture. Setting time takes up to 15 minutes. It will dry in 24 hours if all requirements are met.
Shelf life – 1.5 years. To ensure a tight connection, it is important to prepare the workspace. The recommended application method is dots with a diameter of 6 mm or a continuous layer. After application, the product must be pressed tightly to the surface. Produced in Russia.
The average price is 115 rubles.
adhesives for mirrors VGT 250 gr.
Advantages:
- Quality product;
- Reliable adhesion;
- An excellent option for mounting mirrors;
- Versatility.
Flaws:
- Not found.
STAYER BlackPRO MIRRORS
An excellent glue from a popular brand that is suitable for many types of work. The minimum temperature for application is 10 degrees. Designed for use in high humidity conditions. The composition does not contain harmful chemical compounds, which makes it harmless to the body. Provides tight fixation of the mirror for a long period.
The average price is 205 rubles.
adhesives for mirrors STAYER BlackPRO MIRRORS
Advantages:
- Reliability;
- Harmless composition;
- Famous brand;
- Suitable for decorative and finishing materials;
- Represents liquid nails.
Flaws:
- Not detected.
BISON Expert KM-500
Waterproof adhesive designed for interior and exterior use. Suitable for both gluing glass and mosaic mirrors. Used by professionals during construction work. Production takes place in Russia. Does not emit a pungent odor when first opened. Has low consumption. Release form: cartridge. According to buyers, this is one of the best options that will fix the product for the maximum period.
The average price is 196 rubles.
adhesives for mirrors BISON Expert KM-500
Advantages:
- Low price;
- High-quality composition;
- Excellent adhesion;
- Resistant to moisture;
- Universal application.
Flaws:
- Not detected.
Krass Mirror
Extra-strong assembly adhesive based on synthetic rubber. Designed for gluing various surfaces. Adjustment time – 10 minutes. Produced by a popular company in Russia that has successfully proven itself for decades. The product has low consumption, which is noted by most users, and a high-quality composition that does not cause allergic reactions.
Sold at a price of 322 rubles.
adhesives for mirrors Krass Mirror
Advantages:
- Does not corrode the mirror;
- Sets in 3-4 hours;
- The fixation is tight, you won’t be able to move the mirror with your hands;
- The best representative for mirrors.
Flaws:
- Not detected.
Prevention measures
Caring for a mirror surface should include the following points:
Carrying out regular cleaning using special products or homemade compounds;- exclude exposure to abrasive or other surfaces, including the hard sides of sponges;
- It is advisable to have complex damage and chips repaired by a specialist;
- mirrors do not tolerate constant moisture well, so mirror surfaces that fog up in the bathroom must be wiped dry regularly;
- Rubbing the mirror with shaving foam will help prevent the mirror from fogging.
Any dirt that gets on the mirror must be removed immediately.
Basic requirements for glue
When choosing a composition that meets all the requirements, even from the most famous manufacturer, you must carefully ensure that the product is intended not just for ordinary glass, but specifically for mirrors.
In fact, some of the substances may contain ingredients and additives that can destroy the amalgam (reflective back layer), which will subsequently lead to stains on the mirror product. The gluing solution should not contain various acids and alkalis.
IMPORTANT! It is not recommended to use universal products, which can also harm the amalgam. The fact is that many manufacturing companies, in an effort to reduce the price, add chemical components to the composition that harm the reflective base.
Also, when selecting, the components used in preparing the glue and the characteristics of the room where the art will live are very important.
Since significant changes in temperature can cause glass sizes to change, so for bathrooms it is better to use products that can withstand high humidity and be resistant to cold and warm air. If the elasticity is weak, after drying, a hard substrate forms on the base, which is why the material may crack.
Required characteristics for the product:
- absence of toxins, acids and alkalis in the substance;
- formation of a high-quality seam that is resistant to moisture;
- ease of use and ease of application;
- high reliable strength;
- high percentage of adhesion;
- fast hardening;
- colorlessness;
- elasticity;
- availability.
REMEMBER! Using a product with a poor quality composition may lead to negative results. At best, dull stains will form that spoil the appearance; at worst, the product may be destroyed.
Mirror care rules
The rules for caring for the mirror must be followed. Otherwise, there is a risk of re-appearance of various cracks and chips. It is important to follow the following rules:
- The mirror surface does not like humidity.
- It is better not to place mirrors in direct sunlight.
- Mirrors can only be wiped with soft, lint-free cloths (it is better to purchase a specialized one, this will reduce the risk of scratches).
- There is a thin layer of silver on the mirror, so the surface should never be wiped with products designed to clean glass. They contain ammonia, which harms the surface.
After familiarizing yourself with all the possible ways to decorate a mirror, everyone can easily repair a crack in a mirror with their own hands.
The result can pleasantly surprise and even bring some novelty to the design of the room.
How to fix a scratch on a mirror
But you can disguise defects. The work must be carried out very carefully so that the mirror does not accidentally crack, split or break. Let's take a closer look at how to remove scratches from a mirror at home.
Eight ways to remove scratches from a mirror
How to remove scratches from glass
Removing scratches from car glass, window glass, and aquarium glass is much more difficult. In this case, you cannot sand the surfaces, as you will not be able to remove an even layer. Even if the glass looks normal, grinding will distort and obstruct vision, resulting in poor vision. Polishing is used to remove scratches from glass.
Polishing removes the minimum thickness of the surface layer, while removing small scratches and making the glass more transparent. Choose the finest polishing pastes with grains up to 0.5 microns. For stains and even the smallest scratches, finishing or diamond paste is suitable. By the way, if necessary, it also removes stains.
For thick glass, large scratches and a lot of damage, you can use hand grinding with sandpaper. Choose medium to coarse grit sheets ranging from 200-800. After processing, the glass must be polished.
How to care for a mirror
We looked at how to repair a scratch on a mirror or glass. After treatment, be sure to wipe the surface with a suitable detergent and wipe dry with a paper towel, napkin or dry cloth. And in order to avoid defects and extend the life of the product, it is important to ensure proper care.
Wipe your mirrors regularly with warm water and a cloth or microfiber cloth using circular motions. By the way, ordinary nylon effectively cleans the mirror surface. For contaminated products, use special cleaning products for mirrors and glass.
Heavily soiled products can be washed with hydrogen peroxide or ammonia, which is diluted in half with crushed soda or tooth powder. Vinegar effectively removes plaque. Mix the product with water and tooth powder or crushed chalk. The composition is left for several minutes and the paste is applied to the surface. Wait until it dries slightly and then remove the product with newspaper, crumpled paper or a napkin.
To keep your mirror from fogging and shiny, apply shaving foam evenly to the surface, then wipe off the composition and polish the product with a microfiber cloth. By the way, stains on mirrors appear mainly due to regular fogging and condensation, which is typical for the bathroom.
Unique ways to protect your bathroom mirror from moisture
Interior mirrors used today are produced with amalgam, that is, a coating made of silver or aluminum. Under constant exposure to water, such a spray layer changes its structure, swells, completely losing its original appearance. By knowing unique ways to protect your bathroom mirror from moisture, you can extend the life of such interior items, which will retain their beauty and functionality for many years.
How to glue a mirror to a cabinet door?
To save space, many people decide to attach the reflector to furniture, that is, to wood. Before fixing the element to such a base, it is necessary to thoroughly degrease it with the above solvents. What product to use for gluing is a specialized or, in extreme cases, transparent silicone sealant.
When choosing a mixture for fastening, you need to rely on the weight and dimensions of the object. Therefore, for a small product it is permissible to use mounting nails, but for a large product it is recommended to choose a more reliable mixture. Also, do not forget about the wooden surface - if varnish is applied to it, it should be thoroughly sanded with sandpaper and primed.
REMEMBER! During the gluing process, be sure to follow safety precautions: use personal protective equipment, keep the product out of your eyes, and provide access to fresh air. Also make sure the product has not expired.
You can do the same with the cabinet door, but you will first need to remove it from its hinges. Then attach a reflector to it and carefully outline around the perimeter. At the end of degreasing drying, double-sided tape should be placed on the door in small pieces at a distance of 20-25 cm to support the product during drying. Then apply a suitable product between the sections and stick tightly to the door.