A broken cabinet door, cracked countertop or chipped edge of a mirror has never brought joy to anyone. Our workshop, which works with glass and mirrors, includes repair services for glass products in this case: Repair of glass tables in Moscow and the Moscow region. The advantages of repairs in our workshop: calling a specialist to your home, a one-year warranty on repairs. We also carry out restoration of mirrored doors, kitchen countertops, glass splashbacks and any other glass and mirror products.
A cracked mirror is a sign
Almost every person knows that mirrors have mystical powers and are often a magical tool in various kinds of rituals, acting as guides between worlds. That is why they should not be perceived as ordinary interior items. There are many rules about placing mirrors in different parts of the house and they should be followed. If the mirror cracks on its own, this is a very bad omen. It means that there is a lot of negative energy in your home. Perhaps there is an evil spirit living in the room. Some consider a cracked mirror a harbinger of severe damage. It is believed that to some extent a mirror can protect its owner from negativity, but if the object cannot withstand an energy attack, it may become unusable.
What to do to avoid consequences
To neutralize the negative meaning of the sign about a cracked mirror, to protect yourself from troubles, you need to properly get rid of the mirror cloth. Esotericists advise the following:
- Perform a ritual on the waning moon.
- Before throwing away a mirror that has cracked due to a fall or by itself, it should be placed glass side down for a week.
- Rinse the item under running water to remove the information stored in the mirror surface.
- It is recommended to take the item to the landfill in the dark and alone.
- The abandoned item should be sprinkled three times on all sides with salt blessed on Maundy Thursday.
An even more preferable option is to throw the item into a river or other body of water with running water.
Upon returning, it is necessary to cleanse the place where the reflective surface previously hung from bad energy. For these purposes, you can use candles or incense.
Superstitious people who are alarmed by a broken or cracked mirror should perform a simple ritual that can completely eliminate all possible adverse consequences of this incident. The item must be carefully washed with water, christened three times with a church candle, and then say a prayer, ask for forgiveness and say goodbye to the worthless item.
If the mirror is cracked, signs warn of illness, loss and separation. By performing a cleansing ritual and getting rid of the damaged item, you can neutralize the negative consequences of the incident and avoid possible troubles.
Benefits of DIY restoration
Do-it-yourself mirror restoration has its own special advantages:
- It is not always possible to find a master in your city who can restore amalgam.
- Repairing the surface of a mirror will require patience and an investment of money, so turning to a specialist will require a large investment.
- It will take a lot of time to find a craftsman; in addition, during transportation, the interior item may break. If the damage is small, then it is easier to do everything yourself.
Wooden frames
Wooden frames look great in almost every interior. Due to its structure, wood has a unique pattern, which can be emphasized using varnish and impregnations.
Quadrangular mirrors can be framed with rough-hewn wooden blocks, and round mirrors can be surrounded by radiating “rays” of wood. To do this you will need a wooden base frame, pieces of wood for decoration, and hot glue.
You can also use wood of different species, having different colors and wood structure. It is not recommended to process wood too actively in order to preserve its natural pattern.
Prevention measures
Caring for a mirror surface should include the following points:
Carrying out regular cleaning using special products or homemade compounds;- exclude exposure to abrasive or other surfaces, including the hard sides of sponges;
- It is advisable to have complex damage and chips repaired by a specialist;
- mirrors do not tolerate constant moisture well, so mirror surfaces that fog up in the bathroom must be wiped dry regularly;
- Rubbing the mirror with shaving foam will help prevent the mirror from fogging.
Any dirt that gets on the mirror must be removed immediately.
Mirror mosaic on the fence
What could be better than turning an ordinary fence into a work of art? This mosaic mirror fence is definitely one of the most creative things I've ever seen. And it's not as difficult to do as you think. Even if you don't have enough shards, you can buy old cracked or otherwise damaged mirrors for next to nothing and create a piece of art out of it in your backyard.
Examples of decor for round and oval mirrors
First, let's talk about the decor, which is “built” around the mirror. The circle is beautifully decorated. You can make a sun, a flower, a star, etc. from it. Lots of options. Most often, the decor is also built in the form of a circle, but it can be a square, a multi-pointed star or any arbitrary shape.
Read also: How length of service affects the size of your pension
Examples of round mirror decor
From sticks or paper tubes
You can decorate a round mirror with Chinese chopsticks or tubes twisted from sheets of newspaper or magazine. If the tubes are rolled from newspaper, they will have to be painted. Made from thin glossy paper on which magazines are printed, they can be used without painting. The sticks can also be painted, or left as is.
To paint, find acrylic paint of the desired color in a can, lay the tubes on a sheet of waste paper, and paint on one side from a distance of 20-25 cm. Once dry, turn all the tubes/sticks over and apply paint on the other side.
DIY mirror decor in the shape of the sun
Next you will need silicone. Apply glue to the back of the mirror. You can - in a short strip (so that it doesn’t have time to harden while you lay out the rays), or in drops. If the back of the mirror is not protected by anything, the silicone must be neutral. The acid will dissolve the amalgam and the mirror will be damaged. Place the rays on the glue and wait until the glue sets. After 24 hours, you can safely hang the unique mirror in place.
The mirror can be with or without a rim - your choice. Instead of sticks/tubes, you can use strips of glass, wood, plastic, etc.
From plastic spoons
In this version, a circle of larger diameter is cut out of thin fiberboard or thick cardboard. how much more - choose for yourself. Place the mirror in the center and trace it with a pencil or marker. The decor should not extend beyond this line.
We take plastic spoons, cut off the handles from them, and glue the scoops around the perimeter of the mirror. Three or more such layers are made. They look like petals. When gluing, try to place them very tightly to each other so that the backing does not show through. They can be placed straight or slightly turned to one side.
For a better effect, they can also be painted. The paint can have a metallic effect; you can paint the entire decor one color or different.
Removing the outer and inner rear view mirrors
Rear view mirrors are an integral part of the car. Even those drivers who have equipped their “swallow” with a monitor or camera cannot do without mirrors. Therefore, keeping them in good condition is the primary task of every car owner. Before moving on to the procedure for dismantling the mirrors, we will list the tools that we will need for the job.
How to disassemble an external mirror
It is advisable to dismantle the exterior mirrors in a certain sequence.
- Using a screwdriver, remove the locking bracket to which the mirror angle adjuster is attached.
The side mirror retaining bracket is removed using a Phillips screwdriver.
- Use the same screwdriver to remove the fastening screws. There are only three of them. Be sure to hold the mirror while removing these screws.
The screws holding the side mirror are unscrewed with a Phillips screwdriver
- After removing the screws, the mirror is removed. To do this, you need to slightly pull it towards you.
After removing the screws, the mirror is removed manually
How to properly remove the interior mirror
Changing the rear view mirror in the cabin is a little more difficult. Work must be carried out in the following sequence:
- The plastic plugs above the interior mirror mounting screws are carefully pryed off with a flat screwdriver and removed.
- The mounting screws are unscrewed with a Phillips screwdriver.
The mounting screws for the interior mirror are unscrewed with a Phillips screwdriver.
- The mirror is carefully removed.
How to remove a mirror from a windshield
Dismantling a glued mirror does not require any special skills. Proceed as follows:
- In some modern cars, the bracket with the interior rear view mirror is glued directly to the windshield. To remove it, you must remove all plastic plugs from the bracket (if any).
- After this, the mirror is turned counterclockwise with both hands and removed from the socket.
The glued mirror rotates 90 degrees and is removed manually
The mirror cracked
Is the mirror cracked ? Don’t rush to get rid of the item; you can always replace the mirror cloth. There are times when it is more advisable to restore a damaged item rather than part with it forever. Masters will come to any address in Moscow and the nearest Moscow region and perform all the necessary work to replace mirrors. We accept applications for visiting specialists by phone or online.
When and how to “clean” the surface of negativity
From an esoteric point of view, not only broken mirrors, but also some absolutely intact ones can harm a person. According to reviews from magic experts, three categories of “dangerous” accessories can be distinguished.
- Vintage. Ancient objects evoke admiration and a sense of certain mystery. But who knows what secrets the mirror surface hides? Who previously owned the item?
- Hanging opposite the bed. Or above it. According to legend, such objects destroy families and destinies.
With irregular edges. The boundaries of the mirror should not “cut off” the person looking at it to the neck or waist. The belief promises deprivation of these parts of the body.
If a person doubts the “safety” of his mirror, psychics offer to “clean” the object of negativity. For example, it is recommended to leave the accessory in a container with holy water for several hours. There is advice to wash the mirror under running water, then pack it in a box for three days and cover it with salt. Instead of salt and a box, a piece of dark fabric will do.
When it comes to old items, things are more complicated. It is believed that they can store negative energy from previous owners, so it is better to get rid of such mirrors. At the same time, you can’t just throw away an old (and especially an old and cracked) mirror.
It is important to adhere to the ritual:
- clean the surface with holy water or salt;
- paint the surface with black paint or wrap it with dark cloth;
- get rid of the item - you can throw the old mirror into a regular trash container if you first sprinkle the surface with Thursday salt.
- clean the apartment - the place where the “dangerous” mirror hung is sprinkled with holy water, church candles are burned at home for a week.
Signs and superstitions are part of our mentality. There's no need to fight it
It is important to approach mirror and similar situations more easily and to perceive them with humor. Look at your reflection with a smile and a good mood, because now you know exactly what to do with a broken mirror
If deep damage
More difficult work awaits if the scratches on the glass are deep. Simple rubbing in this case will be ineffective. A recipe using GOI paste and epoxy glue will come to the rescue.
Work order:
- Clean the mirror using glass cleaner. This will degrease the surface and prepare it for further processing.
- Dry the mirror.
- Fill the cracks with epoxy glue. When filling cracks, the epoxy should be distributed evenly, without air bubbles or unfilled cavities.
- Excess filler should be removed with a cotton swab or carefully cut off with a utility knife.
- Leave for 4 days.
- Polish the surface using GOI paste.
Let's sum it up
Removing a mirror is an incredibly labor-intensive process, since mirrors are usually attached to cabinets so that they hang in a specific place for them even after the cabinet itself fails. It would be good if reusable fasteners were used to install the reflective surface, however, as a rule, we are talking about the use of adhesive construction substances that make easy removal of the mirror from its current location impossible. Please read the instructions we have provided above carefully. At least one of them must be suitable in your case. Then you can peel the mirror off the cabinet and place a newer model in its place.
Advantages of do-it-yourself mirror restoration
Given the desire and time, any home craftsman can carry out the restoration himself, extending the life of his favorite mirror.
- restoration in a specialized company can be expensive, because it is a labor-intensive and responsible process;
- Not every city has a person who professionally restores reflective surfaces;
- it will take a lot of time to find a restorer, deliver the item to him and back;
- During transportation there is a serious risk that the glass will break.
Let us once again draw attention to the fact that you can repair minor damage yourself, but entrust major repairs to professionals. We’ll talk more about how to improve a reflective surface with your own hands below.
Variety of options
Before you start attaching the mirror to the cabinet yourself, you need to understand the design features. Standard straight-format devices can be equipped with two, three, or four leaves. Built-in products are installed in wall niches. This arrangement method saves space. Often such models do not have a floor or roof. In this case, the cabinet shelves are fixed directly to the wall.
Special means
To perform work to improve the condition of the mirror surface, special preparations can be used.
Paste GOI
GOI paste is a special composition for grinding work . The main component is chromium oxide. The paste is used very widely - not only for caring for mirror surfaces, but also for polishing:
- glass,
- ceramics,
- metal alloys, etc.
How to use:
- grind the substance into powder;
- using a cotton swab, apply the drug to the damaged areas in a thin layer;
- rub and polish each area for at least a quarter of an hour.
Polishing with GOI paste must last for 15 minutes for there to be a visible effect; the exposure time cannot be shortened. The price for 20 grams is on average 50 rubles.
Cerium oxide
Cerium oxide is a chemical compound that can be purchased in powder form . This substance is used in ceramics, for processing jewelry stones, removing scratches on mirrors, etc. The product is available in packaging of various weights.
To repair a mirror and eliminate defects, cerium oxide is diluted to form a paste. The surface requiring treatment is moistened and the prepared composition is applied.
Periodically moistening the surface, polish with a felt cloth. Adding water helps prevent premature hardening of the mass. If necessary, add “gruel” and continue rubbing. Price for 0.1 kg is about 500 rubles.
Frame
An original frame will help hide the damaged area on the mirror. You can use various materials for it: glass balls, buttons, beads, shells, flat stones, etc. The selected parts should be glued along the edge of the mirror so that the defect is covered. In this process, it is important not to get carried away and not to overdo it with the number of elements so that the frame looks organic.
Causes of wear
Sometimes, after several years of service, we notice that the mirror does not reflect well and some spots appear. Turning the canvas over, it turns out that the coating has been torn off from the back side. It's called amalgam.
This coating can come off for various reasons. And these are not necessarily the consequences of scratches and mechanical stress. Amalgam also begins to slip if normal air circulation on the inside is disrupted. If you see transparent spots on the reflective side, you should think about gluing the mirror correctly or choosing a different place for it.
The production of mirrors is technologically quite complex. To create a reflective surface, a thin layer of metal, supplemented with special additives, is applied to the reverse side. Metal microparticles are gradually applied to the surface, often in several layers.
It will not be possible to achieve the same effect at home without special industrial equipment. Therefore, if your antique mirror in a wooden frame has worn out and lost some of its reflective properties due to peeling amalgam, partial restoration will be required.
No one is stopping you from giving the product to a special company, where they will do professional restoration. But it is very expensive and not every city has such specialists. The cost of the service sometimes exceeds the price of the mirror itself. First, you should try to perform the procedure yourself, at home.
Practice clearly shows that it is possible to restore a surface using available materials, and the result often exceeds expectations.
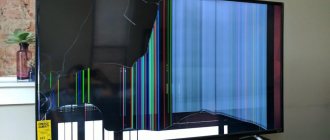
How dangerous are cracks?
The windshield is designed to withstand strong vibration loads from headwinds and temperature changes. It is also capable of withstanding a moderate impact during an accident and severe pressure over its entire area. But glass remains glass and fragility remains the most serious drawback: with sudden temperature changes and pinpoint impacts of hard objects (crushed stone on the road, a nut, a pebble), a chip, pothole or crack can form on its surface.
How dangerous is this? Since the structural integrity of the glass is compromised, it can no longer withstand severe stress. Vibration and tension of the power frame of the body when the car is moving, small mechanical shocks, strong gusts of headwind and temperature changes begin to increase this crack, weakening the glass structure. This leads to the fact that it can simply fall apart from hitting a curb, not to mention a minor accident.
Naturally, breaking the integrity of the glass is dangerous for the driver and passengers of the car and can lead to an accident and serious injuries. In addition, the spreading crack prevents the driver from seeing the road clearly and creates a feeling of discomfort.
Another problem: it will be difficult to pass a technical inspection at the traffic police if there is a crack in the windshield of your car. In any case, you will have to fix it or replace the glass in order to receive a maintenance ticket.
The easiest way to solve the problem of a cracked windshield is to replace it. But this is an expensive pleasure: you need to find and buy glass, or order it at a service station, and you won’t be able to install it yourself - it requires trained craftsmen and professional equipment.
An alternative solution is to repair glass yourself. You just need to stop the crack from growing. But such repairs only make sense if the crack:
- It is small in size and occupies no more than 10-30% of the glass area;
- does not interfere with the driver's view;
- did not reach the edge of the glass (at least 5 cm from the edge).
If these conditions are present, you can try to repair the glass and make it last for some more time. But, in any case, this is a temporary measure - sooner or later, glass replacement is inevitable.
How to restore a mirror yourself
Experts note that any mirror must be carefully looked after, then its restoration will not be a problem for you. In a high-humidity room like a bathroom, you should purchase special reflective glass designed for use in such conditions so that it does not become stained over time. You can make amalgam more wear-resistant yourself using folk recipes. To do this, it is treated with melted wax and turpentine in a ratio of 1:2. In addition, you need to properly clean the mirror surface so that it does not lose its attractive appearance:
- remove dust with a soft, dry cloth;
- Having gotten rid of dust, the mirror is treated with a special glass cleaner;
- At the end, the product is polished with newspapers, removing stains.
If, despite observing all the conditions, small defects still appear, try to eliminate them using available means. The choice of materials and working methods will depend on the specific situation - large areas are restored with foil and glue, and for small scratches, silicone sealant is used. To carry out the procedure, you should prepare a workplace and the necessary tools in advance.
Required materials and tools
To carry out repairs you may need:
- special glue designed for glass and metal;
- brush with stiff bristles;
- foam sponge;
- soft napkins or cloth;
- glass cleaner;
- composition for degreasing surfaces (gasoline or alcohol-containing product);
- foil;
- scissors;
- brush;
- silicone sealant.
REFERENCE! Small restorations can be easily done at home. Even if it is not possible to completely eliminate minor damage, they will at least become less noticeable.
Instructions for mirror restoration
When the workplace and all the necessary materials are ready, begin the repair. If there is visible damage to the amalgam, first you need to carefully remove the product from the frame and place it on a table, which is best covered with a soft cloth. Next, you should adhere to a certain algorithm of actions:
- clean the damaged area with a brush with stiff bristles;
- Next, you need to wash the mirror with glass cleaner and dry everything;
- degrease the surface with an alcohol-containing product and wipe everything thoroughly, let the product dry again;
- cut out a piece of foil of the required size with scissors (it should be slightly larger than the damaged area);
- we apply special glue, apply the cut-out foil to the mirror with the glossy side down and press it properly (some craftsmen use transparent tape instead of glue);
- carefully level the foil with a clean, dry cloth or napkins and wipe off excess glue;
- When the glue has completely dried after a few hours, the restored mirror can be inserted into the frame.
ATTENTION! If the described method does not help remove visible defects, this may mean that the damaged area is too large. In this case, it is unlikely that anything will be fixed.
If desired, the gluing area can be coated with a thin layer of colorless varnish for greater reliability, but this is not necessary.
How to restore a mirror if there are scratches and chips
A sealant is used to repair small scratches and chips on fragile amalgam. To do this, we also first clean and degrease the damaged area, wipe it dry with soft napkins. Next, carefully fill the existing cracks with silicone; for convenience, you can use simple toothpicks. Then let the product dry well and remove all excess.
Preparing for restoration at home
Before you begin restoring the mirror surface, you should perform preparatory steps. The preparation process depends on the type of mirror and the size of the existing defects.
For larger damage
If the mirror is inserted into the frame, in order to more conveniently restore the surface with large defects, you should remove it from the structure. To do this, use a small hammer and screwdrivers to unscrew the fixing screws and remove the hammered nails. In cases where it is impossible to remove the product from the frame, it is recommended to place the entire structure on a flat and hard surface to prevent movement from its original position.
Minor repairs
When planning to get rid of minor and unnoticeable scratches, it is enough to wipe the surface from dirt to better see the damaged areas. It is not necessary to remove the product from the wall, which greatly simplifies the task.
Eight ways to remove scratches from a mirror
- Foil. Before the procedure, remove the mirror and remove it from the frame, if it is framed, or from the cabinet door. If necessary, unscrew the screws and remove the nails. Take a piece of foil slightly larger than the scratch and smooth it out. Turn the mirror over and place the foil over the defect. Smooth out the piece and tape it to the surface. Turn the product over to the front side and check the result. If the foil has moved a little, adjust it;
- Toothpaste. Apply the product to the surface and gently rub into the mirror in a circular motion using a soft flannel cloth. Leave to dry and then polish until shiny. This method is suitable for removing small scratches;
- Mustard and vinegar. Take mustard powder and table vinegar 9%. Mix the components in equal proportions and apply the composition to scratches or chips. Remove excess with a napkin or soft cloth. After the procedure, polish the mirror;
- Cerium oxide is an effective product that will visually hide scratches on a mirror and smooth out surfaces. Mix the powder with a small amount of water to obtain a creamy paste. Apply the solution to the affected areas and polish the product with a damp cloth. Repeat the procedure if necessary;
- Clear nail polish is suitable for removing deep scratches. To do this, fill the grooves with the product, remove the excess with a napkin or cloth and wait until it dries. Then polish the surface with a soft cloth until shiny;
- Colorless silicone sealant is excellent against scratches on home and car mirrors. First, degrease the scratched area with alcohol or glass cleaner. Dry the surface and then fill the cavities with sealant. Leave the product to dry for a day. Carefully cut off the excess product with a knife. To avoid damaging the surface, hold the knife at a 45-degree angle. After processing, the mirror is polished with a flannel cloth or a grinding machine;
- GOI paste is a modern and effective product that is also used to repair scratches on watch glass. Crumble the paste into a powder and apply a thick layer to the damaged area using a cotton swab. Rub the product in for 1.5 minutes and then wipe with a dry, clean cloth. Then you need to do the procedure a second time, but now polish the surface for 15 minutes. Rub the paste carefully and gradually, otherwise the treated areas will fade over time and become different from the other surface;
- A mixture of GOI paste and epoxy glue will eliminate deep chips, cracks and scratches. First you need to degrease the area using alcohol or glass cleaner. The dried grooves are filled with glue so that no air bubbles remain. Excess product is removed with a cotton swab or carefully cut off with a knife. Leave the product to dry for four days, then polish the surface with GOI paste.
Method number 1. Large vinyl sticker
Vinyl decorative stickers for wardrobes, as a rule, are produced on a single-color German Oracal film, which greatly simplifies color matching. Outwardly, they look like a stylish pattern applied with paint. At the same time, you will be able to care for the cabinet in the usual way. Unless you resort to strong friction. And most importantly, when you get tired of one design on the door of a closet, you can literally remove the sticker in a minute without any traces and apply a new one.
This method is universal and can be used for doors made of any materials. You can safely apply stickers to glass and mirrors of sliding wardrobes. They hold up well and look very impressive. At the same time, you get rid of the obsessive reflection, and fingerprints that constantly appear on the glass surface will no longer be too noticeable.
The procedure for applying a large sticker on the wardrobe door:
- Preparation. Clean the surface from dust, fingerprints and other contaminants;
- Smoothing. Place the sticker on a flat surface and smooth it with a squeegee (smoothing spatula), which our store always sends in the kit;
- Fitting. Attach the drawing to the door and mark the position of the corners with a pencil or erasable felt-tip pen. For accuracy, we recommend sticking the sticker with a backing onto masking tape and seeing from a distance how the drawing will look.
- Removal of substrate and application. Since the sticker is large, remove the backing directly from the canvas attached to the tape from top to bottom in small pieces. Immediately apply the freed pattern to the surface and smooth it carefully with a squeegee without unnecessary pressure. And so on to the very bottom. At the same time, remove the transparent mounting film from top to bottom. The work should be done slowly and carefully. Carefully smooth out everything, even the smallest bubbles. It is most convenient to apply non-adhesive adhesives to closet doors with two people. If bubbles still remain, pierce them with a needle closer to the edge and remove the air with a squeegee.
- Check. After removing the backing and mounting film, take the time to carefully look at how each element is stuck. Even for a small flower, all edges should be level on the surface.
This video will show you how to apply large vinyl stickers on surfaces:
Helpful tip: when applying a sticker to a mirror or glass of a wardrobe, spray the surface with water. The sticker will be easier to smooth out.
Step-by-step instruction
How to restore a mirror with large amalgam damage?
You need to carefully remove the mirror from the frame and place it on a table covered with a soft cloth. Thoroughly clean the damaged surface with a brush. Then wash with glass cleaner and dry. Now degrease the damaged area with gasoline or alcohol and dry again. Using scissors, cut a piece of foil slightly larger than the size of the damaged area. Apply glue to the treated area of the mirror, apply the foil with the shiny side down and press. Use a napkin to smooth the surface of the foil from the center to the edges. Carefully remove excess glue with a sponge and dry the mirror for several hours. Place the restored mirror back into the frame.
Repairing a mirror coating is labor-intensive and requires investment, so mirror restoration will probably not be cheap.
To restore the surface of a mirror that has minor damage, grinding and polishing are used.
How to close a door with glass?
How to darken glass in an interior door
- Cover it with self-adhesive film, which can be purchased, for example, at a wallpaper store. ...
- Use film to tint car windows or windows (the downside of this method is that it is not cheap).
- Buy glass paints at any office supply store.
Interesting materials:
How to cook raw milk mushrooms? How to use iodine during radiation? How to take amino acid tablets? How to take BCAA before training? How should girls take BCAA capsules? How to take coenzyme q10? How to take collagen in liquid form? How to take Leuzea? How to take lysine for herpes? How to take melatonin tablets?
How to remove scratches from a mirror
In addition to decorative designs, you can also use the good old traditional methods of getting rid of cracks. True, as has already been said, they will not remove it completely either, but will only disguise it.
You can use toothpaste and flannel cloth. The product is carefully rubbed into a shallow scratch. Then it dries and polishes. And for deeper cracks, colorless silicone sealant or foil is suitable.
It is quite possible to hide problem areas on your own.
What materials will be useful?
What can be used to turn an ordinary boring mirror into a real miracle? Here we can only say that everything can be used - you need to give free rein to your imagination. Children's toys, bottle caps, paper, fabric, all kinds of natural materials, from pebbles to pine cones - absolutely everything will do. The main thing is to choose the option that can be made depending on the person’s creative skills, as well as one that will simply fit harmoniously into the interior.
DIY mirror frame
Most often, wood is used to create original frames , as it is easy to process and suits almost every interior style. The material is time-tested, durable and environmentally friendly. Yes, and it looks very beautiful.
To decorate mirrors of square, rectangular and similar shapes, the easiest way is to use ordinary wooden borders, blocks, and plinths. Round and oval canvases are ideal for experiments. Here you can use wooden spatulas, natural driftwood, twigs and much more.
Original mirror frame
On a note! Round mirrors are often turned into original suns or unique nests using wood.
Some craftswomen who love to work with paper also use it to decorate mirrors. Often used are egg cartons that easily turn into flowers. Special stickers or decoupage techniques can be used. Don’t think that paper is a completely useless material. With the correct working technique, it will not quickly lose its appearance. But the mirror will turn out to be very unusual.
On a note! Sometimes very unusual objects are used - metal rulers, children's toys. In the first case, the rulers can be placed around the mirror like rays of the sun, in the second, toys are glued along the perimeter of the mirror in a certain pattern. This is a great option for a children's room.
Homemade mirror with a metal frame As for natural materials, you can use stones, cones, and shells. The latter will look great in the bathroom. Moreover, the products can be glued both symmetrically and in different places, depending on desire.
Pros and cons of homemade restoration
Having discovered minor defects on a bathroom mirror, many people prefer to carry out the restoration themselves. This procedure has a number of advantages and disadvantages. The advantages of self-restoration include:
- Minimum costs. For processing, you only need to buy cleaning products, without spending money on the services of professionals.
- Use of available materials. Most defects can be removed using household products.
The main disadvantage of doing the work yourself is that you can only remove minor scratches. To remove deep defects, you will need the help of specialists.
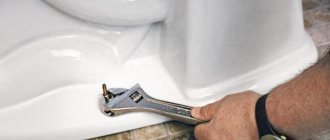
Restoring the enamel coating of a bathtub
- Clean the entire surface of the bathtub with coarse sandpaper.
- Sand the cleaned surface with fine sandpaper and remove dust.
- The enamel is evenly applied with a foam roller.
- Shade the enamel with a flat brush.
To update the bathtub cover you will additionally need:
- foam paint roller with enamel tray,
- flat brush.
The renewed bathtub coating is significantly inferior in strength to hot-drying enamel coatings applied in industrial conditions. Acids, salts, and cleaning agents can quickly corrode the new coating. Therefore, when choosing enamel, you should not neglect the recommendations of manufacturers, and you should handle the renovated bathroom with care.
Stages of applying a new layer of bathtub enamel coating
Wardrobe decor with full color posters
Wardrobe doors with photo printing are not a cheap pleasure. Color posters based on vinyl film are much more affordable and often look much better. This is achieved through high quality printing. You can paste a poster on one of the doors or make a composition on all panels of the wardrobe.
Drawings on color posters can be very diverse: from abstract figures to your own photographs of memorable places. They should be applied like regular vinyl stickers.
Method number 1. Large vinyl sticker
Vinyl decorative stickers for wardrobes, as a rule, are produced on a single-color German Oracal film, which greatly simplifies color matching. Outwardly, they look like a stylish pattern applied with paint. At the same time, you will be able to care for the cabinet in the usual way. Unless you resort to strong friction. And most importantly, when you get tired of one design on the door of a closet, you can literally remove the sticker in a minute without any traces and apply a new one.
This method is universal and can be used for doors made of any materials. You can safely apply stickers to glass and mirrors of sliding wardrobes. They hold up well and look very impressive. At the same time, you get rid of the obsessive reflection, and fingerprints that constantly appear on the glass surface will no longer be too noticeable.
The procedure for applying a large sticker on the wardrobe door:
- Preparation. Clean the surface from dust, fingerprints and other contaminants;
- Smoothing. Place the sticker on a flat surface and smooth it with a squeegee (smoothing spatula), which our store always sends in the kit;
- Fitting. Attach the drawing to the door and mark the position of the corners with a pencil or erasable felt-tip pen. For accuracy, we recommend sticking the sticker with a backing onto masking tape and seeing from a distance how the drawing will look.
- Removal of substrate and application. Since the sticker is large, remove the backing directly from the canvas attached to the tape from top to bottom in small pieces. Immediately apply the freed pattern to the surface and smooth it carefully with a squeegee without unnecessary pressure. And so on to the very bottom. At the same time, remove the transparent mounting film from top to bottom. The work should be done slowly and carefully. Carefully smooth out everything, even the smallest bubbles. It is most convenient to apply non-adhesive adhesives to closet doors with two people. If bubbles still remain, pierce them with a needle closer to the edge and remove the air with a squeegee.
- Check. After removing the backing and mounting film, take the time to carefully look at how each element is stuck. Even for a small flower, all edges should be level on the surface.
This video will show you how to apply large vinyl stickers on surfaces:
Helpful tip: when applying a sticker to a mirror or glass of a wardrobe, spray the surface with water. The sticker will be easier to smooth out.