Restoration of wooden surfaces
No matter how carefully you handle the furniture, abrasions, scratches, and stains still appear. They are easy to eliminate. The main thing is to know how and with what.
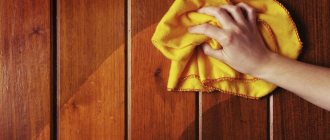
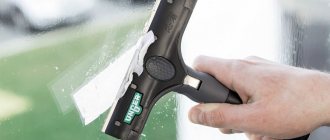
- If the wooden surface has simply lost its shine, find a wood care product that contains orange oil. Take a clean sponge, dampen it slightly and microwave for 20-30 seconds. Spray the product from a spray bottle, then wipe with a hot sponge (hands should be wearing rubber gloves with a coating on the inside).
A hot sponge and orange oil will restore the shine of wooden furniture
Such transformations are possible using a marker, alcohol and wax.
Restoration of faded and worn chipboard countertops
Often, during use, chipboard countertops and cabinet covers wear out.
A tabletop that has faded from abrasion without severe defects on the surface (deep scratches, cracks) can be restored as follows:
- Select the coloring agent according to its shade. It is best to use felt-tip pens - you can moisten a rag with them and rub in soft circular motions and walk across the tabletop until it acquires an even color. Then fix the tint with a fixing varnish.
- In some cases, it is enough to treat a chipboard tabletop with polishing mastic with pigment (available for sale for light and dark furniture) or polish for laminated furniture. After applying the product, the surface must be polished with special lint-free wipes.
About breakdowns of kitchen countertops and the relevance of their repair
Restoring a chipboard countertop in most cases is cheaper than purchasing it. Especially if the repairs will be carried out not by a hired worker, but by the owner himself.
Before you begin repairs, assess the extent of the damage. This will allow you to understand how difficult the repair will be and whether it is worth spending time on it.
Types of damage to chipboard countertops:
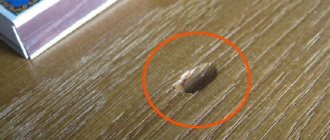
- Chips. On chipboard countertops, they usually appear at the corners and appear as small depressions. Such damage is repaired with wax.
- Cracks. Usually appear due to physical impact, less often they become a consequence of high humidity and temperature changes. Another reason for cracks is improper fastening of the cabinet door. If the crack goes through the entire tabletop, then it will not be possible to restore the furniture. If the damage is small, it can be repaired.
- Holes. Holes in laminated chipboard will appear if a pointed blow is applied to the kitchen surface, for example, with a meat hammer. You can fill the hole with wax.
- Burns. A fairly common problem that occurs if you put a hot pot or frying pan on the table. This type of damage can be easily repaired.
- Swelling of countertops. This occurs due to exposure to moisture. Especially often - with surfaces near the sink.
- Scuffs and scratches. Chipboard is not the most durable material. It quickly develops scuffs and scratches. How to fix the problem depends on where the damage occurred.
Types of damage
Often, the same damage occurs in combination of two or more types, so we list the types:
- chips;
- cracks;
- holes;
- burns;
- swelling;
- abrasions.
Each of these types of damage occurred largely due to improper operation and disregard for safety rules, transportation, etc.
Cracks are classified by depth and by the layer to which they propagate.
Naturally, there are deep and superficial. Surface ones are mainly covered with various means. If restoration methods are used correctly, the table surface will be practically indistinguishable from a new coating without cracks.
If the crack is deep and extends into the wood itself, then reconstruction may not yield anything. The maximum that can be achieved is only to delay the complete failure of the part.
Special means
You can get rid of defects in a matter of minutes using specialized furniture compounds. Some of them have a fairly high price, but in stores you can always choose an option that suits the cost.
stain
This is a material in the form of a liquid or emulsion that is applied to wood to give it a specific color. Products of this type are very relevant for eliminating various shallow abrasions, especially those that affect only the surface layer of varnish.
Treating a wooden tabletop with stain
It is advisable to apply stain to the entire countertop and door, otherwise the treated area will stand out strongly. You should paint an inconspicuous area of the furniture first to make sure the color matches. Afterwards, you can saturate the product completely, and polish it as it dries.
Regular liquid paint
It is better to completely paint old furniture that has a lot of scuffs. To do this, you can purchase alkyd or acrylic paint in the color you like. After thorough sanding and degreasing, the surface is painted and dried, then coated with a finishing wood varnish.
Painting old furniture
Oil polish
If the furniture had a layer of polymer composition on top, for example, polyurethane, you can cover up the scratches using a special oil polish. First, the area with the defect is cleaned until smooth with fine-grain sandpaper, dipped in mineral oil, and then covered with polish. It forms a smooth, shiny surface, carefully filling cracks.
Watco wood polish
Mastic
Another composition with which scratch restoration is carried out quickly and reliably. Mastic restores gloss on damaged substrates, repairs mechanical defects: chips, cracks, marks from animal claws. You can buy the product ready-made or make it yourself:
- Melt 40 g of beeswax in a water bath.
- Add 30 g of turpentine.
- Combine the mass with 10 g of alcohol.
- Mix everything and remove from the stove.
- Treat the furniture with a warm mixture using rags.
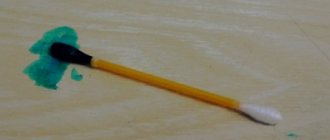
Ingredients for making your own mastic
This mastic is especially suitable for removing white spots and abrasions that have formed on products made of natural wood or MDF.
Pencil
Wax pencils help hide scratches on furniture in one motion. They are sold in all construction stores and come in a variety of shades to match the color of the wood, so choosing the right tool will not be difficult. The damaged surface must be wiped from dust, dried, and then carefully rubbed with a pencil.
Anti-scratch wax pencils in various shades
Some compositions require preliminary melting, which can be done using a water bath or a regular household hair dryer. The device is aimed at a pencil, the wax from which will flow directly onto the defect. After drying, the furniture is thoroughly polished with a dry cloth.
Hatch
A touch-up for restoring chips is considered a professional product and looks like a stationery proofreader. It is used to cover shallow seams, remove tears, scratches, and abrasions. A composition of this type is easily applied to furniture or floors, sets quickly, and is resistant to moisture and temperature changes. The stroke does not leave marks and remains resistant to abrasion for a long time. It is applied to the defect after cleaning the surface, and as it dries, the furniture is coated with varnish.
Furniture touch Master City
Wood wax
Wax can be used to restore bulk items, and not just to fill minor scratches. Such compositions are sold in two forms:
- Soft. Easy to use, easily rubbed into the problem area in a circular motion. After 15 minutes, the unabsorbed excess wax is removed with a rag. This wax is well suited for laminated substrates and natural wood.
- Solid. They are professional products and melt before application. As the base is lubricated, it is polished and the composition is rubbed into the damaged areas.
Hard waxes for furniture restoration
Marker
Some brands of furniture paint (such as MinWax) come in marker form. They are very easy to use. It’s enough just to rub it over the scratch, and then wait for the composition to dry, which happens literally in a minute. To add shine after painting over the defect, use wood polish.
Minwax Scratch Removal Marker
Restoration methods
There are several restoration methods. They are selected depending on the type of item, material and complexity of damage. First, study the condition of the furniture, carefully inspect every detail. If you have small scratches on the wood, they can be easily removed with wax chalk, which you can buy at a hardware or furniture store. For deep scratches you will need putty.
Minor furniture flaws can be eliminated quite easily:
If the facades have lost their shine and color, then a special product containing orange oil will help restore them to their original appearance. It needs to be rubbed in with a soft sponge, pre-moistened and heated. Remember safety - be sure to wear rubber gloves before starting work. Minor scuffs and stains can be easily removed with fresh banana peels. Wipe the stains and then use a dry, soft cloth to remove banana fibers. Whitish stains on the countertop can be removed with toothpaste. It should be applied to the stains, left for a couple of minutes, and then removed with a cloth. Minor scratches and abrasions can be removed with a construction marker.
But here it is important to choose the right color so that the painted spots do not stand out on the facades of the furniture. To make the marker look natural on the wood, blend it with a sponge or finger after application. Iodine is another effective remedy for removing small scratches.
True, iodine can only disguise them.
The listed methods are suitable for repair if the furniture is not seriously damaged and does not require complete restoration.
Restoring a varnished surface with your own hands
Working with a varnished surface is difficult. It is difficult to restore and most often requires complete removal of the varnish. But there are still several ways to repair minor damage:
- Small scratches are masked with a construction marker or iodine.
- Deep scratches can be removed with a masking mixture consisting of 3 parts turpentine and 4 parts melted wax. The resulting mixture is applied to the damage and rubbed in with a cloth.
- To repair scratches on dark-colored surfaces, try shoe polish. Use it to fill the damage and leave to harden, then buff with a soft cloth.
- You can remove stains with gasoline, alcohol, a mixture of alcohol and drying oil.
To restore the surface's shine, rub it with a mixture consisting of 1 part vinegar, 2 parts turpentine and linseed oil. The composition is applied with a swab for 30 minutes.
Veneer restoration
Restoration of veneered furniture is carried out using construction putty intended for repairing wooden surfaces. It is used to fill cracks and chips, and then the surface is painted. If there is a relief pattern, it is created before the putty hardens.
Swollen areas are eliminated using PVA glue. They need to fill the resulting bubble by piercing it with a needle. Then the working surface is covered with fabric, and a load is placed on top.
It is more difficult to work with veneer that has several damages, such as swelling and cracks. In this case, the furniture is restored in three stages:
- The swelling is filled with PVA glue.
- The cracks are filled with putty.
- After the putty has dried, the cracks are painted over with a marker or paint.
Chipboard end for painting
In this case, cutting can be carried out without much danger, since chips and defects can easily be corrected with putty. If we are working with laminated chipboard, but still want to paint it, then we apply primer to the entire product. Primer GF-021 or Otex from Tikkurila is suitable. If sanded chipboard is used, then priming is not necessary, although it is advisable. We putty the end. I use acrylic putty with fine filler. We skin it. We should get a smooth rectangular edge. Sometimes this requires several iterations of sanding and putty. When we are happy with the edge, it needs to be secured, otherwise it will chip or crack. Putty is not a very durable and reliable material. We glue the edge with a construction bandage 4 - 5 cm wider than the end. We use PVA glue. We bend the bandage so that it sticks to the end of the chipboard and extends onto the upper and lower planes. See picture. After the glue has dried, we fill the construction bandage with fine acrylic putty. Usually one putty is used for all these works.
We especially pay attention to the strip where the bandage ends and the chipboard itself begins. Here you need to putty especially carefully so that after sanding and painting the transition is absolutely not noticeable. Dry the putty, sand with fine sandpaper, paint
We dry the putty, sand it with fine sandpaper, and paint it.
Despite the monstrous appearance on the diagram on an enlarged scale, in reality the presence of bandage and putty on the end of the chipboard, if everything is done correctly, is completely unnoticeable.
Repairing chips and scratches on furniture made of chipboard and MDF.
Indexed html links, end-to-end placement, prominent places in the top.
Applying wax by rubbing.
Application with a spatula or edge knife.
We cut off the excess with a knife or a piece of plastic, for example a plug for a furniture corner, which is more preferable because plastic eliminates accidental scratching of already damaged material.
And carefully polish with a clean cloth, preferably felt.
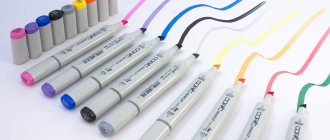
If the material being restored has a distinct wood texture or some other texture, then you can finish painting it on the putty area with alcohol-soluble felt-tip pens or markers.
The more colors you have, the more accurately you will be able to seal the surface. They can also be used to sketch not deep scratches.
Application of hard furniture wax.
Intended: for sealing chips, scratches, cracks, and dents on wooden and laminated surfaces bearing medium and heavy loads (cabinet furniture, doors, MDF panels, etc.), to ensure moisture resistance of the damaged area.
The only difference from soft wax is that it is more resistant to mechanical stress and is applied in a molten form and, accordingly, costs much more, is more difficult to obtain and the color range is not as wide as that of soft wax.
Apply wax, melted with a gas soldering iron or a regular lighter, to the damaged area in excess. For good adhesion, cool the wax (2-3 sec.)
Remove excess wax.
If necessary, sand the repair area.
Soaking
See also Vanish for furniture: how to clean a sofa at home, instructions
If the layer of chips swells under the film, you will have to apply more effort. You will need a sharp knife or spatula, PVA, a press block and clamps.
The sequence is:
- dismantle the tabletop;
- carefully remove the swollen sawdust from under the film;
- dry the product thoroughly;
- mix dried sawdust with PVA glue to obtain a thick mass;
- fill the voids with this product, compact it;
- cover with bars and press the area with clamps;
- leave for 24 hours to dry;
- remove the press, level the surface;
- use edge tape.
That's it, the renovation is complete.
Repair of large cracks
Restoration of kitchen countertops that have defects such as chips requires “patches” made from the same material as the countertop itself. After cutting out the problem area, a fragment of stone treated with glue is placed into the resulting niche. Then this part is polished and does not stand out from the general background.
Deep cracks and splits in decorative stone are repaired with pieces of a suitable material, glued in and then polished.
Applying glue into the cut slot Apply glue to the inserted fragment after hardening, cut off the excess Grind the surface
Selecting the material is quite difficult, since the color range has a huge difference, but it is approximately possible, and even after polishing, even a slightly different glued piece will not be very noticeable, since the stone, although artificial, does not have a uniform color.
Special stores sell repair kits with different colored crumbs and fillers and two-component colorless glue. Such restoration of a decorative tabletop is quite complex and requires certain skills.
Advantages and disadvantages
The film allows you to completely renew the facades of furniture, and no special skills are required to work with it. Thanks to a huge selection of textures, colors, images, you can choose the right canvas for any interior of a bedroom, living room, hallway, nursery, office. The material has gained great popularity due to its advantages, among which are:
- Low cost. Decorating will cost several times less than purchasing new things.
- Interior renovation. With the help of the material you can often change the design of any room.
- Easy installation and dismantling. Anyone can carry out the work of applying and removing the canvas, without any additional tools.
- Easy cleaning. The surface can be cleaned using a regular sponge and water.
- Manifold. A large number of shades and textures makes the catalog products universal; they fit into any interior.
- Moisture resistance. The canvas does not allow water to pass through, it can even be used in the kitchen and bathroom, but it cannot withstand prolonged wetness.
- Resistance to household chemicals. For cleaning, you can use regular detergents.
- Resistant to temperature changes. The film is not afraid of either cold or heat, even sudden temperature changes.
Like any other material, self-adhesive products are not without disadvantages:
- Fragility. The service life of even the highest quality models does not exceed five years.
- Discoloration. Over time, under the influence of sunlight, the surface fades and loses its original appearance.
- Surface preparation. The base for pasting must be level, otherwise all defects and irregularities will be visible.
- Poor abrasion resistance. In places of active friction, the protective layer will be rubbed off.
Restoration of a chipboard cabinet
Do-it-yourself restoration of a cabinet made of chipboard may also be necessary in cases where hinges and other fasteners are pulled out of the side walls due to excessive load.
Since the hinges cannot be moved to another location, they have to be strengthened somehow, the place of the torn fastener restored, and screwed in again. This can be done in the following ways:
- Drill out the joint with a drill with a diameter of 8 mm and drive in the chop. You can then screw a self-tapping screw with fasteners into it, but only after drilling with a thin drill - otherwise the chop may burst. If the edges of the chip do not overlap with the fittings, by analogy with the cases discussed above, fill them with furniture wax of a suitable shade and polish them.
- After drilling out the joint and cleaning the chipboard from crumbling parts, you can fill it with a two-component epoxy compound or glue mixed with shavings. After hardening, you can screw in the fasteners.
Step-by-step instructions for repairing kitchen countertops
If desired, repairing a countertop made of laminated chipboard can be easily done with your own hands. The restoration technique depends on the type of damage. The more significant the defect, the more time and money will have to be spent on eliminating it.
Wetting the tabletop
A bloated tabletop looks ugly and spoils the overall impression of the interior. This problem occurs due to large amounts of moisture getting on the furniture. In this case, the plastic coating often remains in good condition, and the wood-chip base swells.
How to restore a tabletop with a swollen wood base:
- All voids formed from delamination are cleaned of sawdust. The tabletop is removed and put in a warm, dry place to dry. During drying, it should not get wet.
- When the tabletop is completely dry, it is installed in place.
- In a separate container, mix PVA glue with dry sawdust. The resulting mass should have the consistency of a thick paste. This will allow it to keep its shape well and “set” quickly.
- Problem areas are filled with a mixture of PVA and sawdust. The mass is compacted as tightly as possible into the voids. While it is not dry, it is leveled using a spatula or a wide knife.
- The tabletop is clamped with a press. It is left in this form for a day.
- After the composition has dried, the press is removed. Problem areas are cleaned, leveled, and then sanded to make them smooth. The seams are treated with silicone and then fixed with plastic strips.
To prevent the surface from getting wet, its edges are pre-treated with a silicone compound or sealed with a plastic strip.
Cracks
Due to temperature changes, high humidity or improper use, the countertop may crack. If the damage is not very large, repairing it will not be difficult:
- PVA glue is drawn into a syringe without a needle. If the crack is small, use a tool with a needle.
- Fill the crack with glue. Its excess is removed with a napkin.
- Clamps are placed on the sides of the crack to tighten the surface. The table is left in this form for a day.
- Then the clamps are removed. The remaining glue is cleaned off. If necessary, paint over the crack with a retouching felt-tip pen.
If the crack goes through the entire countertop, it cannot be repaired. Even if the parts stick together, one of them will soon fall off.
Chips
Chips usually form on the corners or edges of the product. They are recesses that differ in color from the film coating. Sometimes such damage appears in the center of the working surface. Repairing chips is the most labor-intensive, but it is still possible to repair such damage.
How to repair a chip on a chipboard tabletop:
- The chip is ground with a chisel and sandpaper so that its edges become as smooth as possible.
- The wax is melted using a special device or lighter so that its consistency remains viscous. The composition is applied to the chip site with a reserve.
- When the wax has completely hardened, it is given the desired shape with a chisel. The wax is cut to create a smooth corner or edge.
- The problem area is sanded with felt so that it becomes even and smooth.
- The color and texture of the area are restored using a retouching felt-tip pen. When drawing lines, they are periodically smeared with a soft cloth to mask the visible boundaries.
- At the final stage, varnish is applied. It is distributed over the entire surface. This will add shine to the countertop and seal the result.
If the chip is in a noticeable place and after applying wax it is not possible to restore its color and texture, then a special polymer film is glued to the entire tabletop. It imitates different textures and makes the product uniform.
Scratches
Scratches are the most common type of damage on kitchen countertops. They occur when cutting food directly on the work surface. Fortunately, getting rid of them is easy.
How to disguise cracks:
- Apply wax to the scratch using a rubber spatula. The paste is packed as tightly as possible. It is advisable to use soft compounds.
- Polish the surface with a soft felt cloth to make the problem area smooth.
- The texture is restored using a retouching felt-tip pen. After drawing the lines, the edges of the pattern are rubbed to remove noticeable borders.
- A colorless fixing varnish is applied to the entire work surface.
Do-it-yourself removal of stains and small scratches from the surface of a stone
Don't be alarmed - the process will not take much time and will not require any special efforts or skills on your part. Repairing kitchen countertops made of artificial stone in the event of stains and minor scratches that cannot be removed with conventional means is simple:
- Gently sand the damaged area on the surface of the artificial stone with sandpaper with a maximum grit of P120, gradually reducing the sanding to a level of P400.
- Polish the countertop using a small piece of felt. The process will speed up significantly if you use a screwdriver or a sander with felt attachments.
- As a finishing treatment, you need to use a special polyester composition, having previously degreased the surface. You can consult with direct sellers of artificial stone and products made from them about the choice of finishing agent. As a rule, they offer for sale all the necessary accessories and caring and restorative compositions.
Repairing acrylic countertops with a thickness of artificial stone of about 3-6 mm and a base in the form of chipboard or MDF inside using grinding is not permissible! We are talking about sheet artificial stone from which countertops are made. The thickness of the material simply does not allow such a possibility - sanding off a stain or scratch. In this case, proceed as follows:
- Select a special adhesive for acrylic resin with a mineral filler according to the shade of the countertop.
- Using a hand cutter, carefully remove the damaged top layer of artificial stone.
- A “patch” of the required size is cut out of a material of similar quality and shade.
- The patch is carefully installed in the prepared place and glued.
- After the glue has completely dried (after about a day), the restored acrylic tabletop is polished with a felt cloth.
Repairing an acrylic countertop requires some skill. Therefore, it is better to invite a master.
Repairing chips and cracks on artificial stone countertops
Most of the typical defects on countertops made of artificial stone in the form of cracks and chips can be repaired on site. That is, there is no need to dismantle the kitchen work surface. Since the process itself will require some skill and the acquisition of a number of specific tools for acrylic restoration, it is better to invite a specialist for this. But if the volume of upcoming work does not frighten you, it is quite possible to carry out the repairs yourself. It will consist of the following stages:
- The area with damage (chips, deep scratches or cracks) is thoroughly cleaned of dirt and degreased. The cleaning process involves widening the chips by sanding the edges. There is no need to be afraid that the defect will become more noticeable.
- After cleaning the chips, the inside of the cracks is filled with a special composition of polyester resins, identical in shade to the quartz countertop being repaired. To “get into color” it is better to use restoration materials of the same brand and series.
- Next, the area to be restored is given time to completely dry and harden (this will require at least 18-20 hours). After this, the irregularities are sanded using abrasives. Final polishing is carried out using a grinding machine with a felt attachment.
Restoring and processing stone requires accuracy, diligence and a sense of proportion, which comes with experience. Since most of the work is carried out using power tools, you need to be able to “feel” the material. Otherwise, removing chips and cracks on a stone countertop yourself with your own hands can lead to the formation of even larger defects. Professionalism is also required in the preliminary assessment of the upcoming volume of restoration work. It is quite possible that it will not be possible to repair the working surface on site; dismantling and removal to a specially equipped workshop will be required.
Principles and instructions for restoring chips on a countertop
Knowing how and what you can use to repair a chip or crack on a tabletop, it’s not difficult to repair the furniture structure yourself
At the same time, it is important to comply with technological requirements and use effective options for restoration compositions
Restoration of wood and laminated chipboard countertops
When solving the problem of how to repair a chip on a chipboard tabletop, repair work involves the following algorithm:
- use a hairdryer to warm up the damaged area;
- remove the exfoliated layer, clean the defect area;
- apply glue and leave for 15 minutes;
- prepare the restoring composition in the form of a homogeneous thick mixture of sawdust and PVA glue, leave for 10 minutes;
- the damaged area is sealed with the prepared mixture, the mixture is compacted with a spatula, and the excess is removed.
Restoring a wood countertop takes at least 24 hours.
It takes at least 24 hours to completely dry, after which the repaired particleboard material is ready for use.
To disguise scratches on a wooden countertop, you should sand the surface and sand it. At the final stage, felt is used to provide a glossy finish. To eliminate chips on a wooden base, mix sawdust and PVA glue and fill the voids, which are first cleaned, blow-dried and sanded.
Plastic countertop repair
Deciding how and with what to repair cracks and chips on a plastic countertop in the kitchen should depend on the complexity of the deformation:
- minor damage to the plastic surface can be repaired using superglue or Moment glue;
- in some cases, restoration of the working plane requires the use of special glue for plastic. The composition is applied using a gun;
- If a fragment of a plastic structure breaks off, Titan glue is used for restoration.
To restore chips, it is recommended to grind the plastic into crumbs or powder, mix well with Titan glue and repair the damaged areas of the structure.
Restoring an artificial stone countertop
Cracks and chips on the working surface made of artificial stone are repaired using polyester resins. The algorithm of restoration procedures includes the following manipulations:
- the damaged area is cleaned and degreased;
- if necessary, the chip site is slightly deepened and widened;
- seal the defects with polyester resin and leave to dry completely for a day.
Next, you need to sand the coating with fine sandpaper, followed by polishing with felt. Small scratches on artificial stone can be easily masked with a repair acrylic compound or a glossy solution. I’m planning how to remove a chip on a stone countertop in the kitchen, using PVA glue, abrasive material of different grain sizes and felt.
- prepare the surface by sanding and grinding the damaged areas;
- prepare a restorative composition from acrylic plastic with the addition of an adhesive mass to a thick, uniform consistency;
- The restoration mixture is used to seal the depressions, chips, cracks and leave until complete polymerization;
- Next, the coating is polished with an abrasive material; at the final stage, it is necessary to polish the surface with felt.
Restoring an artificial stone countertop
Stone countertops with minor defects are often repaired using a grinding machine.
To do this, at the first stage, grind and polish the base; this will help to easily eliminate traces of careless use of the working surface. Next, the material is treated with special reducing solutions. Then they go through the grinding unit again: first with an abrasive, and then with a polishing disc.
At the same time, small cracks and chips are eliminated, the stone base acquires an aesthetic appearance and presentability
Then they go through the grinding unit again: first with an abrasive, and then with a polishing disc. At the same time, small cracks and chips are eliminated, the stone base acquires an aesthetic appearance and presentability.
The nuances of glass countertop repair
A kitchen countertop made of glass is difficult to restore, so care and attention are required when using it. Special equipment is used to remove small scratches. This requires skill and skills in working with fragile materials.
If, as a result of careless handling, defects in the form of cracks or chips have formed on the surface, the structure will have to be replaced with a new one, since it will be difficult and expensive to restore the integrity of the glass tabletop
Features of the operation of the countertop and indications for repair
This element of the kitchen set is subject to intensive use, as it simultaneously performs several functions:
- It is a work surface and is actively used in cooking;
- used as a place to install kitchen equipment;
- It is often used as a bar table or serves as a full-fledged kitchen table.
The structure is subjected to various loads, including thermal, mechanical, and vibration. Due to the active use of the surface, sometimes there is a need for emergency repairs to eliminate chips or scratches on the countertop.
Tabletop requirements:
- heat resistance;
- moisture resistance;
- inertness to the effects of UF radiation;
- ease of care;
- presentable appearance.
The countertop must have heat resistance.
When arranging a kitchen, various countertop options are in demand, each of which has a number of advantages and disadvantages.
Wooden
The wooden work surface has high functional and aesthetic characteristics. Among the advantages of the model, the following positions are noted:
- environmental friendliness of the base;
- resistance of the material to temperature changes;
- ease of use;
- presentable;
- compatibility with kitchen interior elements of any style.
In addition, the problem of how to repair chips and other defects on a wooden countertop at home is easily solved here. The disadvantages of using a wooden structure include:
- flammability - the material is highly flammable, caution is required when used in combination with a gas stove;
- susceptibility to mechanical stress - models made of soft wood are easily scratched by a knife, abrasives, or the sharp edge of kitchen utensils;
- high cost - products made from noble species are sold many times more expensive than analogues made from plastic, chipboard or stone.
A structure made of natural wood gets dirty easily, so it is important to provide coating with special compounds. Most often, wooden surfaces in the kitchen are damaged due to contact with moisture. Also, the material is often deformed as a result of exposure to high temperatures.
Made of plastic
Plastic surfaces are made in the form of imitation of various natural bases; most often they produce models imitating wood or stone. Advantages of plastic countertops:
- ease of use and maintenance;
- variety of solutions;
- resistance to mechanical damage;
- ease of eliminating surface defects using improvised means;
- availability of offers.
Minuses:
- fire hazard – the polymer base is highly flammable and, when burned, forms highly toxic compounds;
- upon contact with hot surfaces, the plastic melts;
- does not withstand heavy loads, is easily deformed under the influence of gravity.
If the operating requirements are met, plastic countertops can serve for a long time and with high quality. However, significant mechanical stress contributes to the formation of cracks or other deformations.
From chipboard
Structures made of particle boards are presented in two versions:
- impregnated with resins - able to withstand significant temperature loads without surface deformation;
- with polymer coating - matte and glossy models are available.
Materials in this category are in demand as optimal due to their decent functional characteristics and availability. If there is swelling of the chipboard base, or the laminated covering of the countertop in the kitchen is coming off, the defects are eliminated using special sealants.
From glass
Tempered glass is used in the manufacture of models in this category. The structures are distinguished by their original design and have a number of competitive advantages, including:
- moisture resistance;
- resistance to temperature loads;
- inertness to UV;
- resistance to mechanical stress.
A chip on a glass countertop is very difficult to repair.
Glass countertops are available in a wide variety, and it will not be difficult to choose the optimal solution in accordance with the design of the kitchen interior. Disadvantages of a glass work surface:
- problems with the characteristic “sound accompaniment” during operation;
- high cost of material.
The key disadvantage of the glass model is the difficulty of repair. Most often, the structure cannot be restored, and if cracks or chips form, this element of kitchen furniture will have to be renewed.
Made from artificial stone
Stone solutions are in particular demand due to their excellent characteristics, including:
- resistance to external influences such as moisture, high and low temperatures, chemical compounds, UF rays;
- strength, wear resistance;
- ability to withstand heavy loads;
- ease of care.
A countertop made of artificial stone fits harmoniously into interiors of various styles and looks presentable and status-worthy. The disadvantages of the product include its high cost, but this disadvantage is more than offset by the extremely high service life of the material. Stone surfaces are highly durable and wear-resistant, but accidental damage in the form of scratches, cuts or chipped fragments cannot be ruled out.
How to repair an artificial stone countertop
Cracks in stone appear as a result of stresses encountered during processing, manufacturing, transportation or installation of the countertop. Although a crack, by definition, does not necessarily go through the entire depth of the stone, this is the most common problem you may encounter. When repairing cracks and chips in stone, you can use clear or epoxy resin.
Countertops made of artificial stone are considered the most reliable.
Purchase quick-setting clear epoxy resin. It is UV resistant and dries within one minute under normal conditions. You can also purchase a stone restoration kit from the American manufacturer Tenax Tefill. This is a great product that comes complete with everything you need to fix small holes and chips in the stone. This kit comes with two resin viscosities and a spray catalyst to dry the resin.
Epoxy resin is a universal material for furniture restoration and repair.
The manufacturer recommends using a high viscosity fluid to repair larger cracks, especially those that are not on a horizontal surface. A fluid with a higher viscosity is not as prone to flow as a fluid with a lower viscosity. Use a lower viscosity resin to repair cracks, scratches and chips on horizontal surfaces.
Types of restorative compositions
Compositions for the restoration of kitchen countertops vary depending on the base material:
- Repairing a chip on a plastic tabletop is done using Moment and Titan adhesives. In some cases, special glue for polymers is used;
- Scratches on artificial stone surfaces are removed using a special polyester composition. When deciding how and with what to repair cracks and chips on a stone countertop in the kitchen, they usually use the composite that is used in the manufacture of the structure in question;
- if you are trying to solve the problem of how to remove chips on a wooden countertop in the kitchen, it is recommended to use a restoring substance made from PVA glue and sawdust;
- Waterproof sealants are relevant for restoring chips on chipboard countertops.
In case of significant damage, the use of a thick mass based on sawdust/shavings and PVA glue is required.
How to get rid of scratches on a wooden table
There are two ways to get rid of scratches that spoil the appearance of a wooden table. The first involves the use of professional products that can be purchased in specialized stores. The second is to use improvised means.
Professional products
To remove scratches on a wooden table, you can use special products:
- spray;
- pencil;
- furniture touch;
- wax.
Their main purpose is to mask the scratch and restore the smoothness of the table surface. Many of them are used not only for furniture, but also for doors, window frames, floors, and other objects made of wood.
Hatch
You can easily choose the product of exactly the shade you need. It is applied directly to scratches in several layers. Next, leave until completely dry and wipe with a slightly damp sponge to polish and remove excess marks.
Wax
Special wax for wood is a professional product that can not only cover scratches, but also get rid of cracks, chips and even dents. Suitable for all types of wood and types of material (veneer, combustion engine, chipboard and others). The wax is also selected by color, applied using a spatula and rubbed with a sponge or other soft cloth to fill all scratches with the substance. The excess is cut off with a knife and then wiped with cotton cloth.
stain
Perhaps everyone knows about the existence of stain. This is a special tool for processing wood to hide minor defects and completely restore furniture. You can prepare it yourself, or buy a ready-made powder that needs to be dissolved in water. The advantage of stain is that it not only masks imperfections, but also completely stains the wood, giving it the appearance of almost new.
Special pencil
A special pencil for wood will quickly paint over any scratches. You just need to choose the right color that matches the painted wood. In fact, this is the easiest and fastest way to remove scratches on a table surface, but it only lasts for a short time. That is why the staining procedure will have to be repeated periodically.
Spray
The spray is applied to the scratched surface and left until completely dry. You need to act very carefully with this product, since excess paint can create an imbalance in the shade and you will end up with different colored areas of the furniture. Alternatively, paint the entire table and then such a problem will not happen, but try to apply the product evenly, in several layers.
Traditional methods
Very often, you can remove scratches on a wooden table using improvised means, some of which are generally surprising, for example, walnuts or cigarette ash:
- Mix one part vinegar with three parts olive oil. Rub the resulting mixture onto the scratches on the table and wipe the surface dry.
- If the wood is dark in color, then take a small brush, soak it in an iodine solution and apply it to scratches and cracks.
- Take a walnut kernel and cut it in half. Using light pressure on the wood, work out any imperfections on the wooden table. Walnut will fill in cracks and scratches, but to seal the result, you will need to coat the area with wood varnish.
- Mix cigarette ash with a small amount of water to form a smooth, thick paste. Rub it into the scratched surface of a wooden table and leave until the mixture dries completely. Then carefully remove the excess and apply wood polish.
- Brew very strong tea so that its color is much darker than what you usually drink. Soak a cotton pad in the liquid and treat the entire problem area. Leave to dry. It is advisable to treat the entire table using this method so that there are no sharp transitions in shade.
How to remove scratches and dents from furniture
For these purposes, there are both professional and folk methods. The latter have an important nuance - before using them on a visible surface, you need to try the method on an inconspicuous area so as not to create even more problems.
Furniture touch
Used to mask small scratches. It is a tube that is closed with a cap with a brush, like nail polish. Apply in one or several layers until the defect is completely eliminated. Excess is removed with the edge of a plastic card, and the surface itself is polished with felt or a soft cloth. It is difficult to choose the ideal color, so you can fill in the missing texture with a regular felt-tip pen and cover it with furniture varnish. For this purpose, it is better to use spray varnish. It is applied evenly and does not leave a visible edge of the composition.
Furniture wax
Can be soft or hard. The first one has many more colors, and it is easier to apply. But the hard one is more reliable in further use. It can be used for large dents or even chips. Soft furniture wax is easily warmed up with your fingers and applied in excess to the problem area. The excess can be easily removed with a plastic spatula. Then the surface is sanded and varnished with a composition with the appropriate degree of gloss.
Acrylate/acrylic putty
An option that is more suitable for deep dents. The putty is applied using a rubber or plastic spatula to the surface of the furniture, and after complete drying, it is sanded first with the finest sandpaper and then with felt. If the color does not match, the stain can be tinted with a marker or felt-tip pen, but it is better to take a composition one tone darker, because the light spot will stand out strongly against the general background.
stain
This is a universal composition for removing shallow scratches. The stain penetrates the structure of the wood, coloring it in the desired tone, but retains the texture of the wood, unlike paints and enamels, which give a solid, dense color. The stain should first be tested on an inconspicuous area of furniture, because... the shade may not match the one you want to see in the end. Take your time so that you are completely satisfied with the end result.
Walnut
This folk method is used in the presence of shallow scratches. The problem area is carefully treated with half a nut, and then sanded with a soft cloth to remove the oily sheen. Pecan nuts are also used for this. It should be clarified that this method will not help with deep unevenness; it only makes small scratches invisible that do not go deep into the structure. In addition, for dark wood, craftsmen suggest using a weak iodine solution. It will also help cover micro scratches. But remember that this masking will not even out the surface, but will simply visually hide the flaw.
Installation process
After ordering and manufacturing the components and doors, proceed with installation steps:
- Remove the old elements of the set and unscrew the front panel from each drawer;
- Remove the screws that are attached to the box. Use the old door as an example, mark on it the fastenings that will be on the new facade;
- Before installing the hinges, make a hole for the lock on the facade that you have marked;
- Now attach the hinges from the old doors into the hole;
- Hang the new doors, first attach the hinges at the top and then at the bottom;
- Change the front on drawers and cabinets;
- In the place where you made the marks, screw the screw onto the new facade. Check that you did everything correctly and check the strength of the fastenings.
How to restore a tabletop using a furniture touch or wax
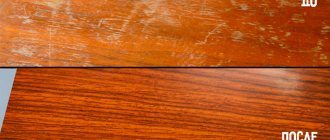
Partial restoration of a white oak table top before and after
There are special restoring compounds that can be used to perfectly restore furniture.
- Furniture hard wax is used to repair dents, chips, and scratches.
It allows the material to acquire additional moisture resistance and resistance to mechanical damage. Before applying it, it is melted with a lighter. Then apply and let cool for 3 seconds. Then the protruding residues are removed using a stationery knife and sanded. It is recommended to fill dents and scratches in two ways: either using latex putty or using epoxy resin compounds - Small scratches are treated with a furniture touch. Shake the primer first, apply it 2-3 times and let it dry. Afterwards, remove excess using a soft cloth.
Minor defects can be painted over using a stroke
Materials for restoration of kitchen furniture
To avoid peeling and swelling of the coating, all component parts must be additionally processed. To do this, apply a layer of waterproof sealant to “weak” areas (joints between the sink and the table, between the table and the stove, etc.), and also install aluminum strips. This procedure must be carried out as soon as the furniture is purchased.
Chipboard with aluminum edge ensures the durability of furniture much more effectively
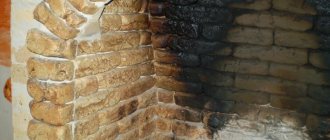
Restoration of a side chip from laminated chipboard
Repair of laminated chipboard furniture
Serious repairs to laminated chipboard furniture frames are required in cases where hinges, guides, fasteners and fittings are torn out of the board due to excessive load or improper use. Let's consider various options for restoring buildings.
Restoration of holes for fasteners
Laminated chipboard is a fairly durable material, but as long as its integrity is not compromised. Due to loads, improper operation, periodic disassembly of furniture or frequent opening of facades, holes very often break, as a result of which screws, confirmations, hinges and other fittings fall out of their fastening points. Simply screwing the fastener into the same place will not work, since the diameter of the hole has increased. However, there is one method that furniture assemblers use.
In order to be able to screw a screw or confirmation into the old place, you need to proceed as follows:
- use a drill with a diameter of 8 mm to expand the existing hole;
- pour PVA or wood glue inside;
- drive a wooden wedge or “coke” into the hole and cut off the excess;
- make a hole in the “coke” with a diameter smaller than that of a self-tapping screw or confirmat;
- screw the hardware into place.
Now you can install the hinge mounting and adjustment pad
How to repair a broken furniture hinge
It happens that a furniture hinge on the facade itself is pulled out of its seat along with pieces of laminated chipboard or MDF. The simplest option is to completely replace the module door. But the façade material may differ slightly in shade from the rest of the structure, and the cost of such repairs may be high. You can repair the canvas and install the hinge yourself and at minimal cost. There are two options:
- Moving hinges above or below the original installation location.
- Repair of the hinge seat.
The first option is the simplest and fastest, but you will still have to seal the old holes. To disguise a broken seat, you can use a special plastic plug. Large holes are restored using PVA mixed with fine sawdust. After the mixture has dried, it is masked with wax pencils and polished.
Moving the loop to another location
The second option is more complex, but, nevertheless, it will avoid making new holes and will extend the life of the facade for several more years. To restore the hinge seat you will need:
- epoxy resin;
- small sawdust;
- rubber or plastic spatula;
- electric drill;
- loop cutter.
Loop torn from the façade with “meat”
First of all, you need to clear the seat of the torn loop, mix sawdust with epoxy resin and fill the recess, leveling the mixture with a spatula. Allow to dry and, if necessary, add more filler. After complete drying, sand the hinge installation area. Next, make markings and, using a cutter or electric drill, drill a groove of the required depth for the mount.
Prepare a mixture of sawdust and epoxy resin and fill the seat of the furniture hinge bowl
Reinstall the hinges
A simple but dubious method
There is another way to attach a torn loop, but it is quite dubious, both from an aesthetic and practical point of view. A wooden block or plywood strip is installed in place of the hinge using glue or self-tapping screws. The fastening for the facade is mounted on them. The plank or block is fixed using screws or glue. However, with this method of installing the hinge, the facade can move significantly relative to its original position, and no adjustment can correct this.
For your information! In order for facades to last for a long time, you need to follow a few simple recommendations. It is necessary to tear off the doors of cabinets and bedside tables smoothly, without sudden movements. Do not hang heavy objects on the handles of the facades, as this leads to increased load, distortion and tearing of the hinges from the landing sites.
Restoration of chips and scratches on tables, cabinets and cabinets made of chipboard
Chips at the ends of lids and table tops, especially at radii, are not uncommon for children's and office furniture.
They can be removed altogether if the end of the furniture is covered with melamine edge. To do this you need:
- Purchase a new melamine edge with glue of the desired shade and thickness (it is usually sold in strips in the same place where chipboard and furniture fittings are sold).
- Remove the old edge by heating the end with an iron.
- Sand the end using a chisel and sandpaper until the chips disappear.
- Apply the new melamine edge using an iron, carefully cut off the excess with a utility knife and sand with a sponge or fine-grained sandpaper.
- If necessary, tint along the edge - with a stroke or felt-tip pen.
If the chips are deep enough and it is not possible to grind them off, then such defects can only be masked:
- Process the chips, clean them from dirt and give them a more regular shape with straight edges using a chisel.
- Select the shade of furniture wax. Sometimes you have to mix several different crayons; in its pure form it is unlikely that you will be able to find the right color.
- Using a plastic spatula, lightly fill the chip with furniture wax and compact thoroughly.
- After the wax has dried, carefully cut off the excess using a spatula or a utility knife until the surface is level and the edge is straight.
- Sand with a rag, if necessary, restore the texture close to the overall chipboard pattern using retouching felt-tip pens (short thin lines, smearing the borders with a napkin). Afterwards, fix the result with a fixing varnish.
In a similar way, deal with scratches and dents - select the wax or stroke according to the shade, fill it until it is level with the surface, sand it, retouch it and treat it with a fixing varnish or polish.
Repair or change
If the kitchen countertops in your home are showing signs of wear and tear, you'll need to decide how you'll solve the problem. The debate about the cost of repairing countertops versus replacing them with new models never ends. This is one of the key points we will cover in this article. You need to ask yourself a few questions:
- Is renovation a good idea?
- How much money will I save on repairs?
- What appearance can I give to the restored surface?
- Can I do this job? Maybe it's better to hire a professional?
Even without noticing it, housewives operate them with maximum load, which many cannot withstand.
You probably won't want to install new laminate over a damaged countertop, but if you do, you probably won't be the first to do so. A large number of homeowners resort to this not the most aesthetic, but the cheapest method. Types of countertops that can be refinished or replaced include tile, cultured stone, laminate and chipboard. Plus, you can refinish solid wood countertops rather than replace them.
Most often, kitchen units are made from chipboard - chipboard.
Repair takes less time than replacement. When you compare the refinishing time to countertop replacement, you will see that one of the benefits of refinishing is that there is much less time spent outside the kitchen! When refinishing compared to replacing, the process can take less than a week, with the actual refinishing being completed in as little as 1-3 days depending on how bad the damage is.
Even laminated coating is not resistant to moisture, high temperature and intense mechanical stress.
When you compare the cost of repairing countertops to replacing them, you will see that you can save a lot of money by repairing countertops. This is especially true if you have good DIY skills and can do some or all of the work yourself. On average, homeowners save between 30% and 70% by refinishing or replacing countertops. The better your refinishing skills, the more you can save on countertop refinishing.
Over time, the surface becomes loose and swollen, and cuts and chips appear on it.
Should you hire a professional? Even if you don't intend to commission a full kitchen remodel and countertop renovation project, you can still seek advice from a professional contractor. As with any home improvement project, we always recommend getting at least 3 consultations from qualified professionals and never signing a contract on the first day of consultation.
It is not always necessary to resort to buying a new product to tidy up the appearance of the kitchen.
Repairing damage to a plastic table
Quite a popular material used for the manufacture of kitchen furniture, which does not swell or get wet. However, mechanical stress on plastic furniture often leads to the formation of cracks or chips, especially in the kitchen.
To repair such a countertop, you will need a special adhesive composition intended for plastic products. This will allow the loose covering to be reattached.
If minor flaws appear on the table - cuts, scratches, then you can do without expensive glue; you can also use regular instant glue for these purposes.
Special means
Furniture wax
Furniture wax can be used to remove small chips, scratches and cracks, as well as dents on laminated and other wooden furniture. Melted wax must be applied to damaged areas of furniture with a spatula; after it has hardened, the excess must be cut off and the treated area polished.
Due to the application technology, this method is usually used by professionals or people who have some skills in working with hot wax. The wax is selected according to the color of the furniture, and if there is no suitable one, the chipped area can be slightly tinted. Watch a video on how to properly repair scratches on a wooden surface with soft wax:
stain
This special material, which comes in liquid form, is applied to the prepared wood to give it a certain color. Stain differs from paint and enamel in that when applied it does not form a film, leaving the structure of the wood clearly visible; the color itself seems to penetrate into the top layer of wood.
Regular liquid paint
If the furniture is no longer new and is so badly cracked that it has acquired an unesthetic appearance, it is better to paint it entirely. We buy the paint we like, sand what we are going to paint and move on. And if you also cover it with varnish, you will get an almost new item in the interior.
Oil polish
Very often, manufacturers coat wooden furniture with urethane or polyurethane, in which case it will be more difficult to polish out scratches. For this purpose, Old English companies produced a special oil polish. You need to stock up on 600 grit sandpaper (wet and dry). Dip sandpaper into lemon oil and sand the scratches until smooth. Then we polish the surface with steel wool No. “0000” and cover it with oil polish to restore the former shine to the restoration site.
How can you restore furniture made from laminated chipboard?
Furniture made from laminated chipboard is found in every home and office. This is the most budget-friendly and quite decent-looking furnishing option. In more expensive versions of furniture, only the body is made from chipboard, while the facade part is made from MDF with various types of cladding (PVC film, veneer, enamel) and solid wood. MDF and solid surfaces may also require restoration, but we will not talk about them. This article contains information on how to restore chipboard with a laminated surface with your own hands .
Do-it-yourself chipboard restoration can be of several types:
- Restoring the color of a worn (worn) surface.
- Masking chips and scratches on the surface.
- Restoration of chipped ends of chipboard furniture.
- Restoration of places with torn fasteners and hinges.
Each of the defects requires its own approach to restoration and a different set of available tools.
Natural wood
If scratches appear during use of solid wood kitchen furniture, they can be easily removed with a special polishing compound. For deeper damage, use a special putty, matched by color. In addition, you will need:
- Sandpaper.
- Varnish.
- Set of brushes.
Clean the damaged area from the old coating and apply putty. Then, after complete drying, remove the excess using sandpaper. The final stage is applying oil varnish to the surface. The varnish will dry and the surface will be ready for use again.
Coloring compounds are also used for restoration. To choose the right one, read expert advice:
- Odorless paint for wood furniture.
- How to paint a kitchen countertop.
Preventive measures
When purchasing furniture made from chipboard and countertops, you should carefully consider transporting the goods from the store to your home or apartment.
Any minor impact, fall, or snagging of furniture parts can lead to various types of damage. The process of installing the countertop also requires close attention. Errors and incorrect technological approach during fastening can lead to cracks in the fastening area. Such places carry an additional load, so you should carefully screw and fasten the parts, select bolts or screws according to size and length, so that when screwing the part does not move apart and crack. It is important that the load on the surface is balanced; if all the household appliances are placed on one edge of the kitchen countertop, and the other is empty, this can lead to cracks. Make sure you follow the operational rules for using chipboard countertops. Choose a high-quality product that can withstand changes in temperature and humidity, try to avoid these same changes, and take care of the surface in a timely manner. Before choosing a crack repair method, analyze the pros and cons, whether you can fix the problem yourself, and how much it will cost. This way you can extend the life of your countertop. Return to list