Double-sided tape is used not only in electrical engineering, but also in everyday life. Indeed, it is very convenient for them, for example, to glue mosquito nets to windows or perform any other similar work.
However, often there is no double-sided tape at hand. You can always purchase adhesive double-sided tape on the website https://greypack.com.ua/tovar/klejkaya-lenta-dvuhstoronnyaya/. If you cannot do this for some reason, we strongly recommend that you read the publication below. It will allow you to create double-sided tape from ordinary tape.
Stickers for WhatsApp
The function of adding your own stickers to WhatsApp was recently unavailable to ordinary users.
Now everyone can make their own favorite pictures to communicate with friends. How to make stickers on WhatsApp:
- First, you need to download the StikerStudio application. This is where all the work will be done. The wizard needs to add a pre-saved image in any format or use a photo.
- After the photo is added, a special frame highlights the area of permissible cropping. After this, the resulting option will be immediately added to the set.
- There is a limitation - you can add from 10 to 30 images to a set.
By the way, such a set of stickers can be a wonderful gift or even a surprise for a friend. Especially if there are funny and not very successful photos of him. It is worth remembering that other users can also use the set.
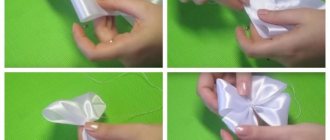
Perfect nail art: DIY nail stickers
Tired of your usual manicure and want something new? Try making stickers on your nails with your own hands. This is an easy way to make a beautiful, original, stylish manicure. In addition, this is how you can transfer any design to your nails without drawing it with your right or left hand (when the difference is obvious). And another nice bonus of this manicure is that you don’t have to wait for your nails to dry or be afraid that the design (coating) will smear. So, how to make nail stickers with your own hands?
— Base coat for nails;
— Nail polishes in the required shades;
- Nail polish remover;
- Nail file;
DIY nail stickers: step-by-step instructions
Step 1: Draw the Background
Paint 10 small rectangles on a plastic bag with nail polish - make sure they are big enough to cover your nails. Wait 5 minutes and then apply the next coat of varnish.
Step 2: Draw the desired design
It is much easier to draw on a flat surface than on nails, especially since you can draw all 10 designs with your right hand. You can choose any design, pattern or technique. To get an abstract design like the one in the picture, simply sprinkle a few colors of varnish (in small spots) onto the already painted background. You can also create additional streaks with a thin brush or needle.
Step 3: Let each layer dry thoroughly
Apply each subsequent layer of nail polish only after the previous layer has dried. When you finish the drawing, no matter how many layers you applied, let the future stickers dry for an hour or two (until completely dry).
Step 4: Remove the finished stickers from the polyethylene
It is very important that the stickers are completely dry (otherwise you will not be able to peel them off without damaging them). Then carefully remove them using tweezers.
Step 5: Apply Base Coat
Apply nail polish base to clean, pre-manicured nails.
Step 6: Apply stickers to your nails
Without waiting for the base coat to dry, apply the decal to your nail so that it adheres thoroughly.
Step 7: Adjust the decals to the shape of your nails
Using nail scissors, trim off the excess edges of the stickers and remove any unevenness with a nail file.
Step 8: Finish the design
After gluing the stickers and adjusting them to the shape of your nails, secure the design on your nails with a topcoat
Pay special attention to the edges and corners of your nails so that the stickers do not start to come off in these places. And... done!
Do you like to experiment with manicure? Everything you might need is in the online store gelpolish.ru - from manicure tools to all kinds of varnishes, thermal films and other materials for your nail art. Here you can also purchase everything you need for a gel manicure - elegant and maximally durable.
We create double-sided tape from ordinary adhesive tape
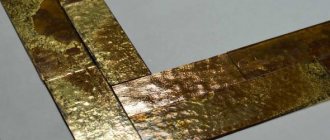
Let's say you have a fairly large roll of ordinary polymer tape at home. It takes a little trick to turn it into double sided. Initially, you should separate the edge of the tape by at least 3 centimeters.
To create a double-sided adhesive agent, it is better to use an ordinary pencil. We place it on the back side of the separated edge of the tape (it is not adhesive), and begin to wind the tape around the pencil until it begins to stick to itself.
Just a few turns are enough. All that is required now is to cut off the resulting adhesive cylinder. It can glue plastic bottles quite firmly.
There is another way. You will need a clean surface (a table top is fine). A very small part of the tape is pasted onto the table and then also wrapped inside out.
The result is a long strip that is double adhesive.
The video will demonstrate how to quickly and easily make double-sided tape from ordinary tape:
Source
How to make a vinyl car sticker
As easy as pie. To do this, you need to have some printing equipment or an industrial-sized plotter. Then you can make any sticker, original, one that no one else has. Although it will probably be difficult to find one. But we'll talk about the topic later.
But seriously, today printing services are quite inexpensive and, depending on the circulation, almost any workshop will be able to apply any vector design to film with the possibility of transferring it to the car body.
Printing houses also offer a service for producing stickers using a non-screen method. and offset, that is, precisely typographic, in the full color range. The quality of such a print will not allow them to make an exact copy of Mona Lisa or Bathing of the Red Horse, but they can do everything within the reach of 16 colors.
If there is a need for photo printing. it will be even more expensive because not every vinyl film can hold the paints that will be applied. You need special photographic film, it is very expensive, perhaps more expensive than the entire tuning, which has already been successfully completed.
Application
In most cases, double tape is used in repair and installation work. With its help, not too heavy objects are attached to suspended ceilings, tiles, linoleum. List of areas of application:
- fastening linoleum to the floor;
- installation of finishing panels made of lightweight materials;
- design work;
- seamless fastening of packaging;
- gluing metal furniture;
- installation of road signs;
- fastening the stiffeners of metal doors;
- fixing handles on transparent sliding doors;
- connecting small shelves;
- gluing mortgages;
- installation of suspended ceilings;
- fastening holders, hooks;
- assembly of window structures;
- gluing moldings;
- clothing industry;
- installation of wiring boxes;
- printing industry;
- production of three-dimensional letters, advertising lighting structures;
- needlework;
- printing;
- creation;
- car body repair;
- chores.
Stickers for children's clothing
You can make stickers from thermal paper for children's clothing. There is material on sale for dark (thick, has a white backing, which increases the risk of incomplete transfer of the design) and light (transparent, so the image will turn out without a background, but it is still better to cut out the design along the contour, since a transparent background is sometimes noticeable). The range includes paper for inkjet and laser printers.
Before making stickers, you need to choose a suitable image. The design must have a dark outline, otherwise it will not be visible on clothing. If you want to make an inscription on a T-shirt, then the letters need to be turned in a mirror direction before applying.
After preparing the image, it needs to be transferred to thermal paper. It is first recommended to print the picture on plain paper to evaluate the result (its color, size, location and side of the sheet).
After printing the design, you can begin applying the image to clothing. In this case, it is recommended to put cardboard inside the T-shirt so that the image is transferred only to the desired surface.
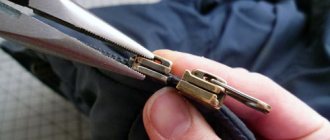
Types of patches
There are several ways to patch a hole in your clothing. Patches can be made from the same fabric as the damaged item. There are products made from adhesive, thermal film, and lace. Thermal patches are most convenient for repairs. Stickers with embroidery, rhinestones, sparkles, and any prints are suitable for decoration.
Adhesive fabric
The material is used when unwanted abrasions occur on clothing. The area that needs to be patched is first steamed with an iron. Then the patch is glued using an iron. To consolidate the result, sew along the contour on a machine with threads to match the product.
Thermal patches
Stickers are made from satin, satin, flock, cotton, faux leather, denim or velvet. There are reflective and neon varieties. Such appliques on trousers or shorts can radically change the appearance of the item. Thermal patches are often used to strengthen elbows and knees on sports and hiking clothing.
The peculiarity of the sticker on jeans is that once applied, it cannot be removed without damaging the product.
Other types of patches
If you don’t have fabric stickers on hand, you can use a piece of the same material that has the damage. The flap is taken from an inconspicuous area of the product, for example, in the pocket area. Cut out the required patch size and sew it to the damaged area. Where the fabric was taken, another material is sewn on.
Lace patches are quite impressive, especially on jeans. They are attached in the same way as standard ones. Most often, guipure is used to create such patches: light for dark jeans, black for light ones.
Making a sticker using tape
An inkjet printer will not work here; you will need to use a laser.
The materials you will need are paper, tape of a suitable size and a hair dryer. Select a suitable image and print it on plain paper. Adhesive tape is glued over the picture and carefully smoothed out. We crop the picture, leaving allowances. Fill the container with warm water and immerse the picture and tape in it for a few minutes. After this, place the sticker under warm running water and carefully remove the wet paper.
After all the paper is removed, an imprint of the picture will remain on the tape. After this, the sticker should be left to dry. Dried tape will regain its adhesive properties.
The finished sticker is cut to the desired format.
Making a sticker using double-sided tape and baking paper
For such a sticker you will need: a printed, drawn or cut out picture, double-sided tape, baking paper. Double-sided tape is attached to the back of the sticker. Then the second protective layer is removed from the tape, and the sticker is glued to baking paper. The properties of this paper are such that the tape sticks to it tightly, and at the same time is easily removed without damaging the paper itself.
The sticker is then cut to the desired shape. These stickers are easy to store without worrying that the adhesive layer will deteriorate or become dusty.
You can purchase special vinyl film in specialized stores. A design is applied to this film and cut out along the contours.
This film also has a self-adhesive layer.
Making stickers with gelatin glue
Boil a packet of gelatin with 4 tablespoons of water and a teaspoon of sugar.
The mixture should be homogeneous. Cool the resulting mixture slightly and pour into a container with a lid. A small baby food jar works well. Leave the glue in the refrigerator overnight. When you need glue, place the jar in a container with warm water and wait until it liquefies. Apply glue with a brush.
Handmade stickers have their own style. You can choose any plot and suitable size. In addition, this is a significant budget savings.
Are you looking for a new creative project? Try making stickers! They are easy to make directly from scrap materials you probably already have at home; You can also create professional-looking stickers using self-adhesive paper, which is readily available at any office supply or craft store. After reading this article, you will learn how to make stickers in three different ways: using glue, using tape or self-adhesive paper.
Tags
Double-sided tape is double-sided tape. adhesive double-sided tape. with your own hands with your own hands with your own hands Hand-made flowers with your own hands with your own hands with your own hands to make types of handicrafts and conditions to make double-sided with hands to make double-sided what to make with hands to make double-sided To make double-sided with hands to make decorative how to make with your own to make double-sided tape Double-sided tape to make double-sided tape
homemade is similar is worth table read wash transparent connection content
Important
- Callanetics and contraindications for practicing it
- Icelandic moss: contraindications for use
- Dioscorea Caucasica: friend or foe from the Red Book?
- Bioptron device: contraindications
- Solyanka kholmovaya: uses and contraindications
- Contraindications Herbalife
- Vibration platform: contraindications and warnings
- Bodyflex and its contraindications
- Beautiful surnames for girls - 154,382 views.
- How to choose entrance doors - 114,977 views.
- What to give for housewarming - 86,732 views.
- How to prepare for an abdominal ultrasound - 83,688 views.
- How to clean coins at home - 50,815 views.
- How to knit a tube scarf? Practical advice. — 50,257 views.
- Is it possible to get pregnant the day before your period? — 47,675 views.
- Secrets of the skill: how to quickly cook peas? — 42,863 views.
We create double-sided tape from ordinary adhesive tape
Let's say you have a fairly large roll of ordinary polymer tape at home. It takes a little trick to turn it into double sided. Initially, you should separate the edge of the tape by at least 3 centimeters.
To create a double-sided adhesive agent, it is better to use an ordinary pencil. We place it on the back side of the separated edge of the tape (it is not adhesive), and begin to wind the tape around the pencil until it begins to stick to itself.
Just a few turns are enough. All that is required now is to cut off the resulting adhesive cylinder. It can glue plastic bottles quite firmly.
There is another way. You will need a clean surface (a table top is fine). A very small part of the tape is pasted onto the table and then also wrapped inside out.
The result is a long strip that is double adhesive.
The video will demonstrate how to quickly and easily make double-sided tape from ordinary tape:
Source
Ways to create with glue
Since decorative stickers are often used in activities with children, it is necessary that the adhesive composition is as safe as possible. You can make this glue yourself from gelatin (1 packet), boiling water (40 ml), sugar (1 tsp), you can add 1-2 drops of aromatic extracts, for example, vanilla. Mix all ingredients until smooth. Store the glue in a bottle with a tightly closed lid in the refrigerator.
If the mixture becomes too thick, place the container in hot water. This will return the previous consistency.
Cut out the print you like and place it on a piece of paper. Using a brush, coat the back with glue. Let the stickers dry completely. Make sure the adhesive layer is dry before use. Store finished products in a plastic container or bag.
Instructions for applying different types of thermal adhesives
To apply the patch correctly and beautifully, it is necessary to do this taking into account the variety of decorative materials and base fabric.
Decal:
- To apply it to a surface, you should first examine the tags on the clothing and make sure that it can be applied with a hot iron.
- Straighten the surface.
- Remove the protective film and attach the design to the fabric.
- Cover the top with a cotton napkin.
- Iron with an iron heated to 150 degrees for 10 seconds. The steam mode cannot be used.
- If there is a hole in the product, first fill it with adhesive interlining from the outside.
- After this, apply the sticker and iron it with an iron. The size of the sticker should be slightly larger than the hole in order to completely cover it.
Hot-melt adhesive patch:
- You need to choose a thermal patch that is suitable in size. You can change the shape yourself by cutting off the excess with scissors.
- Apply to the damaged surface and run a hot iron over it. Some types need to be pressed rather than ironed.
- The exposure time depends on the fabric of the product. On average, 30 seconds is enough.
- For synthetic materials, it is advisable to place a cotton cloth under the iron.
Thermal film:
- The application technology is similar to the previous one. The only difference is that the picture should be applied with the front side to the item.
- Place a sheet of paper on top and press with the sole of the iron.
- To reliably glue the thermal transfer, you can iron the area with the transfer and the reverse side.
- When the sticker has cooled, carefully remove the backing and iron again.
- If you need to remove the sticker, heat it with a hairdryer and carefully remove the sticker from the surface using a knife.
- Wipe the cloth with alcohol and remove any remaining glue. This method is used only for dense fabrics and is not suitable for delicate materials.
Applications without adhesive layer:
- For these decorative elements, the adhesive base is purchased separately in the form of a roll.
- An adhesive layer is attached to the reverse side of the picture and pressed with a hot iron to the paper part of the roll.
- After this, the excess base is removed.
- The adhesive part of the sticker is applied to the front side of the clothing, covered with paper and pressed with a hot iron for 20 seconds.
- The paper is removed after cooling.
Fabric-based patches may not have an adhesive layer. They are sewn on by hand or on a sewing machine. First, they are basted in one thread, then stitched along the contours.
Useful video on the topic:
TOP best
The top best are selected according to positive reviews from customers and professionals. This is how the best are rated:
- Mounting tape for attaching mirrors 3M 4026 - on a foam base. Resists moisture, temperature changes, and chemicals. The strength of the connection increases over time. The surfaces to be glued must be prepared and degreased. Operating temperature from 20 to 38 degrees. You should not glue at air temperatures below 10 degrees, as the initial adhesion is low. This type of tape is used indoors. Manufacturer USA.
- Double-sided heat-resistant mounting tape adhesive 3M VHB GPH 110 – elastic base ensures uniform distribution and strong fastening. Withstands long-term exposure to temperatures up to 180 degrees. Applicable to painted surfaces and surfaces with medium and high energy. Manufacturer Germany.
Working as an Instagram story editor
How to create your own sticker on Instagram using a GIF? Since 2017, the social network has been modernized - animated sticks appeared. Since that year, dancing rabbits, sad dogs, etc. have appeared in photographs. Standard animated stickers are added according to the following instructions:
- Launch the official social network application installed on your mobile device.
- Log in to the messenger by entering your username and password.
- Swipe to the right to open the online story recording mode.
- Select a photo from your mobile phone gallery, take a new one if necessary.
- Complete the picture with filters and masks, if necessary.
- Click on the sticker symbol in the image editor. Go to the bottom "Gif" option.
- Move the stick to the desired part of the publication, having first selected it from the popular ones or found it in the search bar.
- Click on the "Recipient" button, selecting the desired audience. Publish content.
Interesting fact! A separate service, Giphy, is collaborating with the social network to deliver new animations. Stickers similar to me on Instagram are also added and created using this service.
How to apply stickers correctly?
All pictures offered by brands are glued differently. Therefore, let’s dwell on this point in a little more detail in order to understand the essence of the process and the sequence of actions. But first, let’s note the difference between gel polish techniques and the usual type of coating, which does not require a special drying lamp.
For gel polish
Hybrid coatings, which combine the properties of both gel and varnish at the same time, have a number of features that are reflected in the technique of fixing the sticker. For example, without a lamp they do not dry at all, and if it is chosen incorrectly, then such a coating may not last long. When the technique is followed and the lamp has the required power, the decor lasts without the need for correction for about two to four weeks. Stickers have to be glued on top of several layers of special products provided by the technology for working with hybrid varnishes. In addition, this procedure from hygienic manicure to the very end of work is very long.
For regular varnish
Conventional coverings, which women have been using for a long time, have less wear. They are also inferior in color to their hybrid counterparts. However, stickers can be applied to them much faster, which is very convenient in the fast pace of modern life. And there are much fewer layers of material here, although, as in the version with gel polish, the process will require sealing the picture to increase its durability. However, regular polish often begins to chip off the surface of the nail already on the second day, and therefore many women prefer not to waste time on constant correction, but to use stickers and gel polish.
Mermen
When working with gel polish, decals are cut out according to the shape of the nail.
You should not adjust the sticker at the top: it is important that it lies evenly at the base, in the cuticle area. The top edge can be removed later, but if it is cut off, it may not be long enough
- A base layer is applied to the prepared nail, which is then dried in a lamp. After this, a pigmented white gel polish is applied on top of the base and the coating is dried again.
- Now put a little more base on the brush and cover the nail with it again, not forgetting about its end. This time the coating is not dried.
- Take a picture, place it face up on a wet napkin, wait about 30 seconds.
- After this, use tweezers to remove the film from the paper backing and place it on the nail and straighten it.
- Next, the decor is dried, after which it is sealed with layers of base and top, drying each of them for 2 minutes in a lamp. Instead of a base, you can use a top as a backing for the sticker.
Foil
Working with the tape is done on the basis of gel polish.
- After the nail is prepared for a decorative manicure, apply a base, dry it, then cover the nail with the selected pigmented varnish. The coating is dried again. If the varnish has poor pigmentation, it is applied not once, but twice, and each layer is dried until the material is completely dry.
- After this, they take a special glue with a white viscous mass, intended specifically for such transfers. Cover the entire surface of the nail with glue.
- To prevent the mixture from flowing behind the side ridges and cuticle, a special protective silicone agent is applied to the skin around the nail just before painting begins. It dries and forms a thin film that can be removed at the very end of the work.
- There is no need to dry the glue in a lamp; it will dry quickly on its own.
- As soon as it becomes transparent, take a cut piece of film and transfer the picture, pressing it tightly to the surface of the nail.
- After this, the design is sealed with a layer of top coat and must be dried in a lamp.
Self-adhesive
Self-adhesive pictures allow for work with both gel polish and regular coating. To stick them correctly, a dry working surface is important. You should not experiment with undried topcoat, it is useless. The sticky layer of such a sticker needs something to grab onto. The whole point of the work is to separate the picture from the backing and glue it onto a nail painted with colored varnish, pressing it well.
However, this technology has one caveat. Many women complain that the transfer quickly breaks off from the base. Masters note that after the backing for the sticker is completely ready and dried, it is necessary not only to glue the sticker properly, but also to give it two to three minutes so that it takes on the rounded shape of the nail. Only after this can the sticker be sealed with a layer of topcoat to dry or with transparent varnish (when working with regular pigment).
Choice
From the many types, it is important to choose the adhesive tape that will best meet your requirements. Then the work performed using it will be durable and reliable. To decide which tape to buy, use the following recommendations:
- Double-sided tape with acrylic adhesive immediately provides excellent adhesion. It is recommended to be used for fixing mirrors, hooks, hangers, and information signs in public places.
- For smooth, flat surfaces, double-sided tape with a film base is suitable.
- When choosing adhesive tape, check the maximum weight and load it can withstand.
- For angular, rough, uneven surfaces, a tape with a rubberized base is more suitable.