We will move, so to speak, from the most basic to something more complex. In any case, you will definitely cope with all types of these elastic bands, because I will describe in detail how to make each of them
In fact, there are simply an incredibly huge number of ideas for creating rubber bands (and not only). And almost every one of them can be brought to life with the help of simple manipulations. In general, I will show you a lot of hair accessories. Make yourself comfortable, I’ll open the door for you to the amazing (really!) world of hair accessories (no matter how strange it may sound :))
Before you start, take a look here. When you get inspired, come back))
Satin ribbon bows
Let's start with the simplest manufacturing method. The craft will decorate your hair with its beauty. To make bows you will need:
- wide satin ribbons (we have 2 white and 2 blue, measuring 5 by 22 centimeters);
- needle and thread;
- hot glue gun;
- universal glue;
- small rhinestones.
Now let’s look at how to make such hair bands with your own hands for beginners:
- Take a white ribbon. We fold its edges towards the center so that they slightly overlap one another. Sew with a regular stitch on the folded area. We do not cut the thread.
- Now take the second white ribbon and fold it in the same way as the previous one. We sew with the same thread that remained in the previous part.
- We tighten the bows placed neatly on the thread. We sew them in the center to connect everything and maintain beautiful folds. We tie a knot, cut the thread and straighten the folds.
- Let's move on to the blue material. Here the edges need to be glued together with a gun. We immediately glue them on both one and the second blank. The result was round parts.
- Take one of the circles and turn the seam towards you. By pressing the top part, we make a movement that will turn the front part inside out. Straighten and sew with a regular stitch in the center.
- We repeat the action with the second workpiece. Next, you need to do, as in working with white bows, place two blue blanks on one thread, pull them together and sew them. Cut the thread and straighten the folds.
- Prepare a tape measuring 1 by 8 centimeters. Glue rhinestones onto it using universal glue. Using a glue gun, attach a blue bow to the white bow. We wrap the bows in the center with a strip of rhinestones and secure it with glue.
Ready. You can make such beautiful elastic bands for your hair with your own hands.
In conclusion
If desired, you can even make elastic bands - hair spirals - from the appropriate materials; however, we have only told you about the simplest methods for creating this essential accessory. This process is incredibly exciting and will allow you to create a true work of art, the value of which also lies in the fact that you made it with your own hands.
The additional video in this article will help you better understand the basic principles of making hair clips.
Did you like the article? Subscribe to our Yandex.Zen channel
Text \ Photo Ekaterina Posted 10/11/2015
0
share:
To favorites
To print
If you want to thank, add clarification or objection to the author - add a comment!
Currently being discussed:
- Lyubov Burkina
20.08.2018
What hair color should I choose? Please give me some advice. I don't know which one I have...
- I
19.08.2018
I had eyelash extensions for 6 months and took a break. After 3 months I increased it again...
- Vasilisa
18.08.2018
Cool hairstyle
18.08.2018
Hi, can I dye my bleached hair (currently red) bright purple...
16.08.2018
Hello! I am a dark girl with black eyes. I want to dye my hair dark...
15.08.2018
The photo shows young beauties. Can older ladies have their eyebrows done? Age...
Comments »
More complex schemes
For several seasons now, knitted elastic bands and “Athenas” (elastic bands-headbands for creating a hairstyle like a Greek goddess) have been on trend. They take some work to make, but the results are worth it.
Crochet
What do you need:
- a simple elastic band as a base;
- hook;
- shiny (or other yarn of your choice);
- beads, beads.
How to do
- Tie the base with a single crochet, the second row with a double crochet.
- Decorate the yarn accessory with beads: they are strung along the knitting process or sewn on.
The openwork accessory looks beautiful. You can use any pattern for knitting napkins. Needlewomen will be able to tie a simple elastic band in just ten minutes.
Wicker "Athena"
What do you need:
- centimeter;
- old elastic T-shirt;
- scotch;
- thread, needle;
- scissors.
How to do
- Measure the circumference of your head with a centimeter. Measure in the place where you plan to wear the accessory (“Athens” are worn on the forehead, in the middle of the head).
- Cut five identical strips from an old T-shirt. The width of the parts is approximately 2 cm, the length is equal to the circumference you measured.
- Gather the strips into one bundle and tie a knot at the end.
- Glue the base with tape to any surface. This is necessary for ease of use.
- Braid the strips into a braid. At the end there is a knot.
- Keep in mind that the finished braid is half the size of the strips.
- You need to sew the edges together with a strip cut from a T-shirt. You can “sharpen” the braid with a regular elastic band: it will be located at the back, and the Greek hairstyle assumes that the back of the “Athena” is covered with hair.
“Athena” can be done in different ways. The easiest option is to sew a lace ribbon and a linen elastic band. The only difficulty is that you need to take the measurements correctly: those around you should only see the delicate lace on your hair. Of course, this option is only suitable if you plan to wrap the strands around the “Athena” and not wear the accessory over your hair.
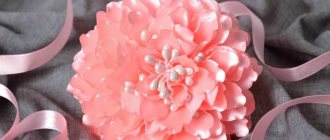
Kanzashi. Making a hair tie from scratch
In order to make an elastic band we will need:
- satin ribbon 5 cm wide, 2 colors (about half a meter of each color);
- satin ribbon 2.5 cm wide, 1 color (about 40 cm).
A bead, a bracket for an elastic band, an elastic band itself, strong threads to match the wide ribbon or a neutral color.
Hot glue, soldering iron or burner, metal ruler, needle with a sharp tip (I use bead needles), a metal template in circles or a felt circle with a radius of 3 cm, a Kocher clamp or tweezers.
Glue. I used E6000, but it could also be, say, a second moment gel.
We cut the wide ribbon into squares, and the narrow ribbon into strips of 5.5 cm. We will need 9 squares of wide ribbon in color 1 and the same amount in color 2. Narrow ribbon will need 6 strips.
We arm ourselves with a Kocher clamp or tweezers and begin to fold the flower petals. To do this, fold a square of color 1 ribbon diagonally in half.
We also place a folded square of tape 2 on it.
Fold the corner together towards the center.
Next we also bend the second corner.
I do all this without any tools. I used tweezers to take photographs so that my fingers did not cover the picture.
After you have made such a package, you need to fold it in half again and squeeze it. This is where you need either a Kocher clamp or tweezers. Kocher, in my opinion, is more convenient, since it firmly holds what is clamped into it, and if necessary, the part I am working with can be put down and it will not go anywhere
