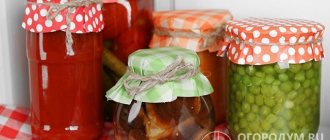
How to sterilize empty jars in a gas and electric oven and with blanks And how much time We will talk about this in this article.
The most important stage in the preparation of preparations is sterilization. There are a large number of methods for carrying out this procedure, but the simplest and easiest way is sterilization in the oven. Disinfection of glass products is carried out according to the same principle, both in an electric and in a gas oven.
How to prepare lids and jars for sterilization
Check the jars for chips, cracks or rust. Containers without damage are suitable for preservation. The covers must be smooth, without scratches or rust.
Using a clean sponge, thoroughly wash the jars and lids. It is better to do this with soda, mustard powder, laundry soap or natural detergent.
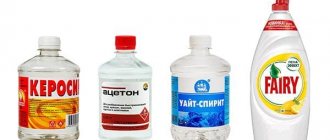
For washing, it is not recommended to use conventional detergents that can be found on the shelves of any store. They often contain chemical additives that are difficult to wash off.
Why is sterilization necessary?
Of course, many wondered: why do our neighbors store the blanks for the whole winter and even longer, and why do some of them explode quite quickly? The secret is simple - jars with blanks explode due to non-compliance with canning rules. Many people neglect them (perhaps due to lack of time or simply ignorance). But in vain!
Strict adherence to the rules of canning is the main secret of long-term storage of preparations. Here are some of them:
- The table on which canning is carried out must be perfectly clean. There should be no crumbs (even small ones) on it, no unnecessary things. On a table that is sparkling with cleanliness, there should be only clean things necessary for canning. This will ensure a sterile environment and prevent harmful bacteria from entering.
- Jars should be sterilized after they have been thoroughly washed with detergent and warm water. This will ensure the death of harmful microbes. Namely, they are the cause of the onset of fermentation of canned products and the subsequent explosion of cans.
So, you shouldn’t waste time sterilizing empty jars. Otherwise, you will have to regret wasted effort and translated products.
How to sterilize jars by steaming over a saucepan
Fill the pan about halfway with water and let the liquid come to a boil. Place lids on the pan and place a colander, sieve or wire rack on top. Place dry jars on top, neck down.
You can use a special sterilizer. This device looks like a flat lid with one or more holes into which cans are inserted.
Sterilizer for jars
Small cans should stand over steam for about 6-8 minutes, 1-2 liter cans - 10-15 minutes, and 3 liter or larger containers - 20-25 minutes.
When large drops of water appear on the inner walls of the jars, sterilization can be completed.
prizyv.ru
Remove the jars and place them upside down on a clean, dry towel. The lids must be carefully removed and also placed on a towel with the inside down.
Allow jars and lids to dry completely before canning.
Time and optimal temperature
The optimal temperature for sterilizing jars is varying from 120 to 150 degrees Celsius. If the upper temperature threshold is exceeded, the glass may be damaged, while a lower mode will not cope with the sterilization task.
Important! If it is not possible to set the desired temperature (which is typical for old-style ovens), you should abandon this sterilization option.
At a temperature of 120 degrees, to achieve the desired result, it is enough to sterilize half-liter jars for five to seven minutes; for liter jars, ten is enough. It is recommended to process two and three liter bottles for twenty and thirty minutes respectively. When the temperature rises to 140 degrees, the time of each treatment can be reduced: to disinfect half-liter containers, three minutes will be enough, and for three-liter containers it will take from twenty to twenty-five minutes.
The temperature conditions required for processing the containers along with the preparations are often specified in the recipe for preparing the preserves. The time and temperature conditions for processing filled containers may differ from those indicated for empty containers: the duration of processing varies depending on the volume of the cans and the type of product being loaded. For example, the processing time for canned meat in liter jars can reach an hour, while for vegetable products in the same containers twenty minutes will be enough.
When processing containers filled with preparations in the oven, it is best to follow the recipe requirements. And this is very important! For example, if you exceed the processing time for whole vegetables - tomatoes or cucumbers, they will acquire a very soft consistency, which will affect the taste of the preserve and make it unsuitable for use. The situation is similar with some salads. If the time is shortened, the result will also be unacceptable - the seams will soon deteriorate. Be very careful and strictly follow the sterilization time prescribed in the recipe so that the result meets your expectations.
How to sterilize jars in the oven
Place jars on a baking sheet or rack in a cold oven. How you install them - neck up or neck down - doesn't really matter. Jars can be placed in the oven immediately after washing.
Screw-on lids can be placed in the oven. Do not sterilize lids with rubber bands as they may melt. They need to be boiled in water for 10–15 minutes.
Close the oven and set the temperature to 100–110 °C. Keep the jars inside for about 20 minutes. The sterilization time does not depend on their volume.
Turn off the oven and leave the jars in there for a few minutes to cool slightly. You need to take them out with a dry towel. If it is wet, the jars may burst due to temperature changes.
Advantages of the method
High-quality sterilization is carried out in the oven.
- The advantage of this procedure is that you will not need to spend a lot of time on additional drying of the containers.
- The main advantage of this method is that there is no need to separately heat each product. The oven can accommodate several glass items at the same time. Its capacity is much larger than a microwave, in which you can sterilize a maximum of 5 containers.
- This procedure can be carried out both with empty products and with blanks. It doesn’t matter whether it’s preparing salads from vegetables or pickled cucumbers and tomatoes.
How to sterilize jars by steaming over a kettle
Fill a regular kettle with water about halfway and boil it. If possible, place the lids in the kettle. If they don't fit inside, sterilize them in a pan of boiling water.
Place the dry jar in the opening of the kettle, neck down.
If the jar is small, you can place it on the spout of the kettle. Or put a masher in the kettle and hang the jar on it.
You need to hold the jars over steam for the same amount of time as in the previous sterilization method over a pan. Then they need to be dried on a clean towel.
The nuances of frying cans in an electric oven and safety precautions
An electric oven is convenient because it can be set to the desired temperature. In this case, the cabinet will heat up gradually, and the heat will be distributed evenly. Due to these features, experienced housewives prefer the electric version of this technique. Even if the internal volume of the oven is small, the jars can be placed there lying down, but they should not touch each other.
Processing glassware in an electric oven takes about the same time as in a gas oven. If the cabinet is fully operational, functions correctly, and has a built-in timer, you need to set 150 degrees for a time that corresponds to the volume of containers being processed.
To avoid getting burned during the sterilization process, you must follow the following precautions:
- Do not touch hot jars with bare hands; use oven mitts and gloves.
- Before removing hot dishes, be sure to dry your hands.
- Oven mitts and towels that will be used to remove jars from the oven must also be taken dry.
- There should be no children in the kitchen to avoid burns and other injuries.
Despite the fact that when the stove is turned on, the room becomes hot and stuffy, it is better to work in clothes with long sleeves - this will reduce the risk of burns.
You can sterilize jars before preserving food not only over steam, but also in any type of oven. Knowing the rules for processing glass containers, you can easily prepare containers for further successful packaging of pickles for the winter.
When removing hot jars, you should use oven mitts or oven mitts.
Be sure to dry your hands before removing hot dishes.
To avoid burns and other injuries, keep children away from the kitchen.
How to sterilize steamed jars in a slow cooker or double boiler
Fill the multicooker or steamer bowl with water and place the lids on it. Install the steamer and place the dry jars on it, neck down.
Turn on the steamer or set the “Steam” mode in the multicooker. If the jars are small, you can close the device with a lid, but this does not play a significant role.
After the water boils, the jars should be sterilized for the same amount of time as over a saucepan or kettle. Place the jars and lids on a clean, dry towel and wait until they are completely dry.
Advantages and disadvantages
Sterilization of jars is an important process during preservation, and the method of disinfecting containers in the oven has a number of advantages over other methods.
One of the advantages of this sterilization method is the ability to simultaneously place a large number of containers in the oven. For example, an option with a stand for sterilizing steamed jars allows you to process one container at a time, which is very time-consuming.
In addition, after sterilization, the jars can be left in the oven until completely cooled or used immediately after processing. This allows the housewife to rationally use the time while the container is disinfected.
Despite all the advantages, this method also has certain disadvantages, among which the following are worth highlighting:
- When sterilizing, it is important to control the degree of “heat”, which is impossible in an oven without a temperature regulator.
- It is important to know and follow the rules for placing containers in the oven, since if the containers are not placed correctly, for example, cold cans in a cabinet heated to high temperatures, there is a high probability of their damage.
- Accidental use of chipped cans may cause them to burst due to exposure to temperatures and may damage nearby containers. As a result, suitable jars may be damaged, and it is very difficult to remove fragments in the oven.
If you take the sterilization process responsibly and perform all the steps correctly, then the likelihood of troubles can be reduced to zero. To do this, you just need to follow the basic rules of sterilization using an oven, which will be discussed further.
Preparing jars
First of all, it is necessary to carry out a visual inspection of the glass containers prepared for sterilization. There should be no chips, cracks or other damage on it. Pay special attention to the neck.
Next, make sure that the lids you have prepared will seal the jars tightly. To do this, pour water into one of the jars, close it with a lid and turn it upside down. Water should not seep through.
Metal covers should not have stains, rust, unevenness or other defects on their surface (especially the inside).
Old lids can smell like previous products for a long time. To get rid of the smell, put them in warm water with vinegar or lemon juice dissolved in it for 15 minutes.
After you have selected good jars and suitable lids, you need to move on to the next stage - washing them thoroughly. I strongly do not recommend using detergents for this. It is better to use regular baking soda. If the contamination is strong, the jars can be pre-soaked in soapy water for several hours. You need to wash off and clean off the dirt using a new sponge (the old one contains residual grease and microbes).
What are the differences between both methods of sterilization?
The most popular sterilization methods remain on the stove or in the oven. These processes are united only by the first preparatory step. The remaining stages are very different:
- in the oven the operation is much faster compared to the stove, since the temperature is much higher;
- no need to wait for the water to drain or for the jars to dry;
- high safety, because you cannot get burned from a dry jar pulled out of the oven;
- operation in the oven is much more comfortable, there is no accumulation of vapors, and there is no increase in humidity;
Of course, sterilization technology has changed over the years. With the advent of the latest household appliances, the canning process has become much easier. Kitchen housewives began to use modern appliances for these purposes:
- microwave;
- multicooker;
- dishwasher.
The newest method of preservation is the vacuum process, that is, a vacuum is used for sterilization. Life is impossible without oxygen. This means that if air is removed from any container, microorganisms will not be able to live, and this is a reliable guarantee of long-term preservation of products. However, in any case, it is imperative to wash the jars and sterilize them.
Household appliances Oven
Sterilization of jars with blanks
According to many methods, cans are sterilized along with finished products. The duration of the procedure is usually indicated in the prescription.
When sterilizing in a water bath, keep in mind that:
- The height of the water level should correspond to the top line of the blanks in the jar.
- The temperature of the water when immersed should be slightly lower than the preservation in the jar.
- The lid should be positioned on top of the container during the process (it should not fit tightly).
- If the recipe does not specify the sterilization time, then process half-liter jars for 15 minutes, liter and three-liter jars for 20 and 30 minutes, respectively.
Disinfection of jars with blanks can be carried out inside the oven. This is much easier than using a water bath, but is not suitable for large bottles. Processing can be carried out “dry” or with the addition of water. In the second case, pour 1-2 cm of water into a baking tray and place the filled jars there.
Metal lids with rubber bands are also treated using wet sterilization.
Disinfection in the oven takes less time than with other methods. In this case, the temperature is brought to 150–170 º C. This is especially true for perishable salads and squash caviar. Such dishes can be processed in a water bath for up to 60 minutes, and in the oven - 1/3 hour. In the oven, 500 ml jars are sterilized for 10 minutes, 1 liter - 15 minutes, 3 liters - half an hour.
Using a microwave is convenient for processing containers with whole fruits. To do this, the jar is filled with vegetables, half filled with brine and covered with nylon. After 2-3 minutes of disinfection at 700-800 W, the jars are sealed with sterile lids.
To store products, sometimes it is enough to carry out pasteurization. This term implies heat treatment not exceeding 100 º C. Before pasteurizing jars, you should find out the necessary disinfection method.
Important! Pasteurization takes twice as long as sterilization. However, the quality of the product will benefit - the fruits, for example, are less overcooked and their appearance is better preserved.
It is advisable to store pasteurized cork away from light and heat to prevent fermentation.
Helpful tips and precautions when sterilizing workpieces
What you need to know when sterilizing workpieces:
- Even new tin lids should be washed thoroughly before canning, as they can become dirty during transportation and storage.
- You cannot roll up jars with metal lids before sterilization. When heated, the expanding air will increase pressure and burst the container. The lids are tightened only after disinfection is complete.
- Heating water with immersed half-liter jars should not last longer than 15 minutes, and three-liter jars - no more than 20 minutes.
- Glass lids with iron “clasps” can be closed before sterilizing jars with contents. They will let excess air out.
- If you have to roll up a hot product, then put it in warm jars. If they have had time to cool down, then it would be better to disinfect them again.
- After rolling, the jars are turned over (examined for air penetration), wrapped and stored in a visible place for 2-3 days.
A detailed study and compliance with all sterilization rules will facilitate preparations and will preserve the taste of sealed products.
Rate this post
Leak test
The presence of defects on the neck in the form of cracks or chips may prevent the container from sealing tightly. In this case, air will penetrate into the jar, causing the food to oxidize and spoil. To avoid this, you need to check the degree of tightness.
Pour water into the jar. Make sure the outside of the container is dry. Close the lid. Shake the jar several times over a dry surface. If water leaks or drips from the jar, it is best not to use it for canning.
It is recommended to check all containers in this way. Although this will take some time, you will be able to prevent food spoilage that occurs due to insufficient sealing.