Home canning is not just one of the ways to preserve crops for the winter, but also a great opportunity to show off your culinary talents: after all, every housewife tries and puts a piece of her soul into this process. It’s especially annoying when jars with blanks explode, deteriorate and become moldy. A great way to avoid such unpleasant consequences is to sterilize jars of preparations in a pan of water. This method effectively destroys most bacteria and microbes that cause spoilage of canned foods and can also harm your health.
Sterilization of jars with blanks is especially important for those who do not have a cold cellar or basement, and the preservation is stored in a closet at room temperature
Why do you need to sterilize glass jars?
Sterilization destroys microorganisms that accumulate on the walls of glass jars intended for storing canned food. This method is widely used in food production. The official name of sterilization is decontamination, that is, the removal of microorganisms and contaminants.
The main advantages of using the sterilization method are obvious:
- destruction of microorganisms (fungi, bacteria, viruses);
- extending the shelf life of the workpiece;
- preservation of food product.
Sterilizing jars in a pan of water began several decades ago. Despite the fact that today housewives have various technical devices for cooking and processing products, the method of sterilization in a pan still remains in demand.
In the dishwasher
This method of sterilization is controversial, but many housewives still praise it. Many who have dishwashers can try it.
When sterilizing jars in the dishwasher, you do not need to use detergents - just set the machine to the highest power and boil the lids in boiling water. This method is ideal when time is short and you need to sterilize a large number of containers.
The downside is the fact that it is impossible to achieve a high temperature in it and this sterilization method cannot give any guarantees.
Choosing a pan for sterilization
The complexity of organizing the process at home lies in the selection of a special pan for sterilization.
The container must meet the basic requirements:
- the width of the bottom should accommodate several glass jars with different neck sizes;
- the height of the pan should correspond to the height of the cans, since the cans are immersed in water “up to their shoulders”;
- The pan should be the same size as the burner on the stove so that the heat remains even throughout the boiling period.
In homemade recipes, the concept of “hanger-deep” is often used, which applies to the process of immersing a jar in water. The phrase “up to the shoulders” means that the water should reach the line where the glass jar begins to narrow towards the neck. The sterilization time is calculated from the moment the water boils in the pan. After boiling, turn down the heat on the stove, but maintain it at a level that ensures a gentle boil. It is necessary to sterilize jars in a saucepan with water every time the housewife plans to store the product for more than 7-14 days.
Many people choose other methods of processing jars, but the boiling process remains the most effective method of destroying harmful microorganisms.
How to sterilize jars with vinegar essence
To quickly sterilize jars before canning at home, you must follow the steps below.
- Pour cold, boiled water into clean jars up to the hangers, add 6 tbsp. 70% acetic acid.
- Close the containers with a plastic lid and shake vigorously for 20 seconds.
- Open the jars, pour the solution into other containers, repeat the manipulation with shaking.
- By pouring water with acetic acid from one container to another, the required number of cans is prepared.
- Sterilized containers are left to dry upside down.
The remaining vinegar liquid can be covered with a plastic lid and stored in the refrigerator. It is advisable to use glass jars with a capacity of 0.5 to 3 liters. They are easy to clean, inexpensive, and due to their transparency, the product is clearly visible.
If you use only washed containers that are not sterilized, the lid will swell and the preparations for the winter will deteriorate.
Disinfection of glass containers in a pan of water
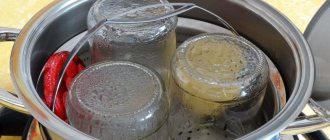
The classic method of disinfecting a preservation container involves using a pan of boiling water. It is advisable to take a vessel with a large diameter so that the maximum number of containers can fit in it. Line the bottom with a towel and pour cool water.
It is important that it completely covers the jars. Washed specimens are placed on the bottom of the pan, upside down, immersing them in water to the top
You should not place the containers too tightly together, because when the water boils, they may burst. After bubbles appear, wait 15 minutes and remove 1 jar at a time with a mitt.
Iron the towel on which the containers will be placed in advance with a hot iron on both sides.
Preparing containers for canning in an electric oven
To disinfect jars in an electric oven, perform the following steps.
- Glass dishes with lids are placed in a cold oven on a wire rack upside down. You can also place it down, but then an unaesthetic whitish coating remains at the bottom.
- Place metal lids nearby.
- Set the mode to “convection” with blowing, or “top-bottom heat”, turn the temperature to 150 degrees.
- Close the oven door and sterilize the jars.
Keep glass products with a volume of 2-3 liters in the oven for 20 minutes, liters - 15 minutes, 0.5 liters - 10 minutes. After manipulation, they are taken out and placed on a clean, dry towel. You should use non-wet gloves or a potholder, otherwise the containers will burst.
Disinfection of containers for canning in the oven of a gas stove
The process of disinfecting glassware for preservation in a gas oven is slightly different from the case with an electric oven.
- Glass products are placed in chilled water. Containers cannot be placed tightly, otherwise they will burst.
- The gas oven is first heated by setting the temperature to 50 degrees, and after 5 minutes, raise it to 180 degrees.
- The duration of the disinfection process is the same as when disinfecting with an electric oven, depending on the volume of the container.
After turning off the oven, open the door and allow the containers to cool.
Processing canning jars in the microwave
Jars are widely sterilized in the microwave; the method is quite effective, but the device does not fit a lot of containers. The procedure is carried out as follows.
- The jars are washed with soda, and 1-2 cm of water is poured into each container. If we are talking about a 3-liter container, you will need a glass of water.
- Place the containers in the microwave, leaving a little space. Vessels with a capacity of 2-3 liters are placed on a barrel.
- If the oven has a power of 700-800 volts, containers are sterilized for 3 minutes, and 3 liter containers for 5-6 minutes. After the water boils in the containers, wait 5 minutes.
- Remove the jars from the microwave with dry gloves, pour out the remaining liquid from them, and place them on a dry towel to dry.
- It is advisable to fill hot containers with canning immediately.
Metal lids cannot be disinfected in a microwave oven; it may be damaged.
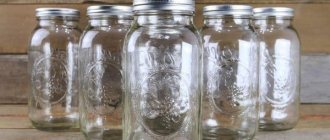
Preparing jars
Before you start boiling, glass jars must be properly prepared.
This process can be divided into several stages:
- Rejection of containers. Jars with chips, cracks, or jagged edges around the neck are not suitable for sterilization. Such specimens may burst during boiling.
- Processing of cans. Containers are thoroughly washed using laundry soap, detergent or baking soda powder. The main condition for washing containers is complete rinsing to remove traces of detergent. Many housewives prefer to use baking soda powder, as it does not leave any traces of soap stains and washes away any dirt well.
- Drying cans. The washed containers are wiped with a towel and left to dry completely on a clean cloth, upside down.
What to do to prevent banks from bursting
To avoid burns and injury from a bursting can, it must be properly prepared.
- do not place the container in a cold place first;
- pour boiling water over it gradually so that it has time to warm up;
- fill with small portions of boiling water and “wash” the walls of the vessel with it;
- steam the jar in advance;
- Place a knife or spoon in the middle and slowly pour boiling water over the device.
Rules for sterilizing empty jars in a pan of water
At the first stage, you need to sterilize the jars in a saucepan with water empty. Compliance with the rules will ensure a successful result of the preparations.
Safety Basics:
- To avoid damage to glass containers, place a clean towel on the bottom of a wide pan. The fabric prevents the dishes from touching each other and prevents damage to both items.
- An important placement condition is to arrange the cans in such a way that they do not touch each other. If they stand close together, this can lead to cracks in both containers.
- When boiling, the jars are placed on the bottom of the pan, base down. For example, when processing with steam, they are placed bottom up, because the technologies of the sterilization processes have significant differences.
- It is not recommended to boil jars and lids at the same time due to the difference in the surface area being treated and the structure of the materials from which the items are made.
It is more convenient to sterilize dishes in a pan of water if all containers being processed have the same volume.
Three-liter jars are processed separately from liter jars for several reasons:
- It is more convenient to place identical dishes at the bottom of the pan for boiling;
- The boiling time for cans of the same volume does not differ; they stop boiling at the same time, unlike dishes of different sizes.
Sterilization time depends on the capacity of the dishes.
It is calculated in advance and timed on the kitchen timer:
| Can volume | Boiling time |
| From 500 to 700 ml. | From 6 to 8 min. |
| From 1 l to 2 l. | 10-15 min. |
| From 3 l. and more | From 20 to 25 min. |
Cucumbers with cranberries
This recipe is suitable for those who strive to make preparations without vinegar, canning is healthy! The acid here is cranberry, which is also the highlight of the twist.
For useful preservation you will need:
- cucumbers per 1 liter jar;
- cranberries – 100-200 gr.;
- water;
- salt/sugar – 25/50 gr.;
- dill, garlic, horseradish leaves, peppercorns.
Preparation consists of the following steps:
- Cover the cucumbers with water and let stand for several hours.
- Peel the garlic and cut into large slices.
- Place dill, garlic, and horseradish leaves into prepared jars.
- Tamp the cucumbers on top.
- Prepare the marinade from 1 liter of water, salt, sugar. After boiling, keep on fire for a couple of minutes.
- While the marinade is preparing, place cranberries in a jar.
- Fill the jar with marinade and sterilize for 10 minutes.
- Then roll up and cool quickly.
If the cucumbers are picked directly from the garden before 8:00 am, then you can skip soaking.
Features of sterilization of jars for specific needs
It is not always necessary to sterilize jars in a pan of water. It depends on the type of workpiece.
Basic examples:
- Yogurt. Yogurt containers are treated with boiling water for 1 minute. It is enough to simply pour a stream of boiling water from a kettle or cup over the jars intended for fermentation.
- Berry or fruit jam. Jars intended for pouring hot jam are boiled for 5-10 minutes.
- Cucumbers, tomatoes. Containers for canned food that are prepared cold or hot are usually processed 2 times. Processing includes sterilization of empty cans and pasteurization of finished canned food.
You can also sterilize jars in a saucepan with water with blanks. - Salads. Vegetables can become a favorable environment for the development of microorganisms, so storage containers for canned vegetables must be processed. The boiling time may be reduced depending on the presence of preservatives in the salads.
In a solution of potassium permanganate
Using a solution of potassium permanganate it is also possible to sterilize any container.
This type belongs to cold sterilization methods. The main thing is to carefully, without getting your hands dirty, dilute the potassium permanganate to a bright color. Next, we proceed according to the scheme as follows:
- Pour a small amount of solution into jars halfway.
- Add cooled boiled water to the top and close with a lid.
- Let stand for 10 minutes.
- Turn over the jars with the solution and let stand for another 5 minutes.
- Drain the solution and rinse the jars.
The option is working, but there is one thing, but potassium permanganate is now very difficult to find.
The process of sterilizing jars with blanks in a saucepan
Pasteurization is a procedure that continues the processing of food products in order to destroy microorganisms. Pasteurization is carried out to destroy various bacteria in a liquid medium. Twice-processed canned food can be stored for several years without loss of taste. Pasteurization is carried out only with those products that are not covered with lids. A hermetically sealed jar with the workpiece cannot be boiled further, since a closed environment under the influence of high temperature favors the development and reproduction of bacteria.
When boiling again, cover the neck of the jar with lids, but never close it tightly.
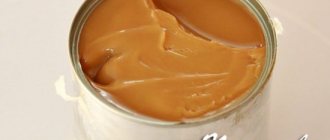
Stew
Stew is canned stewed meat. It is prepared from various types of meat and poultry. The finished stew is softened meat, which breaks down into fibers when cut. After cooking, the stew is placed in sterilized glass jars and then processed a second time to destroy the bacteria inside the canned food. Pasteurization of stewed meat is carried out according to general rules. Jars prepared in advance are filled with meat, covered with lids and placed on the bottom of a wide pan, covered with a towel.
The jars are placed at some distance from each other so that their walls do not have points of contact. The stew is boiled for a long time. The boiling process prolongs the cooking time of meat and also helps reduce the risk of developing a favorable environment for microorganisms.
As a rule, the stew is laid out in containers from 500 ml to 1 liter, but no more:
- 1 liter jars. boil for 1 hour 45 minutes;
- 0.5 liter jars are boiled for 1 hour 15 minutes.
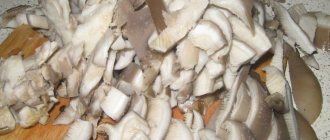
Mushrooms
Homemade mushroom preparations must be carefully processed, without neglecting the described instructions. Salted or pickled mushrooms are placed in sterilized jars and then boiled in a saucepan. Place a wooden grate or spread a clean towel on the bottom of a wide saucepan, then place the canned mushrooms and boil.
The boiling time depends on the varietal variety of mushrooms and the type of canned food:
- pickled mushrooms in 1 liter jars are boiled for 25 minutes;
- blanched mushrooms with a minimum salt content in 800 ml-1 liter jars are boiled for about 60 minutes;
- mushroom caviar in 1 liter jars is boiled for 1 hour;
- salted mushrooms in 1 liter jars are boiled for 30 minutes.
Tomatoes
Tomatoes are often canned using the hot pour method. Many housewives believe that hot brine replaces the method of secondary pasteurization. This is not entirely true. Hot brine or marinade does not exclude the next stage of heat treatment of the jar. Pasteurization prolongs the overall cooking time, but at the same time increases the shelf life of cooked tomatoes.
When boiling tomato preparations, use the set timer:
- 1-liter jars are boiled for 10 minutes;
- 2-liter jars are boiled for 20 minutes;
- Boil 3-liter jars for 30 minutes.
Salad
A vegetable salad recipe involves mixing raw vegetables in certain proportions. Most often, onions, tomatoes, cabbage and carrots are used for vegetable salad. When mixed, these vegetables undergo a natural oxidation process, so sterilization of vegetable salads is mandatory. The jars are processed before laying out the salad. Then the vegetable salad is laid out on them, covered with the prepared lids and placed on the bottom of a wide pan for further boiling.
Jars of salad with a volume equal to 3 liters are boiled for 40 minutes. After this, the lids are immediately rolled up and the jars are removed to cool.
Vegetables
In addition to preparing salads, there are methods when vegetables are pre-fried, boiled or stewed.
Such canned food is sterilized again according to the general rules:
- the jars are placed on the bottom of the pan, covered with a towel;
- between the banks leave a space of 20-30 mm;
- water is poured so that it does not reach the neck of the jar 2-3 cm;
- Boiling lasts from 10 to 25 minutes, depending on the volume of the jar.
Nuances taking into account the type of workpiece
Recipes often call for additional boiling of jars of ingredients. Sterilize preservation at temperatures above 100 °C in an oven, air fryer or regular pan with hot water. Since there is no need to heat full containers so much when pasteurizing, you can also use a water bath, a slow cooker and a microwave. However, the shelf life of pasteurized food products is much shorter compared to the shelf life of sterilized products.
In order for canned food to please you with its taste, housewives need to know the basic rules. There are many subtleties in the culinary art, because each individual dish has its own technology.
Vegetables
For preparations, take ripe fresh vegetables without defects, signs of spoilage or damage. They are thoroughly cleaned of dirt, stems, leaves, and twigs. Remove rotten and damaged parts. Wash under running water at room temperature.
Vegetables can be blanched: steamed or in boiling water for 1-3 minutes, and then immediately immersed in cold liquid. In this way, most of the microbes are destroyed. Due to a sharp temperature change, microcracks are formed, due to which the brine or marinade penetrates better into the pulp of the fruit and prevents cracking of the skin. But this type of processing is not applied to overripe and soft vegetables.
Sterilization of finished products can be done in a microwave or any other convenient way. Processing time varies from 2 to 10 minutes.
Cucumbers, tomatoes, compotes from whole fruits can be canned without subsequent sterilization. Vegetables and fruits are placed in jars and poured with boiling water in 3-4 doses, leaving them in the hot liquid for 5 minutes each time. The first time they use water, the subsequent times use boiling marinades for cucumbers and tomatoes, regular boiling water for fruits, boiling syrup for compotes.
Mushrooms
Greens are placed at the bottom of the jar. The mushrooms with the remaining ingredients of the dish are boiled for about 15 minutes, after which they are allowed to cool slightly and poured into jars along with the marinade. Then they are sterilized in any convenient way from 10 minutes to an hour (the time depends on the size of the dishes).
Salads
When preparing products such as lecho or vegetable caviar, they resort to sautéing, frying or stewing. Then the salads are laid out, not reaching the top edge of 1.5 cm, and the products in the jars are sterilized. It will be most convenient to use large pots of water. The duration of the procedure is 15 minutes.
Sauces
The hot product is placed in a container pre-treated with boiling water. The sterilization time for one and a half liter jars is about 15 minutes. It is most convenient to use a microwave or oven. For larger containers it will take 25 to 40 minutes. Then the finished containers are sealed.
Jam
Because the jam is cooked over a fire for hours, it is sterile. It is poured boiling into jars, immediately rolled up, placed on the neck, and allowed to cool. Some recipes involve pasteurization: filled jars are placed in hot water at a temperature of at least 90 °C.
Stew
Microorganisms develop very actively in meat products, therefore, in order to destroy them and spores, cans of stewed meat are sterilized for many hours (at least 120 minutes). To do this, place them on a baking sheet (you can sprinkle it with salt) and turn on the oven at 200 degrees. The strict requirements of recipes should not be neglected.
Are jars for jam and compotes sterilized?
Fruit and berry preparations are susceptible to mold and fermentation if the containers in which they are stored are processed in violation of technological rules. Sour berries and fruits are especially susceptible to the spread of yeast-like microorganisms, even with the addition of large amounts of sugar, which acts as a preservative during storage.
For bottling compotes cooked according to traditional recipes, 2 stages of processing are provided:
- 3 liter jars are sterilized for 25 minutes before preparing the compote;
- 3 liter jars filled with compote, cover with lids and boil for 20 minutes.
Traditionally, jam is made from fruit or berry raw materials, to which the same amount of sugar is added. After preparation, the jam is poured into treated jars and then subjected to additional pasteurization.
Useful tips
The recommended water temperature in the pan before placing the cans of preserves is 30–70 °C. The hotter the product, the higher it should be. The pan must be covered with a lid. The countdown of sterilization time, which is carried out over intense heat, begins from the moment of boiling.
When sterilizing, you should strictly adhere to the temperature regime specified in the recipe. If this is not observed, bacteria will remain in the product, and an intensive process of their reproduction will soon begin. This will lead to damage to the workpiece.
When processing very hard vegetables, the water temperature should exceed 100 degrees; for this, 50 to 350 g of salt are added to the liquid.
Up to 65% of sugar from the total mass of the product is added to jam, and up to 60% to jam. If its content is lower, the preservation is subjected to additional pasteurization or sterilization. When the recipe calls for the use of vinegar, its strength must be at least 4%.
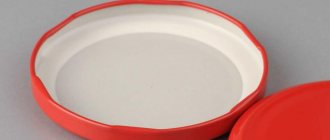
Do lids need to be sterilized?
The last step in preparing homemade canned food is seaming. Using a special seaming key or a seaming machine, the jars are closed with lids in compliance with all sealing rules. If the lids are rolled up correctly, the possibility of microorganisms entering the workpiece is completely eliminated. Another method used to seal home canned food is the use of twist-off lids. To use this type of cap, you do not need a seaming wrench.
The lids are pressed against the neck of the jar and, using physical force, are screwed along the threads marked on the surface of the neck of the jar.
To properly close homemade products, special, pre-treated lids are used. This applies to both tin lids with rubber bands and twist-off lids. Before boiling, the lids are checked for damage. Any crack, chip or violation of the integrity of the rubber band, which is located under the rim of the tin lids, is a reason to refuse to use the material. The lids are boiled separately from the jars for 5 minutes. The condition for their sterilization is complete immersion in water.
After boiling, the lids are carefully removed from the water with kitchen tongs and laid out on a clean towel until completely dry. When pasteurizing blanks, the lids are loosely placed on the neck of the jar. After seaming, the jars are turned upside down. This method helps to control the tightness of the seal. If the lid fits tightly to the neck of the jar, then the brine or marinade will not leak out. If the tightness is broken due to improper tightening, the workpiece will begin to leak after some time.
In the oven
This method is perhaps the simplest. One point: you must use an electric oven; a gas oven will not work due to uneven heating.
So, you need:
- Place clean jars upside down (it is better not to wipe them after washing).
- Turn on the oven at 120 degrees and wait 15 - 20 minutes.
- Leave the jars to cool after the oven is turned off.
It is not recommended to use this method in an oven without a heat sensor.
Common mistakes and their prevention
It happens that homemade preparations explode during storage, lids on canned vegetables swell, and mold appears in jars of jam or the fermentation process begins. This means that at the stage of preparing the dishes for storage, a violation occurred. A serious technological error in sterilization is boiling rolled products. Hermetically sealed jars are not subject to additional boiling, because this promotes the development of microorganisms and prevents the release of excess steam when the liquid is heated.
When sterilizing and subsequent pasteurization, it is necessary to follow some rules:
- To sterilize empty jars, pour warm water into the pan, then place the jars and add water to the narrowing line of the jar. Gradually heating the water simultaneously with heating the jars eliminates the possibility of cracks in the glass.
- For sterilization, place a wire rack or spread a cloth at the bottom of the pan. If this is not done, the jar may burst when boiling.
- The sterilization time is measured from the moment the water boils, and not from the moment the stove is turned on.
- Water should not gurgle when boiling - it can get into the workpiece, which will upset the recipe proportions.
- The fire on the stove is reduced immediately after boiling and maintained at medium level.
- The lids should not be placed too tightly on the neck of the jar. This is due to the fact that when the workpiece is heated, the liquid begins to expand, and excess steam escapes out through the left gap.
- When preparing compotes or vegetable preparations with marinades, you should not pour the preparation to the very edge of the jar. When boiling, the liquid will splash out of the jar, this will disrupt the processing of nearby canned food.
- After pasteurization, the jars are removed from the pan using special devices. In this case, removing the lid from the neck of the jar is completely excluded. Pasteurized blanks must be seamed immediately.
- To prevent temperature changes after pasteurization, it is recommended to cover jars with blanks with a blanket.
- The rules that apply when sterilizing dishes by boiling in a saucepan do not coincide with the rules for processing jars and lids in an oven, microwave or slow cooker.
Home canning is a good way to preserve food. Jars and lids that are used for sealing must be sterilized. One of the most effective and reliable methods of sterilization is boiling dishes in a pan of water.
Purpose of heat treatment
When canning vegetables and fruits, the jars are first sterilized or pasteurized to prevent damage to the products during storage. In both cases, the containers are treated at high temperatures, which kill harmful microorganisms. Without such a procedure, bacteria will begin to actively develop in the nutrient medium.
It is recommended to pasteurize cherries, sour apples, unripe apricots and other similar fruits when preparing jams, compotes, a number of vegetable salads, lecho, and marinades. These products contain enough acid, which kills bacteria, so during pasteurization, jars with blanks are heated only to 85–90 °C. With such processing, the taste qualities of vegetables and fruits, as well as useful microelements, are preserved to the maximum; preservation remains suitable for consumption for a long time.
Sterilization refers to the processing of jars (empty or filled) at temperatures above 100 °C. The process suppresses thermophilic microorganisms that can cause food poisoning.
The pasteurization process makes canned food safe for consumption.