Often, after washing and drying knitted items, the owner wonders how to make it dry and clean. By the way, it can be given a neat appearance, because it cannot be ironed like a regular fabric product. In this case, it should simply be steamed; it is quite easy to do even for a person who rarely stands behind an ironing board.
If you wash the finished product, the loops will lie flat; this is necessary when the fabric has an unkempt appearance. This is very often observed among beginners, the hand is not trained and the loops come out of different sizes.
Also, after steaming, the knitted fabric becomes elastic and after that it is easier to sew. In knitting studios they always said: “After steaming, the product acquires a marketable appearance.”
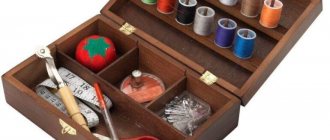
You will need:
- Iron
- A piece of gauze fabric
Attention! Before steaming a knitted item, be sure to test the steaming process on a knitted sample. Instructions.
1. To steam at home with an iron of the previous generation, that is, one that does not have any other modes other than the direct ironing mode (such irons still exist), set the iron’s heating sensor to the maximum temperature.
2. Carefully lay out the knitted item prepared for steaming on an ironing board or other flat surface (first place at least a blanket folded in four under the item if steaming will not be carried out on a special surface of the ironing board).
3. Moisten the pre-prepared piece of gauze cloth generously with water and wring it until slightly damp, through which the steaming will be carried out.
4. Place a piece of gauze on top of the knitted item.
5. Take the heated iron in your hands and bring it as close to the surface of the gauze as possible without touching it. The distance from the sole of the iron to the gauze should be about 0.5-1 cm.
6. Gently move the iron over the surface of the damp gauze. In this case, the water from the gauze will evaporate, and the threads of the product will acquire a neat appearance. You can also use an iron with a steaming function. To do this, pour water into the special compartment of the iron, set the steam mode and move the iron over the surface of the knitted item.
In especially difficult cases, you can use the steam boost function, in which a strong jet of steam is supplied from the sole of the iron to the item you are steaming, which then takes on the appearance of a neat product.
If the knitted pattern does not disturb the shape of the product part, then the paired parts are pinned together and steamed with a hot iron on a very soft mat through a damp cloth. They steam it, not iron it! DO NOT move the iron, just touch it.
Some designs distort the shape of the part, narrower or smaller than the given pattern. In such cases, the knitted part is pinned onto the pattern with the wrong side up and it is steamed in this form, then you need to leave the part to dry directly on the pattern.
A soft bedding is necessary for steaming so that the pattern does not flatten.
It is not recommended to steam very convex designs (braids, cones).
It is better to wash and wring out parts with such patterns, then place them on an absorbent backing. Place the pattern of this part on top and straighten the part along the pattern. Let dry.
Only after these procedures begin assembling the product.
Product assembly.
Next you need to sew the parts, this can be done in several ways:
1. We sweep ironed items with bobbin threads along the wrong side “over the edge”. During the sweeping process, simultaneously plant along the shoulder lines and side lines. Next, the parts need to be sewn on a sewing machine. Remove the basting thread.
2. Shovza needle, or seam “stitch”.
In appearance it resembles machine stitching.
The seam behind the needle is very often done by craftswomen; such a seam is practically invisible, but the disadvantage is that small extra edges remain, and that this seam is not elastic.
Such a seam can be made both from the wrong side and from the front side of the product.
On the wrong side we sew the seam like this:
We put together two parts with the right sides inward, and sew on the wrong side according to the diagram. It is better to take the thread that was used to knit the main product and insert it into a needle with a large eye and a rounded end. If possible, make small, even stitches of the same length.
On the front side, such a seam is made when there are open loops. The figure shows an example of such a seam when connecting horizontal and vertical knitting.
3. You can manually sew the parts on the front side .
This seam is done correctly and is completely invisible. There are several options for making such a seam, the implementation of which is shown in the pictures.
The first method: “stick the needle inside the edge loop”
Second method: “by pulling”
4. Hems along the bottom of skirts and dresses can be hemmed with a buttonhole stitch, but it should be crocheted. To do this, bend the part along the loop column, so that its direction is from left to right. Crochet a row (half column) from right to left in each loop of the loop column.
Steaming method from Semir @ mid @ .
I put gauze in a bowl of water. I turn the iron on to maximum heat. I lay out the part on the table. The gauze is lightly wrung out and applied to the part. With one hand, lightly touching the gauze, I move it over the product. My other hand is under the gauze and carefully straightens the edge of the product. After one such “travel” through the part, it becomes almost equal. I move the iron over the part until the gauze dries out a little. Then, carefully, with both hands, I lift the part and move it to a place where it, along with other parts, can lie until it dries. It is important to remember that a moistened and hot part can be easily deformed. To avoid this, I lift the piece by inserting both hands, palms up, so that the piece rests on the area up to the elbows.
Steaming method from Lisi.
Instead of pinning the knitted parts on a pattern, I place them on a fluffy bath towel (if it’s openwork, then it can be face up, if the pattern is more or less convex, then it’s wrong side up), the steam in the iron is at maximum, I cover the parts with double or triple gauze and without touching I steam the parts at a distance of 1-1.5 cm, I did the same with acrylic, but the size increased slightly. After sewing the seams, I also steam them through gauze without touching them with an iron. As steaming progresses, remove the gauze frequently and straighten the outline of the part. In my experience, this is the most successful way to steam.
You can read more about steaming on the Osinka forum.
How to steam a knitted product
The beauty of a knitted product largely depends on the quality of the yarn. But it looks truly finished after steaming or wet heat treatment (WHT). It is performed using an iron with a “steam” function and a piece of gauze or fabric. We also always steam the finished knitted product using an iron and damp gauze or cloth.
If the product is knitted independently, then the yarn itself is steamed first. Especially if it is reused after the dissolution of the previous item. This is necessary to straighten the caked thread. Then a control sample is knitted and also steamed. This is necessary in order to understand how the yarn will behave in the finished product. The next WTO will be needed for the details of the knitted item. We pre-baste the sleeves together so that they are the same size. If the knitting is stocking, we connect it close to the edge so that the part does not curl into a tube. We baste the front and back separately, folding them in half along the vertical fold. Steam carefully without touching the vertical fold.
We carefully hold the iron in weight. Under no circumstances should you iron knitwear or press on it, as is the case with regular fabric. This will cause deformation. The gauze must be constantly damp. During steaming, it can be moistened several times. Do not dry the steamed knitted parts with an iron completely. At the end of the WTO, they should be slightly damp and dry on their own.
If the yarn is unstable, the knitting structure is loose, then the details of the future product must be pinned with stainless pins to the pattern on the fabric. We attach the paper pattern to a piece of fabric and trace the outline with a permanent marker. Then we pin the details of the knitted item to the contours of the pattern.
When the knitwear pattern has a raised convex pattern, a terry towel should be placed under the piece in front of the WTO. Openwork parts with holes are carefully stretched to the desired size before steaming.
After assembling the product, we also lightly steam it through a damp cloth or gauze, holding the iron suspended. We pay special attention to seams and folds.
The same steaming rules apply to finished knitted items. They are also pre-laid out on an ironing board, smoothing out dents and creases with your hand. Steam through damp gauze using a steam iron. Hold the iron above the surface of the product.
Under no circumstances should you steam the elastic; it will stretch and lose its shape. Otherwise, the finished knitted product will have to be remade, and the hand knitted product will have to be re-knitted. If the item is knitted from thick, harsh yarn, then before the WTO we moisten not only the gauze, but also the product itself.
Several subtleties and features of steaming. If the product is made of wool, there is practically no need to steam it. You can do a minimal WTO, then wrap the knitted item in a terry towel for a few minutes. Unfold and leave in a horizontal position until completely dry.
Knitted items made from cotton yarn should be steamed carefully, without being particularly zealous. Cotton often leaves yellow stains from hot water; under the influence of high temperatures, cotton items can shrink significantly. When performing WTO, you can lightly starch them with an aerosol agent. It will give the knitted product the necessary shape.
Knitted items made from bamboo yarn are very pleasant to the body and environmentally friendly. But she is capricious and easily loses her shape. You don’t have to steam the finished item at all, but dry it immediately in a horizontal position after washing. If a WTO is necessary, then you need to move it very carefully; the iron does not need to be heated too much. Otherwise, the product may become deformed.
Knitted items made from silky or lurex yarns should be steamed carefully. Do not set the temperature regulator on the iron to maximum. Otherwise, the threads may melt and the item will be damaged.
Steam acrylic knitwear very carefully. Or don’t do this at all, laying the item after washing horizontally on the surface until completely dry. Otherwise, the “capricious” thread may become deformed and the shape will be lost.
Delicate openwork items are best steamed without an iron. Pour water into a saucepan and heat it up. When the water boils, remove the lid. Carefully, so as not to scald your hands, hold the mohair product over the steam. Folds and creases are smoothed out, mohair fibers are straightened and fluffed up. Small knitted parts and finishing elements can be steamed over the spout of a boiling kettle. This is a proven folk method.
Before the steaming procedure, be sure to test the knitted product. When knitting yourself, this does not cause any difficulties. You can try it on a sample. If you need to steam a finished item, you should definitely test it on the inside out so as not to spoil it.
When steaming knitted items at home is in doubt, it is better to trust dry cleaning. There, the product will be carefully and carefully steamed using special equipment.
How to properly steam a knitted product with knitting needles
You probably have preserved in your memory the lovely items knitted for you personally by your grandmothers, mothers and even great-grandmothers. Such things are sometimes stored for a long time not only in our memory, but also on a separate shelf, as a special memory of our childhood. But knitting is quite relevant now.
But over time, our lives also improve. A device such as a steamer has firmly strengthened its position in most homes, where preference is given to it rather than an iron. This is true - the device smooths out wrinkles much more efficiently, and the process takes much less time. But knitted items also sometimes need ironing, since wrinkles of threads are a natural phenomenon. That’s when the question arises: “How to steam a knitted item?”
How to properly steam a knitted item
Many modern mothers prefer just such products for their children. They can be knitted yourself, or they can be ordered from craftswomen in the city. But not only children's things can be knitted or crocheted. Many people prefer knitted items in their wardrobe. Scarves, cardigans, hats, skirts, vests, sweaters, tunics, jackets, openwork capes and much more - all this can be knitted yourself.
Naturally, all this is not always stored hanging in the closet on a hanger, but in most cases it is folded on shelves. This is where folds and creases appear on the threads. And if you are the happy owner of such a miracle device as a steamer, then you can deal with the problem in a few minutes.
In addition, steaming will give clothes a neat appearance and prevent further shrinkage, stretching and deformation of the threads.
Rules for using a steamer for knitted items
- Steaming occurs only in a vertical position. Hats, berets and any other headwear must first be placed on a jar or other similar shaped object.
- To align the product along the seams, you can use pins or small stationery needles.
- Products made from cotton, viscose, and linen can be steamed without gauze, but wool and acrylic threads require additional coating. Products made from coarse yarn can be moistened with a spray bottle directly onto the surface of the threads.
- After completing the process, do not immediately put the item on a shelf or in a closet. Let it cool completely.
How to steam things with a steam generator
The steaming sequence is quite simple:
- hang the product in a vertical position on a special stand;
- heat the device and set the steam power to medium;
- walk over the surface, paying special attention to individual areas that have the most folds;
- if the power is not enough and there are still creases on the product, increase the temperature;
- try not to move the iron too closely across the material; the optimal distance is up to 10 cm.
That's all the rules regarding steaming knitted items. Follow simple recommendations and your clothes will retain their attractive appearance for a long time and will not lose their shape.
If you are interested in crocheting or knitting, then you already know that after finishing the work you need to steam the knitted item so that the item looks neat and does not shrink or stretch in the future.
In addition to finished products of simple products, you also need to steam individual finished knitting elements (for example, when knitting a sweater, these will be the sleeves, back and front). With openwork knitting, this procedure helps straighten out all the elements and patterns on the product.
The further appearance of the product depends on proper steaming. You need to steam carefully, otherwise you can deform the item. By and large, steaming is not at all difficult, you just have to follow a few rules. Find out the properties of the yarn you are using - not all threads will withstand exposure to high temperatures.
Even if you are confident in the yarn, practice on a swatch before you begin. Yarn can be of different quality, so even if you have already worked with similar material, it would be a good idea to check.
Other steaming methods
- Instead of an iron or steam generator, some housewives use a hairdryer. To do this, cover things with damp gauze or cloth. Turn on the hair dryer at the highest heat and walk over the surface of the product, holding the device at some distance;
- Thin and delicate knitted items that you are afraid of ruining can be ironed with steam. To do this, fill the bathtub with boiling water and place the product over the bathtub on a grate or other surface. Smooth out the material and leave for several hours. In this case, you cannot hang clothes, otherwise they will stretch or stretch out;
- Individual knitted items and small knitted items can be steamed over a kettle. Wait until the water boils and hold the desired element over the spout with escaping steam;
- To straighten woolen and knitted items without an iron after washing, hang the items on hangers after washing and leave them over a container of boiling water for a while. Or spray the material with water and lay it horizontally on a flat surface.
If after steaming the items become deformed and stretched, wash the items in the washing machine on a delicate cycle at 40 degrees without spinning. They wring things out by hand! Then hang the clothes on hangers or a rope and carefully straighten the material.
Often, after washing and drying knitted items, the owner wonders how to make it dry and clean. By the way, it can be given a neat appearance, because it cannot be ironed like a regular fabric product. In this case, it should simply be steamed; it is quite easy to do even for a person who rarely stands behind an ironing board.
If you wash the finished product, the loops will lie flat; this is necessary when the fabric has an unkempt appearance. This is very often observed among beginners, the hand is not trained and the loops come out of different sizes.
Also, after steaming, the knitted fabric becomes elastic and after that it is easier to sew. In knitting studios they always said: “ After steaming, the product takes on a marketable appearance.”
«.
You will need:
- A piece of gauze fabric
Attention!
Before steaming a knitted item, be sure to test the steaming process on a knitted sample. Instructions.
1. To steam at home with an iron of the previous generation, that is, one that does not have any other modes other than the direct ironing mode (such irons still exist), set the iron’s heating sensor to the maximum temperature.
2. Carefully lay out the knitted item prepared for steaming on an ironing board or other flat surface (first place at least a blanket folded in four under the item if steaming will not be carried out on a special surface of the ironing board).
3. Moisten the pre-prepared piece of gauze cloth generously with water and wring it until slightly damp, through which the steaming will be carried out.
4. Place a piece of gauze on top of the knitted item.
5. Take the heated iron in your hands and bring it as close to the surface of the gauze as possible without touching it. The distance from the sole of the iron to the gauze should be about 0.5-1 cm.
6. Gently move the iron over the surface of the damp gauze. In this case, the water from the gauze will evaporate, and the threads of the product will acquire a neat appearance. You can also use an iron with a steaming function. To do this, pour water into the special compartment of the iron, set the steam mode and move the iron over the surface of the knitted item.
In especially difficult cases, you can use the steam boost function, in which a strong jet of steam is supplied from the sole of the iron to the item you are steaming, which then takes on the appearance of a neat product.
If the knitted pattern does not disturb the shape of the product part, then the paired parts are pinned together and steamed with a hot iron on a very soft mat through a damp cloth. They steam it, not iron it! DO NOT move the iron, just touch it.
Some designs distort the shape of the part, narrower or smaller than the given pattern. In such cases, the knitted part is pinned onto the pattern with the wrong side up and it is steamed in this form, then you need to leave the part to dry directly on the pattern.
A soft bedding is necessary for steaming so that the pattern does not flatten.
It is not recommended to steam very convex designs (braids, cones).
It is better to wash and wring out parts with such patterns, then place them on an absorbent backing. Place the pattern of this part on top and straighten the part along the pattern. Let dry.
Only after these procedures begin assembling the product.
1. We sweep ironed items with bobbin threads along the wrong side “ over the edge”
" During the sweeping process, simultaneously plant along the shoulder lines and side lines. Next, the parts need to be sewn on a sewing machine. Remove the basting thread.
2. Shovza needle, or seam “stitch”
.
In appearance it resembles machine stitching.
The seam behind the needle is very often done by craftswomen; such a seam is practically invisible, but the disadvantage is that small extra edges remain, and that this seam is not elastic.
Such a seam can be made both from the wrong side and from the front side of the product.
On the wrong side we sew the seam like this:
We put together two parts with the right sides inward, and sew on the wrong side according to the diagram. It is better to take the thread that was used to knit the main product and insert it into a needle with a large eye and a rounded end. If possible, make small, even stitches of the same length.
On the front side, such a seam is made when there are open loops. The figure shows an example of such a seam when connecting horizontal and vertical knitting.
3. You can manually sew the parts on the front side
.
This seam is done correctly and is completely invisible. There are several options for making such a seam, the implementation of which is shown in the pictures.
First way:
“stick the needle inside the edge loop”
Second way:
"for a stretch"
4. Hems along the bottom
of skirts and dresses
can be hemmed with a buttonhole stitch, but it should be crocheted. To do this, bend the part along the loop column, so that its direction is from left to right. Crochet a row (half column) from right to left in each loop of the loop column.
I put gauze in a bowl of water. I turn the iron on to maximum heat. I lay out the part on the table. The gauze is lightly wrung out and applied to the part. With one hand, lightly touching the gauze, I move it over the product. My other hand is under the gauze and carefully straightens the edge of the product. After one such “travel” through the part, it becomes almost equal. I move the iron over the part until the gauze dries out a little. Then, carefully, with both hands, I lift the part and move it to a place where it, along with other parts, can lie until it dries. It is important to remember that a moistened and hot part can be easily deformed. To avoid this, I lift the piece by inserting both hands, palms up, so that the piece rests on the area up to the elbows.
Instead of pinning the knitted parts on a pattern, I place them on a fluffy bath towel (if it’s openwork, then it can be face up, if the pattern is more or less convex, then it’s wrong side up), the steam in the iron is at maximum, I cover the parts with double or triple gauze and without touching I steam the parts at a distance of 1-1.5 cm, I did the same with acrylic, but the size increased slightly. After sewing the seams, I also steam them through gauze without touching them with an iron. As steaming progresses, remove the gauze frequently and straighten the outline of the part. In my experience, this is the most successful way to steam.
Discussion of this topic on Osinka. Thanks for the tips mew, Lorna, Puzzle.
WTO (Wet Heat Treatment). Steaming knitted items
WTO technology for knitted products, but still I’ll put in my 3 cents.
I’ll say right away that I knit by machine, but I don’t think that the technology for processing hand-knitted parts should be fundamentally different. Second clause. I almost never knit from pure acrylic, because any item knitted from it is a “good idea” item. You can always choose a different yarn to make the product even better, but which fiber to choose depends on the specific model. I apologize for being so categorical, I emphasize once again that I am proceeding from PERSONAL experience. So here it is. Acrylic
cannot be steamed; under the influence of temperature it becomes flat and inelastic.
If you are knitting from acrylic, then the only thing you can do with the parts before joining is to pin them according to the pattern, spray them with a spray bottle and let them dry. Therefore, you need to very carefully select the knitting pattern for acrylic yarn so that the product looks decent. Again, there is a problem with connecting parts - unstemmed seams look unprofessional. But it’s just wool, cotton and flax that need to be steamed.
And in different ways, depending on the knitting pattern and much more. I will try to systematize my scattered thoughts specifically from the point of view of fiber composition, knitting pattern, type of product, etc. I’ll post it today or tomorrow. (I love this thing, so that everything is scientific, with classification... I don’t know how to explain it on my fingers
WTO (wet heat treatment). Steaming knitted items
Firstly
, why do we steam at all?
The main tasks
: to give the correct shape to the details of the product, to make the loops more even, and the pattern more expressive, the seams even and clear (just don’t throw hats at me right away, lovers of large embossed braids! There are different patterns...).
Secondly
, three moments when steaming may be necessary (and sometimes simply necessary): the product in detail after finishing knitting, in the process of joining the parts, after washing (I have a couple of openwork sweaters that have to be brought to life after EVERY wash).
Thirdly
, what do we knit from?
You can divide the yarn into groups for ease of discussion. Moreover, the knitting pattern and model are largely determined by the yarn. Smooth wool, mohair, wool with additives, cotton, linen, viscose and all their various combinations require different handling. Fourthly,
we steam only from the inside out and don’t press too hard with the iron, these aren’t just any dry jeans, right?
I also always knit pattern
from the yarn that will be used for the product and steam it. Everything becomes clear immediately. You can adjust the temperature and degree of pressure. My ironing board is quite soft; I added a layer of thick batting under the cover.
Now, in order. 1. Pure wool
(sheep, alpaca, angora, it doesn’t matter, I mean smooth thread without any bells and whistles), in my opinion, needs steaming.
It becomes softer and fluffier; under the influence of steam, all the fibers of the yarn straighten and the loops become smoother. Sometimes it takes extra effort to make a jumper made from fluffy yarn look like the picture in the magazine, but this has already been discussed a lot in the topic about mohair. So: If the details of the product are knitted with a pattern without high relief elements and not with elastic, then I usually pin them right on the ironing board with the wrong side up according to the pattern (more precisely, according to the dimensions: length, width, armhole length, etc., the pattern as such I rarely do this) and steam it through a damp iron. This is usually done in parts, because... The whole thing doesn’t fit on the board. If the fabric is elastic, you cannot steam it in a stretched form. You need to place the part so that the elastic is in a “compressed” form, give the part the correct shape and carefully, without pressing, go over it evenly with the iron. The knitting becomes much smoother. I also steam relief patterns, and I hold the iron almost suspended. After all, reliefs become flat not from temperature, but from pressure. If I feel that I have overdone it and ruined the relief pattern with excessive pressure, I have to wash it. After washing everything falls into place. 2. Smooth blended yarn: wool + cotton / viscose
.
The principle is the same: we steam smooth patterns boldly, and the more prominent, the more careful you need to act. I always steam openwork patterns so that the pattern of “holes” is clear. There is a huge problem with relief patterns made from such yarn: unsteamed ones look uneven, steamed ones look flat. I can’t recommend anything here, it all depends on the desired effect. 3. Any “summer” yarn ( cotton, linen, viscose
), again smooth. If you consider that openwork is usually knitted from such yarn, then steaming is necessary. I prick them according to size and steam them. If the yarn is viscose, then it is better to adjust the temperature of the iron on a sample and not hold the iron in one place, but for cotton and linen - at maximum and without any constraint. If there is a jagged edge, then you need to prick all the corners and then steam. It’s hard to say about the elastic; you should definitely try it on a sample.
All of the above applies to the processing of parts before assembly. During the assembly process, you also can’t do without an iron. If parts are sewn together by machine, be sure to steam all seams from the inside out. Sometimes hand seams need to be lightly steamed, with the exception of seams connecting elastic fabrics. Usually the connection of the elastic is almost invisible, but if it seems that it is crooked, you need to steam it so that the elastic next to the seam is in a compressed state.
After washing, some knitted items again ask to be ironed, especially those stitched on a machine. I always lightly steam the machine seams, even if there is no need to iron the entire item. Somehow it always seems to me that they lie unevenly. I also had several jumpers made of pure wool, knitted with stockinette stitch; they had to be completely steamed after washing, even stretching them a little. Summer openwork blouses and tops also look, after washing, not exactly wrinkled, but somehow expressionless. But relief patterns made from pure wool look better and better. That's why I love it!
WTO for mohair
I remembered another method of steaming, if you can call it that, which I used
for mohair
. I had such a wonderful “Cosmetic device “Chamomile”, which consisted of a bath with a boiler and a plastic hemisphere that was placed on it, into which you were supposed to stick your face and undergo a steam bath. So I pulled a mohair sweater over this hemisphere, evenly steamed all its sections and combed it with a clothes brush. The effect is amazing - all the pile immediately came out, straightened and became silky and soft. This is how people suffered until they came up with powerful steam irons!
If it is pure wool, or wool with cotton, then you can steam it, but very carefully. Place the pieces on the ironing board, wrong side up, without stretching (!!!). Give the correct shape. Iron through a damp iron: lightly apply the iron to the surface of the product, do not push the iron, just apply it, while holding the iron almost on its weight, only lightly touching the sole to the product. It’s better, of course, to try on a sample (if you knitted a sample to calculate the size of the product). Actually, you are right, the elastic band looks smoother after this treatment. But if there is at least 15% synthetics, then it’s better not to risk it.
WTO. Steaming knitted items
Girls, I make everything much simpler. I rarely knit from pure synthetics. Therefore, I always steam everything, and I advise everyone to do so. I have a few tricks for this. Firstly, the parts must be swept in pairs, and always with the front side inward - then you can apply a little more pressure with the iron. If the design is very embossed, place a terry towel under it all on the ironing board. Then there’s this: we steam it through gauze, not through calico. Then we leave everything to dry. Then we calmly collect the seams and steam only the seams on the finished product. I try not to float the elastic, except perhaps the very edge at the shuttle seam (if the collar has an elastic band). Openwork should always be steamed and very carefully. But pinning pieces onto a pattern and splashing them with water is not serious, and it’s of little use. One of my friends washes parts before assembling. Of course, this is her business and the business of her clients - but to me these things seem immediately knitted from old washed yarn. And if you process it using my method, you will feel the difference.
how to steam gum
Well, about the elastic band (although I mostly do this with machine ones). Thread thin straight knitting needles into the lower and upper edges of the elastic band, pull it in height so that it shrinks well in width, and lightly steam (the iron is always suspended!). It looks just great.
Thanks to the craftswomen from Osinka for useful tips on steaming knitted items.
How to steam a knitted product without ruining it?
It is much easier for modern housewives to care for knitted clothes. Nowadays, everyone has irons with an additional “steam” function. But this method can only process products made from viscose, cotton or linen threads - the so-called “summer knitting”.
First, you need to lay out the item (or its element) on a flat, soft surface (ironing board) without folds or unevenness. To give the desired size and shape, pin the edges.
Woolen items should be covered with wet gauze or a towel and ironed. The iron should be held suspended and should not be “pressed” on it (as when ironing ordinary fabric). The gauze or towel should be kept damp at all times. You can moisten them several times during steaming.
If the item is knitted from coarse and thick yarn, then we moisten the product itself. If you have a steam generator at home, then you no longer need to use a damp cloth.
What's the best way to store knitted items?
I think that caring for knitted items also includes recommendations for the proper storage of knitted items. So here are some tips on this matter.
Before putting things into storage during the off-season, they must be washed, as dirty threads attract moths.
Dry orange peels, as well as “favorite” bags of lavender, are good at repelling moths.
It is ideal if you “fry” woolen items in the sun. Better on both sides. But fading products should be placed in the sun only from the wrong side.
As an alternative to the sun, things can be frozen, and with the advent of a freezer in almost every home, this is not difficult to do. But I prefer the sun.