Hello good traveler. You looked at Fedor Lykov’s blog at the right time. Today you will learn how to clean your keyboard. Without it, it is impossible to register with Odnoklassniki and perform many other functions.
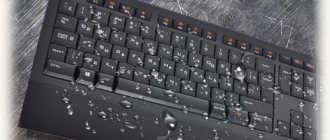
Today's article will be useful for those who like to have a snack at their desk. No matter how careful you try to be, this inevitably leads to a clogged keyboard, which then needs to be removed.
What can lead to dirty keys?
No matter how you keep your workspace clean, a lot of debris will accumulate in the space between the keys.
Accumulated dust pellets lead to blocking the keys.
However, this is not the worst thing. The worst thing will be if dirt gets inside the device.
Unprepared users grab their heads and rush to the service center, looking for help. The high price doesn't even stop them. But with the basic knowledge gained in today's article, you can save money and time.
How to apply lubricant?
Everything is quite simple here: you can either take one of the ready-made, proven guides, which is perfect for beginners, or reinvent the wheel. Fortunately, there is room to roam around here, not a single manual claims to be the only racially correct one, and lubricants are designed to be mixed, applied in different ways, and generally discarded as soon as you want. The main thing is to remember that it is better to separate the parts for experiments and test them immediately after application, rather than lubricating the entire keyboard.
Guide to lubrication of stabilizers
Guide to Lubrication of Switches
How to clean the keyboard on a laptop
As you know, a laptop keyboard is one of the main parts of the device. Its cleanliness affects not only its appearance, but also its performance.
However, you need to be extremely careful when cleaning the keys, otherwise you may damage them.
It is not recommended to use compressed air as a cleaning tool, but rather use the following:
- Portable vacuum cleaner with low power.
- A small soft brush, a cloth and cleaning products.
Is it possible to wash the keyboard with plain water under the tap?
There is no definite answer to this question: some wash it and say that this does not affect the performance of the device in any way, while others categorically state that it is impossible to clean the periphery in this way, since there is a risk of water getting under the board.
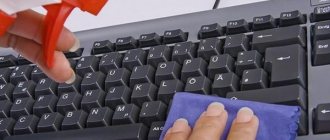
The best option is to rinse only the keys under running water. To be more effective, you can add detergent to the water and go over each button with a brush. This way you can remove greasy deposits and sticky layers from the keys.
Correct keyboard cleaning algorithm
- Turn off the device.
This action must be done first, since working with an active laptop can lead to damage to it. You also need to unplug all connected devices from the connectors.
- Preparation of materials for work.
To ultimately get a perfectly clean keyboard we will need:
- Capacity sufficient to accommodate all removed keys.
- Medical alcohol.
- Packaging of cotton swabs.
- Detergent, for example for dishes.
- Roll of disposable towels.
- Flat blade screwdriver.
You'll likely have all of these in your bathroom cabinet, so on very rare occasions you'll have to go to the store.
- Removing small crumbs and debris between keys.
To remove crumbs and small debris, you need to turn the device upside down and shake it lightly, but without unnecessary fanaticism.
- Cleaning the keys.
If necessary, you can dismantle them, but before that you should admit whether you can return them to their place in the same sequence. You also need to make sure whether they can be removed at all.
Then we take a flat-head screwdriver in our hands and dismantle it with extreme caution. It is better not to touch the spacebar and enter buttons. Installing them in place will be problematic due to their large size. Be careful, the buttons are plastic and break easily.
I strongly advise you, after removing the keys, to place them in a container without delay, otherwise you may lose them all. To clean the dirt, you need to add a small amount of detergent to the water and thoroughly rinse the keys with it.
- Clearing the space under the buttons.
To do this, take cotton swabs and dip them in a solution of alcohol and warm water. Then we begin to carefully wipe every millimeter, making sure that no water drips from the stick.
- Installing buttons in reverse order.
Before you begin installing the keys, you need to dry the treated surfaces thoroughly. We lay out the keys on the table and wait for a while, usually 30 minutes is enough.
Cleaning a mechanical keyboard by removing the buttons
If the keyboard is very dirty, it will not be possible to avoid completely disassembling it. First of all, you need to photograph it or find a similar photo on the Internet, so that during assembly there will be no problems with the sequence of button placement. Next, you should pry the top panel with a sharp object and disconnect it, or unscrew the fastening screws and separate the parts of the device.
Then the keys are removed (it is better not to touch Enter, Shift and Delete, since they have an additional metal fastening) and the silicone base, which needs to be washed separately. It is most convenient to use special forceps, but in their absence everything can be done manually: just grab the cap and pull it up. Cleaning by analogy is performed with compressed air, a brush and cotton swabs. When cleaning the switches, it is rational to re-lubricate them and then leave them to dry for several days.
Before washing the plastic “stencil”, you should remove the microcircuit. The top of the keyboard can be cleaned with a toothbrush and soap. Then you need to dry all the elements and assemble the device in its original position.
There are special mixtures that resemble jelly, which are able to penetrate deep into the keyboard and, due to their stickiness, remove dust and dirt from hard-to-reach places.
If you are interested in how to clean a backlit keyboard, you should understand that there are no special differences from a regular one. The main emphasis is on the fact that each key has an individual fastening. Disassembling the structure is not difficult, but subsequent assembly can be difficult. Therefore, you need to act carefully, laying out the parts on the surface for ease of subsequent restoration.
Life hacks on how to clean your keyboard from dust
Laziness is the engine of the process. Now users are trying to minimize the cost of effort and time as much as possible.
Alternative ways:
- The use of a jelly-like mass, which is similar to the children's “toy” slime, has become widespread. Whoever came up with this was a genius. The method helps to collect small crumbs and dust in the spaces between the keys. However, this is also not a panacea.
If the keyboard has not been cleaned for a long time, you will not be able to reach deep-seated dirt.
- Another device for lazy people is a mini vacuum cleaner. It runs on USB and doesn't require much storage space.
Although this seems like a solution, according to reviews it has very little power.
Laptop
In the first part of our big life hack, we will tell you about the best, safest and most effective way to clean the keyboard of your laptop (netbook). In general and special cases.
Not every keyboard can be washed under water!
Why clean
Some people are guilty of having a snack while sitting at their laptop. Hence, such contaminants as crumbs, droplets of sweet tea, coffee, and juice appear on the face. But if you don’t have such a tempting habit, then you don’t need to clean your keyboard? Alas, it remains necessary, so you also need to know how to clean laptop keyboards.
The keys on a laptop are attached slightly differently than on a regular mechanical computer keyboard.
All electronics are, unfortunately, a big “dust collector”. Hence the advice - do not forget to clean the cooler of your device from dust. The keyboard also attracts dust and dirt. And you need to wash it not only for an exemplary appearance, but also to ensure the functionality of the device and its long service life. As long as there is dust on the outer surface of the keyboard, it is not dangerous. But if it gets into the “stuffing”... Here's what you can expect:
- Mechanical debris can cause buttons to stick.
- Spilled liquid is the cause of failure not only of the keys, but of the entire laptop.
- If dust and dirt get far inside the equipment, it can lead to overheating of the radiator, which leads to serious damage.
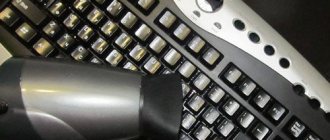
Use the cold air jets of a hair dryer
Types of cleaning
Laptop cleaning is divided into two types, which also affects how to clean the keyboard on a laptop:
- Superficial. Cleaning both buttons and the spaces between them. Produced at home, without disassembling and using complex technologies.
- Deep. Removing dirt from the key contacts so that they do not penetrate further into the “filling”. It is necessary to remove the keyboard and, possibly, if the contamination has penetrated deeper than it, clean, rinse and other elements. For owners of many laptops with a non-removable keyboard, the problem is complicated by the fact that the device has to be almost completely disassembled. If you do not have the skills, self-confidence and any experience in this matter, then it is better to entrust the procedure to specialists.
Advice! The more often and thoroughly you carry out surface cleaning, the less often your equipment will need deep cleaning.
When cleaning such cables, be as careful as possible!
Superficial
Be prepared to do a superficial cleaning at least once a month.
Facilities
How to clean a laptop keyboard? To do this, you should always have a kit ready with the necessary tools:
Jelly sponge for keyboard cleaning
Special mini vacuum cleaner
How to clean a laptop keyboard? You can purchase such a universal device
Set from a Chinese store site
Cleaning the screen and keyboard
Can of compressed air
- Special kit for cleaning the keyboard. This convenient innovation can be purchased at a number of specialty stores. It already includes cleaning liquid, a cloth and a brush.
- Isopril diluted alcohol (products made from it are also suitable). The answer to the question “What else can I use to clean my laptop keyboard?” and an excellent handy alternative to special cleaning liquids. However, you should not overuse it - lightly soak a rag or napkin in the solution - do not allow alcohol to drip onto the keyboard.
- Soapy water. It is obtained by diluting shavings of household or toilet soap, dishwashing liquid, liquid soap, shampoo, and shower gel. Also, carefully dampen a cloth in it, and after the procedure, be sure to wipe the buttons dry with a soft, dry cloth.
- Napkins. Use a soft, lint-free cloth. A damp cotton pad or cotton swab or microfiber material will do. An excellent example is specialized Defender wipes. The buttons are wiped only with rags, cloth, napkins, but not with a brush!
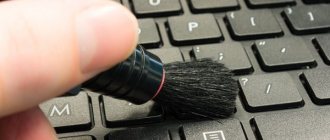
- Soft brush. Use this tool to clean the spaces between the keys.
- Jelly sponge. Know-how of the last days. It is some semblance of a children's toy - “lizun”. The principle of operation is simple - with a sticky base you walk thoroughly and several times over the keyboard. “Jelly” will stick to itself all the dust, dirt, crumbs, even from hard-to-reach places. Ideally, one jelly sponge = one cleaning, but if the keyboard is not too dirty, then the product may be suitable for the next cleaning.
Universal remedy - isopryl alcohol
Electronic wipes
“Can I wash my laptop keyboard with water?” - you ask. Depends on the model, namely on the presence of hydrophobic elements on it. So it's better not to.
Advice! Do not use ethyl alcohol, vodka, acetone or other solvents to clean and disinfect the keyboard! Not only can they destroy the paint on the buttons, but they can also burn the plastic parts!
Cleaning the spaces between the keys
Cleaning without disassembling the laptop
You can try to clean your laptop from dust and dirt without disassembling it. To do this, simply turn the device over and gently shake it up and down, left and right to shake out crumbs and dirt particles. But there are more professional ways:
- Vacuum cleaner. There are special mini-vacuum cleaners for keyboards, but it’s okay if you use a household “giant”. Just turn it on at the lowest power and put on the narrow attachment, which is often included with the vacuum cleaner. By the way, special car vacuum cleaners are also effective. For thorough cleaning, you will have to hold each key for 3-5 seconds.
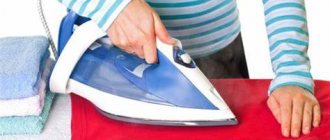
- Hair dryer. Holding the laptop at a comfortable angle, blow out all the crumbs from it with cold (only cold!) air.
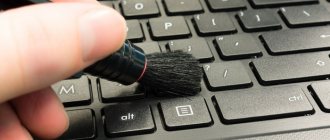
- Long bristled brush. The procedure is long and meticulous - you will need to bypass every button.
- A can of compressed air. You will find a miracle of technology in specialized stores. It is simple to use - spray at the required angle to the contaminated surface.
These jokes about cleaning your keyboard...
Deep
Is it possible to wash the keyboard from a laptop or netbook? Yes, but only in a specific way.
The algorithm varies depending on the model of equipment, but in general it is as follows:
- Take a photo or otherwise record the keyboard in its assembled form.
- Using a nail file, an awl, or a thin crochet hook, pry up each button and remove it. Be careful not to damage the cable. Pay special attention to the long keys - they are much more difficult to both remove and fix back.
- Using brushes, a vacuum cleaner or the same hair dryer, sweep and blow out dust from the opened “insides”.
- If necessary, wipe each button with a soft, dry cloth or brush.
- Is it possible to wash the keyboard under the tap or shower? No, but the buttons are fine! Particularly dirty keys are washed in soapy water and then treated with an antiseptic. Another unusual life hack: put buttons in a linen bag, mesh or an unnecessary sock. Soak in detergent and then rinse thoroughly under running water. Before returning the keys, be sure to dry them completely! The process can be speeded up by using a hairdryer with a cold stream of air.
- Using the photo you took, return the keys home. You will know that the key is in its place during installation by a characteristic click.
Deep cleaning means removing the keys
Advice! For those who find it tedious to assemble a “mosaic” of keys from a photo or have no way to photograph/draw the keyboard, we offer the idea of so-called zone cleaning: you remove the key, clean the surface underneath it, clean it itself, dry it and immediately return it to its place. Then move on to the second, third, etc.
Emergency
One of the most common and dangerous problems for the keyboard is spilling coffee, tea, juice or other liquid. At the same time, the worst thing is sweet drinks - sugar hardens and crystallizes, which makes washing it off an additional problem.
Spilled liquid? The equipment can still be saved!
The algorithm for dealing with such contamination is approximately the following:
- Turn the device over quickly and try to shake out as much liquid as possible.
- Use a hair dryer or vacuum cleaner to blow out the remaining microdrops.
- Disassemble the keyboard and try to dry it from the inside. Soak with a dry, moisture-absorbing cloth, replacing it with a new one as it gets wet.
- After all these operations, wipe the internal elements with isopryl alcohol, and then again with a dry and soft cloth.
- Take your time to reassemble the device - the longer it dries, the better.
Advice! For the sake of the safety of your device, we do not recommend drying the keyboard yourself without certain skills. It is much easier and more effective to call a specialist as quickly as possible or take the device to a service center.
You will see more ways in the video in this article. And we move on to the second section.
How to prevent contamination
As they say, it is easier to prevent than to correct later.
Therefore, you can minimize pollution using the following tips:
- Don't turn your workspace into an office desk.
- Wipe off dust from the keyboard surface frequently.
If your workplace is located where there is no way to prevent dirt from entering, then stores sell special silicone pads.
Such devices exactly replicate the keyboard of each specific model. It allows you to protect the keyboard from dirt and dust.
Superficial cleaning
Once a month you need to carry out superficial cleaning.
It will get rid of dust and crumbs (applies to those who like to chew something tasty in front of the monitor). Turn the keyboard over and shake it a little. Some of the garbage will disappear at this stage.
Take a small brush or paintbrush and brush away any dust or crumbs stuck between the keys.
You can get rid of dust in hard-to-reach places using a special USB vacuum cleaner for the keyboard or cans of compressed air, which are sold in digital and household appliance stores (cleaning products department). An ordinary hairdryer will also work, but only if the keys fit tightly and there is no chance that debris will simply clog deeper.
You can only blow the keyboard with cold air.
To remove grease from the keys, go over them with a paper towel or microfiber.
When performing preventative cleaning, you should never use wet rags: no liquid should get inside the keyboard. Maximum - wet wipes for the computer.
What to do if liquid is spilled on the keys
There are situations when water is accidentally spilled on the keyboard. Sometimes this leads to buying a new device or going to a repair shop.
However, if ordinary water is spilled on the keyboard, the chances of saving it are much greater.
To do this, you need to quickly disconnect the device from the network and turn it upside down at night.
If sweet liquid gets on the buttons, you won’t be able to get rid of it with regular drying. It must be washed according to the sequence described above. Usually this helps to cope with the tragedy, especially when all the manipulations are completed within the first minutes.
Otherwise, most of the buttons will fail and the only way to restore functionality will be to buy a new device.
We disassemble the case
If you don’t have the basic skill of parsing complex structures, then type “Keyboard name + disassembling” into Google/YouTube. The keyboard must be divided into keycaps, a case, a plate (a plate under the switches) and a PCB board.
Example with our Leopold analysis:
An example with Googled text parsing of Asus Flare
An example of successful and unsuccessful keyboard parsing:
Poorly pressed keys
Most often, the cause of failure is simple wear and tear. No problem - carefully pull out the key, take a piece of foil 10 by 10 millimeters and roll it into several layers.
Then we slip it under the button and put the key in place. The smoothness of pressing is adjusted by the height of the foil. If the button is large, just a larger piece (you can use paper). With such a crutch, the keyboard can work for years, it’s been proven.
Final keyboard assembly and testing
Once the markings are applied, workers “sieve” the keyboards in a basket with rubber pads until the pads, as a result of “churning” and random movement, fall into their nests on the back of the keys. The pads create a spring effect. Therefore, after pressing any key, it seems to spring back and return to its original place in the unpressed (pressed, in technical language) position.
Then the board is installed in the keyboard housing, and then an electrical membrane with a sensitive switch is installed for each key on the keyboard (Fig. 7). The switches are aligned under the keys. When a key is pressed, the switch emits a special signal that travels through an electrical circuit to a tiny processor (the microchip we started with in describing the keyboard assembly process) on the board, and then into the computer.
Rice. 7. Installation of a membrane with sensitive switches under each key of the future keyboard.
When the membrane is finally installed and aligned under the keys, the keyboard is covered with a plastic cover. Then the keys are tested, rejecting those that were assembled unsuccessfully for various reasons (Fig. 8). Problems can arise both due to improper assembly of the keyboard, and due to faulty radio elements that are installed on the keyboard's printed circuit board.
Rice. 8. Testing a fully assembled and ready-to-use computer keyboard.
It should be noted that modern radio components are of high quality; defective elements are rarely encountered. And keyboard assembly technologies have been developed in such a way that defects will be a rarity rather than a common occurrence. However, checking the keyboard after assembly is done. And now, after checking, the keyboard can be connected to the computer. And with its help you can print and enter the necessary characters and commands for a long time and reliably.
A little about the matrix
In this case, entering new characters stops for a while. However, almost all PCs still use a conventional interface despite the growing popularity of the USB bus.
A more detailed technical description of the keyboard can be read below: 1. In one of the previous posts, the topic of a computer keyboard was briefly touched upon.
Only this computer consists of a single chip and performs specialized functions. Reducing the cost of LSI is possible only with maximum automation of the stages preceding their production and mass production.
The basis of our push-button keyboard is an integral timer, which is configured as an unsynchronized multivibrator. Note: Only the common components of a standard keyboard are discussed here.
Similar licensed images:
The keyboard can be passive, one contact per key, or dynamic, two contacts per key. This depends on the state of the other keys. The case is important from an aesthetic point of view for some people.
The number of devices that can be connected to the bus is limited only by the maximum pF bus capacitance. But the program does not need the serial number of the pressed key, but the ASCII code corresponding to the designation on this key. LED indicators are mounted at the top of the case, which are usually textured differently than the caps. Issues the so-called scan code 2.
It must be installed in the correct position. It should be noted that the keyboard contains an internal byte buffer through which it communicates with the computer. Most scan codes are single byte 8 bits, but some are multiple bytes long.
Using the keyboard, you can enter any symbols - from letters and numbers to hieroglyphs and musical notation symbols. A midi keyboard consists of two main parts: The actual keys with contacts. Connection diagram of a homemade steering wheel to the board from the Genius keyboard.
Electronics with mechanics “in one bottle”
A computer keyboard is a rather complex device. First of all, this is due to a large number of mechanical moving parts: buttons, rubber bands, movement-sensitive radio elements that receive key press signals. It is known in technology that the more mechanics there are in a product, the more complex and less reliable it is.
High reliability and durability of such devices with a large number of “mechanics” can only be achieved through strict adherence to all design and technological requirements. And also due to the high reliability of all the original components from which this product is assembled. So a computer keyboard is a prime example of how you can make a reliable mechanical device in our computer age. Simply, more reliable electronics come to the fore and replace less reliable mechanics.
And yet the keyboard works. It works to the delight of computer users for a long time, although there are so many mechanics in it that are not at all modern!
By the way, sometimes it is better to see once than to hear a hundred times. Especially when we are talking about little-known “subjects”, such as digital electronics, radio engineering, and the production of radio electronics products. Therefore, below you can watch a video about making computer keyboards: